
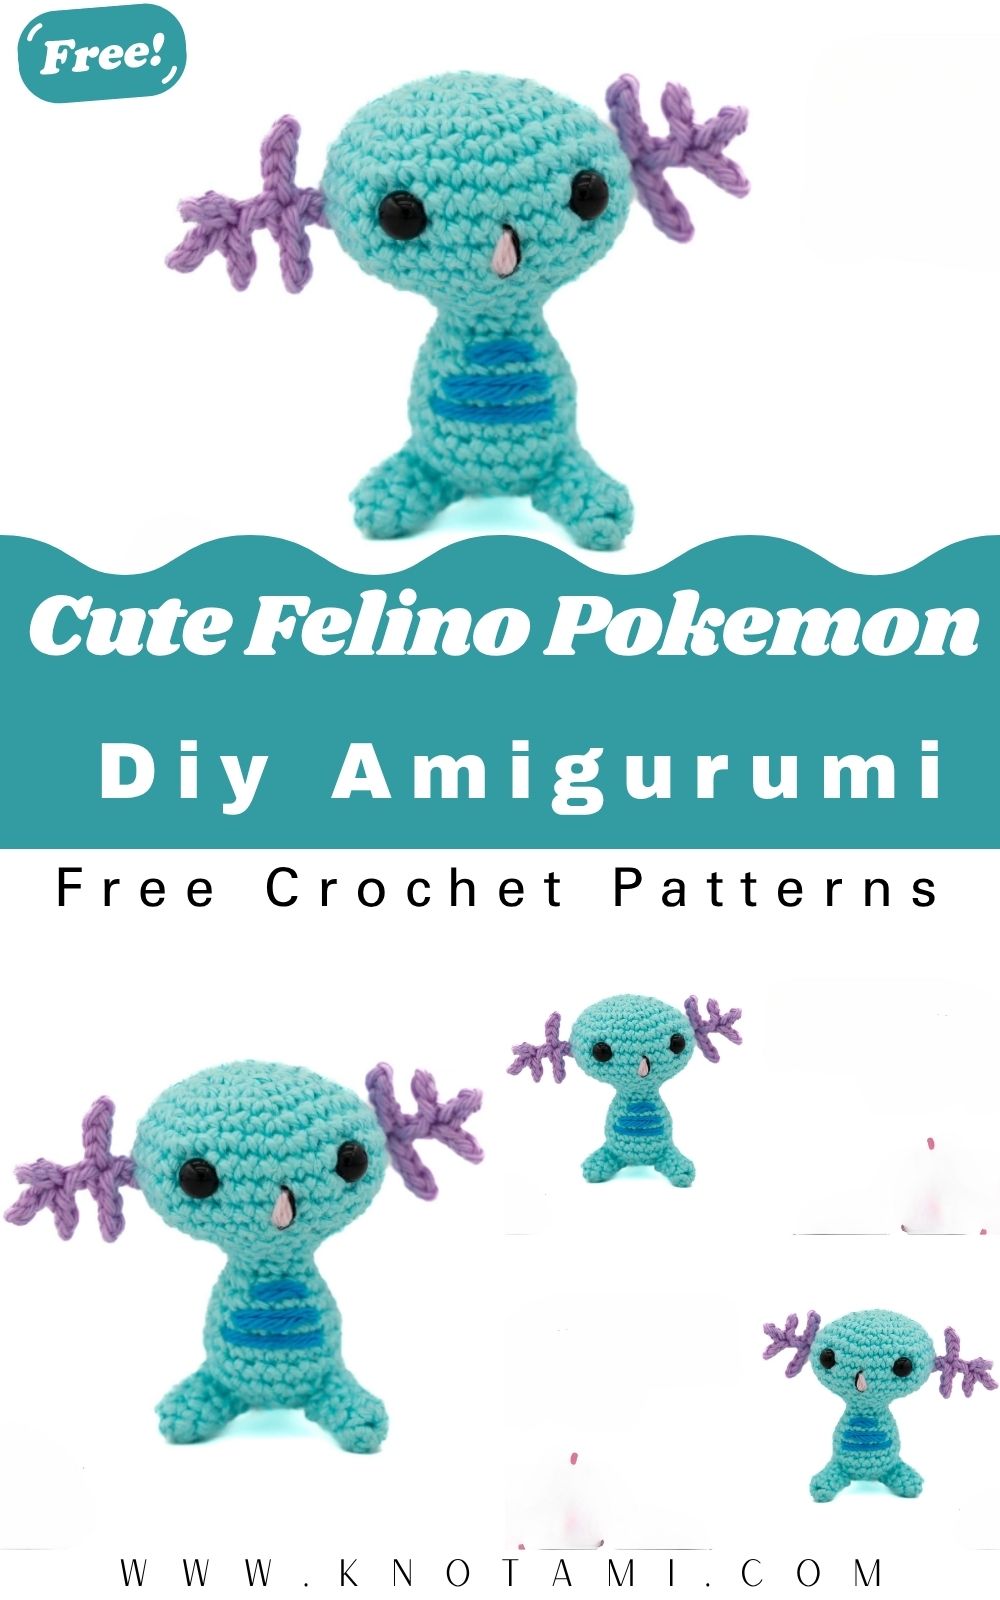
Crochet Felino Pokemon Amigurumi stands out as a charming project that taps into this trend. Felino (known as Wooper in English) is that adorable, wide-eyed Water/Ground-type Pokémon resembling a cheerful axolotl. Its simple, rounded design makes it ideal for amigurumi, appealing to both longtime collectors and newcomers eager to try their first plush.
These projects continue growing because they offer more than just toys they create tangible memories. Beginners love the forgiving shapes, while experienced crocheters enjoy customizing colors and sizes. Whether displayed on a shelf or gifted to a fellow trainer, Pokémon amigurumi adds cozy, personal charm to any collection.
Materials & Crochet Essentials
Gather these supplies for a smooth crocheting experience with your Crochet Felino Pokemon Amigurumi:
- Plush Yarn Recommendations: Use super bulky or chenille yarn (like Bernat Blanket or Himalaya Dolphin Baby) in light blue for the body. Add white or cream for the belly and accents, plus black for eyes and details. These yarns create that irresistibly soft, huggable texture.
- Pokémon-Inspired Color Palette Ideas: Stick to Felino’s classic blue with pinkish gill accents. Experiment with pastel variants like mint green for a shiny feel or soft lavender for a dreamy twist.
- Crochet Hook Sizing: A 4mm to 5.5mm hook works best with plush yarn for tight stitches that prevent stuffing from showing.
- Stuffing Materials: Polyester fiberfill for a plump, cuddly result.
- Safety Eyes and Embroidery Tools: 10-12mm safety eyes for that signature wide-eyed expression, plus black embroidery floss or yarn for the mouth.
- Stitch Markers: Essential for tracking rounds in continuous spirals.
These materials keep the project affordable and accessible for at-home crafting.
Core Techniques Used in This Pattern
Crochet Felino Pokemon Amigurumi relies on fundamental amigurumi skills that build confidence quickly.
Work in continuous rounds (spirals) without joining at the end of each round. This creates seamless, smooth shapes. Use a stitch marker to note the start of every round.
Master smooth increases and decreases: Single crochet increases (2 sc in one stitch) build roundness, while invisible decreases (front loop only) keep the surface tidy without bumps.
Shaping soft plush figures involves magic rings for starting spheres and careful stuffing as you go. Attach limbs evenly using simple sewing techniques or crocheting them directly onto the body for stability.
Facial detailing shines through embroidery or strategic placement of safety eyes. These methods ensure your Felino looks irresistibly cute and balanced.
Building the Felino Character
Head Structure
Start with a magic ring and work increases to form a rounded head. Aim for a slightly oval shape to capture Felino’s chubby-cheeked look. Stuff firmly as you close the rounds for a stable base.
Cute Facial Features
Place safety eyes wide apart for that innocent, surprised expression. Embroider a small, upturned mouth and add blush with pink yarn or fabric paint. The gills on the sides (simple fin-like flaps) bring personality—crochet them separately and attach.
Body Shaping
The body connects seamlessly or attaches to the head. Keep it short and rounded like a little potato for maximum cuddliness. Felino’s design is armless, so focus on a smooth torso transitioning into the lower body.
Tiny Arms and Legs (or Lack Thereof)
Felino has stubby legs and no visible arms. Crochet small leg nubs or flippers and sew them on symmetrically. This simplicity makes it perfect for beginners.
Tail Creation
Shape a short, tapered tail with gentle decreases. Add a slight curve for character—it helps the plush sit nicely.
Ear Detailing (or Head Fins)
Felino features prominent head fins/gills. Crochet two small, curved pieces and attach them securely. These details transform the basic shape into a recognizable Pokémon.
Plush Styling & Character Personality
Give your Crochet Felino Pokemon Amigurumi extra flair with styling options:
- Sleepy Expression Options: Tilt the eyes slightly or embroider closed eyes for a dozing vibe.
- Chubby Plush Styling: Overstuff gently for extra roundness.
- Mini Keychain Version: Scale down with thinner yarn and a 3mm hook, add a clasp for backpacks.
- Oversized Cuddle Plush Idea: Double the pattern with jumbo yarn for a giant floor pillow friend.
- Soft Pastel Variations: Try shiny color swaps or mix in sparkly yarn for magical appeal.
These tweaks let your creativity shine while keeping the core pattern simple.
Helpful Tips for New Crochet Fans
- Preventing Uneven Shapes: Count stitches religiously and use a stitch marker. Adjust tension if rounds start slanting.
- Choosing Soft Beginner Yarn: Plush yarns forgive minor mistakes and feel luxurious.
- Keeping stitches tight, especially around safety eyes and joins to avoid leaks.
- Improving Plush Symmetry: Pin pieces in place before sewing and step back often to check balance.
Take breaks to keep your hands relaxed crochet should feel joyful!
Fun Ways to Use This Amigurumi
Your finished Crochet Felino Pokemon Amigurumi becomes more than a toy:
- Anime Room Decor: Perch it on shelves among other Pokémon plushies.
- Pokémon Fan Gifts: Ideal for birthdays, anniversaries, or new trainers.
- Handmade Collectibles: Build a full team over time.
- Backpack Charm Ideas: The mini version travels everywhere.
- Cozy Shelf Decorations: Group with plants or books for a whimsical display.
Common Beginner Questions (FAQ)
Is this Crochet Felino Pokemon Amigurumi suitable for absolute beginners? Yes! The pattern uses basic stitches and simple shapes, with intermediate details like attaching parts for those ready to level up.
How long does it take to complete? A standard size takes 4-8 hours, depending on experience. Break it into sessions for fun.
What if my stitches look loose? Switch to a smaller hook or tighter tension. Plush yarn hides imperfections well.
Can I sell the finished plush? Personal use is encouraged; check pattern creators for commercial guidelines.
How do I make it stand up? Add weight to the bottom with plastic pellets (safely contained) or ensure a flat base.
Skill Level: Beginner-Friendly with Intermediate Details
Conclusion
There’s nothing quite like holding your very own handmade Crochet Felino Pokemon Amigurumi with that soft, smiling face ready for adventures. This project brings together nostalgia, creativity, and the pure joy of crafting something special at home.
Grab your yarn, hook up some magic, and watch Felino come to life stitch by stitch. Experiment with colors, sizes, and accessories to make it uniquely yours. Whether it’s your first Pokémon plush or the newest addition to your collection, this little Water-type friend will fill your days with cozy smiles. Happy crocheting, trainers, may your hooks stay sharp and your amigurumi always adorable.