
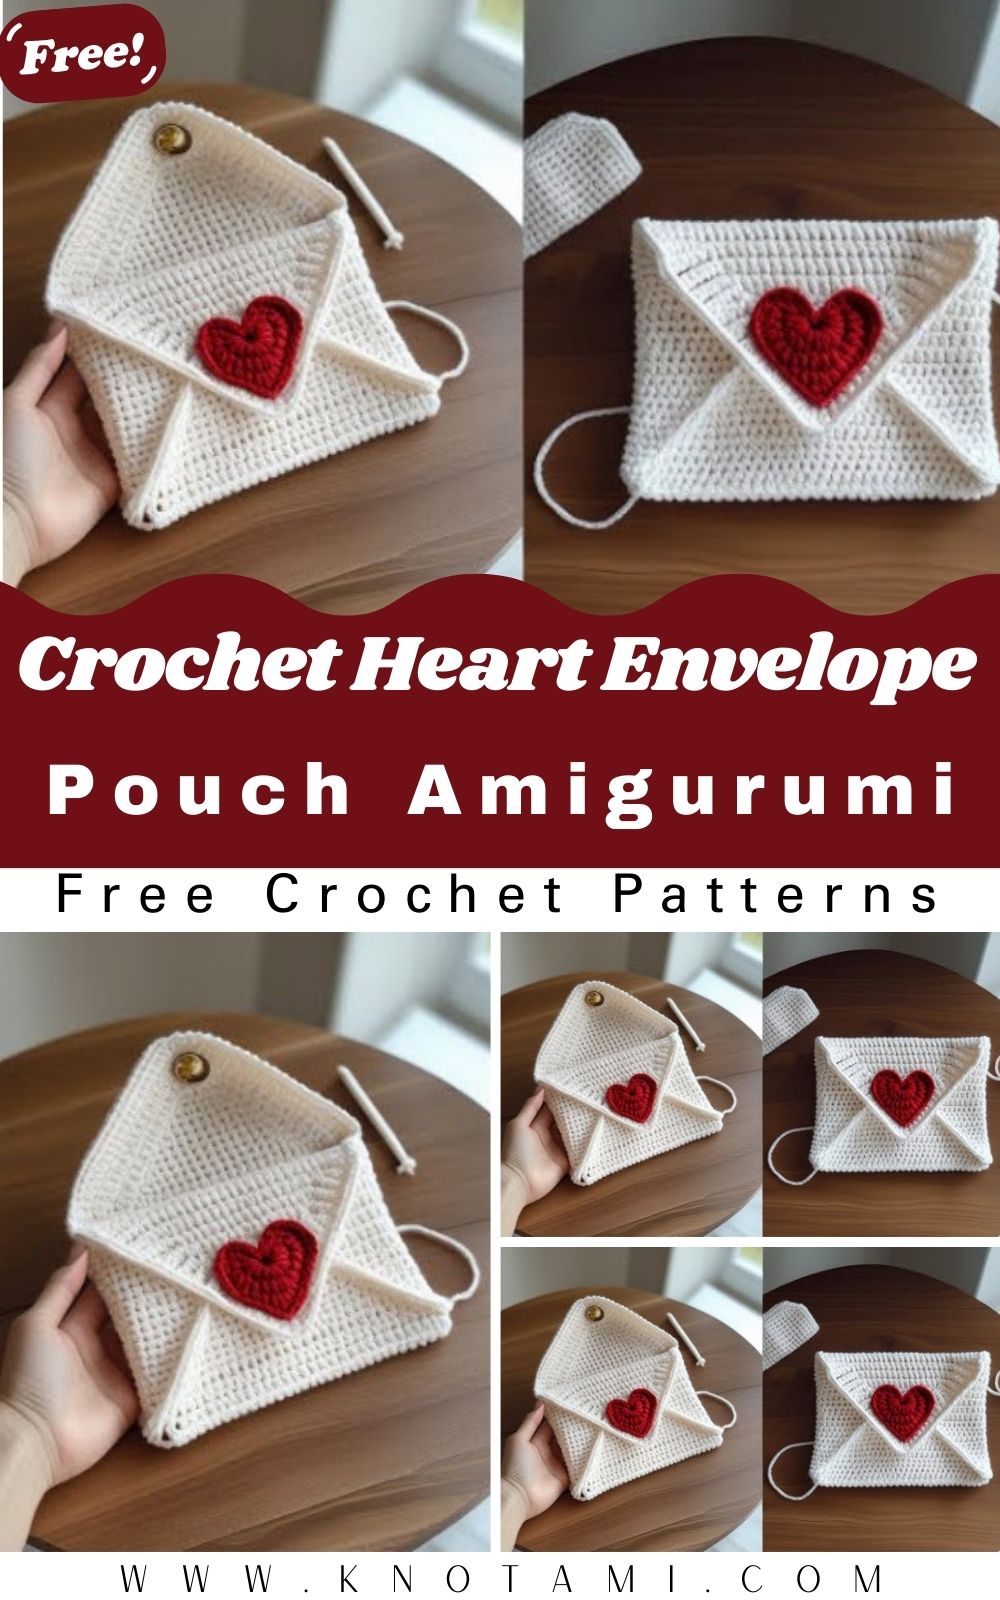
I had almost given up on this project entirely. At first, it seemed a little too cutesy and somewhat unnecessary to me, especially since I already had several unfinished projects, WIPs sitting in my yarn basket. However, I then watched the Crochet Heart Envelope Pouch Pattern video again. The moment I saw that beautiful heart-shaped flap closing over the envelope, my heart was won over. And that was that within ten minutes, the hook was in my hand, and I had already started making it!
Let me walk you through everything: materials, stitches, steps, and all the little things I wish someone had told me before I started.
So What Exactly Is This Pouch?
Think of a classic paper Crochet Heart Envelope Pouch. Now imagine it crocheted, palm-sized, and sealed with a heart instead of a boring flap. That is this project in a nutshell.
It falls under the amigurumi style of crochet tight stitches, firm fabric, and three-dimensional shaping. But unlike stuffed amigurumi animals, this one is hollow inside. That little hollow space is the whole point. It is a pouch that actually holds things.
People use it as a coin purse, a jewellery holder, a gift bag for tiny presents, or just a decorative little trinket to hang somewhere. I made one for a friend’s birthday stuffed with a pair of earrings and a handwritten note. She literally screamed. In a good way.
Who Is This Pattern For?
Skill level: Beginner-friendly (with just a little patience)
If you can single crochet, work in rounds, and do a basic increase or decrease — you are ready. That is genuinely all this pattern asks of you.
The heart-shaped sounds intimidating, but it really is just two small circles joined together and then shaped a bit. Once you see it happen in front of you, it clicks immediately.
If you have never tried amigurumi or worked in rounds before, this is actually a great first project for that. The rounds are short, the results are quick, and you will feel very accomplished very fast.
What You Will Need Before You Start
The Yarn
Go with cotton yarn if you can. DK weight or light worsted. Cotton holds its shape better than acrylic for pouches . You want the finished piece to feel structured, not floppy.
That said, I have made these with acrylic too and they turned out just fine. A slightly firmer acrylic (not the super-soft baby kind) works well enough.
Grab two colors if you want the heart in a contrasting shade. Totally optional, but it does look really lovely.
The Hook
Here is something that catches a lot of beginners off guard: go smaller than your yarn label says.
If your yarn says 4mm, use a 3mm or 3.5mm. The tighter gauge gives you a firmer fabric that keeps its envelope shape. A looser gauge and your pouch will look and feel more like a sad little cloth bag.
I usually use a 3mm hook with DK cotton, and it gives me exactly the result I want.
Everything Else
- A yarn needle for sewing and weaving ends
- Scissors (obviously)
- Stitch markers please, please use these. They save so much confusion when you are working in rounds
- A button, snap, or small magnetic clasp for the closure
- Optional: a tiny pinch of polyfill if you want the heart flap to feel slightly padded
Nothing fancy. Nothing you probably don’t already have in your craft drawer.
Stitches and Abbreviations
Here is your quick-reference cheat sheet. Keep it nearby while you work.
- ch — Chain
- sl st — Slip stitch
- sc — Single crochet
- inc — Increase (work 2 single crochets into the same stitch)
- dec — Decrease (single crochet two stitches together)
- MR — Magic ring
- BLO — Back loop only
- rnd — Round
- st / sts — StStitch/stitchesep — Repeat
The only one that might feel new if you are a beginner is the magic ring. It can feel awkward the first few times. Stick with it once it clicks, and you will use it constantly.
Step-by-Step Instructions
Part One – The Envelope Body
This is your pouch base. A flat rectangular piece that you fold in half to create the pocket.
- Chain 14. (Adjust this number up or down depending on how wide you want your finished pouch.)
- Single crochet across 13 stitches in the first row.
- Chain 1, turn. Continue in rows of single crochet, turning at the end of each row.
- Keep going until your piece is roughly square as tall as it is wide. This usually takes around 12–15 rows depending on your tension.
- Fold the rectangle in half with wrthe ong sides together.
- Single crochet along both side edges to close them up. Leave the top open — that is your pouch opening.
- Fasten off. Weave in those ends.
That’s your pouch body done. Set it aside.
Part Two — The Heart Flap
This is the fun part. You are going to make two small round shapes and join them to create the heart.
First lobe:
- Make a magic ring.
- Round 1: 6 sc into the ring. Pull the tail to close. (6 sts)
- Round 2: 2 sc in every stitch. (12 sts)
- Round 3: Work even — 1 sc in each stitch. (12 sts)
- Round 4: Work even again. (12 sts)
- Do not fasten off. Set aside and mark your last stitch.
Second lobe:
- Repeat everything above exactly.
- Do not fasten off.
Joining the two lobes:
- Hold both lobes side by side they are going to become the two bumps at the top of the heart.
- Insert your hook into the last stitch of the second lobe and the corresponding stitch of the first lobe.
- Slip stitch them together at the point where they will meet in the center of the heart.
- Now, crochet around both lobes as one continuous piece.
- At the outer curves, add increases to keep the shape round. At the center top (the V dip between the two bumps), work a decrease to pull them inward.
- At the bottom point of the heart, keep decreasing gradually until the shape comes to a gentle point.
- When the heart is big enough to fully cover your pouch opening, fasten off — leave a nice long tail for sewing.
Take a breath here and look at what you’ve made. It’s a heart. You crocheted a heart. That never gets old.
Three – Sewing It All Together
- Place your heart flap on top of the pouch with the point facing down and the flat top edge of the heart lined up with the back edge of the pouch opening.
- Thread your yarn needle with the long tail you left.
- Whipstitch the heart to the pouch along that top edge. Go slowly and keep it even this seam will show.
- Knot off securely inside the pouch. Weave in the end.
Four – The Closure
- Sew your button onto the front center of the pouch, a centimeter or two below the opening.
- On the pointed tip of the heart flap, make a small button loop: chain 5 or 6, slip stitch into the base of your chain to form a small ring.
- Test the fit. The loop should slip over the button snugly but not so tight that it is a struggle.
- If you prefer a snap fastener, sew the two halves on the inside of the flap tip and the outside front of the pouch instead.
Five Final Touches
Weave in every single loose end. All of them. I know it is tempting to skip some. Don’t.
If you used cotton yarn, give the pouch a light press with a damp cloth it firms everything up and makes the shape look cleaner.
Now add any extras you fancy. A tiny crochet flower on the heart. An embroidered initial. A small charm. A bit of ribbon. Make it yours.
Things That Actually Help (Beginner Tips)
A few things I’ve learned from making these over and over:
- Count your stitches at the end of every round during the heart. Seriously, every round. One missed stitch throws off the whole shape and you won’t notice until it looks weird.
- Use a different colored stitch marker for the start of your round vs your join point. It sounds extra but it saves a lot of “wait, where am I?” moments.
- If the heart lobes look uneven, measure them. Both lobes need to be the same size. If one is bigger, frog back a round and redo it.
- Work a little tighter than feels comfortable. Amigurumi-style projects benefit from tension that is slightly firm. Loose stitches make the pouch look saggy.
- Don’t skip the swatch. Even a tiny 10-stitch square tells you so much about how your finished pouch will feel and look.
Mistakes That Are Easy to Make (And How to Fix Them)
The sides of the pouch have gaps or holes. You probably increased where you shouldn’t have, or your tension loosened. Frog those side seams and redo them more carefully. Use pins to hold the edges together before you sew.
The heart is lopsided. One lobe is bigger than the other. This is so common. Make sure both lobes have the same number of rounds before you join them.
The pouch doesn’t stay closed the button loop is too loose. Redo the loop with fewer chains. Chain 4 instead of 6 and test again.
The fabric is too stiff and hard. Your tension is very tight, or your hook is too small for that yarn. Go up half a size on the hook.
The finished pouch looks bigger than expected. Your tension is loose. Go down a hook size, or switch to thinner yarn.
Ways to Make It Your Own
This is where the real fun starts. Once you’ve got the basic pattern down, the customization options are basically endless.
- Size it up: Double your starting chain and add more rows. Now it’s a gift bag or a small clutch.
- Make a set: Crochet five or six in different colors and stack them as a gift.
- Add a wrist strap: A crocheted chain of about 60–70 stitches attached to both sides turns this into a little wristlet.
- Go gradient: Use self-striping yarn or carry two colors together for a gradient effect.
- Stuff the heart slightly: A tiny pinch of polyfill under the heart flap gives it a cute raised, pillowy look.
- Line it with fabric: A simple fabric lining sewn inside takes about 15 minutes and makes the pouch feel genuinely luxurious.
- Skip the button: Leave it open, or use a small gold safety pin as a decorative closure.
Size and Color Ideas
Sizing
Your starting chain controls the width. Your rows control the depth. Here is a rough guide:
- Tiny (earring/ring size): Chain 10, about 10 rows – finished width around 6–7 cm
- Small (coin purse): Chain 14, about 13 rows – finished width around 9–10 cm
- Medium (gift pouch): Chain 18, about 16 rows – finished width around 12–13 cm
Colors That Work Beautifully
- Red body + white heart = classic Valentine
- Sage green + cream = cottagecore perfection
- Navy + mustard = bold and modern
- Blush + dusty rose = romantic and soft
- Black + gold = dramatic and gift-ready
- Rainbow variegated = joyful and fun
There is no wrong color choice here. Go with what makes you happy.
FAQ — Questions I Get Asked All the Time
How long does this take from start to finish?
Somewhere between 2 and 5 hours for most people. If you are new to working in rounds, budget more time for the heart. Speed comes with repetitio. By your third pouch, you will be flying.
Can I use bulky yarn?
Technically, yes, but the finished pouch will be much larger and the fabric will feel heavy for such a small item. It works better for a bigger bag version. For the classic cute little pouch, lighter yarn really is the way to go.
I can’t do a magic ring. What do I do instead?
Chain 4 and slip stitch into the first chain to form a ring. Single crochet into that ring for your first round. It’s not quite as tight at the center, but it works completely fine and many crocheters prefer it.
Can I sell the Crochet Heart Envelope Pouch made from this pattern?
Check the original designer’s terms. Most independent crochet designers allow you to sell finished items with credit. Just don’t copy or redistribute the written pattern itself.
My heart looks more like a blob. Help/?
The two lobes need to be identical and the decrease at the center V needs to be precise. Go back and compare your lobes side by side before joining. If they’re the same, the heart shape will come.
What is the best way to gift this Crochet Heart Envelope Pouch?
Tuck a small treat inside a piece of chocolate, a folded note, a ring, a gift card and tie a ribbon around it. It needs zero additional wrapping. It is already thrift.
Go Make This You Are Going to Love It
If there is one Crochet Heart Envelope Pouch pattern I would recommend to someone who wants to feel the joy of finishing something beautiful, useful, and genuinely impressive-looking in a single afternoon, it is this one.
It is small enough that it doesn’t feel overwhelming. It is pretty enough that you will want to keep making more. And it is useful enough that you will actually use it or give it to someone who will.
Grab your hook, pick your favorite color, and just start. The first round is always the hardest part. After that, you’ll find your rhythm and before you know it, a tiny crocheted heart will be sitting in your palm.
And once that happens , don’t say I didn’t warn you about making seven.