
Before you dive into the written instructions, make sure to watch the embedded video above. This video provides a visual walkthrough that complements the pattern perfectly, showing you exactly how to handle the yarn and where to place your stitches. Consequently, seeing the technique in motion will help you master the shaping of the head and the tiny ears. Once you have finished watching the video, you can use the detailed steps below to refine your work and ensure your Piglet Winnie Pooh Keychain Amigurumi looks professional and polished.
Skill Level: Easy/Beginner Friendly
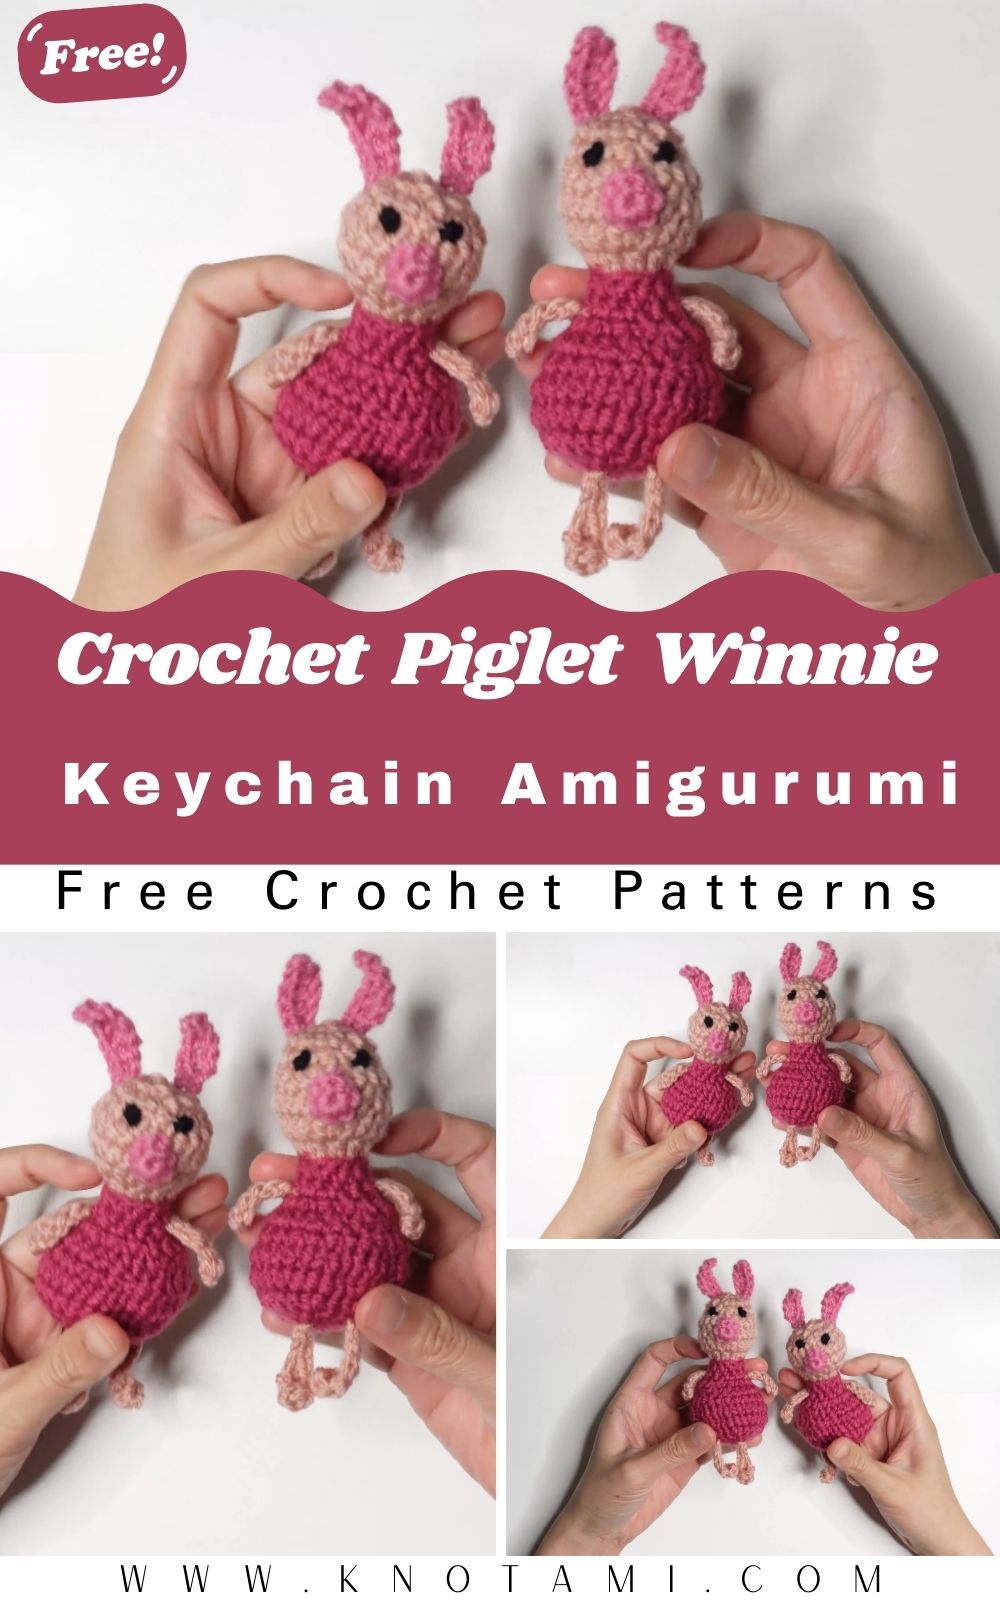
You do not need to be a master of the craft to complete this project successfully. This Piglet Winnie Pooh Keychain Amigurumi is rated as an easy level project because it uses basic stitches like the single crochet, increase, and decrease. However, since the pieces are quite small, you will need a bit of patience and a steady hand. Therefore, it is a fantastic project for someone who has just learned the basics and wants to practice working in rounds while creating something recognizable and iconic.
Tutor’s Suggestions
To achieve the best results for your Piglet Winnie Pooh Keychain Amigurumi, I highly recommend using a smaller hook than what is usually suggested on the yarn label. This ensures that your stitches are tight enough so that the stuffing does not peek through the gaps. Additionally, make sure to use a high-quality stitch marker. Because this is worked in continuous rounds, it is very easy to lose your place. Finally, I suggest stuffing the body firmly but being careful not to overstretch the stitches, as this maintains the delicate shape of our little friend.
Materials Needed
-
Yarn: Light pink cotton or acrylic yarn for the head and body, and a darker pink for the ears and stripes.
-
Crochet Hook: A 2.5mm or 3.0mm hook works best for this scale.
-
Safety Eyes: 5mm or 6mm black safety eyes for that classic look.
-
Stuffing: Polyester fiberfill to give your Piglet his squishy shape.
-
Keychain Ring: A sturdy metal ring to attach to the top.
-
Yarn Needle: For sewing the pieces together and weaving in ends.
-
Scissors: To trim your yarn precisely.
-
Embroidery Thread: A small amount of black thread for the nose and eyebrows.
Step by Step Guide to Creating Piglet
1. Crafting the Head
To start your Piglet Winnie Pooh Keychain Amigurumi, you must begin with a magic ring using the light pink yarn. Work 6 single crochet stitches into the ring and pull it tight. In the second round, you will increase in every stitch to reach a total of 12. During the third round, follow a pattern of one single crochet then one increase. Furthermore, continue expanding until the head is the desired size, usually around 24 or 30 stitches. Afterward, work several rounds evenly to create the roundness of the face.
2. Adding the Features
Before you close the head, you need to insert the safety eyes between rounds 8 and 9. Space them about 4 or 5 stitches apart to capture Piglet’s innocent expression. Once the eyes are secure, use your darker pink yarn to embroider a small triangular nose right in the center. Subsequently, you can use black thread to add tiny, worried eyebrows. This specific detail is crucial because it gives your Piglet Winnie Pooh Keychain Amigurumi his unique personality.
3. Working the Body
The body of your Piglet Winnie Pooh Keychain Amigurumi should be slightly smaller than the head. Switch to your darker pink yarn to create the striped effect that Piglet is known for. You can alternate between light and dark pink every two rows. By doing this, you replicate his classic outfit perfectly. Stuff the body firmly as you go, and then use your yarn needle to sew the head securely onto the body. Ensure the head is centered so he sits or hangs correctly.
4. Creating the Ears and Arms
For the ears, use the darker pink yarn and start with a small chain. Work around the chain to create a leaf shape. Because Piglet has long, pointed ears, you want them to stand up tall. Sew these to the top of the head. For the arms and legs, simple small cylinders of light pink yarn will suffice. Attach them to the sides and bottom of the body. Finally, attach the keychain ring to the very top of the head by sewing it in with extra strength.
>
Where to Use Your Keychain
Your finished Piglet Winnie Pooh Keychain Amigurumi is incredibly versatile and can be used in various ways. Most commonly, you can attach it to your house keys or car keys to make them easier to find in your bag. Moreover, it looks adorable as a “bag charm” on a purse, laptop case, or school backpack. If you are not a fan of keychains, you could even hang it in your car or use it as a Christmas tree ornament. It serves as a constant reminder of friendship and courage.
Tips and Tricks for Success
One of the best tips I can offer is to use a “yarn under” technique instead of “yarn over.” This creates a “V” stitch that is tighter and more structured, which is ideal for amigurumi. Additionally, if you find that your ears are floppy, you can add a tiny bit of wire or just sew them with more tension. Another trick is to use a blush or pink marker to add a little color to the cheeks. Consequently, your Piglet Winnie Pooh Keychain Amigurumi will look like he just stepped out of a storybook.
Common Mistakes to Avoid
The most frequent mistake people make is losing track of the round count. If you skip a stitch, the shape of the head will become lopsided. Therefore, always use your stitch marker faithfully. Another mistake is stuffing the piece too late. If you wait until the opening is too small, the stuffing will be lumpy. Instead, add small bits of fiberfill as you decrease. Lastly, avoid using yarn that is too fuzzy, as it can hide the definition of Piglet’s features and make the Piglet Winnie Pooh Keychain Amigurumi look messy.
Frequently Asked Questions (FAQs)
Q1: What size yarn is best for this project?
A1: You should use a Category 3 (DK) or Category 4 (Worsted) yarn. However, for a keychain, a thinner yarn like cotton usually looks neater and holds its shape better over time.
Q2: How long does it take to finish one Piglet?
A2: Because it is a small amigurumi, most crocheters can finish the entire project in about 2 to 3 hours. This makes it an excellent choice for a quick weekend craft.
Q3: Can I wash my amigurumi keychain?
A3: Yes, you can gently hand wash it with mild soap and let it air dry. Just be careful with the metal keychain ring to prevent any rusting.
Q4: Do I have to use safety eyes?
A4: If you are giving this to a small child, it is safer to embroider the eyes with black yarn instead. This removes any choking hazard while still looking very cute.
Q5: How do I make the stripes look even?
A5: To get clean color changes, pull the new color through the last two loops of the previous stitch. This technique ensures that the stripes on your Piglet Winnie Pooh Keychain Amigurumi are sharp and professional.
Conclusion
In conclusion, creating this Piglet Winnie Pooh Keychain Amigurumi is a delightful way to spend your afternoon. By following this guide and watching the video, you have transformed a simple ball of yarn into a beloved character. This project highlights how much character can be packed into a small space. As you continue your crochet journey, remember that every stitch is a step toward mastering this beautiful art form. Now that you have finished your Piglet, you might even feel inspired to make him a tiny Pooh or Tigger friend to keep him company. Happy crocheting and enjoy your new handmade companion!