
Looking for an Uplifting Crochet Baby Bunny Keychain Soft Amigurumi Pattern? This quick, beginner-friendly guide lets you craft a plush, portable cuddle buddy in minutes. Plus, speedy stitches and pastel charm make it perfect for soothing, last-minute, stash-busting gifts.
Small in size, big on smiles, the Uplifting Crochet Baby Bunny Keychain Soft Amigurumi Pattern is your quick, cozy make for any day. Designed with simple rounds, gentle shaping, and minimal sewing, this beginner-friendly project comes together quickly in plush yarns and charming pastels.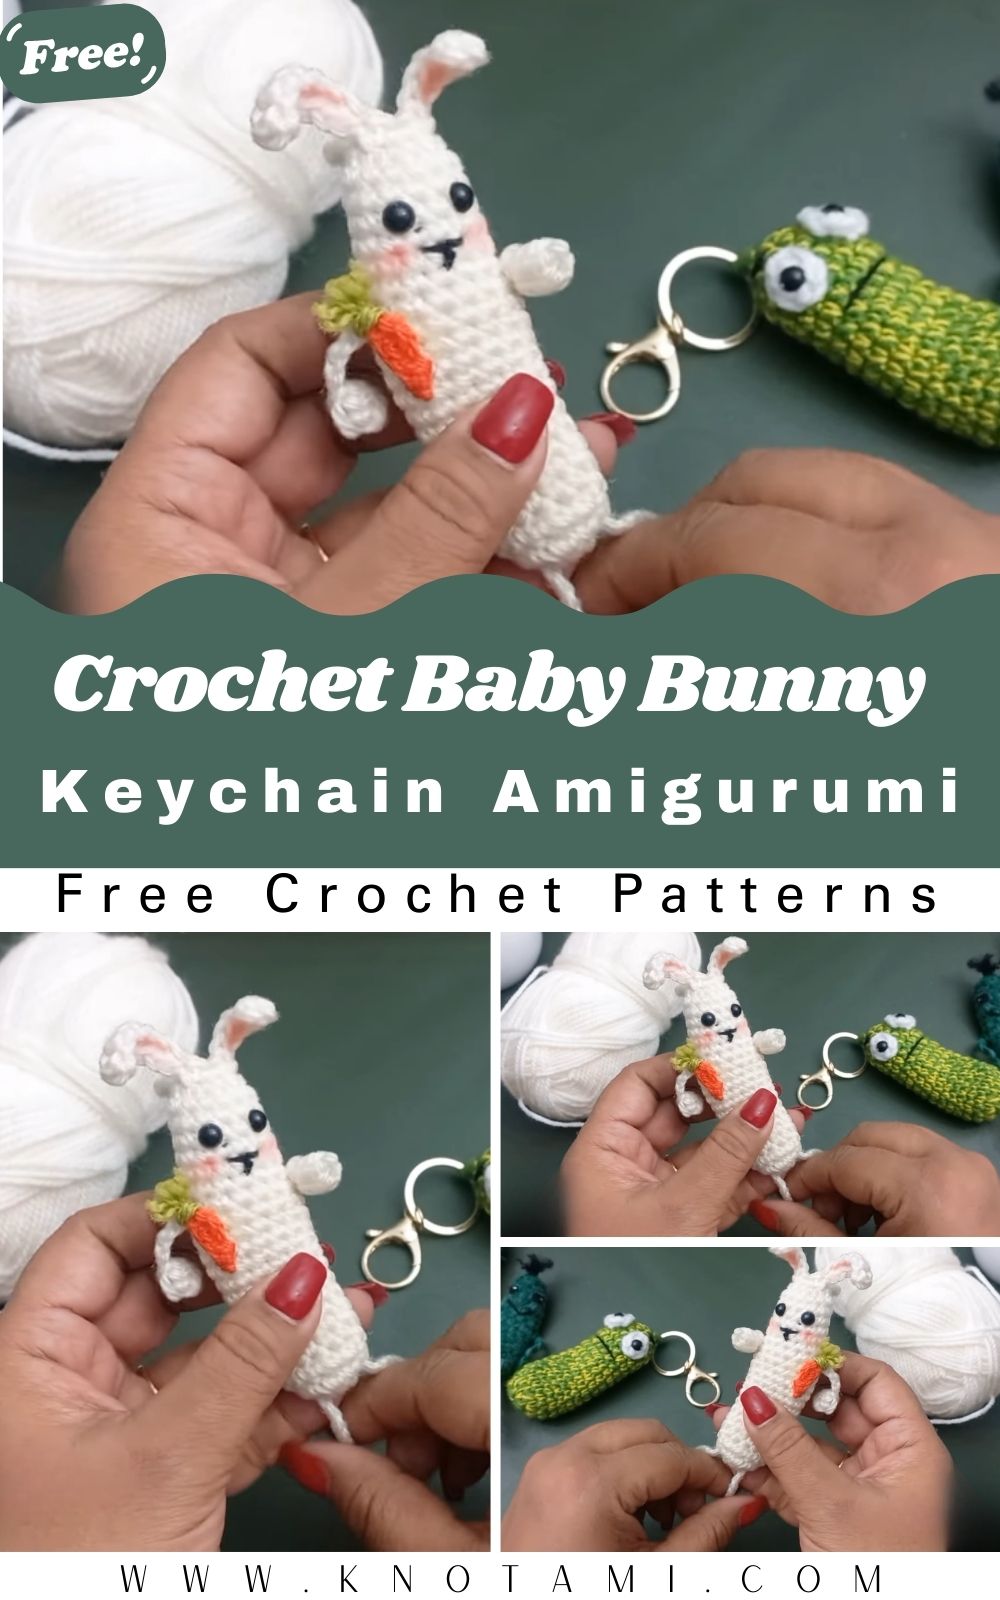
Personalize with safety eyes or embroidered features, add a tiny bow or pom-pom tail, and finish with a key ring or lobster clasp. Lightweight, gift-ready, and perfect for batch-making, these tiny bunnies hop from stash to finished in a flash.
uses:
- bag charms and backpack zipper pulls
- Easter basket fillers or party favors
- craft-fair mini makes and stocking stuffers
Uplifting Crochet Baby Bunny Keychain Soft Amigurumi Pattern
Uplifting Crochet Baby Bunny Keychain Soft Amigurumi Pattern: First, create a tiny cuddle buddy with this cheerful, beginner-friendly guide. Moreover, it is plush, portable, and irresistible, so you can clip it to keys or backpacks in minutes. Additionally, fast stitches and pastel charm bring stash-busting joy for last-minute, heartwarming gifts. Because the steps are beginner-friendly and the sewing is minimal, you can relax as you crochet and enjoy a tidy, professional finish. Therefore, this pattern is perfect for both quick makes and calming craft sessions. Ultimately, this Uplifting Crochet Baby Bunny Keychain Soft Amigurumi Pattern helps you craft a sweet, durable keepsake.
Finished Size
Using worsted weight yarn with a 2.75 mm hook, the bunny measures about 7 to 8 cm tall without ears and roughly 10 to 11 cm including ears.
With plush chenille yarn and a 3.5 to 4 mm hook, expect about 9 to 10 cm tall without ears and about 12 to 13 cm with ears.
Additionally, the keychain drop adds another 2 to 3 cm, depending on chain length.
Total Time Estimate
Beginners: 1.75 to 2.25 hours.
Meanwhile, intermediate crocheters: 1.25 to 1.75 hours.
- Materials and Exact Measurements
Main yarn - Option A (classic stitch definition): Worsted-weight size 4 cotton or acrylic, about 20 to 30 yards (18 to 27 m)
- Option B (velvety softness): Micro plush or baby chenille, light bulky size 5, about 25 to 35 yards (23 to 32 m)
- Contrast yarn for nose and optional bow: 1 to 3 yards (1 to 3 m)
- Crochet hook
- Option A: 2.75 mm or 3.0 mm for worsted
- Option B: 3.5 mm to 4.0 mm for plush
- Safety eyes: 6 mm for worsted, 8 mm for plush
- Keychain hardware: 25 mm split ring with 30 to 35 mm chain or a lobster clasp
Fiberfill stuffing: 8 to 12 g - Tapestry needle: size 16 or 18 (approx. 5 to 6 cm)
Stitch marker and scissors - Optional: blush and cotton swab for cheeks
- Optional: thin wire or strong thread for a sewn loop
Abbreviations and Notes
- US terms are used.
- MR: magic ring; ch: chain; sc: single crochet; inc: increase (2 sc in same st); dec: invisible decrease; sl st: slip stitch; st: stitch; rnd: round; FO: fasten off.
- Work in continuous rounds unless stated otherwise. Additionally, place a stitch marker at the first stitch of each round.
Gauge and Sizing Tips
For amigurumi, firm fabric matters more than exact gauge; therefore, if you see stuffing through, choose a smaller hook.
For instance, 6 sc in MR, then 6 increases to 12 should form a flat circle about:
2.2 to 2.6 cm with worsted and a 2.75 to 3.0 mm hook
3.2 to 3.8 cm with plush and a 3.5 to 4.0 mm hook
If you want a smaller bunny, drop the hook by 0.25 to 0.5 mm. Conversely, for a larger keychain, step up by 0.25 to 0.5 mm and select bigger eyes.
Structure Overview
In this Uplifting Crochet Baby Bunny Keychain Soft Amigurumi Pattern, the bunny is worked top down in one piece for the head, neckline, and body. Meanwhile, ears and arms are made separately and sewn on with a few stitches. Additionally, the tail is either a tiny pom or a crocheted nub. Furthermore, the hardware attaches at the crown for a secure hang point.
Step-by-Step Pattern With Time Estimates
Step 1. Head (25 to 35 minutes)
- Rnd 1: MR, 6 sc. (6)
- Rnd 2: inc in each st. (12)
- Rnd 3: [sc 1, inc] x6. (18)
- Rnd 4: [sc 2, inc] x6. (24)
- Rnd 5: [sc 3, inc] x6. (30)
Next, ensure the circle is flat, not cupping. If it cups, loosen your tension, then continue.
Rnds 6 to 9: sc around. (30 each)
After that, insert safety eyes between Rnds 7 and 8, about 6 to 7 sts apart. Alternatively, embroider eyes later for baby-safe gifts. Because placement changes personality, pin before locking washers.
Rnd 10: [sc 3, dec] x6. (24)
Rnd 11: [sc 2, dec] x6. (18)
Then begin stuffing the head firmly yet evenly so the shape remains round and smooth.
Rnd 12: [sc 1, dec] x6. (12)
Rnd 13: sc around. (12)
Importantly, do not overstuff at the bottom of the head.
Step 2. Neckline and Join (10 to 15 minutes)
Rnd 14: [inc, sc 1] x6. (18)
Rnd 15: sc around. (18)
Rnd 16: [inc, sc 2] x6. (24)
Meanwhile, lightly stuff the neck while keeping it narrow. Additionally, roll the neck between your fingers to smooth lumps.
Step 3. Body (30 to 40 minutes)
Rnd 17: [sc 3, inc] x6. (30)
Rnds 18 to 21: sc around. (30 each)
Rnd 22: [sc 3, dec] x6. (24)
Rnd 23: [sc 2, dec] x6. (18)
Rnd 24: [sc 1, dec] x6. (12)
As you work, stuff the body with small tufts. Furthermore, shape the tummy by concentrating stuffing at the lower front.
Rnd 25: dec around. (6)
Rnd 26: sc around to level and close, then FO leaving a long tail. Subsequently, weave through front loops of the final 6 sts, pull tight, and secure. Consequently, the bunny looks smooth and compact.
Step 4. Ears — make 2 (15 to 20 minutes total)
Option A, classic slim ears:
Rnd 1: MR, 4 sc. (4)
Rnd 2: [sc 1, inc] x2. (6)
Rnd 3: sc around. (6)
Rnd 4: [sc 2, inc] x2. (8)
Rnds 5 to 8: sc around. (8 each)
Rnd 9: [sc 2, dec] x2. (6)
Rnd 10: sc, FO with tail. Afterwards, lightly pinch the base and stitch to keep a slight fold.
Option B, plush chubby ears:
Rnd 1: MR, 6 sc. (6)
Rnd 2: [sc 2, inc] x2. (8)
Rnds 3 to 5: sc around. (8 each)
Rnd 6: [sc 2, dec] x2. (6)
FO with tail. Subsequently, flatten when attaching for a cute curve.
Finally, place ears 3 to 4 sts apart on the crown. First pin, then sew each base with 5 to 6 small stitches.
Step 5. Arms — make 2 (12 to 18 minutes total)
Rnd 1: MR, 6 sc. (6)
Rnd 2: sc around. (6)
Rnd 3: [sc 1, inc] x3. (9)
Rnd 4: sc around. (9)
Rnd 5: [sc 1, dec] x3. (6)
Rnd 6: sc around, FO with a long tail. Do not stuff (or add a tiny bit).
Then attach arms one round below the neckline so the bunny appears to hug the tummy.
Step 6. Tail (5 to 8 minutes)
Option A, crochet nub:
Rnd 1: MR, 6 sc. (6)
Rnd 2: [sc 1, inc] x3. (9)
Rnd 3: sc around. (9)
Rnd 4: [sc 1, dec] x3. (6)
FO and sew to the lower back; additionally, add a wisp of stuffing first.
Option B, tiny pom:
Wrap yarn around two fingers 20 to 30 times, tie, trim, and fluff. Then stitch securely to the back.
Step 7. Face Details (8 to 12 minutes)
Nose and mouth: With contrast yarn, insert between Rnds 8 and 9, centered. Next, make a 2 to 3 mm horizontal stitch for the nose; then bring the yarn down one round and split it into a short V. Finally, secure it inside.
Cheeks: Lightly brush on blush or embroider tiny pink ovals.
Because facial placement sets the mood, adjust spacing until the bunny looks friendly and bright.
Step 8. Attach Keychain Hardware (5 to 8 minutes)
Create a loop at the top center: ch 6, sl st back into the same spot, then FO and weave ends. Alternatively, thread a reinforced yarn loop through the crown.
Afterwards, slip the split ring or lobster clasp through the loop. Additionally, a 30 to 35 mm chain improves the dangle on backpacks.
Optional Mini Bow (6 to 10 minutes)
Ch 12, sc in second ch and across; turn, ch 1, sc across once more. FO, then wrap the tail around the center 6 to 8 times to cinch and tie off.
Subsequently, sew below one ear or at the neck; moreover, pick a contrasting color for extra pop.
Making Time Summary by Section
Head: 25 to 35 min
Neck: 10 to 15 min
Body: 30 to 40 min
Ears: 15 to 20 min
Arms: 12 to 18 min
Tail: 5 to 8 min
Face: 8 to 12 min
Hardware: 5 to 8 min
Bow: 6 to 10 min
Basic Tips for Success
Use a smaller hook than the yarn label suggests so stitches stay tight. As a result, stuffing will not show through.
Keep a removable marker at the start of every round; additionally, count after each inc/dec round.
Stuff in thin layers, not clumps. Consequently, shapes stay smooth and plush.
Try invisible decreases through front loops to reduce gaps.
Weave in ends through the core while gently tugging to bury knots; furthermore, sink tails slightly before trimming.
Common Mistakes and Fixes
Visible holes after decreases: Use invisible decs; if holes persist, slightly tighten tension and catch only front loops.
Lopsided head/body: Rotate work frequently, stuff evenly, and redistribute with a tool tip as needed.
Ears mismatched: Count rounds, pin before sewing, and use the same number of whip stitches per base.
Loose safety eyes: Ensure the washer clicks. If plush fabric is thick, pre-pierce with an awl, then press on a hard surface.
Stretchy loop: Use a firm loop (sl st chain) or sew in a small split ring through a dense spot.
Neckline Notes and Shaping Advice
A defined neck helps the head sit proudly; therefore, avoid overstuffing. Add minimal stuffing, then compress gently while stitching.
If the neck looks too thin, add an extra increase round. Conversely, if it looks thick, skip one even round before decreasing.
Variations to Try
Kawaii cheeks and lashes; additionally, dust on soft pink blush.
Spots or a tummy patch: switch colors for 1 to 2 rounds or appliqué a tiny heart.
Longer floppy ears: add two extra even rounds mid-ear so they drape cutely.
Pocket carrot charm: MR, 5 sc; 1 round even; then [sc 1, dec] to 3 sts; FO; add a green tassel.
Seasonal looks: spring pastels, autumn brights, winter neutrals; moreover, hold a metallic thread for sparkle.
No safety eyes: alternatively, embroider closed eyes with gentle arcs.
Sizing Adjustments
To scale down: use sport weight yarn, a 2.25 to 2.5 mm hook, and 5 mm eyes; keep stitch counts.
To scale up: choose plush size 5 yarn and a 4.0 mm hook; add one even round in the head and body; use 8 mm eyes.
As a rule of thumb, keep eye spacing one to two stitch widths wider than the eye diameter.
Care and Safety
Hand wash in cool water, squeeze in a towel, and air dry. Additionally, avoid high heat, since it can deform eye washers.
For children under three, embroider features and sew the keyring to a bag; moreover, reinforce all parts.
Troubleshooting Shape and Proportions
Head too small: add one even round at the widest part or remove one even round from the body; alternatively, choose slightly smaller eyes.
Neck wobble: insert a small felt disk between the head and neck stuffing so the head sits sturdier.
Ears leaning back: angle the first stitches slightly forward; moreover, pinch and stitch the base for a natural tilt.
Pattern Recap At a Glance
Head increases to 30 sts, works four even rounds, then decreases to 12.
Neckline expands to 24.
Body increases to 30, works four even rounds, and closes.
Ears, arms, and tail are simple mini shapes.
Finally, hardware attaches at the crown for a secure hang.
Why This Pattern Works for Beginners
Rounds are short, so mistakes are easy to catch. Additionally, stitch counts repeat in predictable rhythms.
The neck join is integrated; therefore, no separate head sewing is required.
Arms and ears reuse core skills; moreover, each part teaches gentle shaping.
Optional Seamless Arms Variation
Work the body to Rnd 20. Then ch 4 at one side, skip 2 sts, continue as written, ch 4 at the opposite side, and skip 2 sts again. On the next round, sc into each chain and stitch to close openings. Subsequently, stuff the arm channels lightly. Consequently, the arms are integrated and very secure.
Attaching to Different Accessories
Backpacks: use a lobster clasp; additionally, pick a longer chain to clear zipper seams.
Zippers: thread the split ring through the pull hole; consequently, the bunny doubles as an easy grab tab.
Car keys: choose a swivel clasp to reduce twisting; moreover, reinforce the crown loop.
Beginner Friendly Checkpoints
After Rnd 9 of the head, confirm 30 sts.
After Rnd 16, verify 24 sts at the neck; additionally, test firmness with a little stuffing.
Before closing the body, ensure stuffing is firm yet springy; consequently, your bunny keeps its shape.
Notes on Yarn Choices
Cotton shows crisp stitches and resists fuzzing. Additionally, it wears well on keychains.
Acrylic offers bounce and a soft hand at a friendly price; therefore, it’s excellent for first timers.
Plush chenille feels luxurious; however, stitches can be harder to see, so use lighter colors and good lighting.
Eco-Friendly Options
Use recycled cotton or leftover scraps to reduce waste; furthermore, this tiny make is perfect for stash busting.
If fiberfill is unavailable, fill with shredded fabric scraps; consequently, your bunny stays nicely plump.
Embroidery Alternatives to Safety Eyes
Satin stitch ovals with a backstitched outline for definition.
Sleeping eyes with two shallow arcs and tiny upward lashes; consequently, the bunny looks peaceful and sweet.
Quick Reference Stitch Counts
Head peak: 30 sts; Neckline: 24 sts; Body peak: 30 sts; Ears: 6 to 8 sts; Arms: 6 to 9 sts; Tail: 6 to 9 sts.
Closing Encouragement
You did it! A soft baby bunny is ready to hop onto your keys, brighten a backpack, and spark smiles wherever you go. With each stitch, your confidence grew, and now you have a plush friend to show for it. Finally, repeat this Uplifting Crochet Baby Bunny Keychain Soft Amigurumi Pattern in different yarns to create a whole litter each with a unique personality. Moreover, every color choice tells a new story. Above all, enjoy gifting a pocket-sized pick-me-up crafted with this charming pattern.