
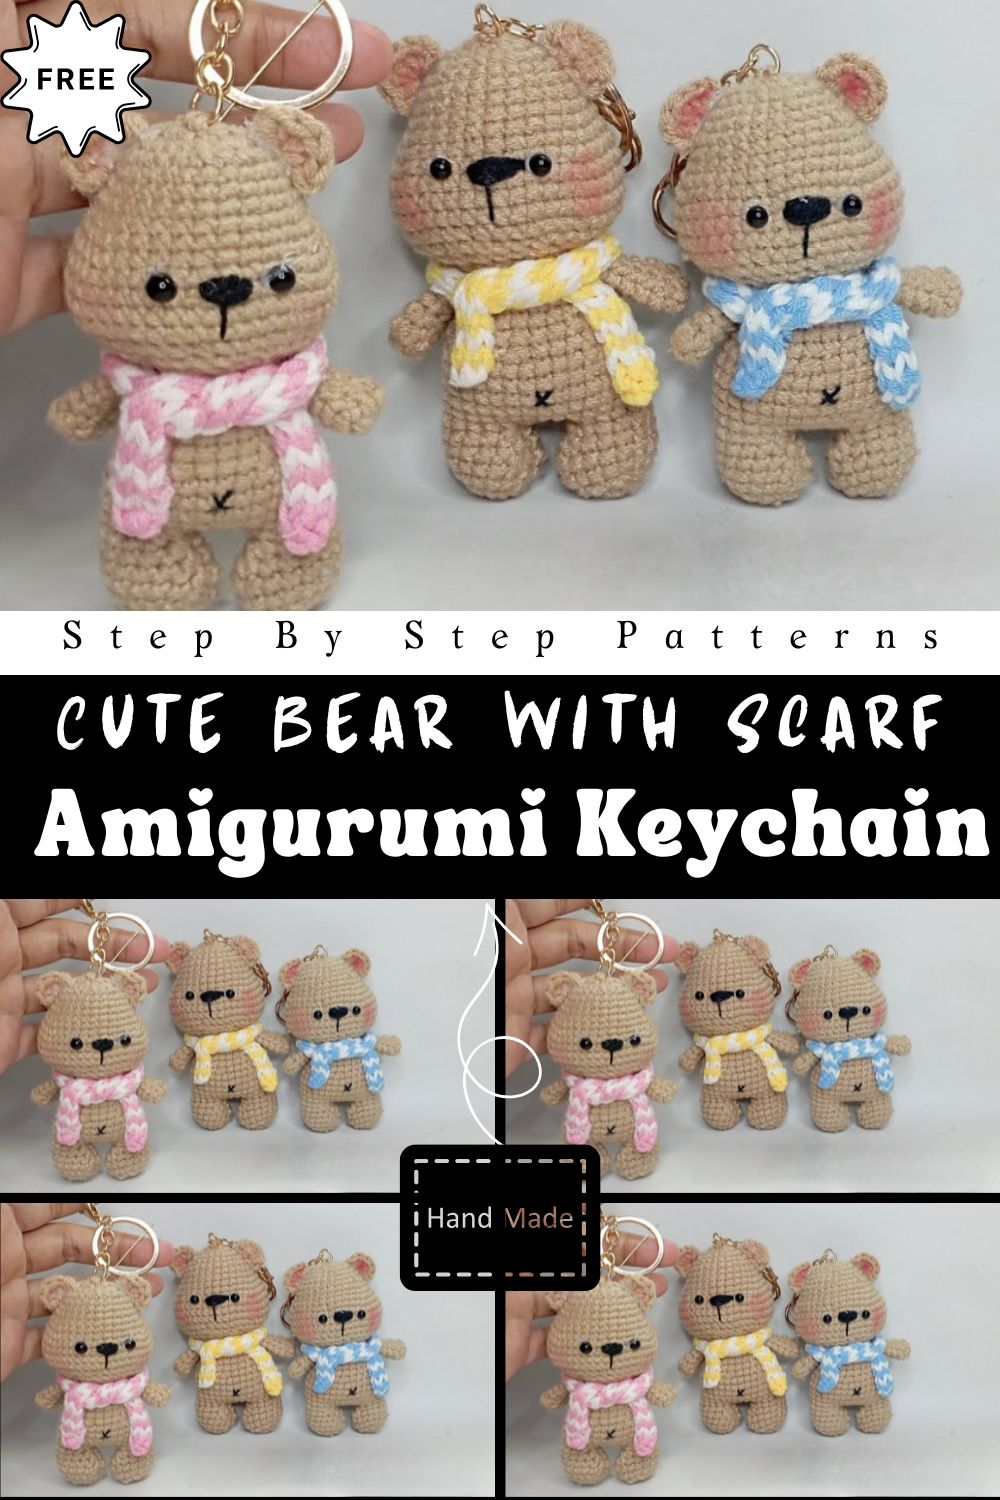
Few things feel as sweet as crocheting a tiny bear complete with a snug little scarf. This Crochet Bear with Scarf Pattern isn’t just another project; it’s a pocket-sized bundle of joy, creativity, and warmth.
Crochet lovers adore mini amigurumi bear keychains, crochet bear amigurumi, and especially those with tiny scarves because they blend simplicity and charm most delightfully. The soft texture of the yarn, the gentle shaping of the snout and ears, and the final touch of the scarf bring your bear to life stitch by stitch.
Materials & Tools
You don’t need much to bring this tiny bear to life! Here’s a quick list of everything you’ll need for your crochet bear with scarf amigurumi pattern:
-
Yarn: Use soft cotton or acrylic yarn in light brown or beige for the bear’s body. A small amount of contrasting color (like red or blue) is perfect for the scarf. Recommended yarn weight: sport (2) or DK (3) for a mini size.
-
Crochet Hook: A 2.0mm–2.5mm hook works best for tight stitches that keep stuffing hidden.
-
Fiberfill Stuffing: Use soft fiberfill to stuff the head and body evenly. Don’t overfill; just fill it enough to give it shape.
-
Stitch Markers: These help you keep track of your rounds (a lifesaver for beginners!).
-
Yarn Needle: For sewing parts together and neatly weaving in ends.
-
Scissors: Small craft scissors for trimming yarn tails.
-
Safety Eyes (Optional): 6mm eyes give your bear that adorable sparkle, but you can also embroider eyes with black yarn.
-
Keychain Ring (Optional): Attach it to the top of the head to turn your bear into a cute keychain or bag charm.
Each tool plays a small but important role,e so gather them all before you begin, and you’ll be ready for smooth stitching!
3. Step-by-Step Instructions
This mini crochet bear with a scarf is a fun, quick project that’s perfect for beginners. Follow these friendly steps to make your very own little friend!
-
Start the Head & Body
-
Begin with a magic ring and crochet 6 single crochets (sc).
-
Continue increasing each round until the head reaches your desired width (usually 5–6 rounds).
-
Once you’ve reached the size you like, crochet several rounds evenly to form the round bear head.
-
-
Stuff & Shape
-
Add a bit of fiberfill stuffing before closing the head.
-
Continue the body by gradually decreasing to form a round, compact shape.
-
Before sealing,g add the final bit of stuffing and close tightly.
-
-
Make the Ears
-
Crochet two small circles (start with a magic ring and a few single crochets).
-
Sew them evenly on top of the head.
-
-
Arms & Legs
-
Crochet small tubes or ovals for limbs. Keep them short and simple, this is a mini amigurumi bear keychain after all!
-
Attach the limbs symmetrically to the body.
-
-
Facial Details
-
Use black embroidery thread or yarn to stitch the nose and mouth.
-
Add safety eyes or embroider small black dots.
-
-
The Cozy Scarf
-
Chain about 25–30 stitches using a contrasting color.
-
Work one or two rows of single crochet for a neat finish.
-
Wrap it around your bear’s neck and tie a small knot. It instantly adds personality and cuteness!
-
-
Finishing Touches
-
Secure all parts well.
-
Attach the keychain ring if desired.
-
Fluff up your bear and adjust the stuffing gently to balance the shape.
-
Your crochet keychain bear pattern is now complete, te ready to accompany you everywhere!
4. Special Features & Pro Tips
What makes the bear-with-scarf crochet pattern so special? It’s the small details that make a big difference!
-
Beginner-Friendly Design: This pattern uses basic stitches, single crochet increase, and decrease, so even new crocheters can follow along easily.
-
No-Sew Option: You can attach arms and ears as you crochet to reduce sewing time.
-
Quick to Finish: You can complete one bear in just 2–3 hours, rs making it ideal for quick gifts or market crafts.
-
Customization Ideas: Try different yarn colors for the sc, arf red for Christmas, mas green for spring, or pastel shades for baby gifts.
-
Pro Tip: Always use stitch markers to keep track of rounds and lightly stuff your bear as you go to maintain even shaping.
-
Finishing Trick: To make your bear look extra plush, roll the body gently between you handsr. It helps the stuffing settle evenly and gives it that professional finall rounded finish.
5. Uses & Creative Ideas
Once your little bear is ready, there are endless ways to use it!
-
Cute Gift Idea: Perfect for birthdays, holidays, or as a handmade surprise for friends and family.
-
Adorable Keychain: Attach to your bag, backpack or keys for daily cuteness.
-
Desk or Shelf Décor: Place it on your workspace or craft shelf as a cheerful companion.
-
Plushie Collection: Create multiple bears in different colors and scarves for a fun collectible set.
-
Seasonal Variations: Add tiny accessories like Santahatsats, bunnyearsars, or flower crowns to celebrate different occasions.
This mini amigurumi bear with a scarf is not just a craft; it’s a little piece of joy you can carry anywhere!
6. Conclusion
Crocheting your own bear with a scarf pattern is one of those projects that brings instant happiness. It’s simple, fast, and perfect for relaxing weekends or creative breaks. Whether you’re making it for yourself, gifting it to someone special, or adding it to your craft shop, this crochet bear amigurumi will always bring smiles.
So grab your yarn, pick your favorite colors, and start crocheting your tiny friend today. Remember,r every stitch tells a story,y and this one’s about love, creativity,y and a little bear wearing a scarf!
If you enjoyed this project, don’t stop here, try making a Crochet Twin Bear Couple Pattern next for double the fun and cuteness!