Materials & Tools
Before we begin, let’s go over the essential tools and materials you’ll need to crochet your Chicken Flower Keychain Amigurumi.
Supplies List
-
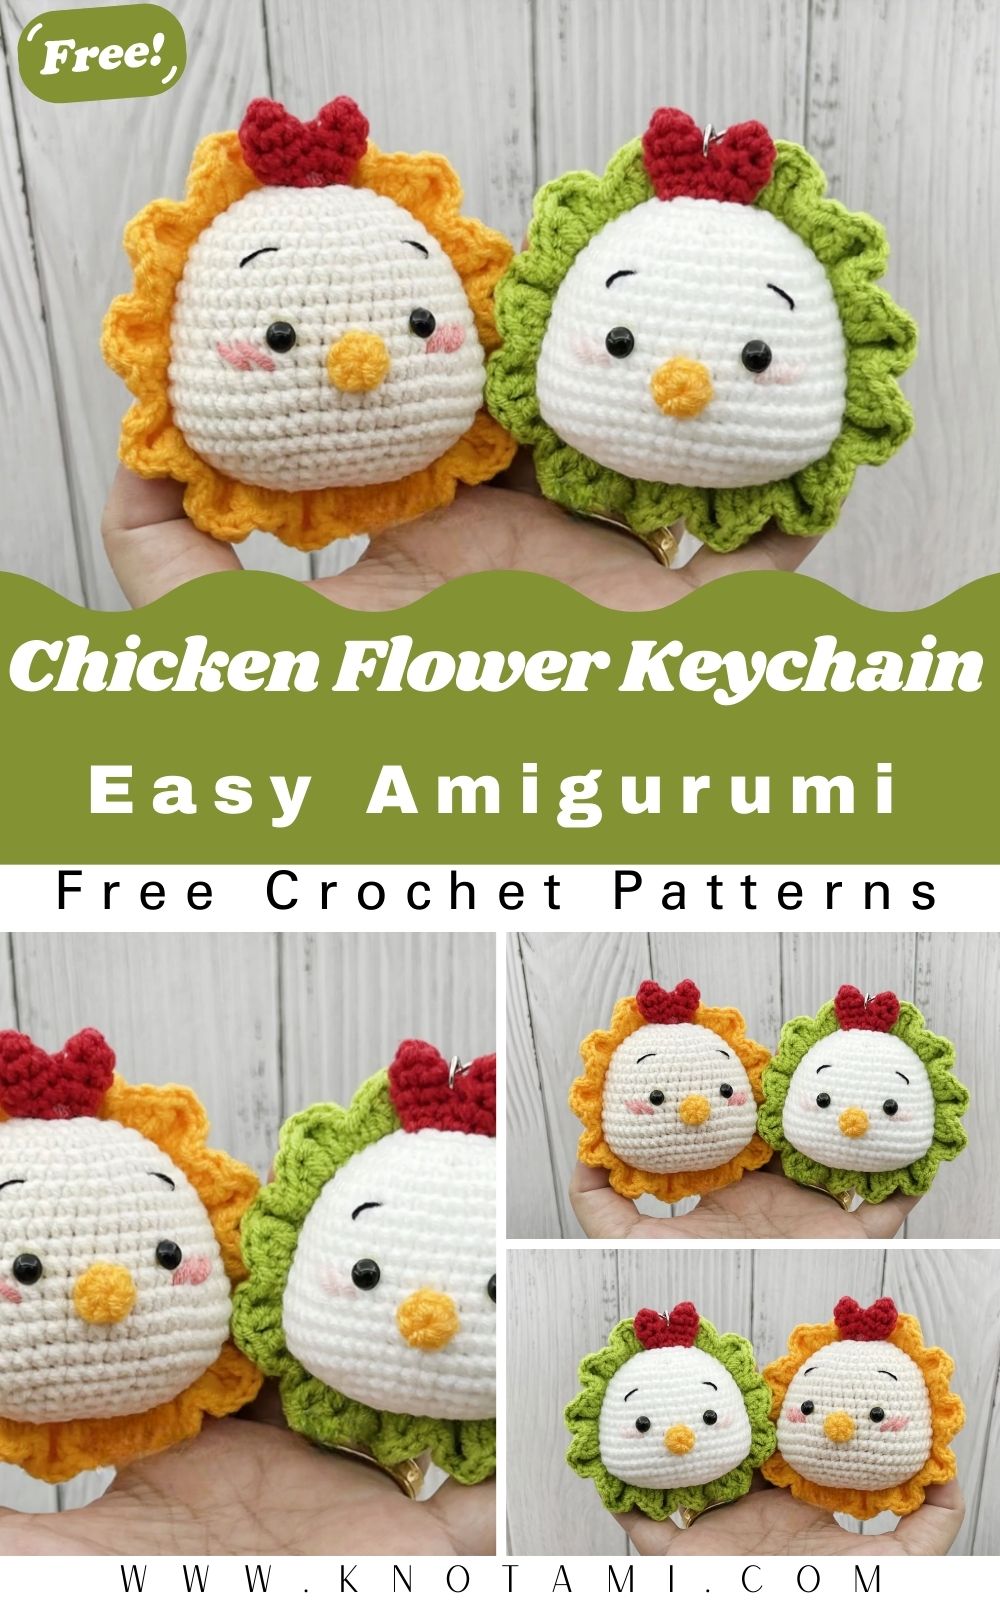
Yarn: Lightweight (Category 3) or DK cotton/acrylic yarn in white (body), yellow (beak and feet), red (comb and flower details), green (leaf), and pink or blue (flower).
-
Hook: 2.5 mm – 3.0 mm crochet hook (depending on your tension).
-
Stuffing: Polyester fiberfill for shaping the body and head.
-
Safety eyes: 6 mm black safety eyes (or you can embroider the eyes).
-
Scissors: For neat yarn trimming.
-
Tapestry needle: For sewing and weaving ends.
-
Stitch marker: To track rounds in continuous crochet.
-
Keychain ring or clasp: For attaching your finished piece.
Yarn & Color Tips
-
Choose cotton yarn for a firm structure and crisp stitch definition.
-
For a softer plush, use acrylic yarn or velvet yarn for a fluffy texture.
-
Feel free to mix and match colors and astels for a spring vibe, or bright shades for a fun pop look.
-
If gifting, pick colors based on the recipient’s personality: sunny yellows for positivity, pink for charm, or mint for calmness.
Pro Tip: Use lighter yarn weight if you want a small, delicate keychain. Thicker yarn will create a bigger, plush-style chicken.
Step-by-Step Crochet Instructions
Let’s bring your chicken and flower to life! Follow these simple steps carefully, take your time, enjoy the process, and you’ll have an adorable finished piece in no time.
Step 1: Making the Head
-
Start with a magic ring using white yarn.
-
Round 1: 6 single crochets (sc) into the ring (6).
-
Round 2: 2 sc in each stitch around (12).
-
Round 3: (1 sc, inc) repeat around (18).
-
Rounds 4-7: sc around evenly (18).
-
Round 8: (1 sc, dec) repeat around (12).
-
Insert safety eyes between rounds 5 and 6, spaced about 4 stitches apart.
-
Add stuffing.
-
Round 9: dec around (6). Fasten off and close the hole neatly.
Tip: Keep the head slightly firm but not overstuffed to maintain the perfect round shape.
Step 2: Forming the Body
-
With white yarn, make another magic ring.
-
Round 1: 6 sc (6).
-
Round 2: inc in each stitch (12).
-
Round 3: (1 sc, inc) repeat (18).
-
Rounds 4-8: sc around evenly (18).
-
Round 9: (1 sc, dec) repeat (12).
-
Add stuffing as you go.
-
Round 10: dec around (6). Fasten off and leave a long tail for sewing.
Sew the head to the body using the tail end and the tapestry needle. Make sure it’s centered and securely attached.
Step 3: Adding the Comb and Beak
-
Comb:
-
Use red yarn. Chain 5.
-
Work sc, hdc, dc, hdc, sc back along the chain.
-
Fasten off and sew onto the top of the head.
-
Beak:
-
Use yellow yarn. Chain 3.
-
Work sc, hdc, dc in the same chain, fasten off, and fold in half.
-
Sew under the eyes.
Optional: Add a tiny blush using pink embroidery thread or a dab of fabric paint to make the chicken extra cute.
Step 4: Making the Feet
-
With yellow yarn, chain 4.
-
Slip stitch into the second chain, sc into the next two.
-
Make two short toes by chaining 3 and slip stitching back.
-
Fasten off and make another identical piece.
-
Sew both feet to the bottom of the body.
Step 5: Crocheting the Flower
-
Use pink yarn (or any color you like).
-
Round 1: Make a magic ring and work (sc, hdc, dc, hdc, sc) five times into the ring. This forms five petals.
-
Pull tight to close the ring.
-
Switch to green yarn for the leaf.
-
Chain 6, sc into the second chain, then hdc, dc, hdc, sc along the chain.
-
Fasten off and sew the flower and leaf to the side or top of the chicken.
Pro Tip: Use contrasting colors between the chicken and the flower to make the design pop.
Step 6: Attaching the Keychain
-
Sew a small loop of yarn at the top of the chicken’s head.
-
Insert a metal ring or lobster clasp through the loop.
-
Reinforce with an extra stitch for durability.
Now your chicken flower amigurumi is ready to join your daily adventures as a keychain or bag charm!
Customization Ideas
There’s no limit to how creative you can get with this adorable chicken keychain!
Color Combinations
-
Classic Look: White chicken with a red comb and yellow feet.
-
Spring Theme: Soft pastel body with a bright pink flower.
-
Rainbow Fun: Striped yarn for a multi-colored chicken.
-
Festive Edition: Add a small Santa hat for Christmas or a heart for Valentine’s Day.
Accessories
-
Add a mini bowtie or scarf under the beak.
-
Use metallic yarn for sparkle.
-
Stitch a tiny name tag or charm beside the keychain.
Creative Idea: Make pairsonene chicken with a daisy, another with a rose, perfect for best-friend keychains!
Advanced Tips & Troubleshooting
Crocheting small amigurumi can be a little tricky. Here are expert tips to help you perfect your craft:
-
Invisible Decreases: Use front-loop-only decreases to keep stitches neat.
-
Consistent Tension: Don’t crochet too tightly; it makes shaping harder.
-
Mark Your Rounds: Always use a stitch marker when working in spirals.
-
Stuff Gradually: Add small bits of filling as you go to avoid lumps.
-
Seamless Joins: Use a whip stitch or ladder stitch to attach parts cleanly.
-
Even Petals: Count your stitches carefully in the flower for uniform shape.
-
Avoid Yarn Splitting: Use a smooth hook and yarn that doesn’t fray easily.
-
Shape Correction: If the head looks uneven, roll it gently between your palms.
-
Blending Colors: When switching yarn colors, carry the yarn inside the piece for a tidy transition.
-
Pattern Reading: Familiarize yourself with common abbreviations sc, inc, dec, hdc, dc, sl st.
Conclusion
The Easy Crochet Chicken Flower Keychain Amigurumi Pattern is proof that joy can come in the smallest, cutest forms. With just a few stitches, some colorful yarn, and your creative energy, you can bring this cheerful little chicken to life. It’s a quick, meaningful project that reminds you of the happiness that handmade art brings fromthe quiet rhythm of crochet to the bright smiles it inspires.
So, grab your hook, pick your favorite yarn shades, and let your imagination bloom.
In just a few hours, you’ll have not only a lovely chicken flower keychain but also a piece of your creativity you can carry everywhere, a small token of handmade joy that truly brightens your day.