Free Crochet Penguin Hair Tie Pattern for Beginners
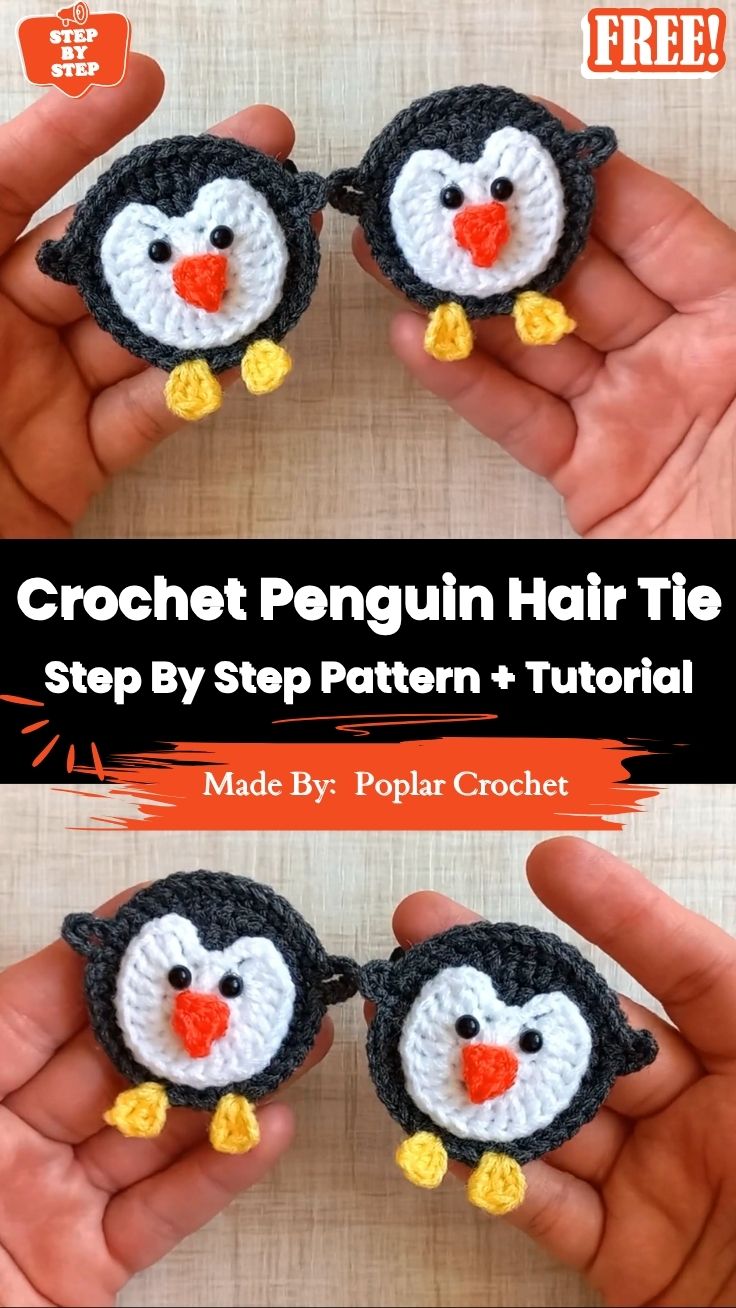
Tiny black loops, a soft puff of white yarn peeking out at the center, and two little wing points barely wider than a fingertip that’s the texture you’re working toward with this Free Crochet Penguin Hair Tie Pattern for Beginners.
Unlike a full amigurumi doll, a hair tie penguin is worked flat or semi-flat: a single black base circle with lightly puffed dimension, a separate white belly piece stitched on top, tiny wing points, dangling feet, and a beak all anchored to a hair elastic at the back. It’s a crochet hair accessory small enough to finish in one sitting, and because every piece is tiny, precision matters more than stitch count. This guide focuses on the parts that actually trip beginners up: keeping the belly centered, stopping stuffing from peeking through thin single crochet, and attaching the elastic so it survives daily wear instead of pulling loose after a week.
Time Box
- Black base circle + light stuffing: 10–15 minutes
- White belly panel: 5–8 minutes
- Beak, wings, feet: 10 minutes
- Assembly + elastic attachment: 10–15 minutes
- Total: about 45–60 minutes
Materials
Yarn – worsted weight (4) cotton or acrylic in:
- Black (base circle, wing points)
- White (belly panel)
- Yellow (feet)
- Orange or red (beak)
Hook – a hook one size smaller than the yarn’s recommended size (commonly 2.5–3.5mm for worsted weight) keeps stitches tight enough that light stuffing won’t show through.
Hair Tie Elastic Band – a thin, unbraided elastic cord loop, not a thick fabric scrunchie band thick elastics distort the flat shape when sewn on.
Safety Eyes or Embroidery – 4–5mm safety eyes work if the hair tie is for an adult or older child. For younger kids, embroider a small French knot instead; safety eyes are a choking-hazard risk if the backing ever loosens on a piece this small.
Light Stuffing – a pinch of polyfil, not a packed handful. The goal is slight dome shape, not a rounded 3D head.
Abbreviations
MR – magic ring
sc – single crochet
inc – increase
dec – invisible decrease
st(s) – stitch(es)
sl st – slip stitch
rnd – round
Important Stitches
The whole piece relies on single crochet and invisible decrease. Invisible decrease matters more here than in a full-size amigurumi a visible decrease bump on a piece this small distorts the round shape of the head noticeably.
Before You Start
Place a stitch marker in the first stitch of every round on both the black base circle and the white belly panel — on a piece this small, it’s easy to lose track of where a round starts after only 12–18 stitches, and one missed round shifts where the belly and beak line up. Keep a second, contrasting-color scrap of yarn nearby to mark the center of the belly panel before you sew it on; it saves you from eyeballing “the middle” under time pressure.
Penguin Construction
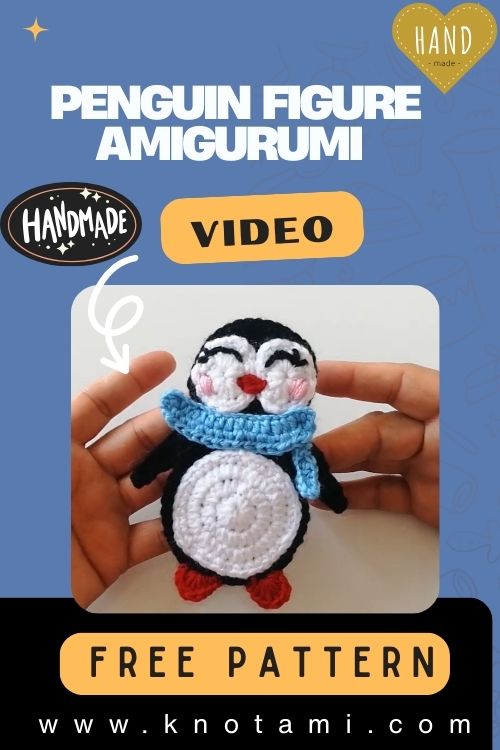
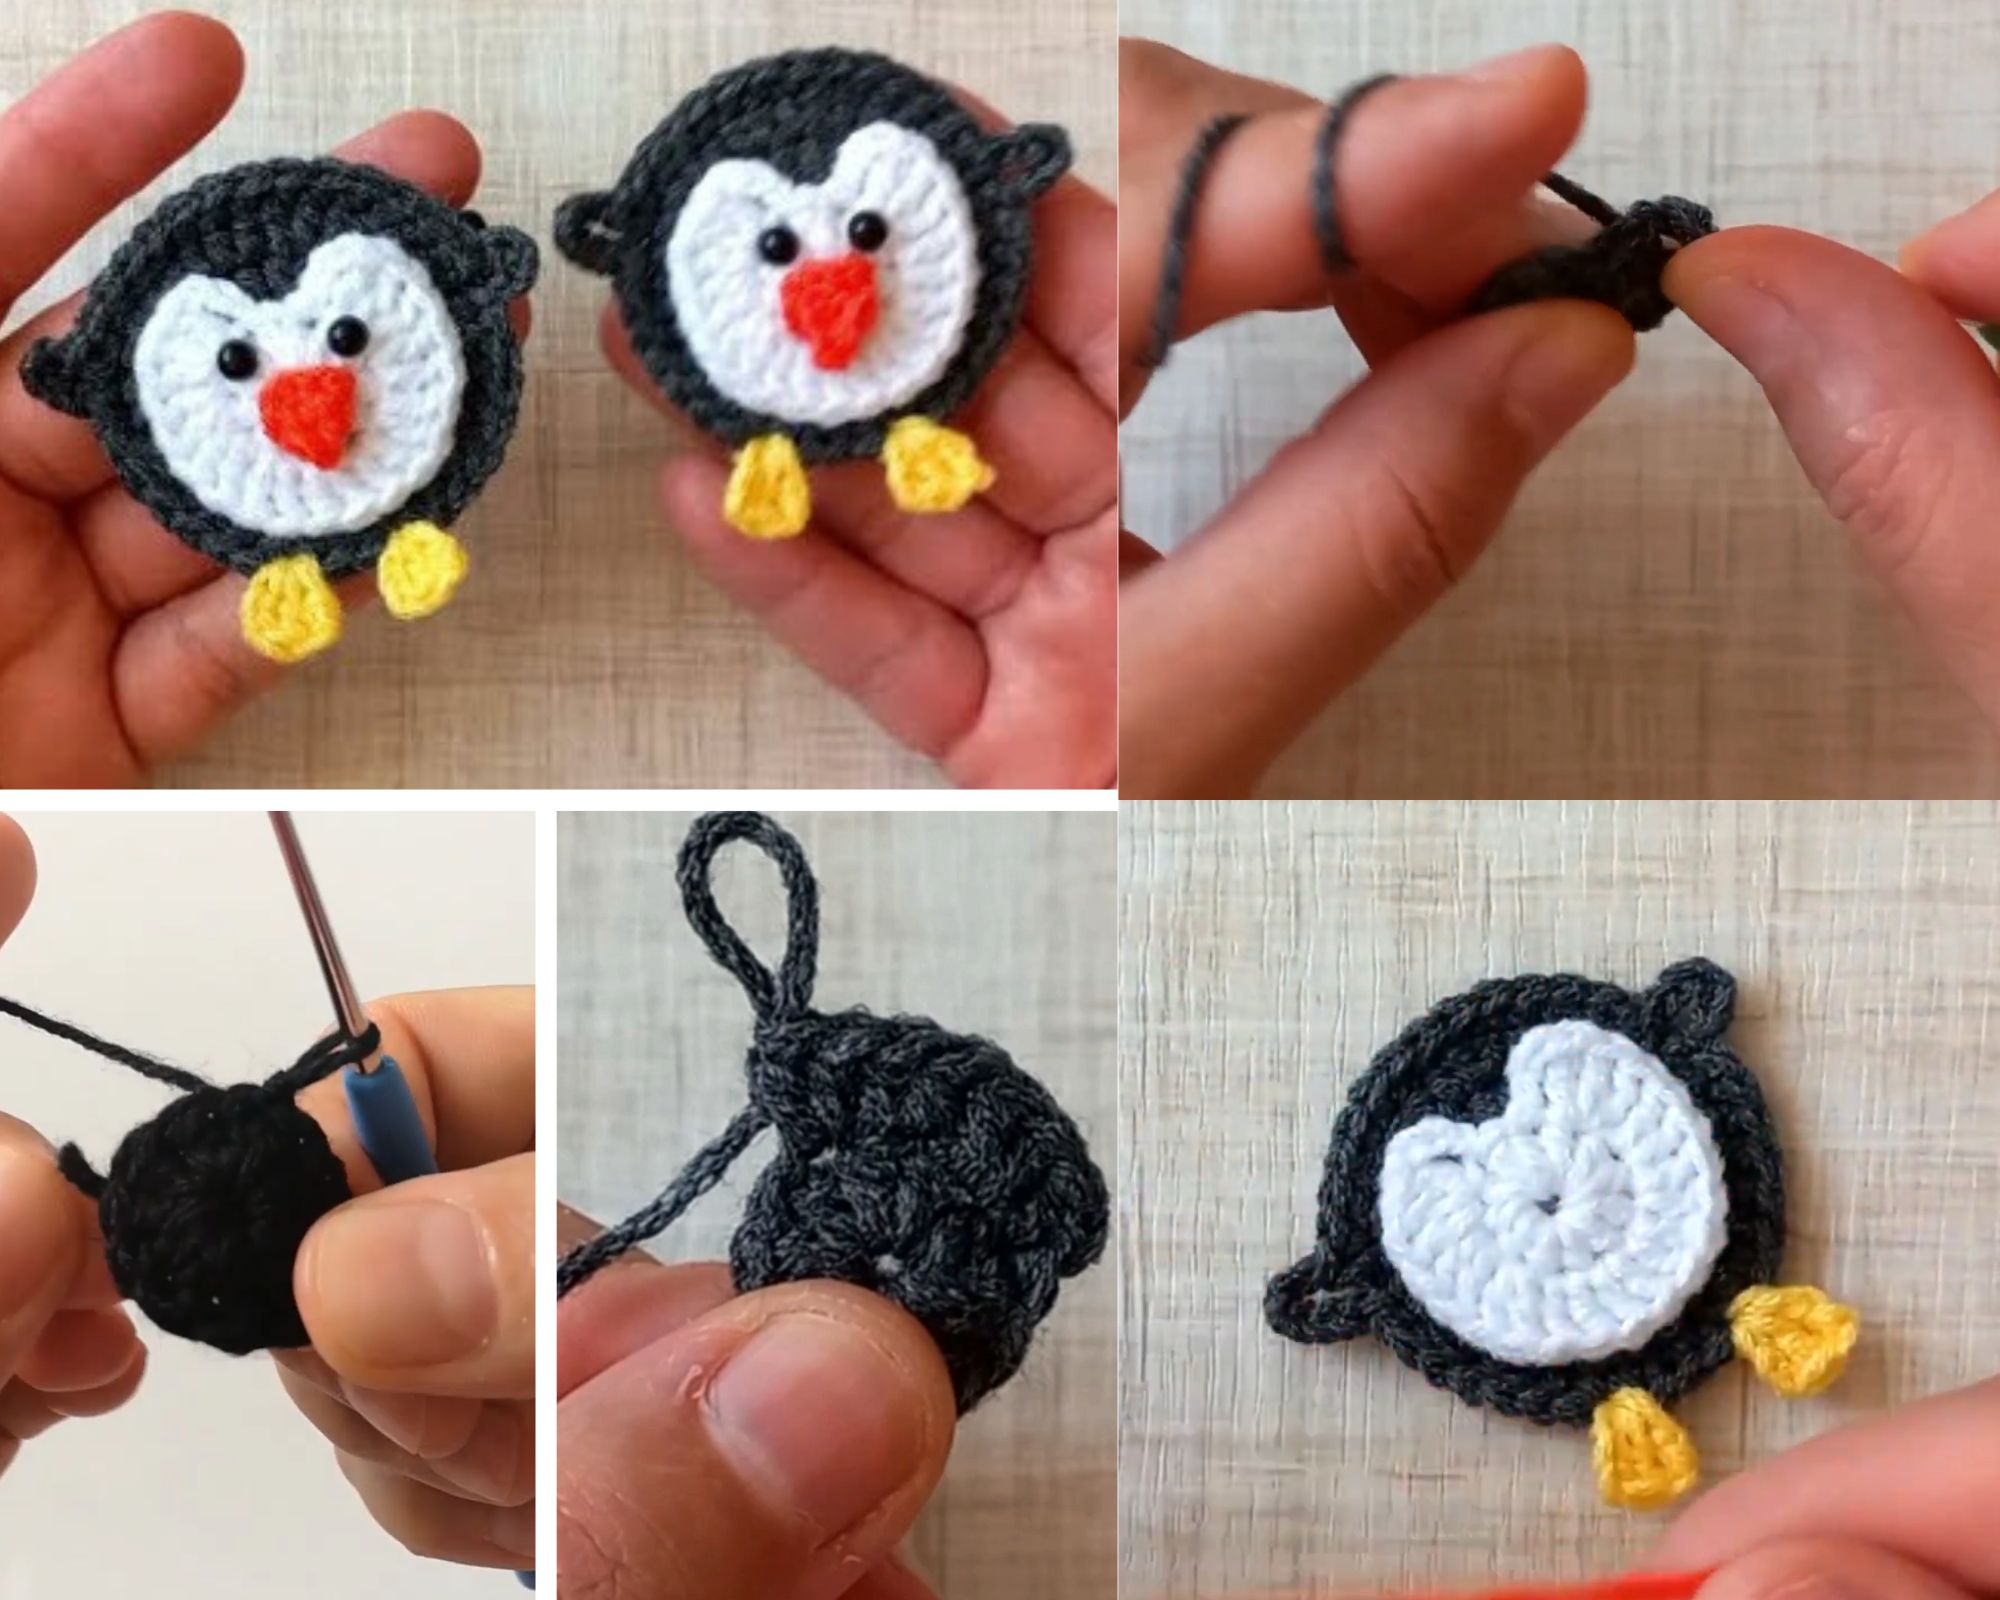
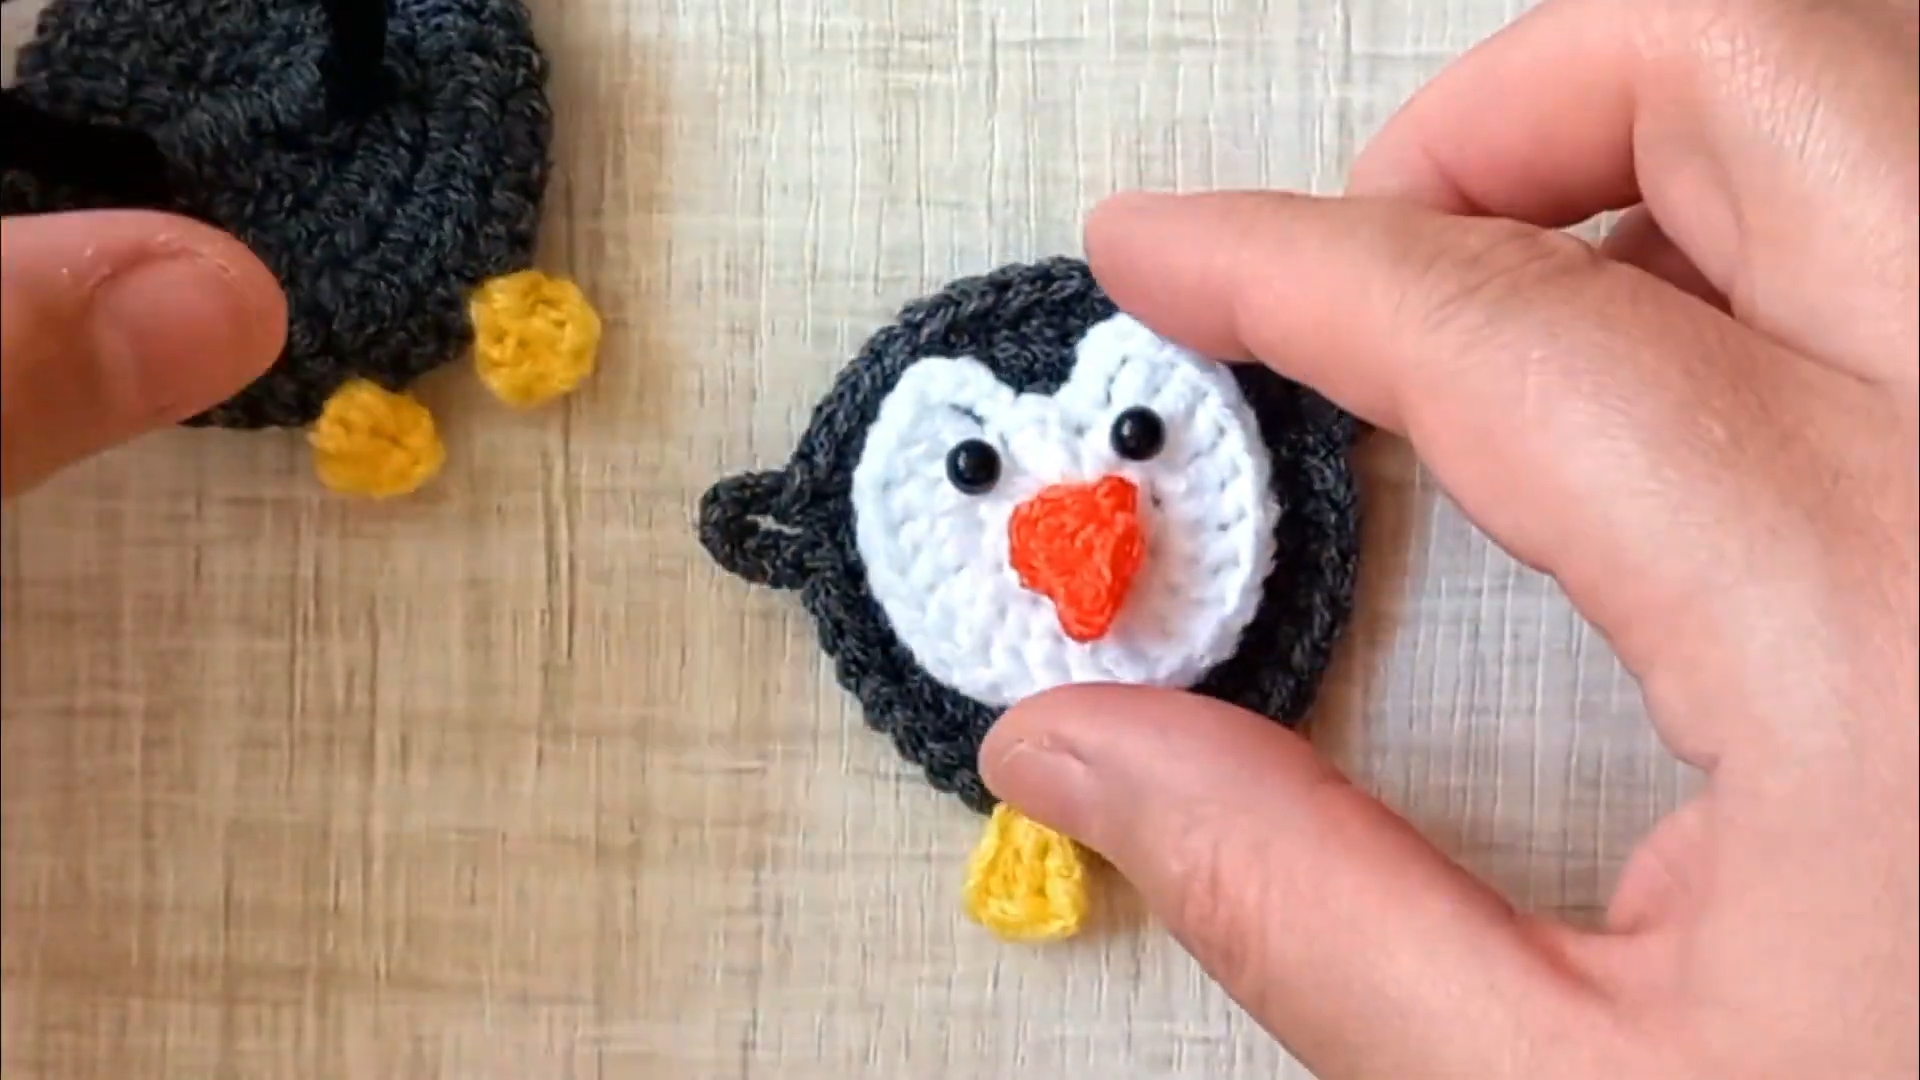
Looking at the pic, the ears are worked straight into the black circle’s last round as small points, not added separately. The belly is a small white circle stitched flat on top through front loops only, leaving a clean black border showing around it. The hanging loop is a short chain of black yarn worked and knotted at the top before closing the circle not a separate elastic threaded on later. Feet are tiny yellow puffs tacked side by side at the bottom edge, and the beak is a small orange heart shape centered below the eyes.
1. Body/Head Base Circle (Black)
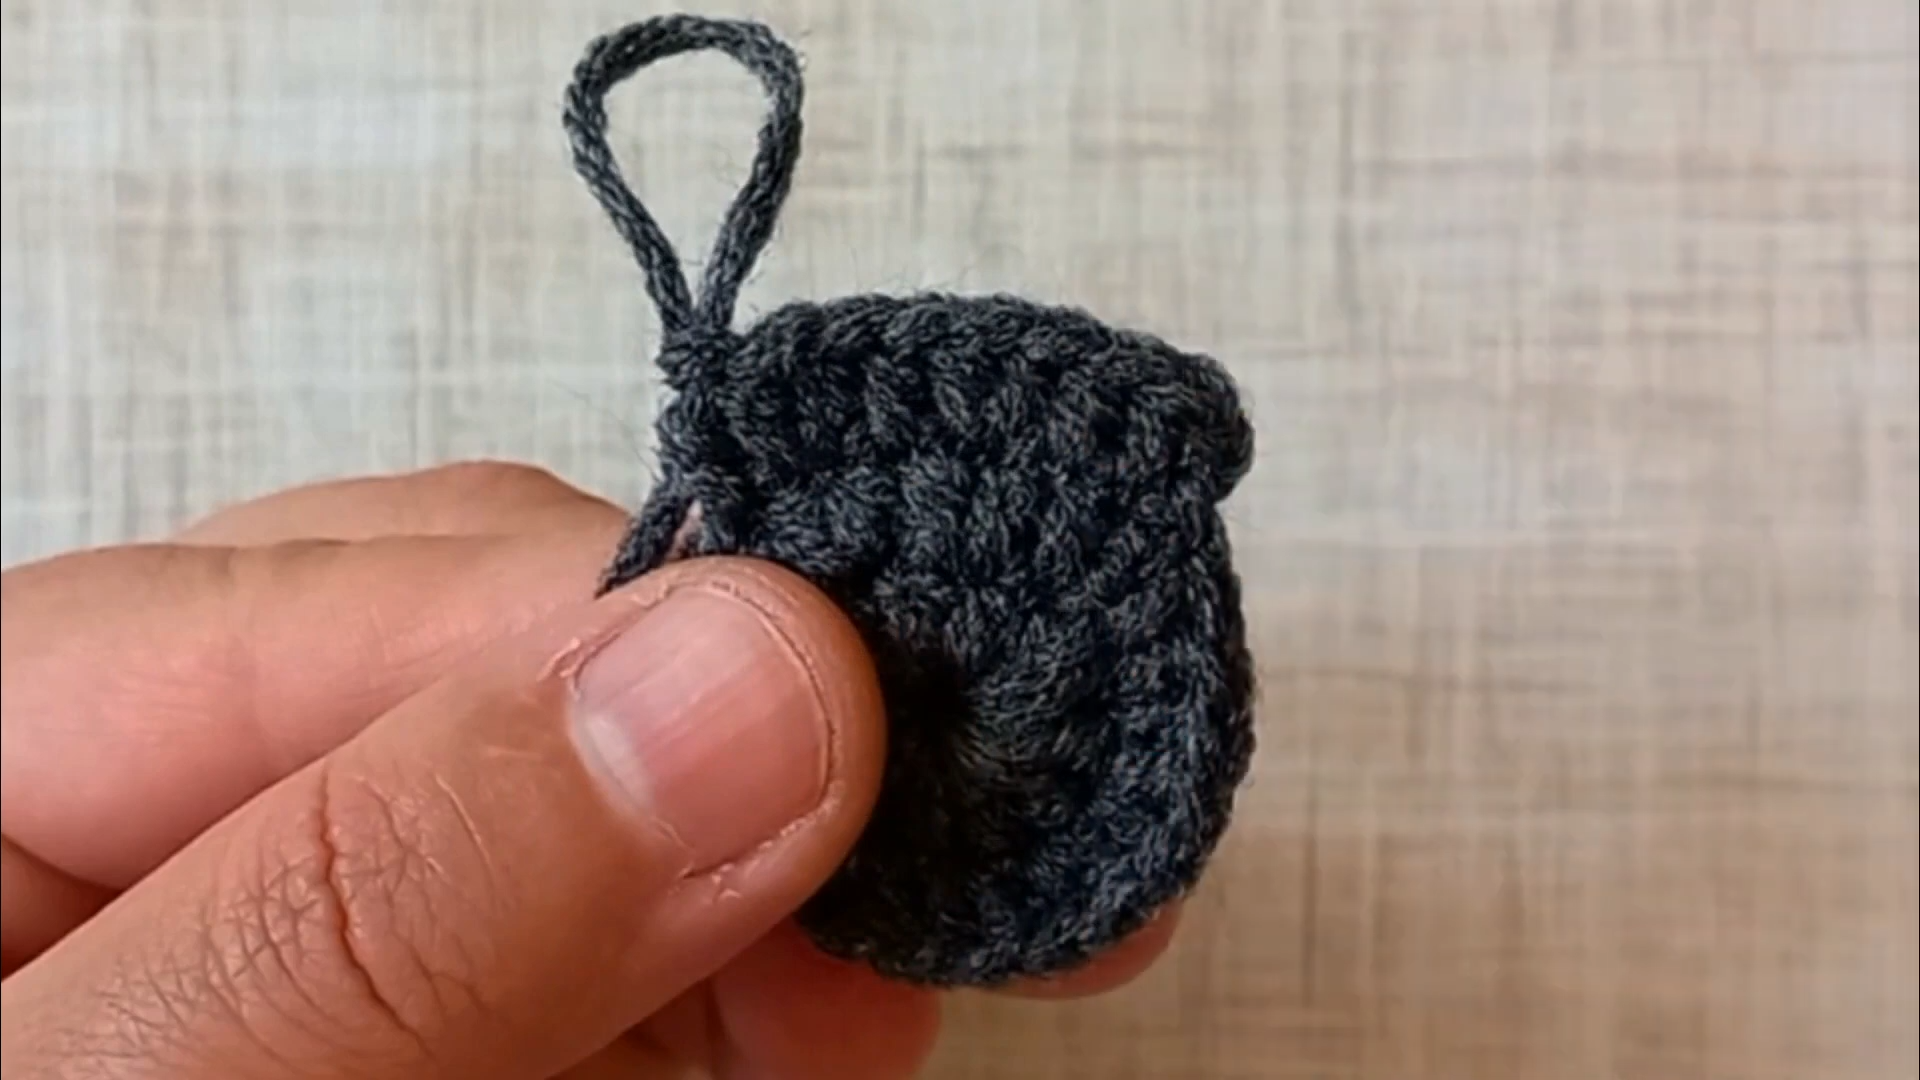
Start with a magic ring and single crochet increases in the standard doubling pattern for the first two rounds, then work straight rounds until the circle reaches your target width, finishing with one or two decrease rounds to curve the edge slightly inward. Stop increasing the moment the circle looks slightly wider than tall a true circle reads better as a penguin head than an oval.
Pro Tip: Work the last round tighter than the rest by going down half a hook size or pulling your loops shorter. The last round is what a finger touches most, and a looser final row is the first place stuffing peeks through.
2. Beak
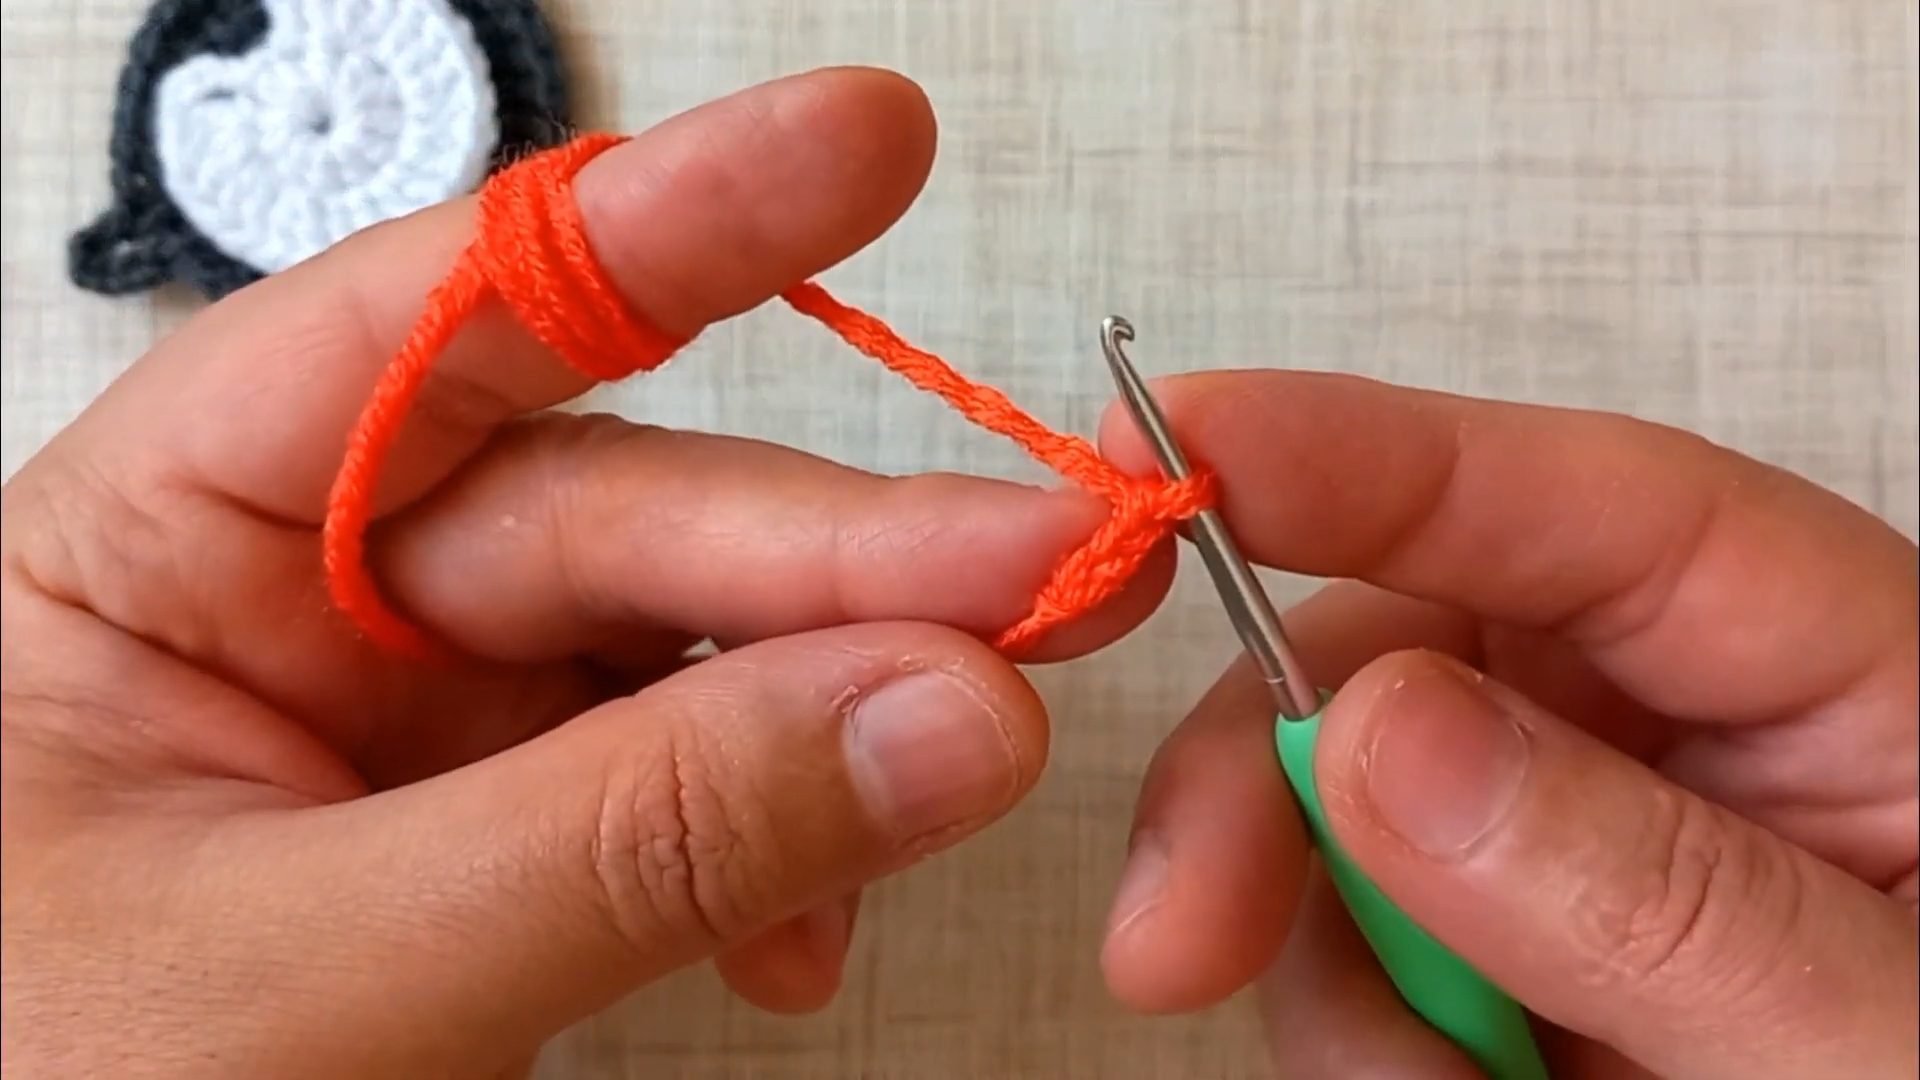
Work 2–3 rounds from a magic ring in orange or red, stopping while the shape is still small and slightly pointed rather than fully round. A beak that’s too rounded reads as a nose instead of a beak once it’s sewn on.
2. White Belly Panel
Crochet the belly separately as a small flat oval or teardrop shape — do not try to work it directly into the black base in a single piece, since this is where beginners lose the round count fastest. Work a short flat piece back and forth in rows (2–3 rows is typically enough for a piece this size), leaving a long tail for sewing.
- Chain a small starting row and single crochet across.
- Increase one stitch at each end for a second row to widen the oval.
- Work a final row without increasing, then fasten off with a long tail.
Attaching the Hair Tie Elastic
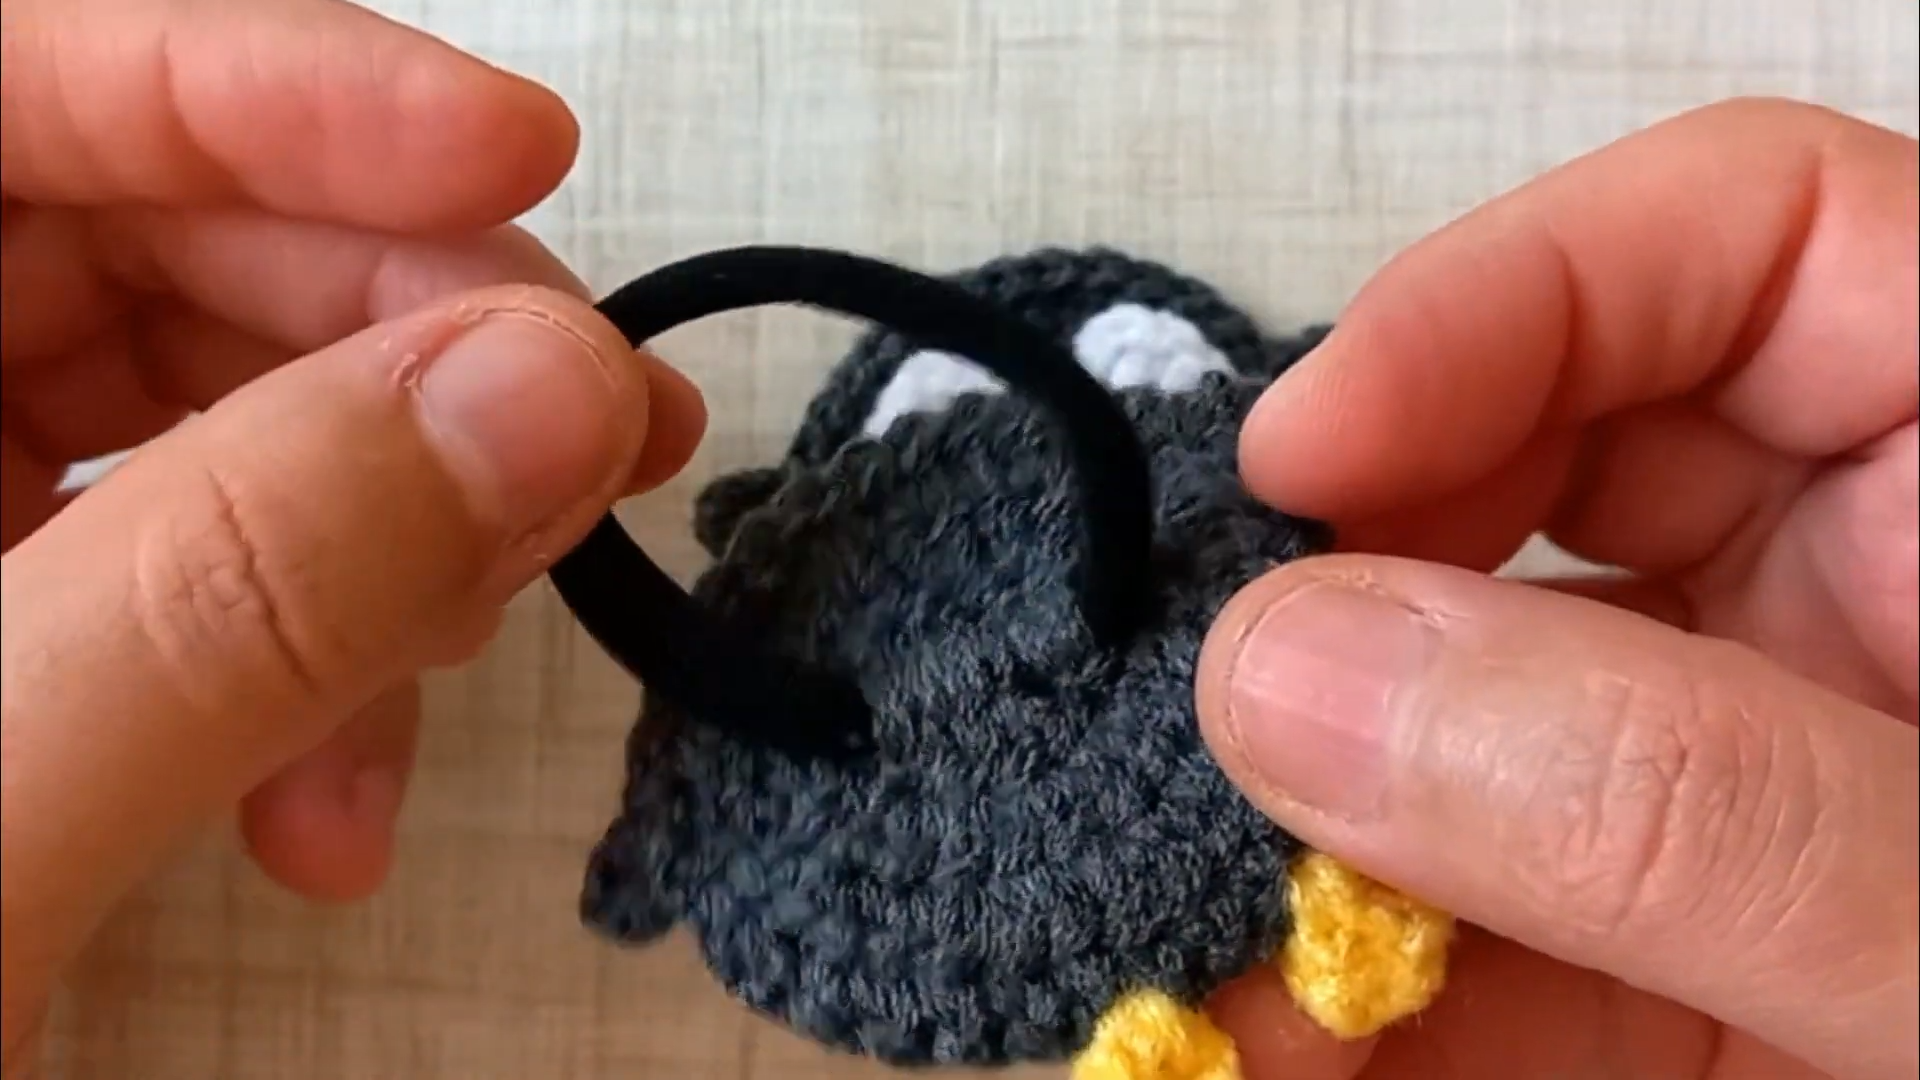
Fold the elastic loop in half and tack the fold point flat against the back of the black circle with 4–5 small whipstitches through both layers of elastic and the crochet fabric, then go back over the same spot a second time before weaving in ends. A single pass of stitching is the most common reason these come loose after a week of wear; the elastic needs to be caught from both directions, not just tacked once.
4. Ears/Wings (Small Black Points)
Work each wing as a tiny flat triangle: chain 2–3, single crochet into the second chain from the hook, then decrease to a point over 2 more rows. Make two, working the second as a mirror image of the first so the points curve outward symmetrically instead of both pointing the same direction.
5. Feet (Yellow, Dangling)
Chain a short strip and single crochet back across, leaving both yarn tails long. Feet are the piece most likely to end up uneven, since they hang free rather than being stitched flat against the body. Measure both against each other before fastening off, not after.
Assembly
Facial Features Placement
Center the belly panel first, using your marked center point matched against the vertical center of the black circle — everything else (beak, eyes) gets positioned relative to the belly, not the outer edge of the head. Pin or hold the belly in place and step back to check symmetry before stitching a single stitch; on a piece this small, a beak or eye set even 2mm off-center reads as visibly lopsided in the finished photo.
Stitch Count Checkpoints
Before closing the base circle, count the final round out loud against your marker. Before sewing the belly on, count its edge stitches against the width of the space it needs to cover a belly panel that’s even one row too wide will pucker the black base when sewn down.
Finished Size
Roughly 1.5–2 inches (4–5 cm) across the black base circle, depending on yarn weight and hook size, small enough to sit flat against a ponytail without adding bulk.
Pro Tip: Sew the elastic on before adding the final pinch of stuffing. Stuffing first makes it hard to get the needle through solidly to catch the elastic against the crochet fabric underneath.
Light stuffing goes in through the last open stitches of the base circle, right before closing, just enough to round the shape slightly, using a stitching pin or the end of your hook to distribute it evenly toward the edges so the center doesn’t dome unevenly.
Watch The Video Tutorial
If you’d like to follow along visually, this video walkthrough covers
the same steps shown below. It’s a helpful reference if you prefer
watching over reading, but the full written pattern with exact stitch
counts is available right here on this page.
Common Mistakes
- Belly placed off-center – fix by basting with a contrasting scrap thread first, checking from a few feet away, then switching to your final yarn to stitch.
- Lopsided beak – measure from both eye positions to the beak edge before the final stitch.
- Uneven feet length – hold both feet stretched side by side before attaching either one.
- Visible knot at the elastic – tuck the knot between the elastic and the crochet fabric, not sitting on top where it shows against hair.
Troubleshooting
If stuffing shows through the stitches, drop half a hook size rather than adding a lining. A smaller hook is a permanent fix, while a fabric lining adds bulk to something meant to sit flat. If the belly panel won’t lie flat against the curved black circle, it’s usually cut too wide; unravel a stitch or two off each side rather than trying to force it flat with extra pins.
Size Modification
For an ornament or bag charm instead of a hair tie, work one extra round on the base circle before decreasing, and stuff more fully since it no longer needs to sit flat against hair. Swap the elastic for a small loop of chain stitches or a jump ring at the top instead.
Color Variations
Swap black and white for gray and cream for a softer look, or drop the belly panel and beak shape entirely and restitch the same base circle in orange with a black stripe for a different small bird design using the same construction.
Care Instructions
Hand-wash gently in cool water and lay flat to dry. The elastic band degrades faster than the yarn with repeated stretching, so check it every few months and re-stitch a fresh loop if it’s begun to feel loose.
Video Pattern Reference
For the belly panel placement, foot positioning, and elastic attachment specifically, the visual sequence is easier to follow than written steps alone. The full tutorial is here: Crochet Penguin Hair Tie Video Tutorial.
FAQs
Can I make this without safety eyes?
Yes, a small embroidered French knot in black yarn gives the same look and removes any small-parts risk, which matters most if the hair tie is going to a child.
What yarn weight works best for a small piece like this?
Worsted weight (4) with a hook one size down keeps stitches tight enough to hold shape without extra rows of reinforcement.
Will the elastic wear out before the crochet does?
Usually yes; plan to check the elastic every few months and re-stitch a new loop rather than remaking the whole penguin.
Pairing Ideas: A matching set works well as a small penguin brooch pin using the same base circle with a pin backing instead of elastic, or as a set of stitch markers using a smaller magic ring count