
Crochet Wallet Coin Purse Amigurumi A Friendly Bunny-Ear Guide
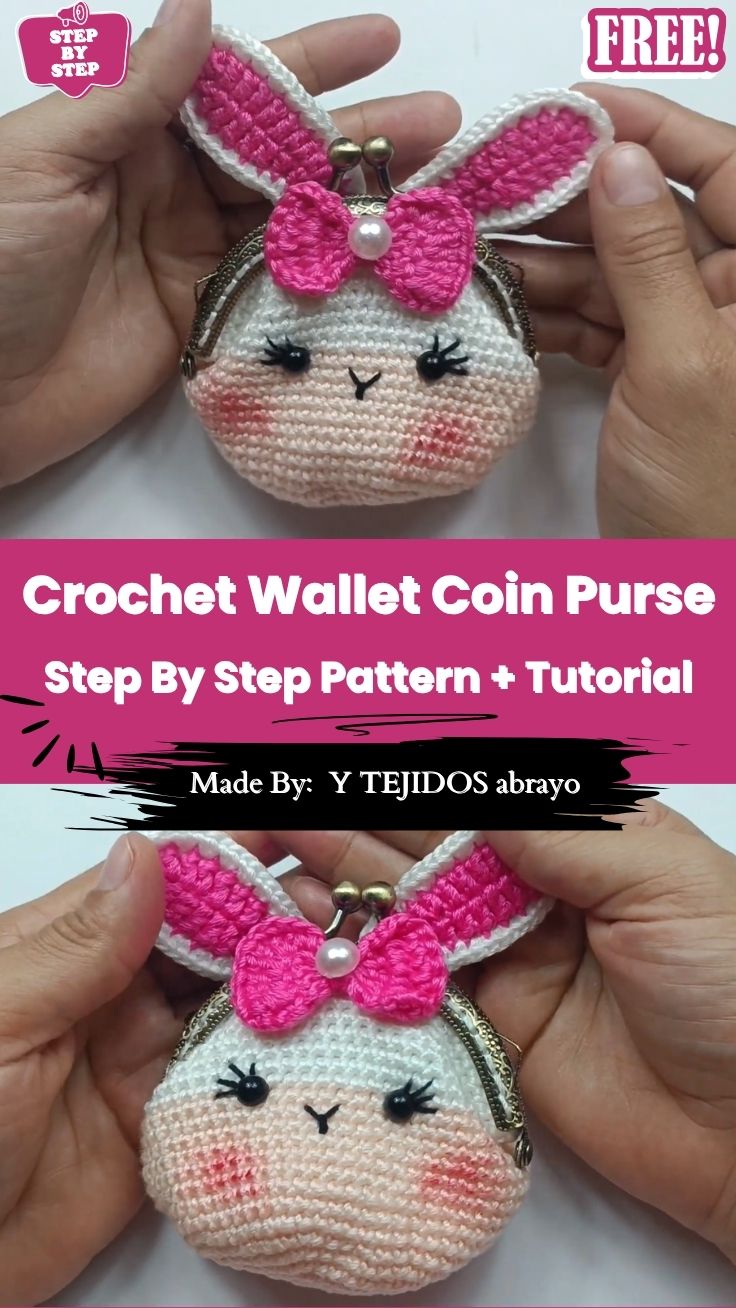
Round and pouch-shaped with soft bunny ears and a sweet little bow, the Crochet Wallet Coin Purse Amigurumi looks like a toy but works like a real wallet perfect for coins, cards, or lip balm. Its stitched-on face gives every pouch real personality.
Built with a handful of basic stitches, the pouch comes together in one relaxed sitting, making it a confident pick for beginners still building their skills. It doubles as a genuinely lovely handmade gift, especially for kids or anyone drawn to cute little accessories. The coin purse design keeps shaping simple while the amigurumi bunny ears add just enough charm to make it memorable.
What You’ll Need
- A metal coin purse frame with sewing holes (sometimes called a “purse clip” or “kiss clasp”)
- 100% acrylic yarn, light weight (about 2mm thick), in your main color plus a second color for contrast (the sample uses a soft color for the body and white for the top half)
- Small amounts of pink and white yarn for the ears
- A 2.0mm crochet hook
- A large, blunt sewing needle (big enough to pass through the purse frame holes)
- Stitch marker
- Safety eyes (or small black buttons)
- Scissors
- Optional: a small pearl or bead for the bow, and a touch of blush-colored makeup for the cheeks
Stitch abbreviations used:
- sc = single crochet
- inc = increase (2 sc in the same stitch)
- hdc = half double crochet
- dc = double crochet
- ch = chain
- st(s) = stitch(es)
Part 1: The Purse Body
Start with a magic ring.
- Round 1: 6 sc into the ring. (6 sts)
- Round 2: inc in every stitch around. (12 sts)
- Round 3: sc 1, inc — repeat around. (18 sts)
- Round 4: sc 2, inc — repeat around. (24 sts)
- Round 5: sc 3, inc — repeat around. (30 sts)
- Round 6: sc 4, inc — repeat around. (36 sts)
- Round 7: sc 5, inc — repeat around. (42 sts)
- Round 8: sc 6, inc — repeat around. (48 sts)
- Round 9: sc 7, inc — repeat around. (54 sts)
From here, you stop increasing and just build height.
- Rounds 10–27: sc in every stitch around, with no increases or decreases (54 sts each round). That’s 18 rounds total.
If you want a two-tone purse like the one in the photos, work the first 9 of these rounds (rounds 10–18) in your main color, then switch to your second color for the remaining 9 rounds (rounds 19–27).
When you finish round 27, cut the yarn and leave a long tail, you’ll use this tail to sew the piece onto the purse frame later. Set this piece aside.
Part 2: The Bunny Ears (Make 2 Ears, Using 4 Pieces Total)
You’ll make 4 identical flat pieces, 2 in pink and 2 in white, then pair them up (one pink + one white) to form each ear.
For each piece:
- Chain 15.
- Skip the first chain, then work: 3 sc, 4 hdc, 5 dc into the next stitches along the chain.
- In the very last chain, work 3 dc (this turns the corner at the tip of the ear).
- Continue back along the other side of the same chain: 5 dc, 4 hdc, 3 sc.
- Fasten off, leaving a long tail on the white pieces only (you’ll use this thread to join the two layers together and then attach the ear to the purse).
Repeat this 4 times total (2 pink, 2 white).
To finish each ear: lay one pink piece and one white piece back to back, then use the long white tail to stitch around the outer edge, joining the two layers into one ear shape. Repeat for the second ear.
Part 3: The Bow
The bow is made of two matching “wing” pieces joined in the center.
First wing:
- Chain 3, then work 4 dc into the first chain (counting the starting chain-3 as your first dc, this gives you 5 dc total along this short base). Don’t close this into a ring yet.
- Chain 3, turn.
- Work 1 dc in the first stitch, then inc (2 dc) in each stitch across, working only 1 dc in the very last stitch.
- Chain 3 and slip stitch into the same stitch to finish this side.
Second wing: Return to the center starting point and repeat the same steps on the other side, so you end up with two matching triangular “wings” joined at a shared center point. Close the ring at the center once both sides are complete, leaving a short tail.
Wrap the tail tightly around the center of the bow a few times to cinch it into a classic bowtie shape, then secure it with a knot. If you’d like, sew a small pearl or bead onto the center of the bow for extra detail.
Assembling the Purse
- Attach the purse frame: Fit the crocheted body into your metal purse frame. Using your large needle and the long tail left from round 27, sew through each hole in the frame and into the corresponding stitch along the top edge of your crochet piece. Go slowly and keep the edge sitting evenly inside the frame, this makes a big difference in how neat the finished purse looks. Work your way all the way around until the whole top edge is stitched in place.
- Attach the ears: Fold the base of each finished ear slightly inward and stitch the fold in place so the ear holds a slight curve, the way a real bunny ear would. Position both ears along the top of the purse, a little apart, and stitch them firmly in place. You can angle them so they stand up, lean outward, or fold over, whichever looks cutest to you. A small dab of fabric glue can help hold folded ears in position while you decide.
- Attach the bow: Stitch the finished bow onto the front of the purse, just below or between the ears.
Adding the Face
- Eyes: Place your safety eyes between rounds 18 and 19 (right around where the color change happens, if you used two colors). Space them about 6–7 stitches apart, centered under the bow.
- Eyelashes: Before inserting the eye backs, use a small length of yarn to stitch 2–3 short diagonal lashes just above and to the outer side of each eye.
- Nose: About two rows below the eyes, centered between them, stitch a small doubled loop of yarn to form a tiny nose.
- Cheeks (optional): Add a soft touch of pink or peach blush to each cheek with a cotton swab for a rosy, sweet finish.
Tips for a Neater Finish
- Keep your tension consistent throughout the body rounds, loose stitches here can make the purse frame fit loosely later.
- If your yarn is a little thin for your hook size, go down half a size for tighter, sturdier stitches (a coin purse gets more handling than a soft toy, so firmness helps it last).
- When sewing onto the metal frame, always sew back through the same hole a second time before moving to the next one, this keeps the edge secure and stops it from pulling loose with everyday use.
- If you’d rather skip the two-tone look, this pattern works just as well in a single color from round 10 onward.
Conclusion
And there you have it, your very own Crochet Wallet Coin Purse Amigurumi, ears, bow, and all! It’s a fun little project that ends up looking far more polished than the time it actually takes to make, and that’s always a nice feeling. Once you’ve made one, the same shaping technique for the body and ears works beautifully for all kinds of animal-themed pouches, so don’t be afraid to experiment with different ear shapes, colors, or face details to make a version that feels like your own.
If you make one, I’d love to hear how it turned out – happy stitching!


