
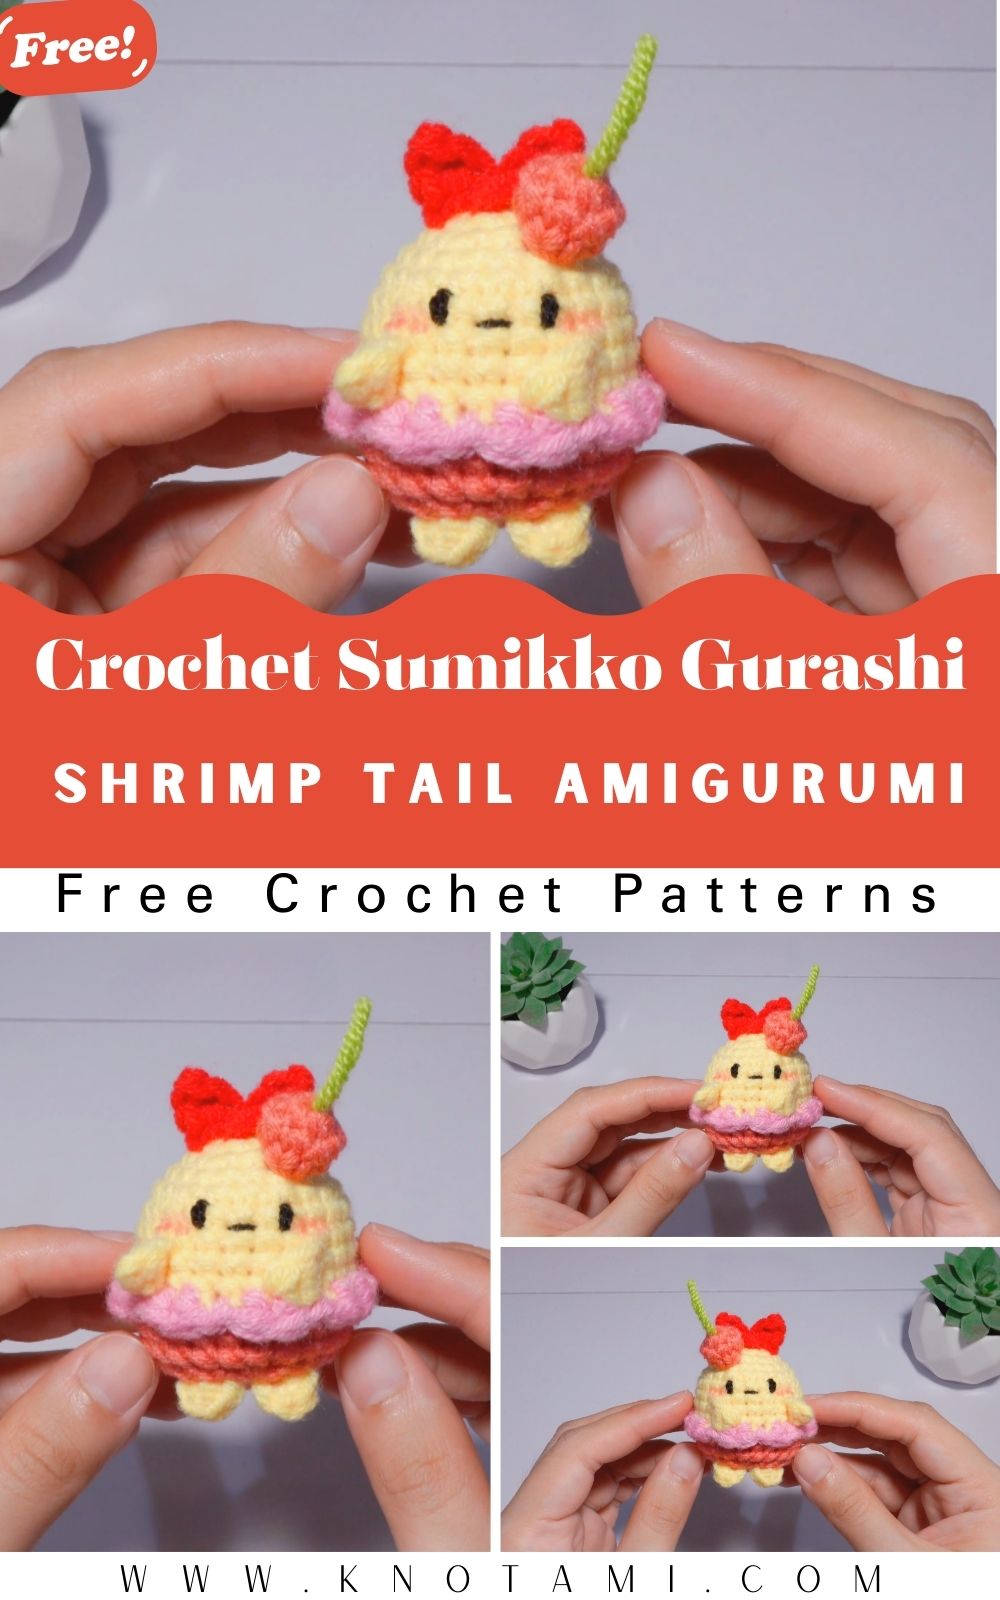
Do you want to make the shy and lovable Crochet Sumikko Gurashi Shrimp Tail. This character is a fan favorite because of its tiny tail and quirky personality, making it a perfect addition to your collection of handmade treasures. Whether you are looking to decorate your desk or create a thoughtful gift for a friend, this project is a fantastic choice for any enthusiast.
Starting this journey is quite simple because the shape of the Ebi Fry is very forgiving for those still practicing their tension. As you work through the rounds, you will see the iconic textures begin to form, transforming a simple ball of yarn into a recognizable character. Because this Crochet Sumikko Gurashi Shrimp Tail is small and portable, you can easily finish it in one sitting. Furthermore, using the right shade of yellow and pink yarn will ensure your finished piece looks exactly like the original character from the series.
Below, you will find the embedded video tutorial that demonstrates each stitch in real time. While the written instructions provide the structural details, watching the visual movements can help you understand the specific placement of the hook. Consequently, using both the video and the text together will lead to the best possible results for your finished project.
Skill Level
Intermediate Beginner
Tutor Suggestions
Before you begin, I highly suggest that you choose a yarn with a slight fuzziness to mimic the fried texture of the character. Additionally, make sure to use a stitch marker at the start of every round so you do not lose your place. It is also a good idea to stuff the body firmly but avoid overstuffing the tail section so it remains flat and cute.
Materials and Step by Step Guide
Required Materials
-
Yellow yarn for the body
-
Pink or light red yarn for the tail
-
2.5mm or 3.0mm crochet hook
-
Black embroidery thread for eyes
-
Fiberfill stuffing
-
Yarn needle and scissors
The Body Pattern
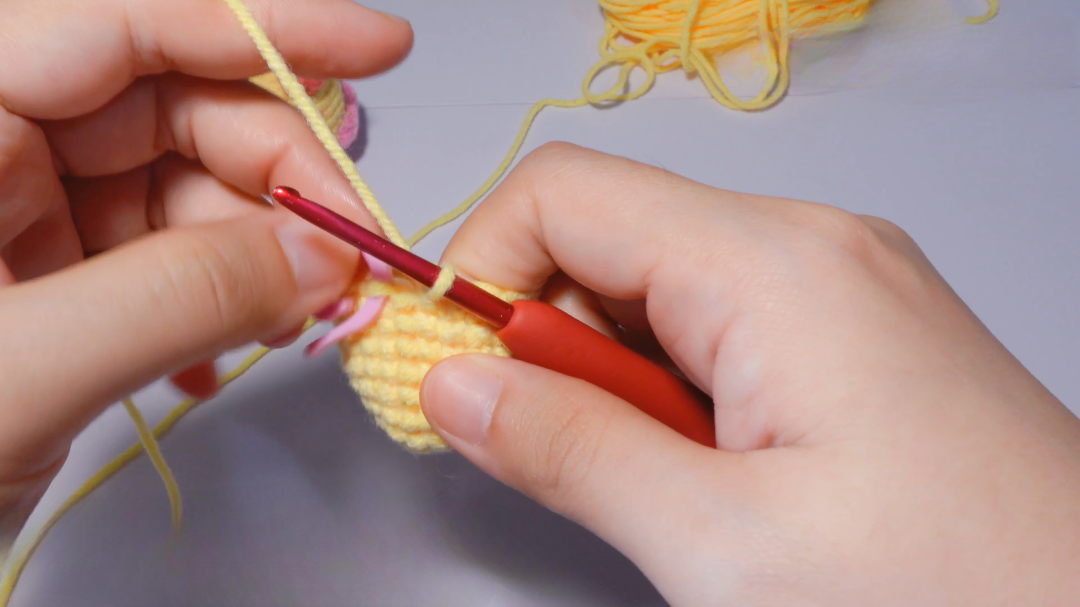
Start by creating a magic ring with the yellow yarn. You should work six single crochets into the ring to form the base. In the second round, increase in every stitch to reach twelve stitches. Afterward, you will continue to increase gradually until the body reaches the desired width.
Once you have the width, work several rounds of even single crochets to build the height of your Crochet Sumikko Gurashi Shrimp Tail. This creates the cylindrical shape of the fried shrimp. Transitioning smoothly between these rounds is vital for a professional look. Therefore, keep your tension consistent throughout the process.
The Tail Section
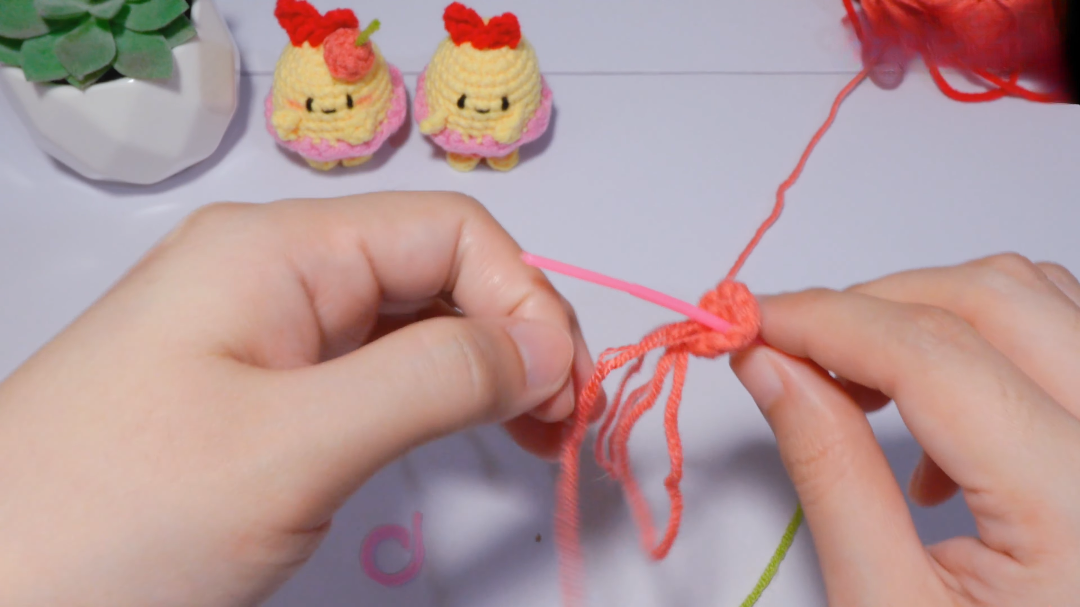
Switch to your pink yarn to create the tiny fins at the top. You will need to make two small triangular pieces. Start with a small chain and work decreasing rows until you reach a point. Once finished, you will sew these to the top of the yellow body. Because the tail is the most defining feature, take your time to align them perfectly in the center.
Assembly and Details
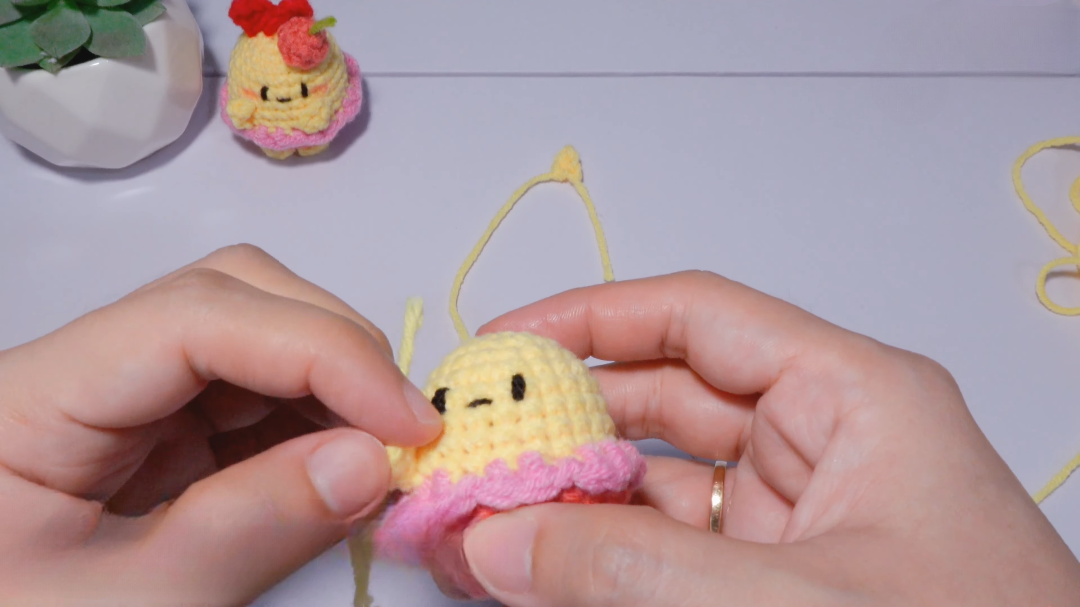
After the body is stuffed and closed, use your yarn needle to weave in all loose ends. For the face, use black thread to sew two tiny dots near the middle of the body. You might also add a tiny bit of pink blush under the eyes using fabric marker or yarn. Consequently, your character will look expressive and full of life.
Where to Use Your Creation
You can use this finished piece in many creative ways. For instance, it makes an excellent keychain for your backpack or a cute charm for your phone. Additionally, many people use these as “pocket pals” or desk mascots to brighten their workspace. If you make a whole set, they look wonderful displayed in a small bowl or basket as home decor.
Tips and Tricks
To get a better “fried” look, you can use a wire brush to lightly brush the yellow yarn after finishing the body. This creates a fluffy texture that looks like breadcrumbs. Moreover, using a hook that is slightly smaller than the yarn label recommends will ensure your stuffing doesn’t peek through the stitches.
Common Mistakes
One common mistake is stuffing the body before finishing the eye embroidery. It is much easier to secure the threads on the inside of the fabric when the piece is still open. Additionally, avoid making the tail fins too large, as this can make the character look unbalanced. Always check your stitch count at the end of every round to ensure the shape stays symmetrical.
Frequently Asked Questions
What type of yarn is best for this project?
Cotton yarn is excellent for definition, but acrylic yarn is better if you want to brush it for a fuzzy texture.
Can I make this bigger?
Yes, you can simply use a thicker yarn and a larger hook to scale up the size while following the same pattern.
How do I clean my amigurumi?
It is best to spot clean with a damp cloth or hand wash gently in cold water to keep the shape intact.
Is this pattern suitable for children?
The finished toy is great for kids, but ensure the eyes are embroidered rather than using plastic beads if the child is very young.
How long does it take to finish?
Most people can complete this Crochet Sumikko Gurashi Shrimp Tail in about two to three hours depending on their speed.
Conclusion
Creating your own handmade items is a rewarding experience that allows you to express your creativity. By following this guide, you now have a beautiful Crochet Sumikko Gurashi Shrimp Tail to call your own. Remember that practice makes perfect, so do not be afraid to try again if your first attempt isn’t exactly how you imagined it. Happy crocheting and enjoy your new little friend.