
Are you in asearch of a project that combines cultural pride with modern fashion trends. You will learn how to create a Crochet Strappy Pixel Crop Graphgan that features a beautiful Africa map design. This project is perfect for those who love the “graphgan” style, which uses a grid based chart to create pixelated images within your crochet fabric. Consequently, you will find that this method allows for incredible detail and personalization in your handmade wardrobe.
As you begin this journey, you should know that this Crochet Strappy Pixel Crop Graphgan is designed to be both breathable for summer and structurally sound for a perfect fit. Furthermore, we will focus on using the single crochet stitch to ensure the pixel map looks crisp and professional. Whether you are making this for yourself or as a thoughtful gift, the combination of the strappy back and the detailed front panel makes it a standout piece. Therefore, let us gather our materials and prepare to master the art of pixelated crochet together.
![]()
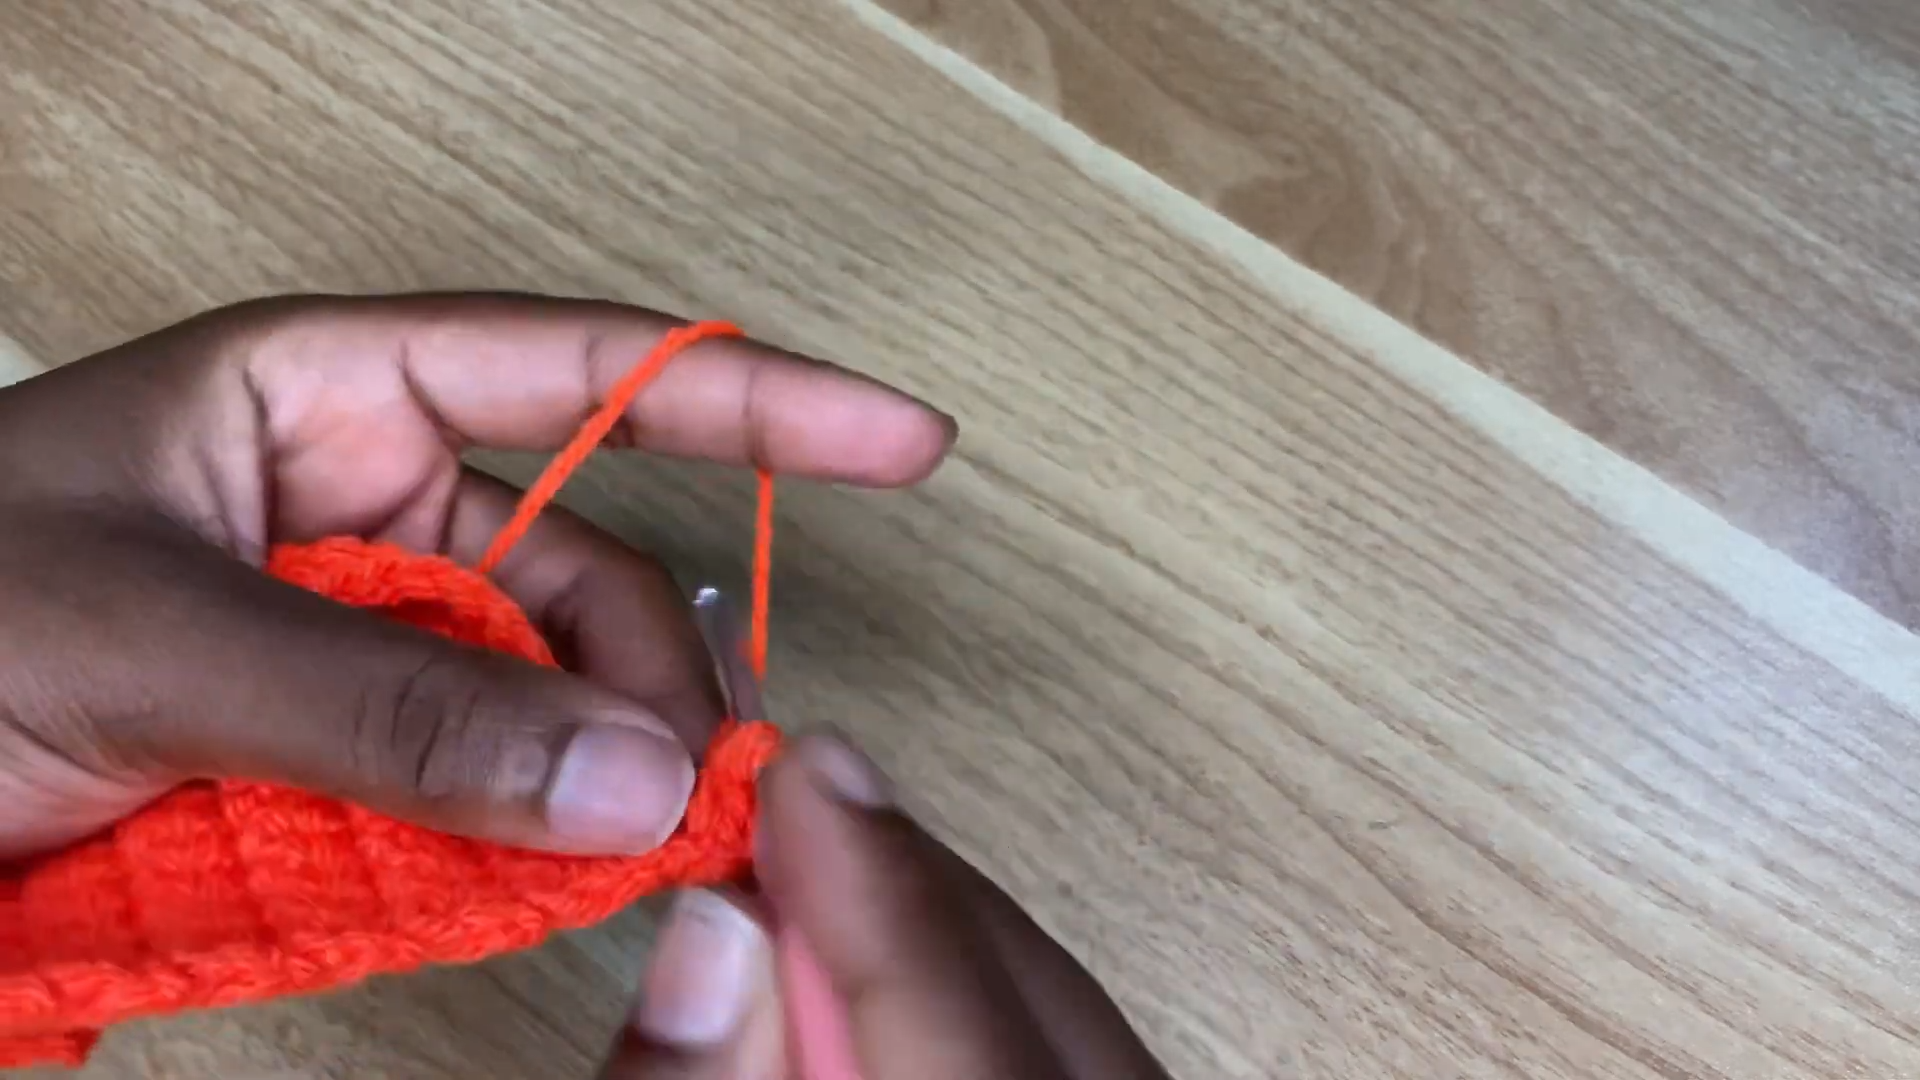
To help you visualize the stitches and the color changes mentioned in this guide, you can follow along with the embed video above. Watching the video will clarify how to manage multiple strands of yarn while working on the Africa map section. Moreover, it provides a real time look at how the increases should appear on the side panels. Please refer to the visual cues in the video whenever you feel unsure about the placement of your stitches.
Skill Level / Level of Difficulty
The Crochet Strappy Pixel Crop Graphgan is rated as Intermediate. While the stitches used are basic, the project requires an understanding of color carrying and following a graph chart. However, a dedicated beginner who understands how to increase and decrease can certainly succeed by taking it slow.
Tutor’s Suggestions
I highly suggest that you print out your Africa map graph before you start. It is much easier to cross off rows on paper than to scroll through a digital file. Additionally, try to keep your tension consistent. Because this is a Crochet Strappy Pixel Crop Graphgan, any significant change in tension might make the pixel map look distorted. Finally, always use stitch markers to identify your increase rows so you do not lose count during the side panel construction.
Material List and Step-by-Step Guide
Required Materials
-
Yarn: Yarn Art (or any weight 3/light worsted cotton blend).
-
Hook Size: 3.5 mm crochet hook.
-
Tools: Scissors, darning needle, and stitch markers.
-
Hardware: Four metal or plastic rings for the back straps.
-
Measuring Tape: Essential for ensuring the 36 inch bust fit (or your custom size).
Step 1: Starting the Foundation
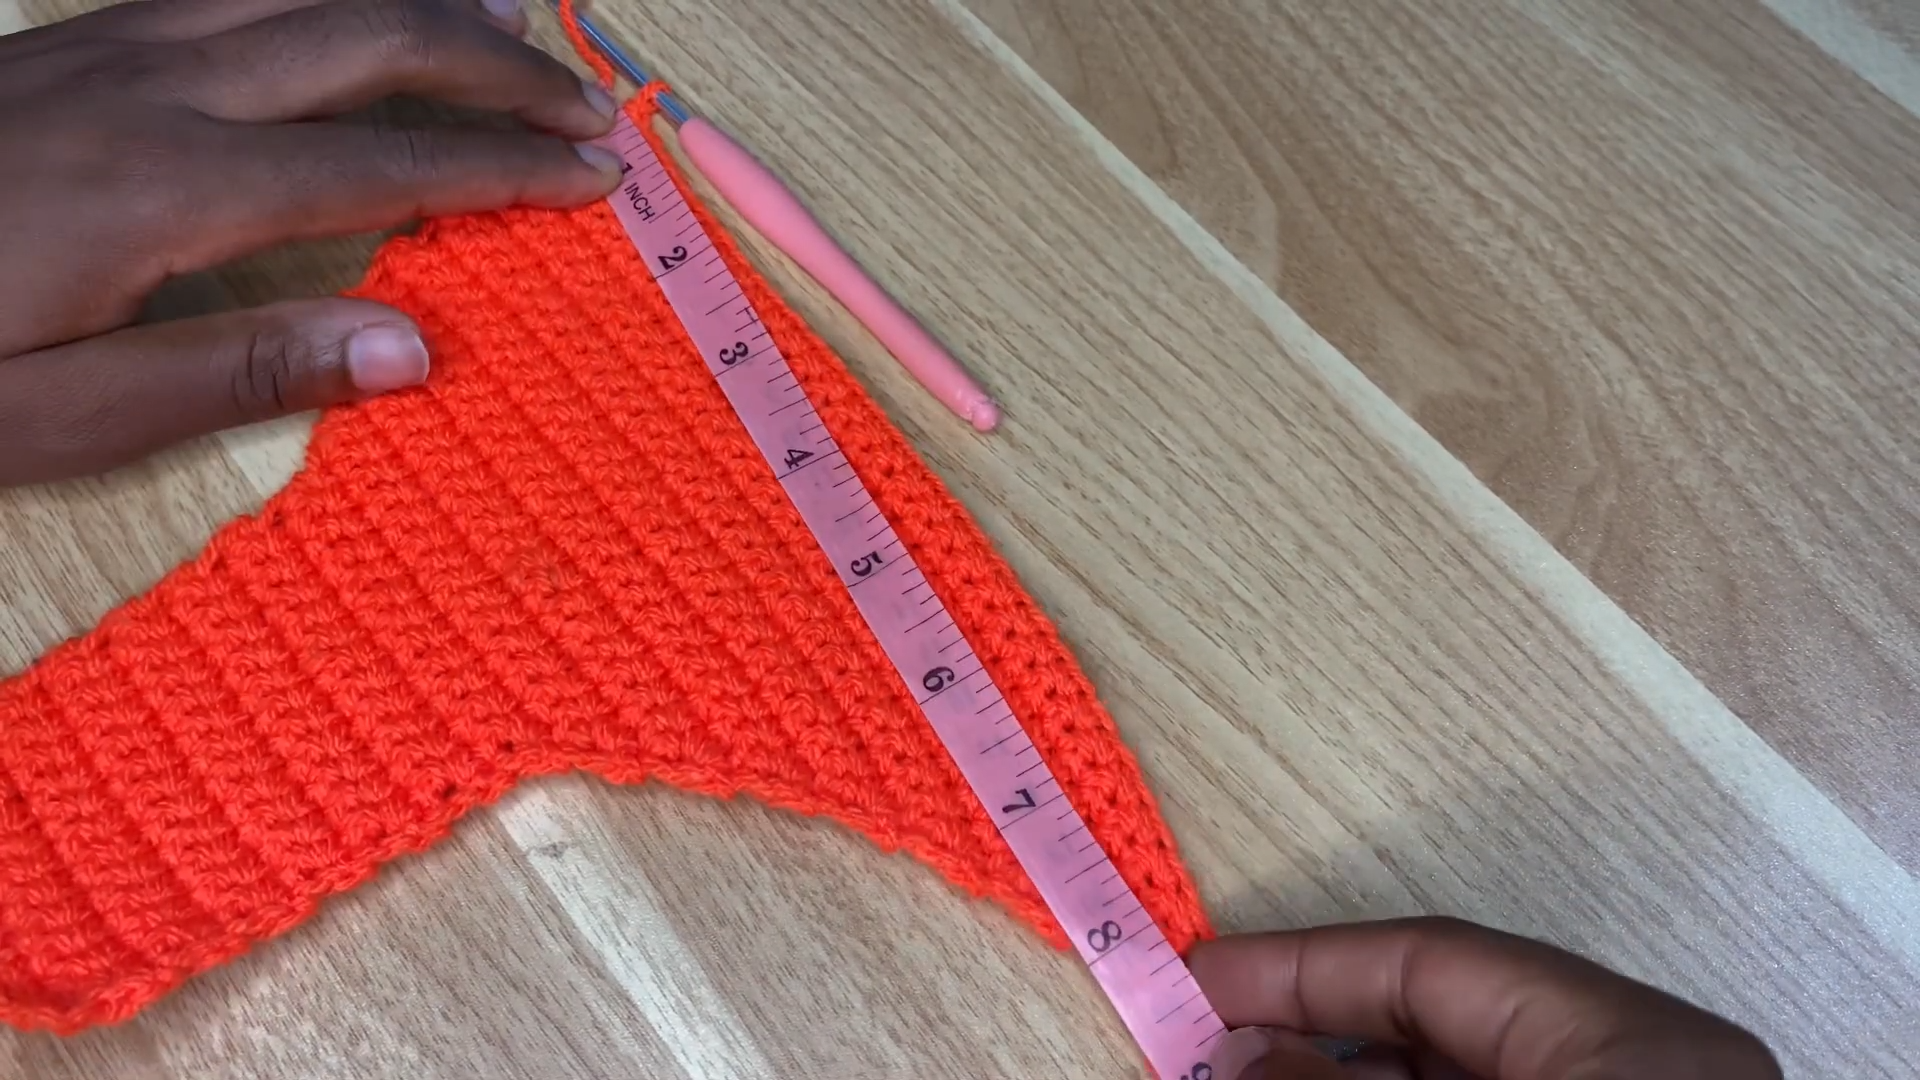
First, you must determine your size by measuring your bust. For a standard medium, we use a 36 inch bust. You divide this by four, which gives you 9 inches for each quarter panel. Start your Crochet Strappy Pixel Crop Graphgan by making a slip stitch and a foundation chain of 13. Skip the first chain and place 12 single crochets across the row.
Step 2: Building the Base Rows
Continue to work in rows of single crochet. For a medium size, you will complete 14 rows of straight single crochet. This creates the solid base of your front panel before the shaping begins. Remember to chain one and turn your work at the end of every row to maintain clean edges.
Step 3: Shaping and Increasing
Now, you will begin increasing at both sides to create the curve of the top. Chain one and place two single crochets in the first stitch. Work across and place two single crochets in the final stitch. For a medium Crochet Strappy Pixel Crop Graphgan, you should complete six increase rows. Following this, you will perform one side increases until your panel reaches the 9 inch width when slightly stretched.
Step 4: The Africa Map Graphgan Section
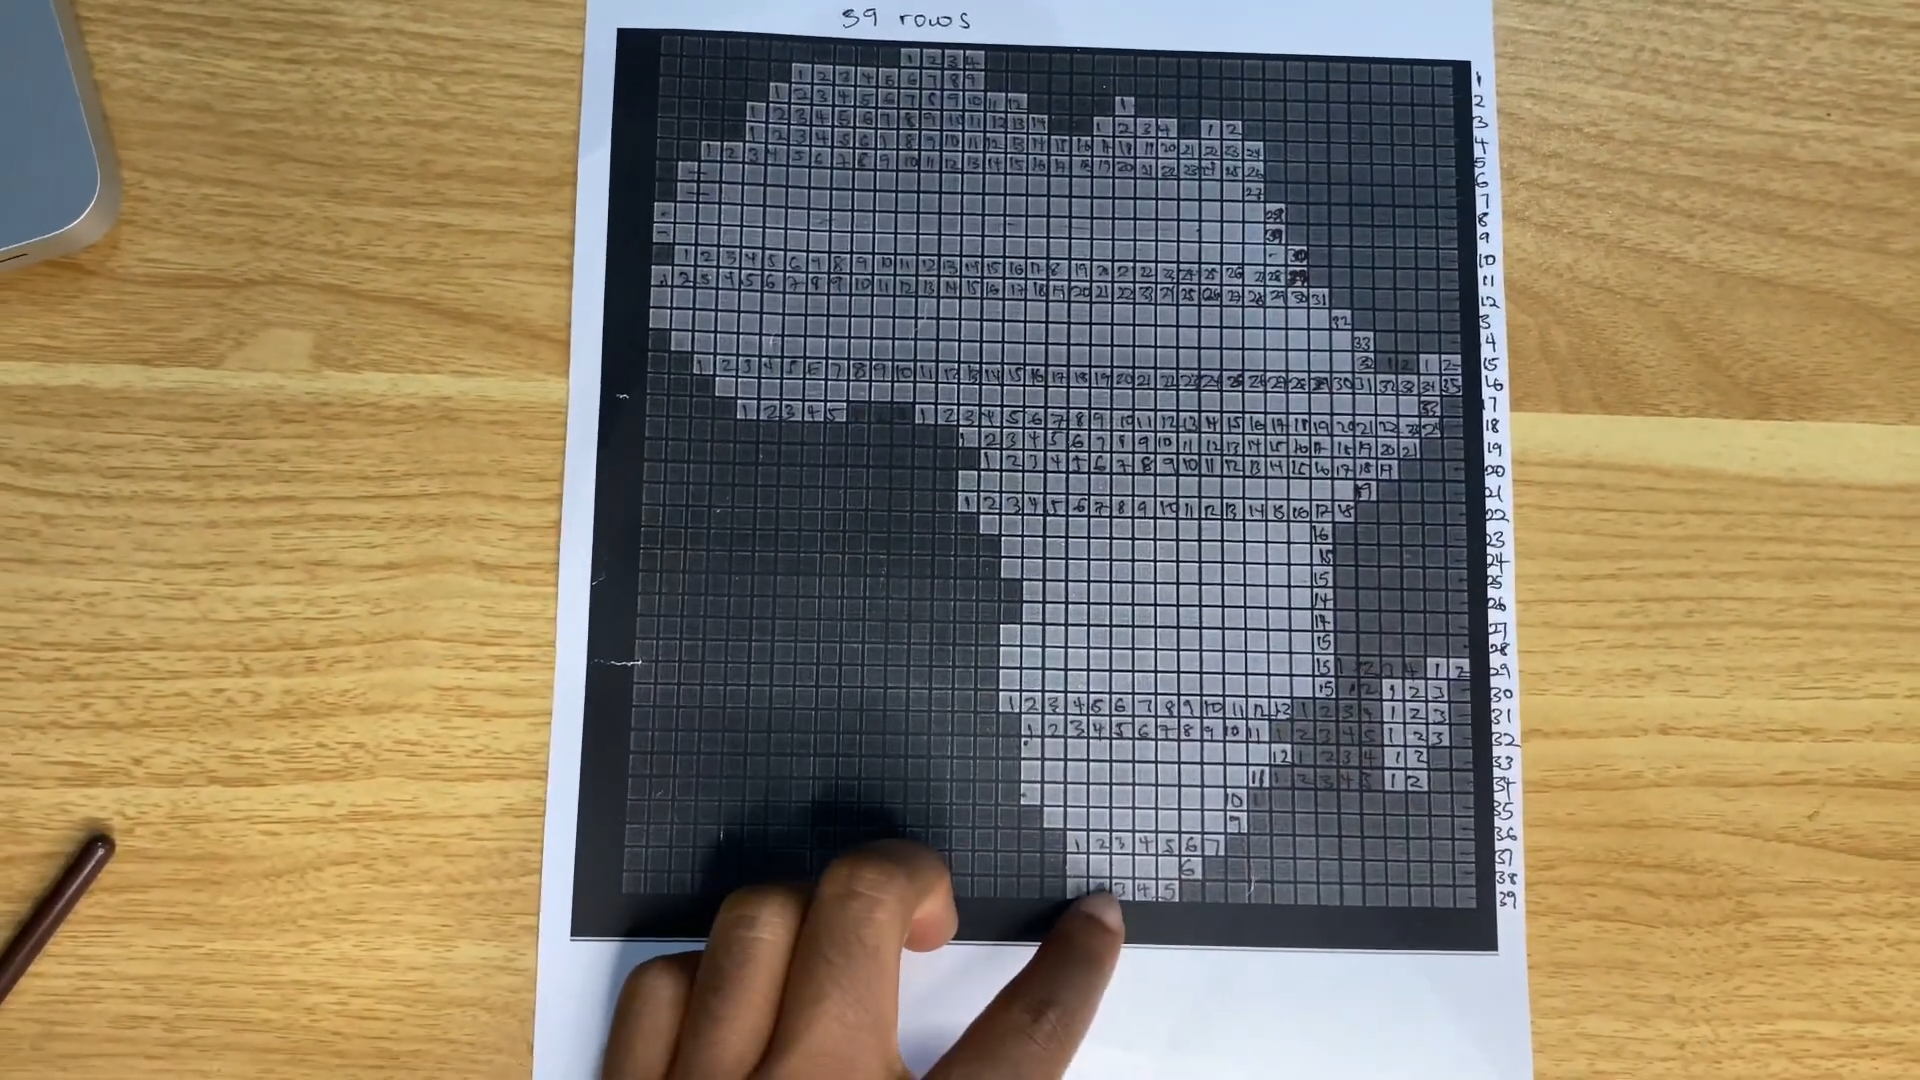
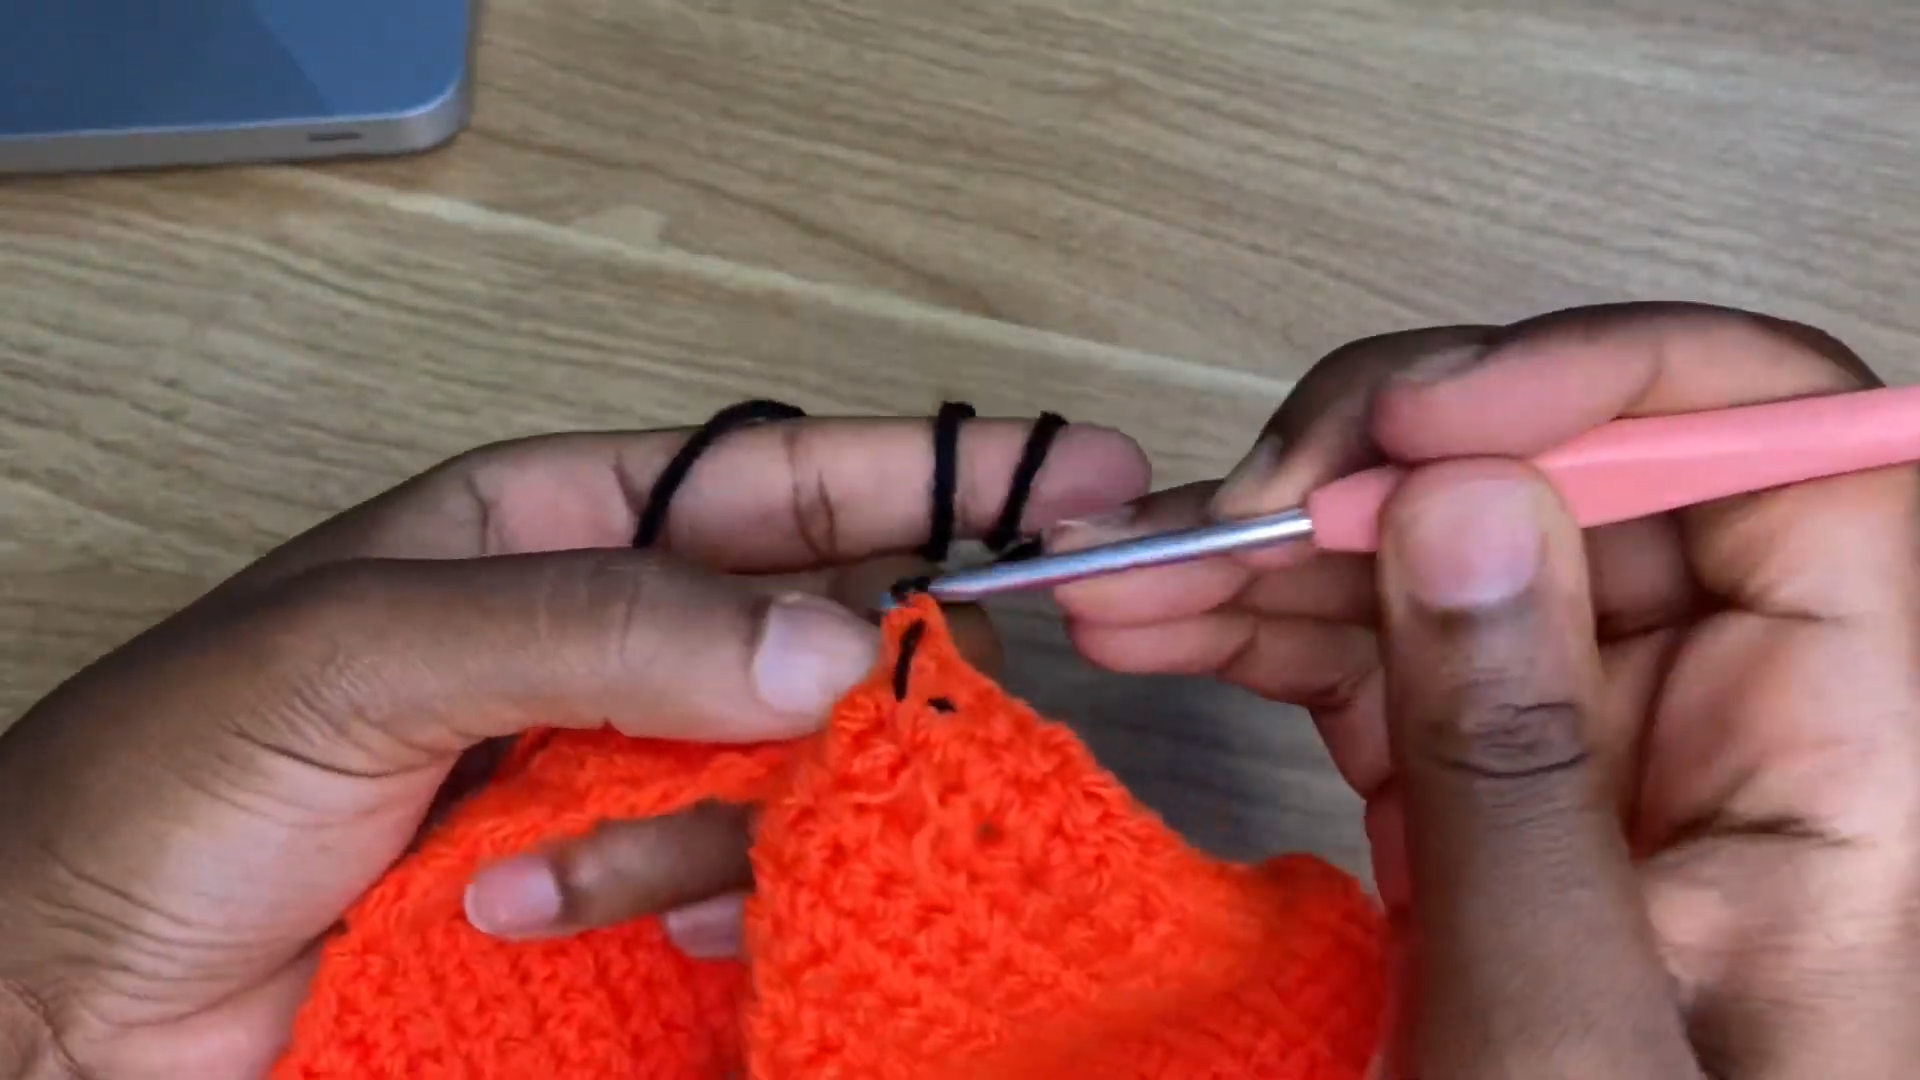
Once your two front pieces are joined, it is time for the pixel art. You will have a total of 70 stitches across. To center the map, work 17 single crochets in your primary color, then begin the 35 stitches of the map using the graph. Use the second color of yarn to “draw” the Africa map. You must carry the yarn or “float” it behind your work. This is the core of the Crochet Strappy Pixel Crop Graphgan design.
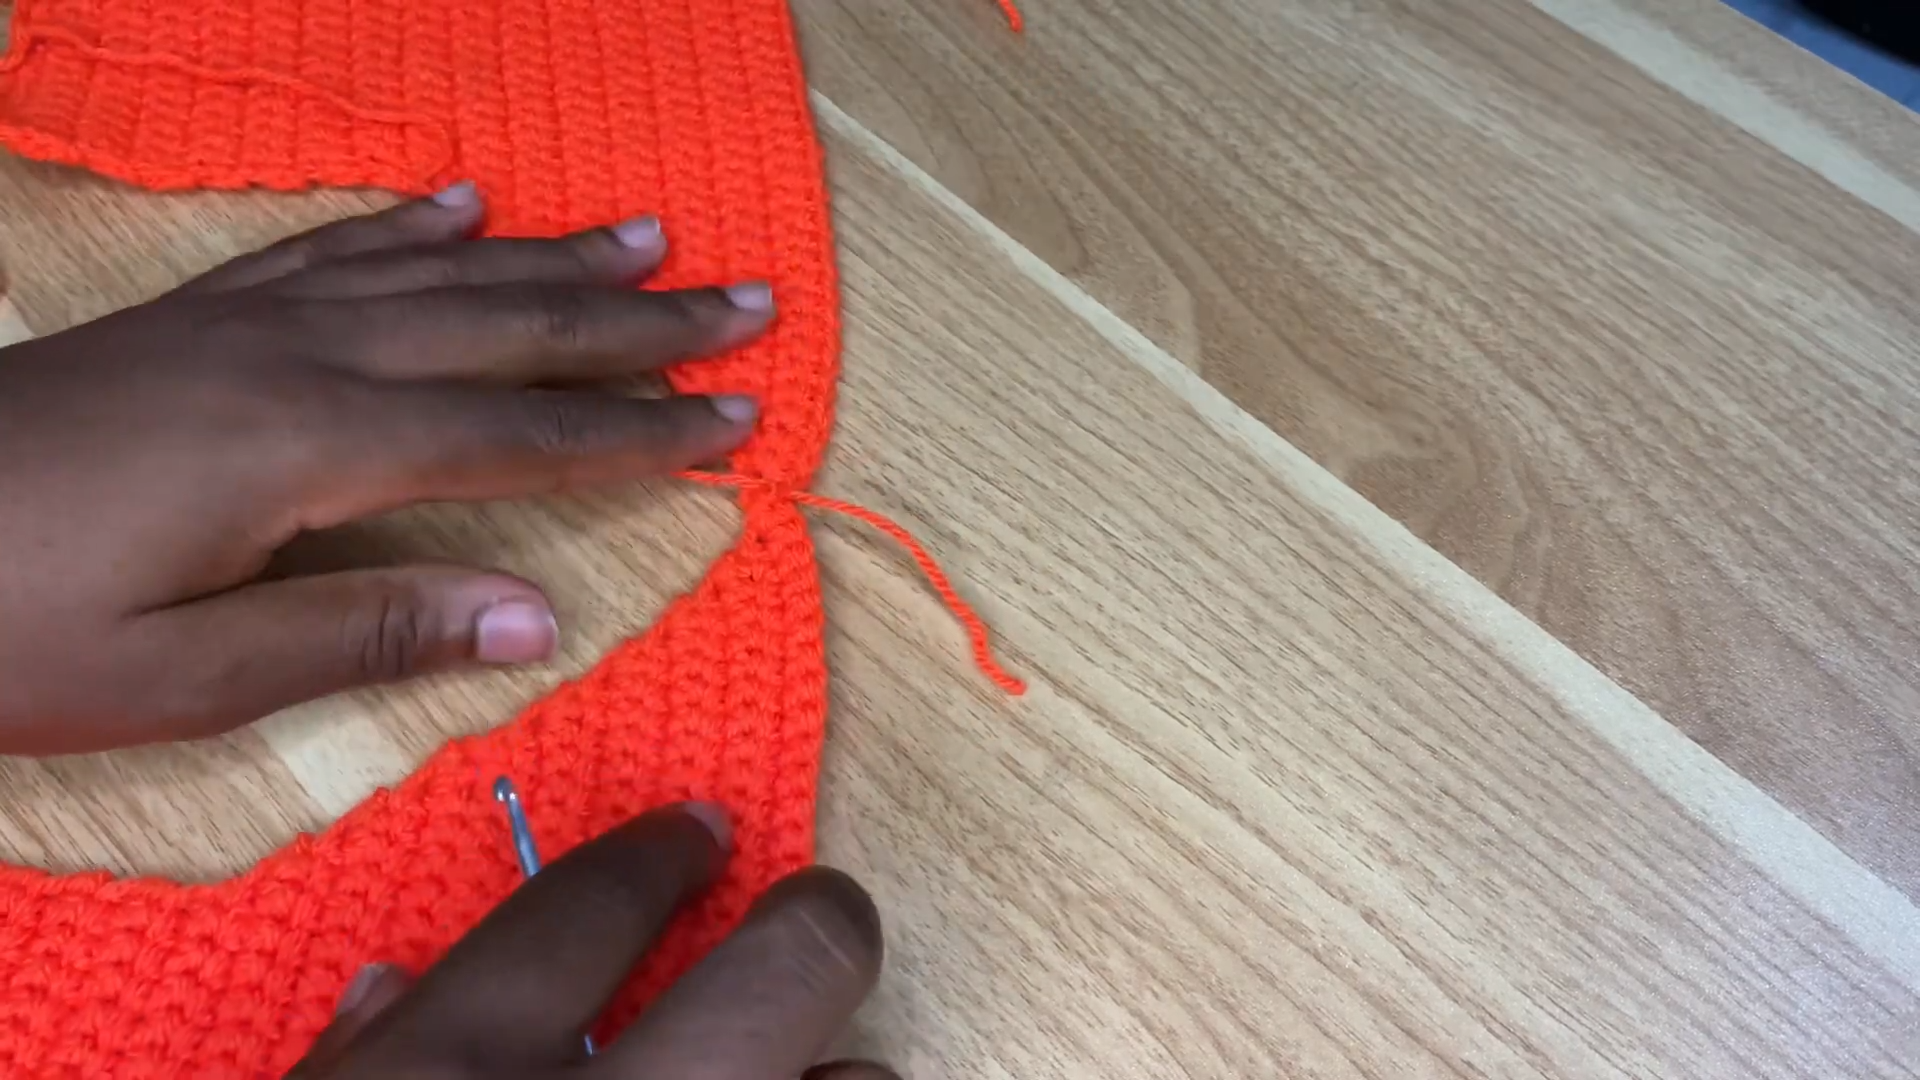
Step 5: Constructing the Back Panels
The back panels are made similarly to the front but with a focus on the strappy closure. You will repeat the foundation of 13 chains and 14 rows. Afterward, you only increase on one side for six rows. This ensures the back remains open and adjustable. Make two of these panels to complete the set.
Step 6: Assembly and Rings
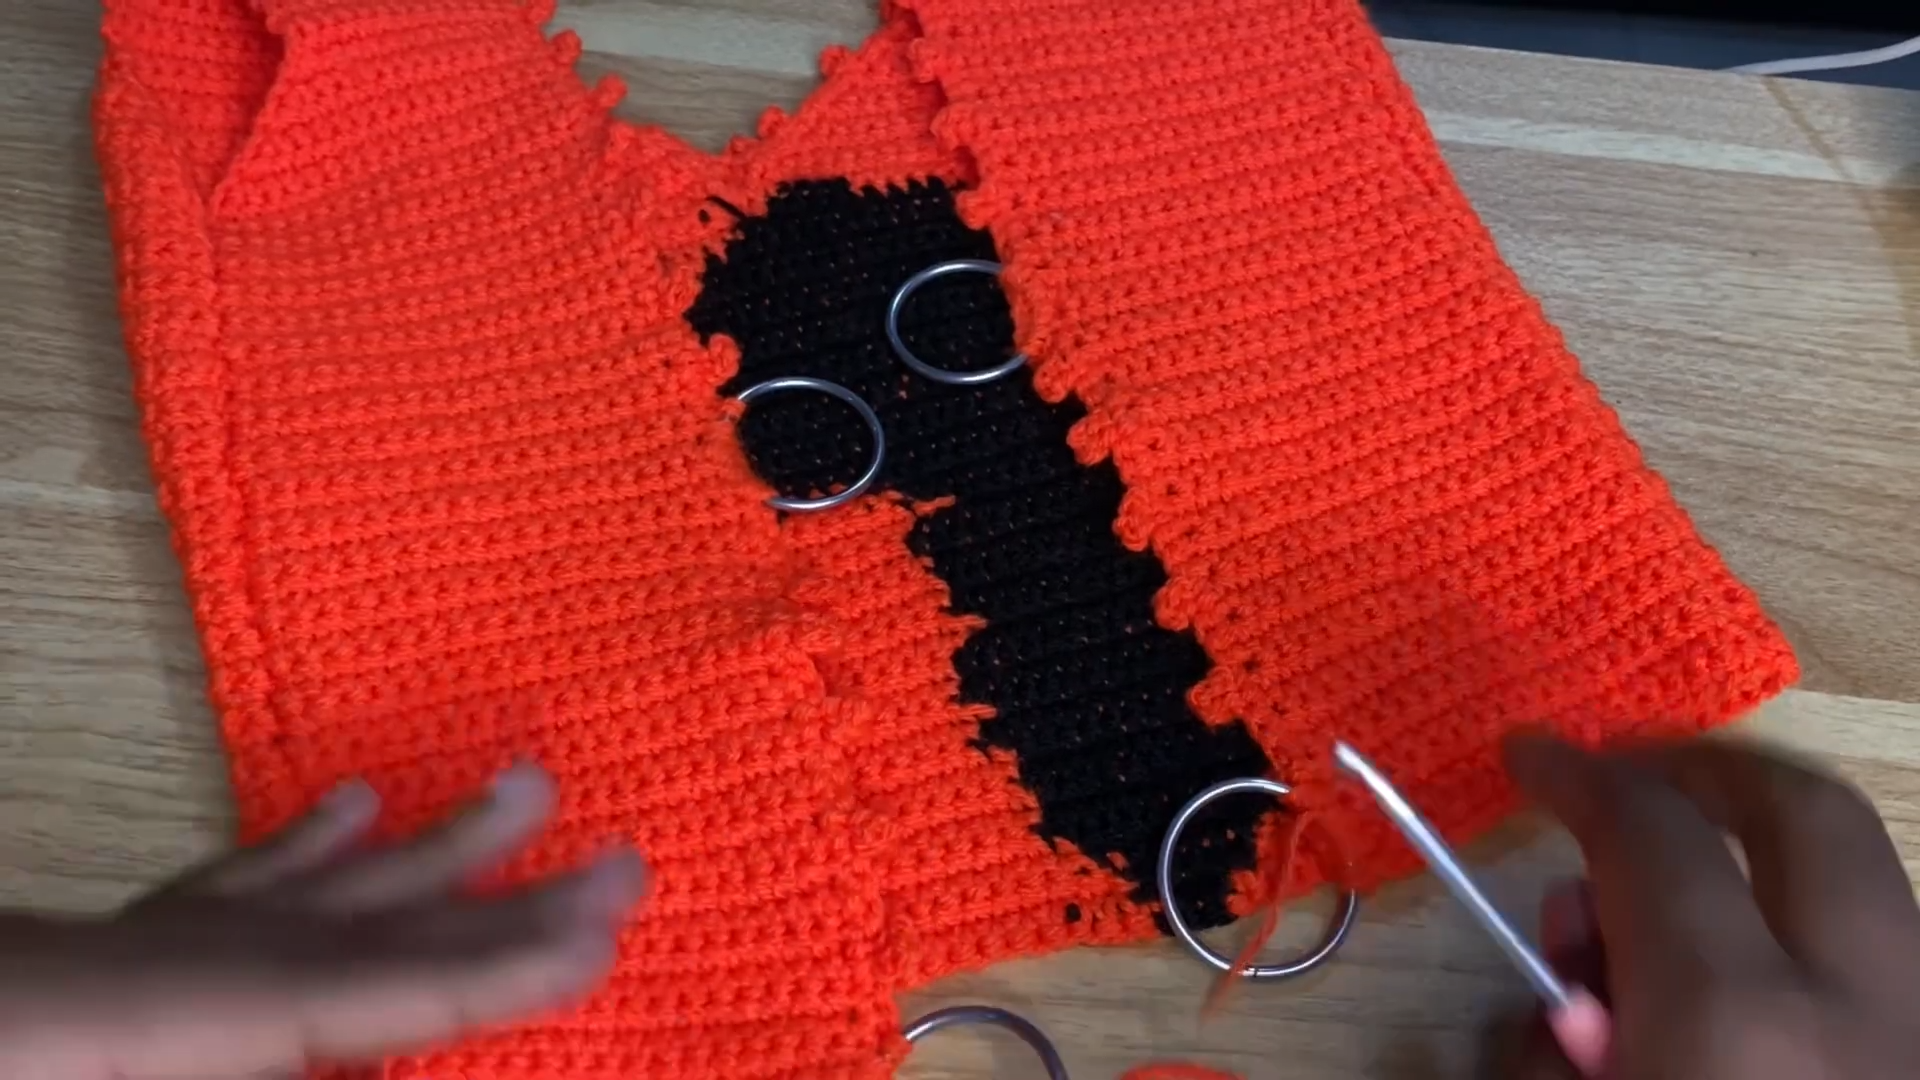
Using your darning needle, sew the side seams of the front and back panels together. Next, you will attach the four rings to the back. Work eight single crochets around each ring to secure it to the fabric. These rings will act as the eyelets for your straps, giving the Crochet Strappy Pixel Crop Graphgan its signature look.
<
Communicating with You
As you work through these steps, you should feel proud of your progress. Crochet is a slow art, but the result is a durable and unique garment. You are not just making a top; you are mastering a complex graphgan technique. If you find the map section challenging, simply take a deep breath and count your stitches again. You have the skills to finish this beautifully.
Where to Wear Your Graphgan
This Crochet Strappy Pixel Crop Graphgan is incredibly versatile. You can wear it to a summer music festival paired with high waisted denim shorts. Alternatively, it works perfectly as a beach cover up over your favorite swimsuit. Because of the detailed Africa map, it is also a fantastic piece for cultural festivals or art gallery openings. Furthermore, you can layer it over a white button down shirt for a more “boho chic” look during the cooler autumn months.
Tips and Tricks
-
Yarn Tangle Prevention: Use small bobbins for your map colors to prevent the strands from tangling while you turn your work.
-
Seamless Joins: When changing colors, pull the new color through the last two loops of the previous stitch for a sharp transition.
-
Blocking: Always steam block your finished Crochet Strappy Pixel Crop Graphgan. This helps the pixel map lie flat and prevents the edges from curling.
-
Strap Strength: Use a smaller hook for the straps to ensure they do not stretch out too much over time.
Common Mistakes
One frequent error is forgetting to chain one before turning, which leads to a shrinking project. Another mistake is pulling the carried yarn too tight across the back of the graphgan section. If you do this, the front of your Crochet Strappy Pixel Crop Graphgan will pucker and look uneven. Lastly, make sure you do not skip the measuring step. Since yarn weights vary, relying on row counts alone might result in a top that is too small or too large.
FAQs
Q1: Can I use double crochet instead of single crochet?
While you can, it will change the dimensions of the map. The Crochet Strappy Pixel Crop Graphgan is designed for single crochet to keep the pixels square.
Q2: What if I am a size Large?
You should follow the size guide in the tutorial. Usually, this means increasing the foundation chain and adding more rows before starting the map.
Q3: How do I wash my handmade crop top?
You should always hand wash your crochet items in cool water with a mild detergent and lay them flat to dry.
Q4: Do I have to use the rings for the back?
No, you can crochet loops instead. However, the rings provide a more professional and sturdy finish for the straps.
Q5: Can I change the map to a different shape?
Absolutely. The beauty of a Crochet Strappy Pixel Crop Graphgan is that once you understand the grid, you can insert any pixel art you like.
Conclusion
Creating your own Crochet Strappy Pixel Crop Graphgan is a rewarding project that combines technical skill with personal expression. Throughout this process, you have learned how to manage color changes, follow a complex graph, and assemble a garment that fits your body perfectly. Consequently, you now possess a one of a kind top that showcases your talent and patience. Furthermore, the techniques you mastered here, such as carrying yarn and shaping panels, will serve you well in all your future crochet endeavors.
As you wear your new Africa map top, remember that every stitch represents your hard work and dedication to the craft. Therefore, do not be afraid to experiment with different color combinations or even larger graphs in the future. Crochet is a journey of endless possibilities, and this crop top is just the beginning. Thank you for following this 1500 word guide. I hope you found the instructions clear and the tips helpful. Happy crocheting, and I look forward to seeing your beautiful finished versions of this Crochet Strappy Pixel Crop Graphgan! Please share your photos and stay tuned for more patterns that challenge and inspire your creativity.