
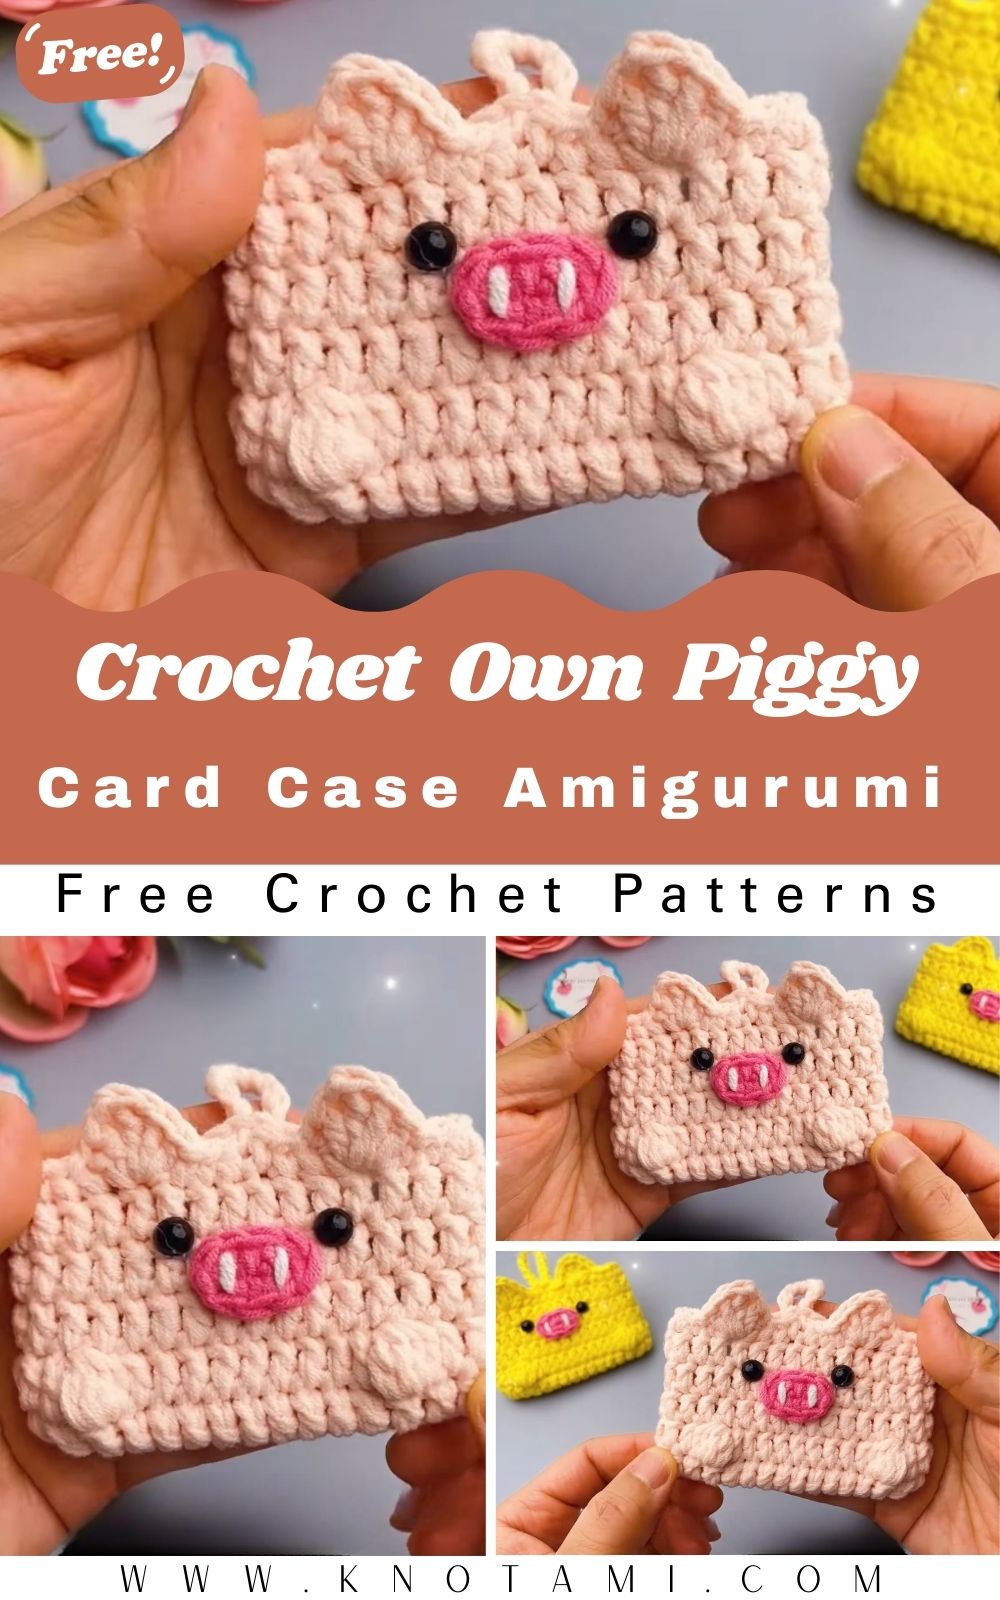
This adorable Crochet Own Piggy card case is super cute, practical, and beginner-friendly. It keeps your cards organized in a kawaii-style pouch that’s quick to make and perfect for daily use or as a thoughtful handmade gift.
This trending Crochet Own Piggy card case is a perfect mix of cuteness and usefulness. This beginner-friendly amigurumi pattern creates an adorable kawaii piggy pouch that neatly holds your cards, IDs, and small essentials. Quick to crochet, it makes a lovely handmade gift or everyday accessory. Add your favorite colors for a fun, travel-friendly organizer.
Why This Crochet Piggy Card Case Pattern is Trending
Crochet lovers everywhere are falling in love with this adorable project. The Crochet Own Piggy card case combines kawaii charm with real usefulness—keeping cards, IDs, or small essentials neatly tucked away in a small travel-friendly pouch. It works up quickly using basic stitches, making it an ideal handmade gift or daily accessory that brings smiles wherever you go. Perfect for beginners seeking a fun amigurumi project with fast results
Materials Required
Gather these simple supplies before starting your Crochet Own Piggy project:
- Pink yarn (main color for the body)
- White or contrasting yarn for the snout
- Small amount of black yarn or safety eyes for the face
- Fiberfill stuffing (a little goes a long way)
- Zipper or button for closure (optional)
- Yarn needle, scissors, and stitch markers
- Optional: Keychain ring or lanyard clip for portability
This project is stash-friendly and budget-friendly, perfect for using up leftover yarns.
Yarn Colors
Choose soft, pastel pink for that classic piggy look. For extra cuteness, try:
- Baby pink for the body
- Hot pink accents on ears and nose
- White for the snout
- Black for eyes and nostrils
Creative color customization lets you make rainbow piggies, pastel unicorns, or even your favorite character-inspired versions!
Crochet Hook Size
Use a 3.0 mm to 3.5 mm crochet hook. This size gives a tight, sturdy fabric ideal for a card case that holds its shape without gaps. Beginners—go up half a size if your tension is tight.
Skill Level: Beginner
Crochet Abbreviations (US Terms)
- MR: Magic Ring
- ch: Chain
- sc: Single Crochet
- dc: Double Crochet
- inc: Increase (2 stitches in one)
- dec: Decrease (invisible or regular)
- sl st: Slip Stitch
- bobble: Bobble stitch (optional for texture)
- st(s): Stitch(es)
- Rnd: Round
Magic Ring Tutorial
The magic ring creates a tight center with no hole—essential for amigurumi.
- Loop yarn around your finger twice.
- Insert hook under both loops, yarn over, pull through.
- Chain 1, then work your stitches into the ring.
- Pull the tail to close.
Practice a few times—it’s easier than it looks!
Increase & Decrease Stitches
- Increase: Work 2 single or double crochets into the same stitch.
- Decrease: Insert hook into next stitch, yarn over, pull up loop; insert into following stitch, yarn over, pull up loop; yarn over and pull through all loops.
These shape your piggy’s cute rounded features.
Step-by-Step Pattern
This Crochet Own Piggy card case uses mostly double crochet for quick progress. The body forms a flat rectangular pouch with charming piggy details on top.
Start with two strands of yarn held together for a thicker, sturdier fabric (great for beginners).
Foundation: Chain 17. Work dc into the third back bump and continue across, increasing at ends for an oval shape. Join with sl st.
Continue with rounds of dc, adding bobble stitches if you want textured spots. Build up 4-5 rounds for the perfect card-sized body.
Piggy Face Tutorial
Bring your piggy to life! Sew or glue on small black eyes for that sparkling look. Embroider a sweet smile with black yarn. The snout gets special attention for maximum cuteness.
Card Case Body Instructions
Work the main rectangular body flat or in joined rounds:
- Create a base chain and work dc rows/rounds to desired width (about credit-card size).
- Fold or continue to form a pocket.
- Leave an opening at the top for easy card access.
This functional design keeps everything secure yet accessible.
Ears & Nose Details
Ears: Chain and work a small triangle or rounded shape with increases. Fold slightly for dimension and attach to the top.
Nose: Crochet a small oval snout in white or lighter pink. Add nostrils with French knots or embroidered lines for that signature piggy snout.
Assembly Guide
- Attach ears to the top corners.
- Position and sew/glue the snout in the center.
- Add eyes above the snout.
- Weave in all ends neatly.
Your Crochet Own Piggy is almost ready to hold cards!
Zipper/Button Option
For security, sew in a small zipper along the top or add a cute button with a loop closure. This turns your pouch into a safe everyday accessory.
Stuffing Tips
Lightly stuff the snout and ears for a plump, 3D kawaii effect. Don’t overstuff the body keep it flat enough to slide cards in easily. Use small bits of fiberfill and push gently with the back of your hook.
Beginner Crochet Tips
- Count stitches at the end of each round.
- Use stitch markers to track your first stitch.
- Keep tension consistent for a professional finish.
- Watch your hands in good lighting and take breaks.
- Mistakes? Frogging (ripping out) is part of the fun!
This fast project builds confidence quickly.
Customization Ideas
Make it uniquely yours:
- Add a tiny bow or flower to the ear.
- Create a family of piggies in different colors.
- Attach a wrist strap for a mini wallet.
- Turn it into a keychain or AirPods case variation.
- Embellish with embroidery for names or hearts.
The possibilities are endless with this fun amigurumi project!
FAQs
Is this Crochet Own Piggy pattern suitable for absolute beginners? Yes! It uses basic stitches and simple shaping, with clear steps.
How long does it take to complete? Most makers finish in 1-2 hours—perfect for quick handmade gifts.
What size is the finished card case? Approximately credit-card sized, small and travel-friendly.
Can I sell items made from this pattern? Yes, but please credit the design inspiration and make your own variations.
What if I don’t have a zipper? A button, snap, or simple flap works beautifully.
Conclusion
Ready to create something adorable and useful? This Crochet Own Piggy card case amigurumi pattern delivers creative handmade crochet fun while providing practical everyday organization. Grab your yarn and hook your new favorite accessory (and conversation starter) awaits! Happy crocheting, and don’t forget to share your piggy creations