Free Crochet Mini Puppy Amigurumi Pattern for Beginners
Grab your hook because amigurumi puppies like the one shown here are quick wins for anyone building confidence with rounded shaping and small joins. The crochet pattern below walks through every part of the build, from the head to an optional little dress, so the finished toy looks balanced and huggable rather than lopsided.
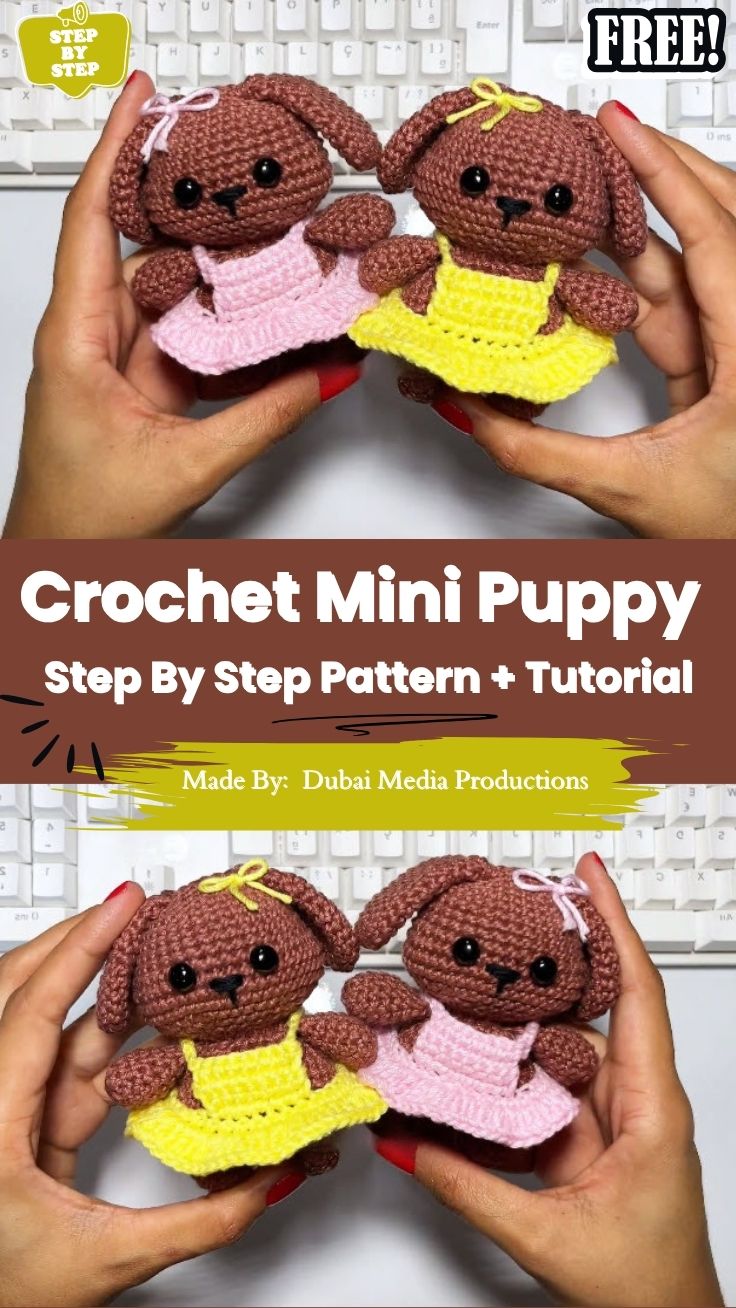
Puppy Overview
Style and Look
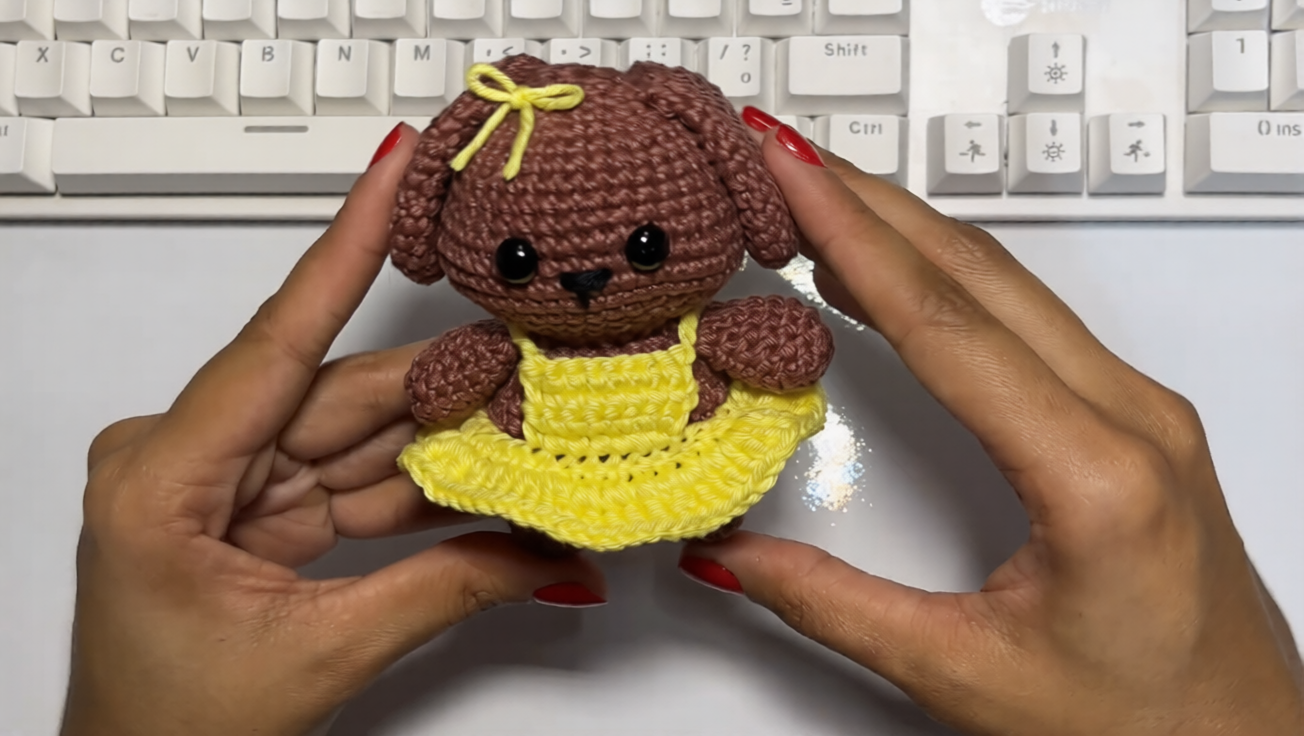
A rounded head with two floppy ears, small stubby arms, short round legs, and a compact round body give the puppy its soft, huggable silhouette. Black safety eyes and a tiny embroidered nose bring the face to life, and a bow or dress can dress the piece up further.
Time Box
Set aside roughly two to three relaxed evenings: one for the head and body, one for the ears, arms, and legs, and one for assembly, eyes, and any accessory pieces.
Materials
- Worsted weight cotton or acrylic yarn in a warm brown shade, the standard choice for a mini amigurumi at this scale
- Small amount of contrast yarn for a bow or dress, such as yellow
- A hook in the 3.5mm to 4mm range, sized to sit slightly smaller than what the yarn label recommends so the stitches stay tight
- Two small black safety eyes, roughly in the 6mm range, though the exact size should match the scale of your head piece
- Polyester fiberfill stuffing
- Tapestry needle
- Stitch markers
- Small scissors
- Black embroidery thread for the nose
Yarn Quantity
- Body and head: a small amount, typically well under half a standard skein for a toy this size
- Ears, arms, legs: leftover brown yarn from the body skein
- Dress or bow: a small scrap of contrast color yarn, a few grams is usually enough
Gauge
Amigurumi pieces at a small scale are forgiving on exact gauge, but keep your tension tight enough that stuffing never peeks through the stitches. A slightly denser fabric holds its shape better than a loose one on a project this size, so most crocheters size down a hook or two from what the yarn label suggests.
Additional Supplies
- Stitch markers to track the start of each round
- Pins to test ear and limb placement before sewing
- A small crochet hook or blunt needle for turning tiny pieces right side out if needed
Abbreviations
- MR: magic ring
- sc: single crochet
- inc: increase
- dec: decrease
- st or sts: stitch or stitches
Important Stitches
Single crochet, worked in a continuous spiral, forms the entire puppy. Increases and decreases shape the rounded head and body, while a slip stitch join finishes flat pieces like the ears and dress panels.
Before You Start
Use a stitch marker on every round so you never lose track of where a round begins. Work with a firm tension throughout, since gaps show up more easily on a toy so small than they would on a larger project.
How the Puppy Is Constructed
The head and body are worked as separate rounded pieces, stuffed, then joined together. Ears attach on either side of the head after the eyes are placed, and short limbs are sewn onto the body once the main shape is finished. An optional dress and bow are added last for personality.
Step by Step Pattern
Step 1: Shape the Head and Place the Eyes
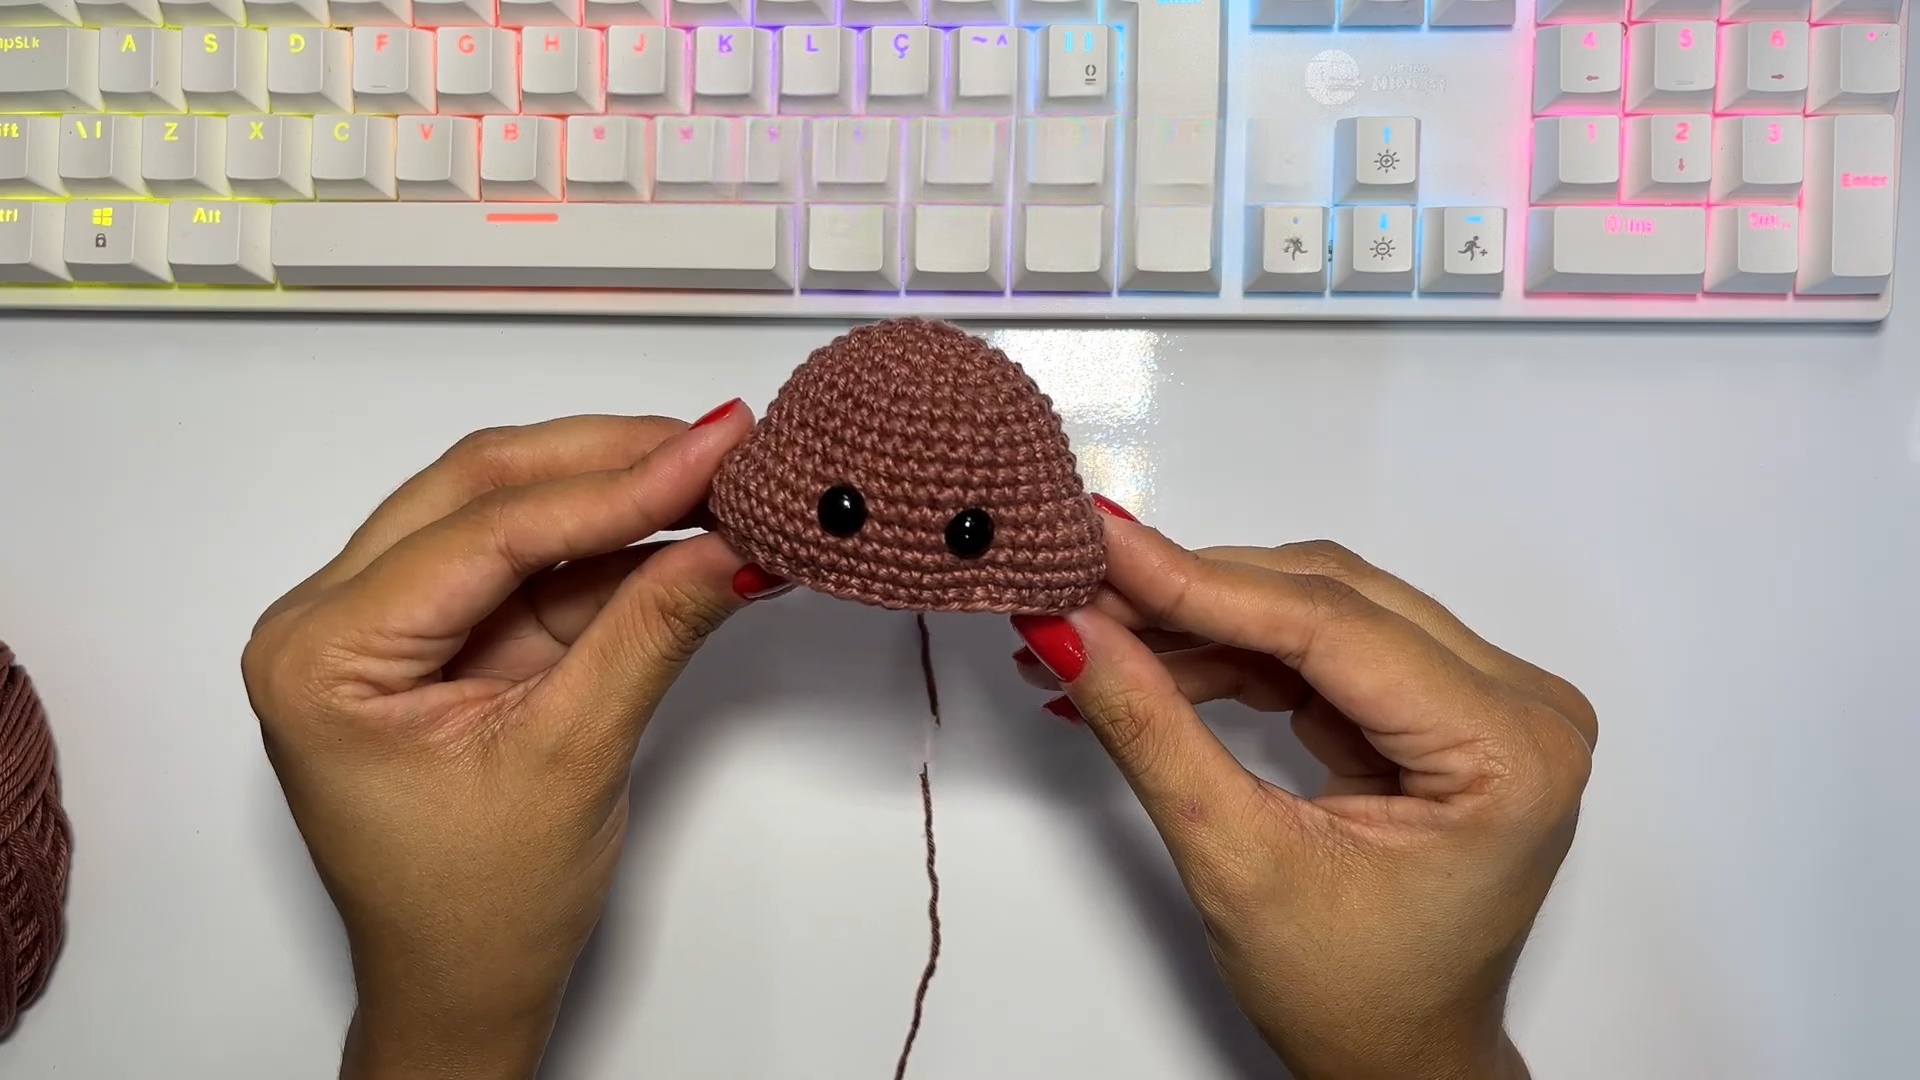
Start the head with a magic ring and build outward in continuous single crochet rounds, increasing evenly around each round so the shape grows into a smooth dome rather than a pointed cone. Once the widest point is reached, work several straight rounds without increasing to give the head its rounded fullness. Before closing the piece, hold the eye posts against the front of the head and shift them slightly until the spacing between them looks centered and even, then push both posts through from the outside and snap the plastic backing on firmly from the inside. Take a moment to look at the face from a few different angles before moving on, since this is the step that sets the puppy’s whole expression.
Pro Tip: Push both eye posts through from the outside and check the gap between them against the width of the head before snapping the backs on, since safety eyes cannot be repositioned once locked in place.
Step 2: Join the Head to the Body
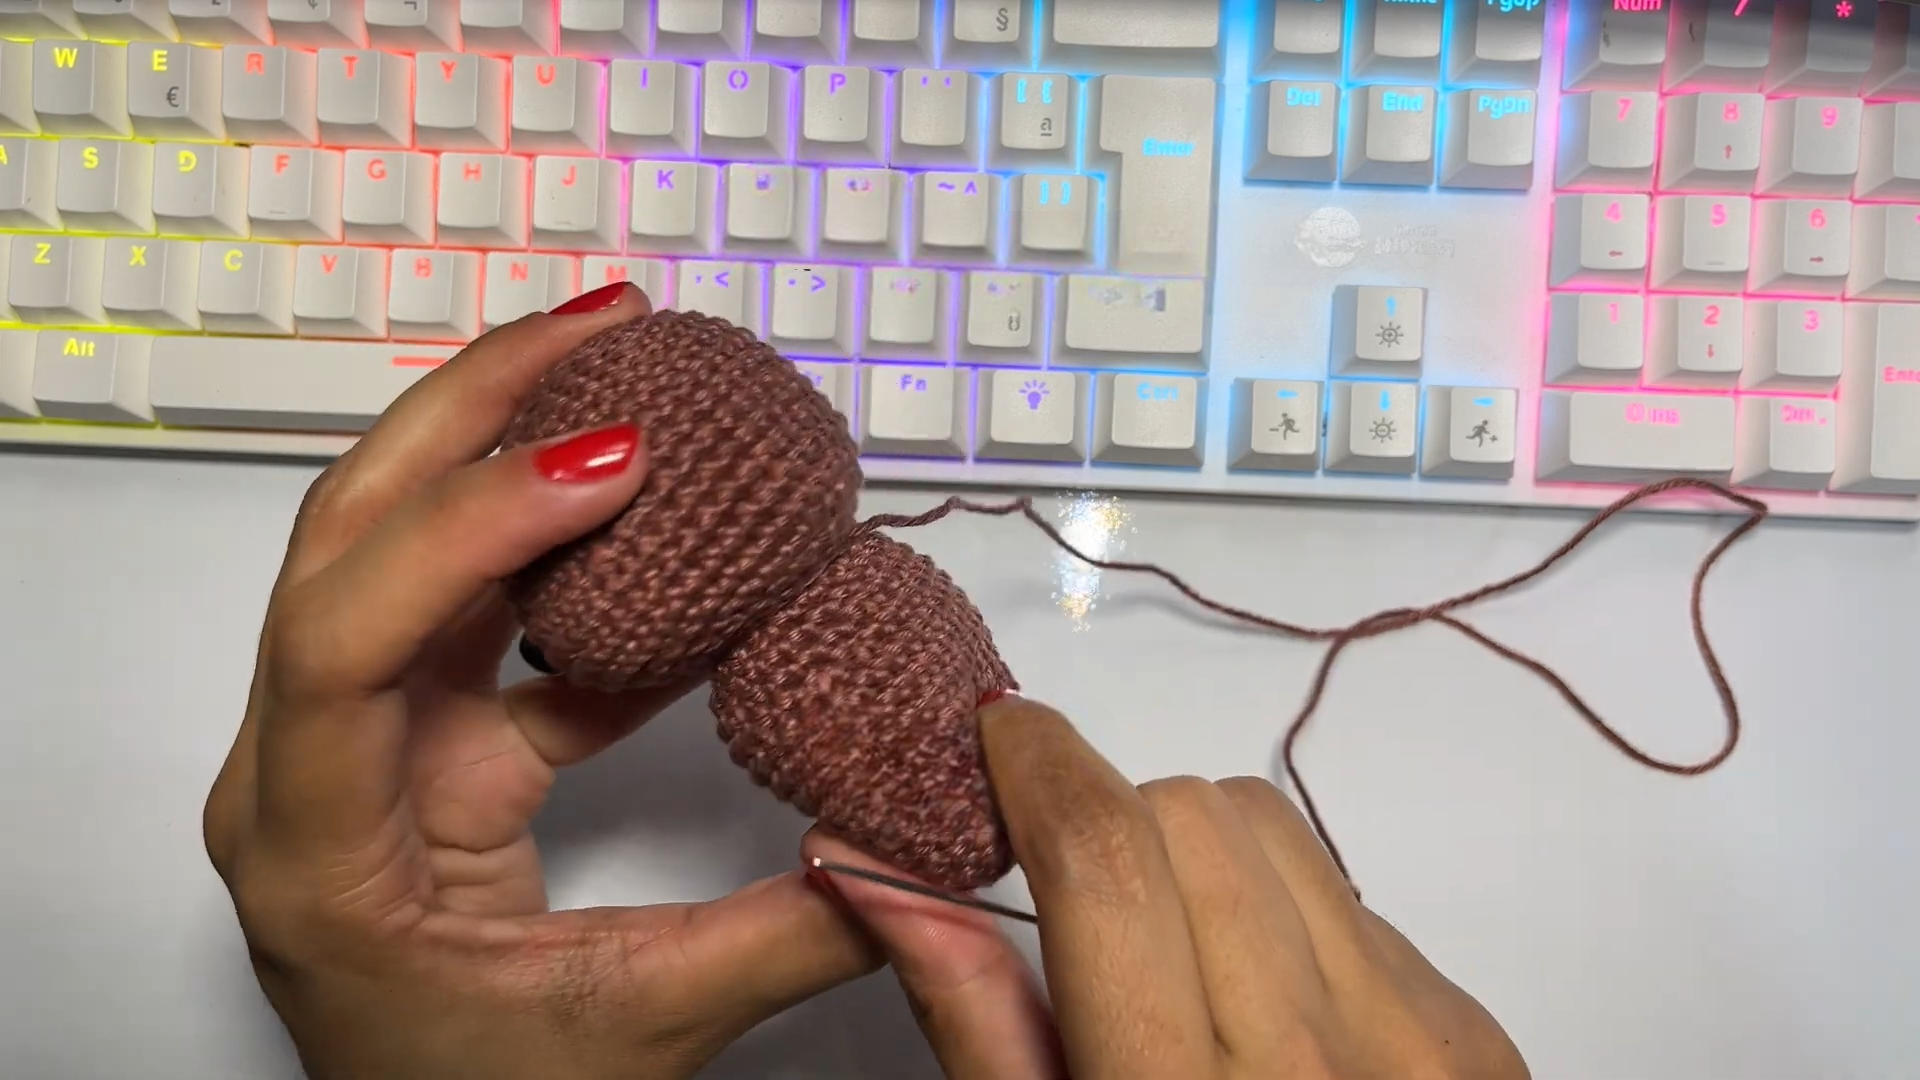
Stuff the head firmly, packing small pieces of fiberfill into the corners first so no hollow spots form near the eyes. Line the open edge of the head up with the top of the finished body piece, matching the stitches around the seam as evenly as possible. Thread a long tail of matching yarn onto a tapestry needle and whip stitch around the entire seam, catching a loop from both pieces with each pass. Leave a small gap open until the very end, add a bit more stuffing through it to keep the neck area full, then close the last few stitches and pull the seam snug so no gap remains visible.
Step 3: Attach the Ears
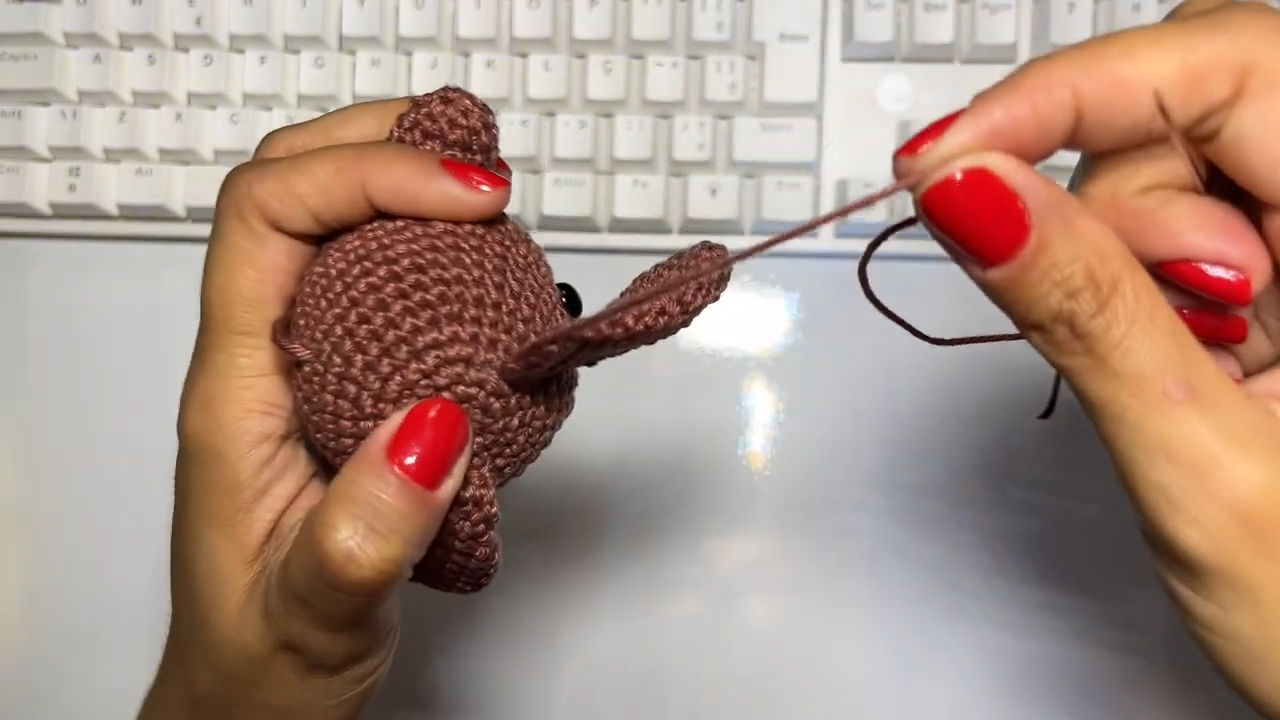
Hold each ear against the side of the head where you want it to sit, and pin both in place before sewing anything. Step back and compare the height, angle, and distance from the eyes on both sides, adjusting the pins until the two ears mirror each other. Once you are happy with the placement, whipstitch along the base of the ear using small, even stitches, working slowly around the curved edge so the seam tucks in close to the head instead of showing on the surface. Repeat the same placement check and stitching method on the second ear before moving on.
Step 4: Finish the Body and Embroider the Nose
With both ears secured and the arms and legs already sewn onto the body, thread black embroidery thread and stitch a small triangular nose just below and between the eyes. Keep the stitches close together so the shape looks solid rather than sketched in with thin lines, and anchor the thread with a secure knot on the inside of the head before trimming. Go back over the whole puppy at this stage and weave in every loose yarn tail through several stitches on the inside, since any ends left hanging can work loose over time.

Step 5: Add the Dress and Bow
If you are adding the optional dress, slip the finished panel over the puppy’s body from the bottom up and settle it into place at the shoulders. Use a few small tacking stitches at each shoulder strap to hold the dress secure without pulling the fabric tight. For the bow, cut a length of contrast yarn, tie it into a simple bow shape, and stitch it firmly between the ears using its own center knot as an anchor point. Both the dress and the bow are entirely optional finishing touches, and the puppy looks just as complete and charming left plain.
Finished Size
Expect a compact toy that sits comfortably in the palm of your hand once stuffed, with the exact final measurement shifting depending on the hook size and yarn weight you choose.
Stitch Count Checkpoints
Count your stitches before closing the last round of the head and again before closing the body, since a missed increase or decrease is far easier to fix before the piece is stuffed and sewn shut.
Shaping and Stuffing Tips
Add stuffing in small pinches rather than one large handful so the fill distributes evenly and avoids lumpy patches. Check the shape of the head and body from multiple angles before adding the final rounds of stuffing, and stop as soon as the fabric feels firm without stretching the stitches.
Watch The Video Tutorial
If you’d like to follow along visually, this video walkthrough covers
the same steps shown below. It’s a helpful reference if you prefer
watching over reading, but the full written pattern with exact stitch
counts is available right here on this page.
Common Mistakes
- Placing the eyes before checking spacing, leaving the face uneven
- Skipping stitch counts, which leads to a lopsided head
- Attaching ears at mismatched heights
- Overstuffing limbs so they lose their soft, floppy look
- Leaving loose ends unwoven, which unravels the seams over time
Troubleshooting
Head or body looks loose and floppy.
Tension was likely too loose for the yarn weight used. Try a smaller hook or work each stitch slightly tighter on your next attempt.
Ears do not match each other.
Uneven row counts or inconsistent tension between the two pieces cause this. Recount rows on both ears side by side before attaching either one.
Stuffing shows through the stitches.
The fabric is too loose for the amount of fill inside. Reduce stuffing slightly or switch to a denser stitch tension.
Safety eyes sit crooked.
Placement was not checked before locking the backing on. Always test position with a pin first, then double-check from the front before securing permanently.
Curling edges on the dress panel.
Flat crocheted pieces naturally curl when tension is uneven. Blocking lightly or working a slip stitch border around the edge helps it lie flat.
Finishing
Weave every tail through several stitches on the inside of the piece before trimming, and give the whole puppy a gentle shape check once assembled to make sure nothing sits twisted.
Attaching Safety Eyes and Nose Securely
Always snap safety eye backings on fully until they click into place, since a loose eye becomes a choking hazard on a toy meant for small hands. Secure the embroidered nose with several passes of thread knotted firmly on the inside of the head.
Personalization Ideas
Try a Different Ear Style
Swap the floppy ear shape for a shorter, perked ear to give the puppy an alert expression instead.
Add a Bandana Instead of a Dress
A tiny crocheted or fabric bandana around the neck offers a quick, low-effort accessory swap.
Mix Up the Color Palette
Cream, gray, or spotted color combinations each give the same pattern a distinct new personality.
Washing and Care
Hand wash gently in cool water if needed and lay flat to dry, keeping the puppy away from direct heat that could warp the stuffing or safety eyes.
Uses and Benefits
A finished puppy like this works well as a nursery shelf piece, a handmade baby gift, or a small keepsake for a crochet lover. Because the pattern comes together quickly, it also makes a satisfying project for using up leftover worsted weight yarn scraps.FAQs
How long does the mini puppy amigurumi take to finish?
Most beginners finish the full puppy across two to three relaxed crafting sessions.
Can I use acrylic yarn instead of cotton?
Yes, acrylic works fine and gives a slightly fluffier finished texture compared to cotton.
Is the dress necessary?
No, the puppy looks complete and huggable without any added outfit.
What size hook works best?
A hook in the 3.5mm to 4mm range paired with worsted weight yarn produces a tight, even fabric suited to this scale.
How do I keep both ears identical?
Count rows and stitches on both ears before attaching either one to the head.
Conclusion
A mini puppy amigurumi like the one here proves that a handful of simple rounds and a little patience can turn into a genuinely charming keepsake. Whether it ends up on a nursery shelf, tucked into a gift box, or clipped onto a bag as a tiny companion, the floppy ears and sweet expression give it a personality far bigger than its size. Once the core shaping and joining techniques feel comfortable, swapping colors or adding a bow becomes an easy way to make each puppy its own.