

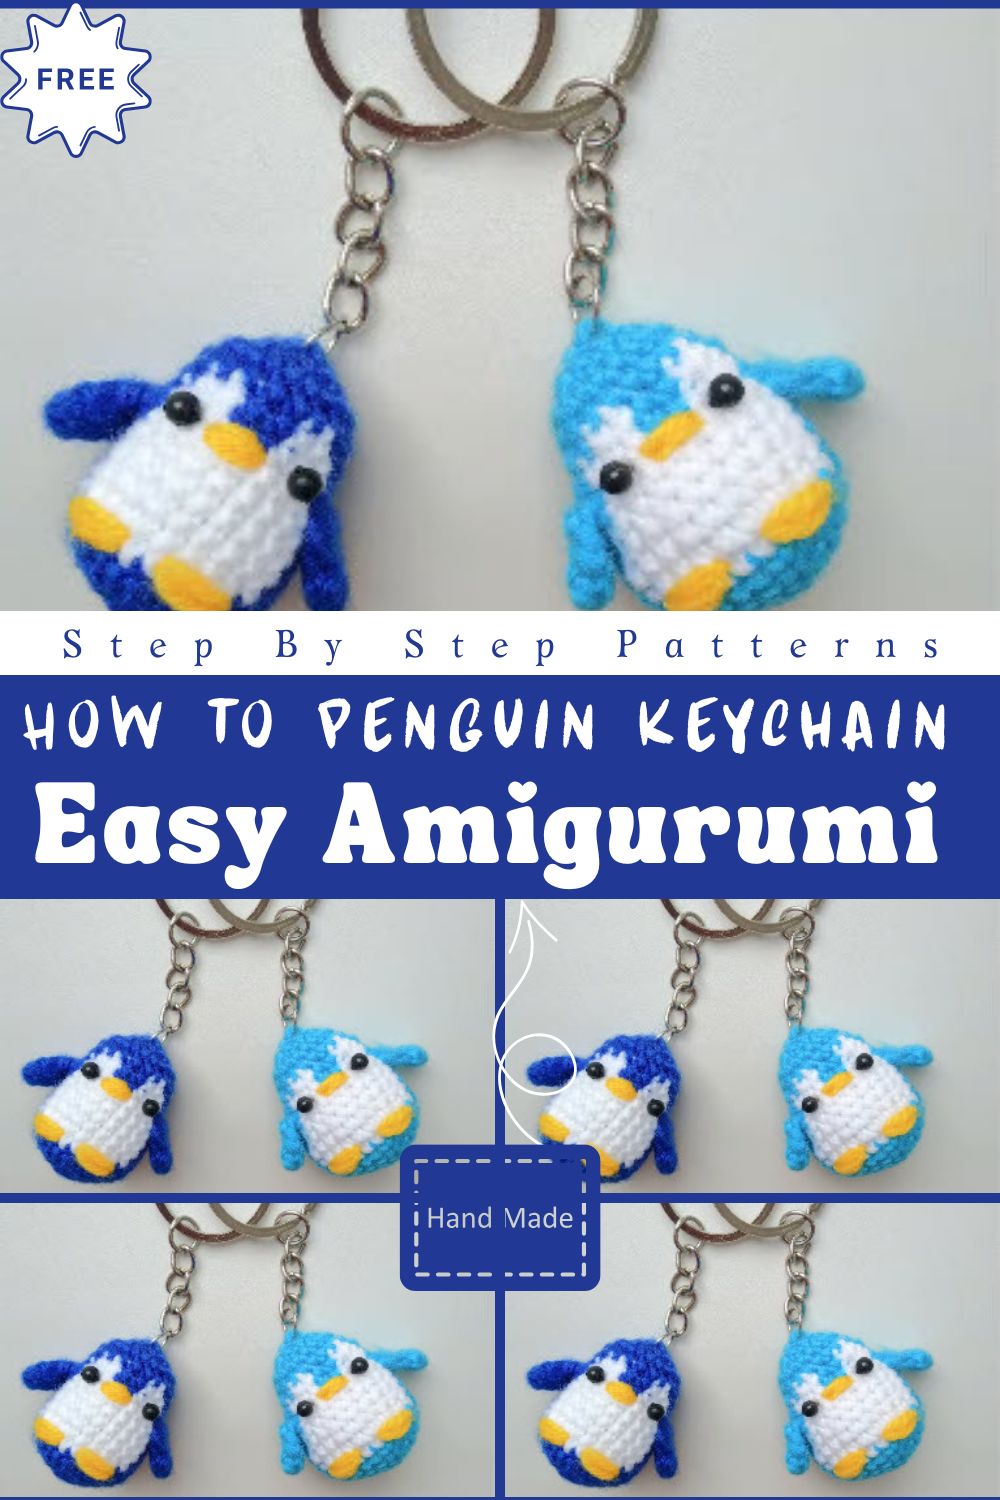
Crochet animals are hard to resist, and this Crochet Penguin Keychain is no exception! With its round little belly, flappy wings, and sweet beady eyes, this mini penguin brings wintery charm and handmade warmth wherever it goes. Whether you’re new to amigurumi or a seasoned crocheter looking for a quick, adorable project, this pattern is the perfect pick.
The crochet penguin keychain pattern is a favorite among crafters for its simplicity and cuteness. Learning how to crochet a penguin keychain is not just about making a key accessory; it’s about creating a joyful little companion that makes you smile every time you see it. This easy crochet penguin amigurumi is beginner-friendly fast to finish and incredibly rewarding.
Materials & Tools
Here’s everything you’ll need to bring your beginner crochet penguin keychain to life:
| Item | Description |
|---|---|
| Yarn | Use lightweight cotton or acrylic yarn (DK or light worsted weight). Choose black white and yellow (or orange) for the penguin’s body tummy and beak. Cotton gives a neat finish, while acrylic is soft and fluffy. |
| Crochet Hook | A 2.5mm–3mm hook keeps stitches tight and prevents stuffing from showing. Perfect for amigurumi miniatures! |
| Fiberfill Stuffing | For that adorable round belly just a small pinch goes a long way. |
| Stitch Markers | Helps you keep track of rounds while working in continuous spirals. |
| Yarn Needle & Scissors | For sewing small parts, weaving in ends and trimming neatly. |
| Safety Eyes (6mm–8mm) | Adds a cute sparkle to your penguin’s face or embroider eyes for a soft, child-safe option. |
| Keychain Ring or Lobster Clasp | Turns your tiny penguin into a practical portable accessory. |
Pro Tip: Use pastel-colored yarns for a baby penguin version it’s perfect for keychains charms or even bag decorations!
Step-by-Step Instructions
Let’s crochet your adorable penguin step-by-step!
Step 1: Start with the Body (Magic Ring)
Begin with black yarn. Make a magic ring and crochet 6 single crochets (sc) into it. Pull tight to close the loop this forms the base of your penguin’s body.
Step 2: Build the Round Body
-
Round 2: 2 sc in each stitch (12 sts)
-
Round 3: (1 sc, inc) × 6 (18 sts)
-
Rounds 4–7: sc in each stitch around (18 sts total)
This gives your penguin its chubby, rounded shape.
Step 3: Add the White Belly
Switch to white yarn and crochet 2–3 rounds evenly to form the penguin’s front belly patch. You can also crochet a small white oval separately and sew it onto the body.
Step 4: Shape the Head
Continue in rounds using the same stitch count for about 3–4 more rows. The body and head blend together naturally no need to sew separate parts!
Step 5: Insert Safety Eyes & Beak
Before closing place safety eyes between Rounds 4 and 5, about 3 stitches apart. Then using yellow or orange yarn embroider a small triangle-shaped beak between the eyes.
Step 6: Stuff and Close
Add a little fiberfill stuffing shaping the penguin gently in your hands.
-
Next round: (1 sc, dec) × 6 (12 sts)
-
Final round: (dec) × 6 (6 sts)
Fasten off and sew the small opening closed with your yarn needle.
Step 7: Add the Flippers and Feet
-
Flippers: Chain 4, slip stitch back and attach to each side of the body.
-
Feet: Chain 3 slip stitch into the base of the penguin with yellow yarn.
Step 8: Attach the Keychain
Sew or tie a small loop of yarn on top of your penguin’s head and connect your keyring or lobster clasp. You’re done your penguin keychain is ready to waddle into the world!
Special Features & Pro Tips
What makes this crochet penguin keychain pattern so special? Let’s find out!
No-Sew Option: You can crochet the flippers and beak directly onto the body to save time.
Quick & Easy: Finish your penguin in under 2 hours perfect for last-minute handmade gifts.
Custom Colors: Try blue, gray, or pastel pink for a kawaii penguin look!
Beginner-Friendly: Uses only single crochet stitches ideal for first-time amigurumi makers.
Adjustable Size: Use thicker yarn and a 4mm hook to make a plush toy version instead of a keychain.
Shaping Trick: After stuffing roll the penguin gently between your palms to even out the shape before closing.
Expert Tip: If you’re gifting your penguin add a tiny bow tie or mini scarf using leftover yarn it adds an extra layer of charm!
Uses & Creative Ideas
Your new crochet penguin keychain isn’t just adorable it’s versatile too!
Cute Keychain: Attach it to your keys purse or backpack for everyday cuteness.
Handmade Gift: Perfect for birthdays Christmas or friendship gifts.
Home Décor: Display it on a shelf desk or workspace to brighten your day.
Amigurumi Collection: Pair it with crochet seals dolphins or polar bears for an adorable arctic-themed set.
Seasonal Variation: Add tiny hats or scarves to create winter or holiday versions!
Conclusion
Crocheting your own Penguin Keychain Amigurumi is more than just a craft it’s an expression of creativity and joy. Each stitch brings you closer to making something uniquely yours, full of warmth and personality.
Even if you’re a complete beginner this project proves that you can turn simple yarn into something truly special. So grab your hook pick your favorite colors, and dive into the world of cute crochet penguin keychains your tiny winter friend is waiting to come to life!