
If you have been searching for a project that stands out from the usual cute animals, then this Crochet Flower Mouth Monster Demogorgon Amigurumi is exactly what you need. Crocheting this creature allows you to explore intricate textures and unique shapes that you do not often see in standard patterns. Furthermore, it is a fantastic way to showcase your skills to friends and fellow crafters who appreciate the darker side of pop culture.
Starting a project like this can feel intimidating, but you have the power to bring this “Stranger” creature to life with just a hook and some yarn. Consequently, this guide is designed to simplify the complex parts of the monster, such as those iconic petal-like jaws. By following along, you will discover that making a Crochet Flower Mouth Monster Demogorgon Amigurumi is not only rewarding but also incredibly fun. Let us dive into the materials and techniques required to master this supernatural craft.

To help you visualize the more intricate parts of the construction, I have included an embedded video above that demonstrates the flick of the hook for each petal. While the written instructions provide the structure, watching the video will clarify how to join the limbs and form the detailed mouth. Therefore, you should keep the video playing in the background as you work through the rows. This visual aid ensures that your Crochet Flower Mouth Monster Demogorgon Amigurumi turns out exactly as pictured, especially when it comes to the complex facial features.
Skill Level / Level of Difficulty
The level of difficulty for this project is Intermediate. While the basic body parts use standard amigurumi techniques, the flower mouth requires a bit more patience and precision. However, if you are a confident beginner who knows how to increase and decrease, you can certainly tackle this Crochet Flower Mouth Monster Demogorgon Amigurumi with great success.
Tutor’s Suggestions
I highly suggest that you use stitch markers for every single round because it is very easy to lose your place in the dark yarn. Moreover, you should try to keep your tension consistent so the stuffing does not peek through the stitches. If you find the mouth petals are curling too much, you might want to switch to a slightly smaller hook for that section. Lastly, always leave long yarn tails for sewing, as this makes the assembly phase much smoother and more secure for your monster.
Materials Needed
Materials Required
To begin your Crochet Flower Mouth Monster Demogorgon Amigurumi, you will need the following supplies:
-
Medium weight yarn in dark grey or brown for the body.
-
Red and pink yarn for the inner mouth detail.
-
White yarn or embroidery thread for the teeth.
-
A 3.5mm crochet hook.
-
Polyester fiberfill stuffing.
-
A yarn needle and sharp scissors.
-
Stitch markers to keep track of your rounds.
Step 1: The Head and Base
First, you will start with a magic ring using your primary body color. Work 6 single crochets into the ring and pull it tight. In the next round, you will increase in every stitch to reach 12. Continue expanding the circle until the base of the head is wide enough. Because this is a Crochet Flower Mouth Monster Demogorgon Amigurumi, the head serves as the anchor for the petals, so make sure your stitches are tight.
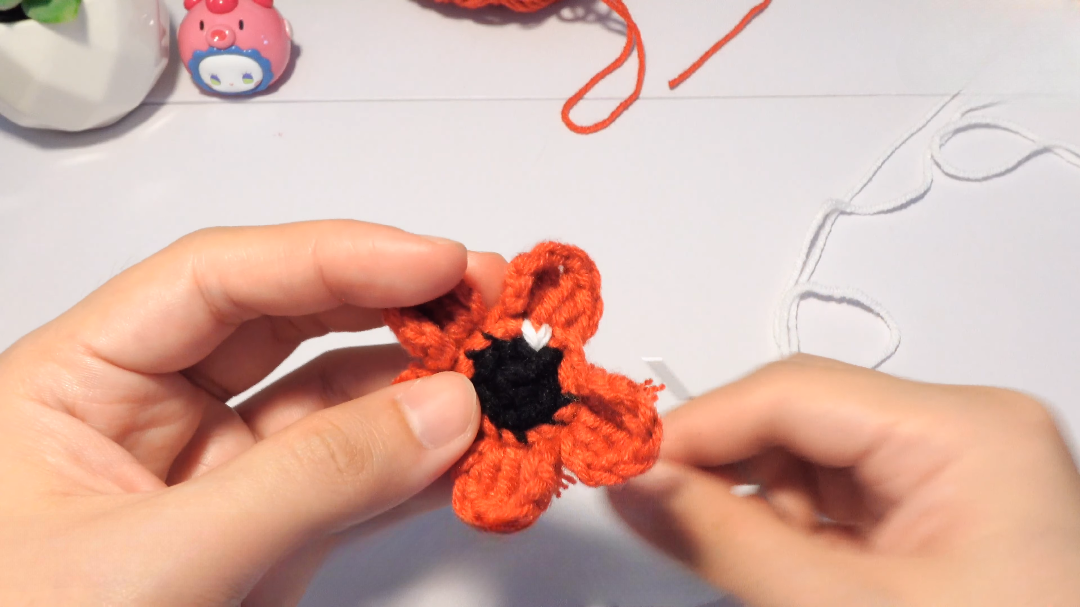
Step 2: Creating the Iconic Flower Mouth
The mouth is the most important part of this pattern. You will switch to your red yarn to create the inner lining. After completing the flat circle for the face, you will work in the front loops only to start the five petals. Each petal is worked individually by turning your work and decreasing at the edges to create a pointed shape. As a result, the face will begin to look like a blooming flower. Once all five petals are attached, you can add small white French knots or tiny crochet triangles to represent the teeth.
Step 3: The Body and Limbs
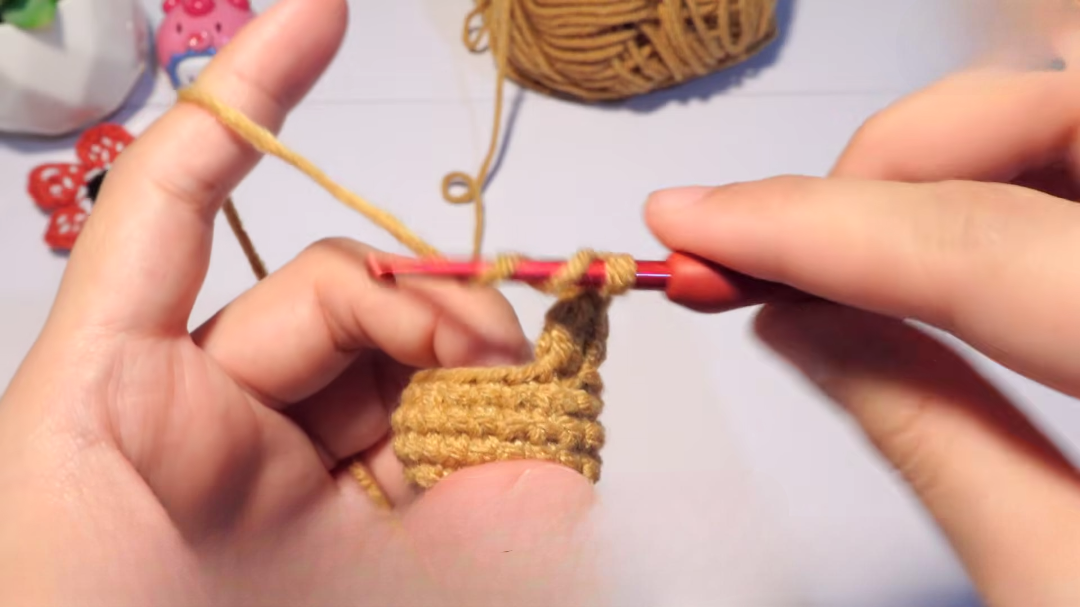
Next, you will move on to the elongated body. Amigurumi monsters often have lanky proportions, so you will work many rounds without increases to create a tall, slender torso. For the arms and legs, you will create thin tubes. It is important to remember that you should only stuff the limbs lightly so they remain poseable. After you finish the four limbs, you will sew them firmly to the torso. Because the Crochet Flower Mouth Monster Demogorgon Amigurumi is top-heavy due to the head, ensure the legs are balanced properly.
Step 4: Assembly and Finishing
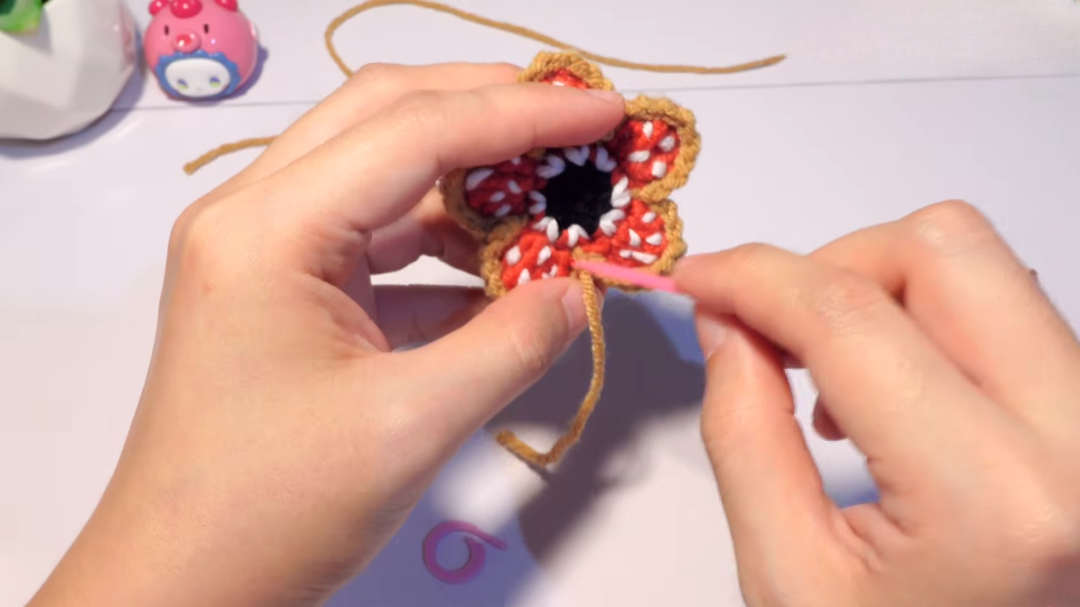
Finally, you will attach the head to the body using a mattress stitch for a clean finish. Take your yarn needle and weave in all the loose ends carefully. If you want your monster to look more realistic, you can use a bit of fabric paint to add shading inside the mouth. Consequently, your Crochet Flower Mouth Monster Demogorgon Amigurumi will have a professional, high-quality look that rivals store-bought collectibles.
Direct Communication
You are doing an amazing job following along with these steps. Remember that crochet is a journey, and you should feel proud of every stitch you place. If you get stuck, take a breath and look at the video again. You have the creativity needed to make this project your own.
Where Can We Use It?
There are many wonderful ways you can use your finished Crochet Flower Mouth Monster Demogorgon Amigurumi. Firstly, it makes a perfect desk companion for anyone who loves dark fantasy or horror genres. Secondly, you can use it as a unique piece of Halloween decor that stays out all year round. Many crafters also find that these monsters make incredible gifts for friends who appreciate handmade, “creepy-cute” items. Furthermore, if you make a smaller version, you could even turn it into a statement keychain for your backpack.
Tips and Tricks
One great tip is to use a wire frame inside the limbs if you want your monster to be able to stand or hold a pose. Additionally, using a “fuzzy” yarn for the body can give your Crochet Flower Mouth Monster Demogorgon Amigurumi a more organic and mossy appearance. If you are struggling with the teeth, you can use felt cut-outs instead of yarn to save time and add a different texture. Moreover, always stuff the head firmly to maintain the shape of the open mouth.
Common Mistakes
A common mistake many people make is stuffing the body too early, which makes it hard to sew the limbs on straight. Another error is not counting the stitches on the petals, leading to a lopsided mouth. Furthermore, some beginners forget to use the back loops for the inner mouth, which prevents the petals from sitting correctly. To avoid these issues, you should double-check your stitch count at the end of every round. Lastly, avoid using yarn that is too slippery, as it can make the small details of the teeth difficult to manage.
FAQs
Q1: What yarn is best for this monster?
A: You should use a sturdy acrylic or cotton blend yarn. This ensures that your Crochet Flower Mouth Monster Demogorgon Amigurumi holds its shape over time and does not pill.
Q2: How long does it take to finish?
A: Depending on your speed, it usually takes about 5 to 8 hours. Because the petals are detailed, you should plan to spend a bit of extra time on the face.
Q3: Can I make this for a small child?
A: Yes, but you must ensure all parts are sewn on very securely. Additionally, avoid using wire if it is intended for a young child.
Q4: How do I clean my amigurumi?
A: You can spot clean it with a damp cloth and mild soap. Therefore, it will stay looking fresh without losing its shape in a washing machine.
Q5: Can I change the size of the monster?
A: Absolutely. By using a thicker yarn and a larger hook, you can create a giant version of the Crochet Flower Mouth Monster Demogorgon Amigurumi.
Conclusion
In conclusion, crafting a Crochet Flower Mouth Monster Demogorgon Amigurumi is a rewarding project that results in a truly unique item. By following this guide and using the transition words provided, you have learned how to construct the body, the intricate mouth, and the spindly limbs. Although it requires some focus, the end result is a high-quality plushie that showcases your talent. You should keep practicing these techniques to expand your amigurumi skills even further. Moreover, you can now share your progress with the crafting community and inspire others to try this fun pattern. Always remember that each stitch brings you closer to mastering this wonderful hobby. Consequently, your next project will be even easier and more enjoyable than the last. Enjoy your new handmade friend!