
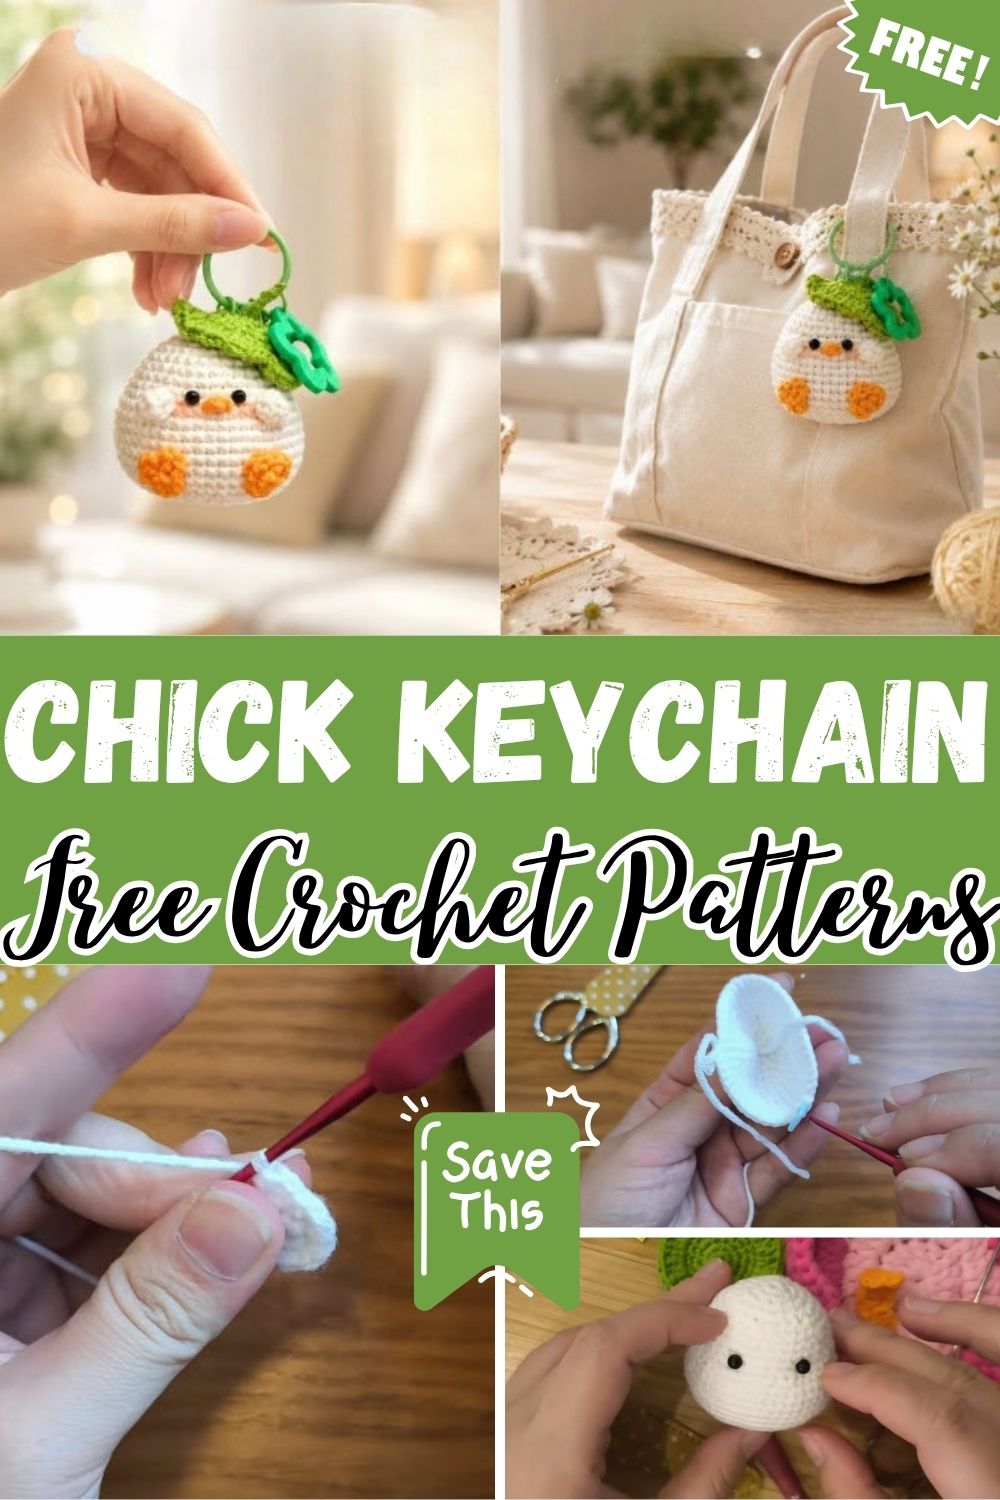
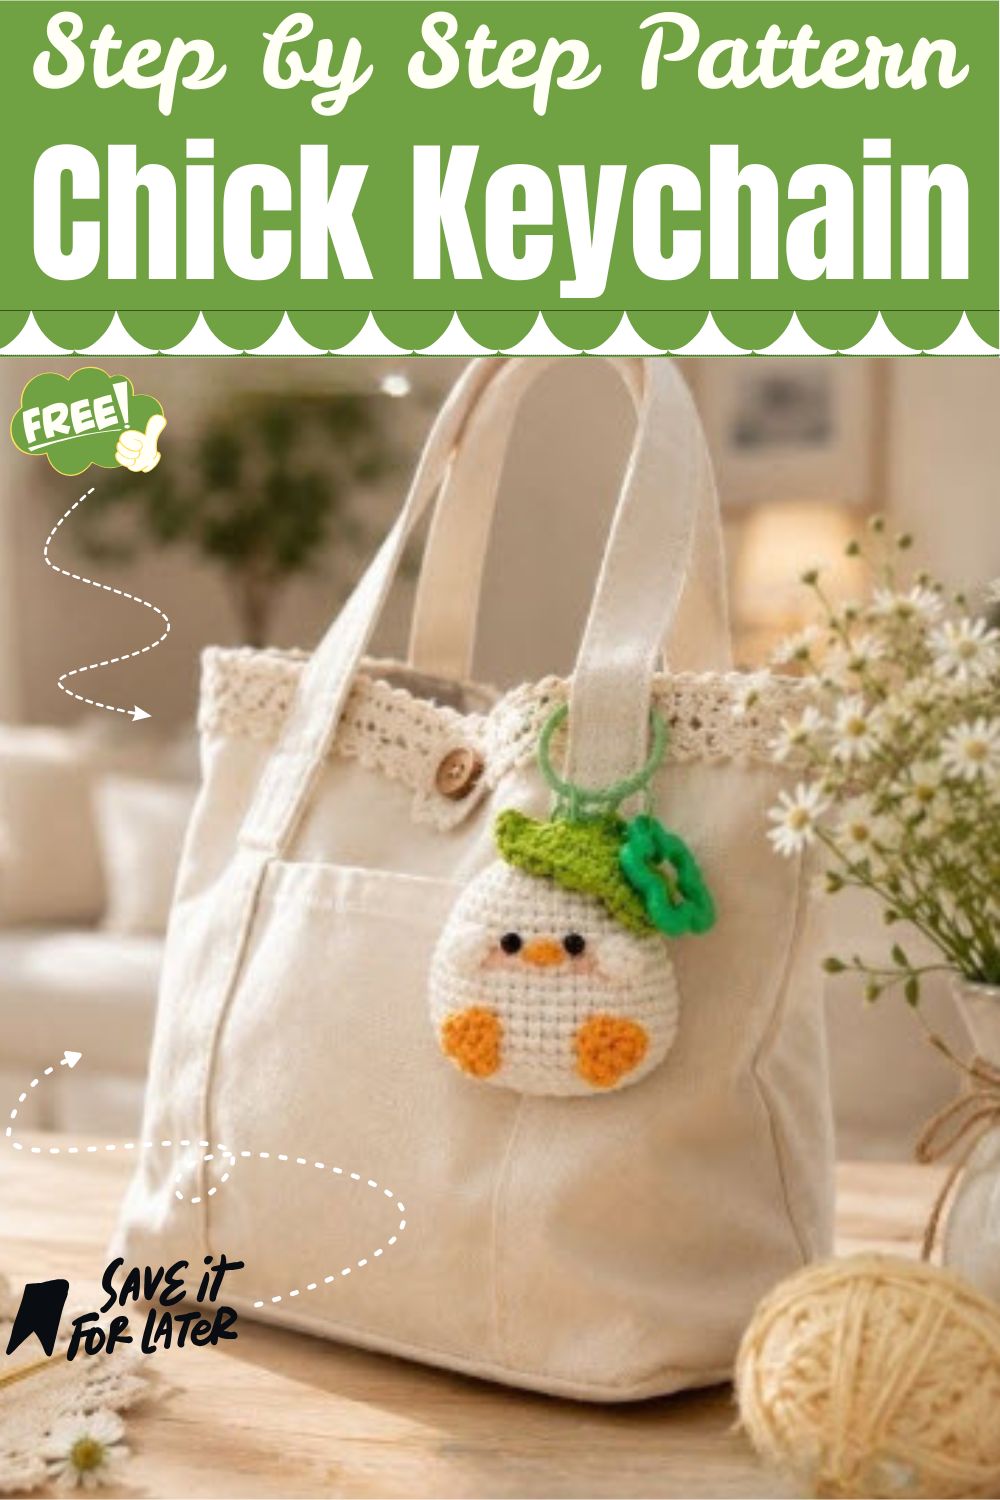
A tiny chick with a leafy green hat on its head is hard to walk past. This Free Crochet Chick Keychain Pattern works up fast, relies on basic stitches only, and gives every bag, backpack, or set of keys its own little mascot. New crocheters can follow along without stress, and seasoned makers will find it a calm weekend make.
Your finished bird gets two shiny black eyes, a small orange beak, and a frilly green lily pad perched at an angle. The body is worked as a single piece from a magic ring, widening first and then curving inward around the stuffing. Pick up a hook and some soft yarn, and let’s begin.
What to Expect from This Chick
Nothing here is complicated, because the same few moves keep coming back. You start with small circles, add stitches at even intervals, and later remove them again. Wings, beak, and feet are tiny pieces that take only minutes, so the project always feels like it is moving along.
Quick Facts About the Project
- Skill Level: Beginner
- Finished Size: Roughly 2 to 2.5 inches (5 to 6 cm) across, depending on how tightly you stitch
- Time Needed: Around 2 to 3 hours with assembly included
- Yarn Choice: A thin cotton or acrylic that pairs well with a 2.0 mm hook
- Hook Size: 2.0 mm
What You Will Need
- Yarn colours:
- Cream or pale yellow for the body and wings
- Orange or golden yellow for the beak and feet
- Green for the lily pad hat
- Hook: a 2.0 mm hook
- Eyes: a pair of black safety eyes
- Stuffing: a handful of polyester fiberfill
- Tapestry needle: for stitching parts on and hiding tails
- Stitch marker: to flag where each round begins
- Scissors
- Extras: a small keyring with a clasp, and a dab of fabric glue if you want a firmer hold
Skills Covered in This Pattern
The list of techniques is short, and the early rounds let you practice each one before the details begin.
- Magic ring: an adjustable loop that cinches shut so no gap is left at the centre.
- Chain (ch): makes the foundation for the wings and the airy spaces in the leaf ruffle.
- Slip stitch (sl st): links the end of a round to its start and tidies off small parts.
- Single crochet (sc): your go-to stitch for both the body and the hat.
- Half double crochet (hdc): adds a little extra height to the wings and toes.
- Double crochet (dc): shapes the wing tips, the beak, and the leaf border.
- Increase (inc): two single crochets in the same stitch, which widens the piece.
- Invisible decrease (dec): joins the front loops of two neighbouring stitches so the fabric stays smooth.
- Fastening off: snipping the yarn and drawing the end through your last loop.
- Sewing on parts: using the tapestry needle to attach the beak, wings, feet, and hat.
Step-by-Step Chick Keychain Instructions
Skim through a round before you stitch it. The figure in brackets is the stitch count you should have when the round ends. After Round 2, crochet in a continuous spiral and shift your marker up once per round.
Starting with the Magic Ring
Round 1: Make a magic ring and work 6 sc into it. Pull the tail to close the circle, then join with a sl st to the first sc. (6)
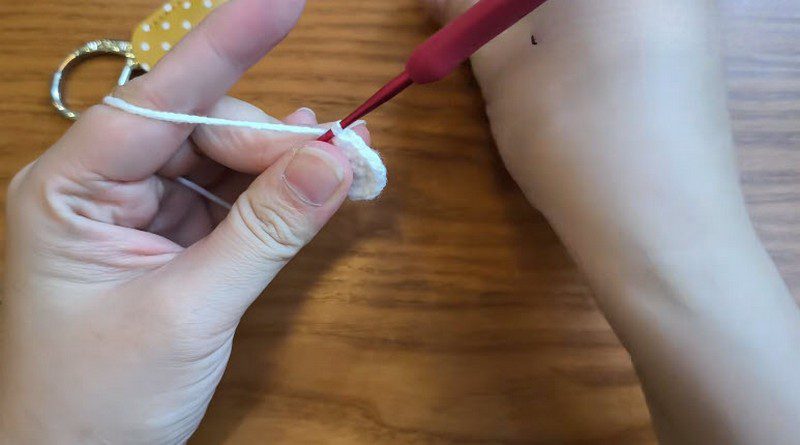
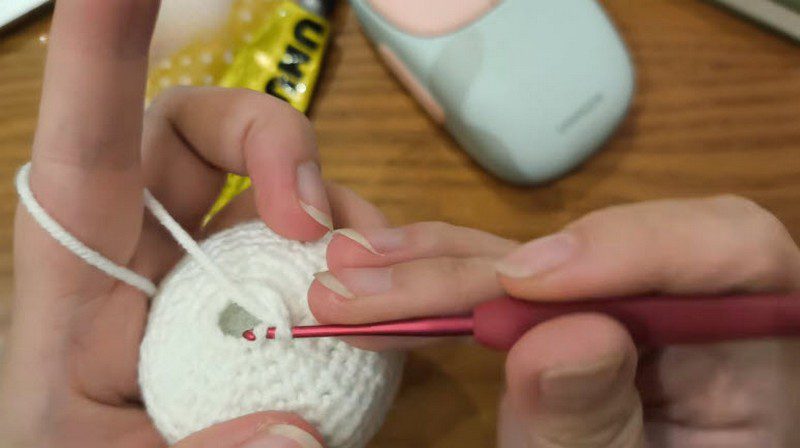
Loop the working yarn over the index finger of your left hand. Hold the small ring between your thumb and middle finger so it stays put while you stitch. Push the hook into the ring’s center from the front, wrap the yarn, and draw up a loop. A relaxed grip lets each loop slide through, and the loose tail can lie across your finger, clear of the hook.
Round 2: Ch 1, then work 2 sc in each stitch around. (12)
Round 3: (1 sc, inc) repeat 6 times. (18)
Widening the Circle
Pin your marker into the first stitch of the round and advance it every time you complete a lap. Rest the little disc between thumb and fingers, yarn over your index finger, hook poised at the next stitch. Lay the circle on your palm to check it. If the edge frills, you have too many stitches, and if it curls up like a saucer, you have too few. Recount before you go further.
Round 4: (1 sc, inc, 1 sc) repeat 6 times. (24)
Round 5: (3 sc, inc) repeat 6 times. (30)
Round 6: Work 1 sc in each of the 30 stitches around. (30)
Round 7: (2 sc, inc, 2 sc) repeat 6 times. (36)
Rounds 8 and 9: Work 36 sc in each round. (36)
Round 10: (5 sc, inc) repeat 6 times. (42)
Round 11: (3 sc, inc, 3 sc) repeat 6 times. (48)
Raising the Sides
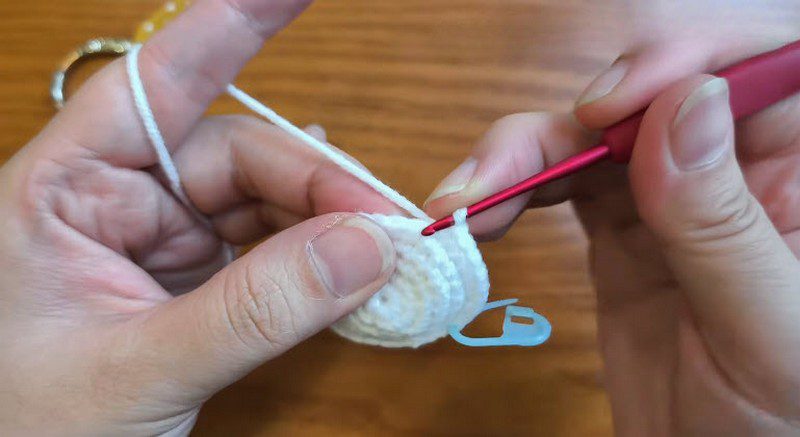
Rounds 12 to 17: Work 1 sc in every stitch around for 6 rounds. (48)
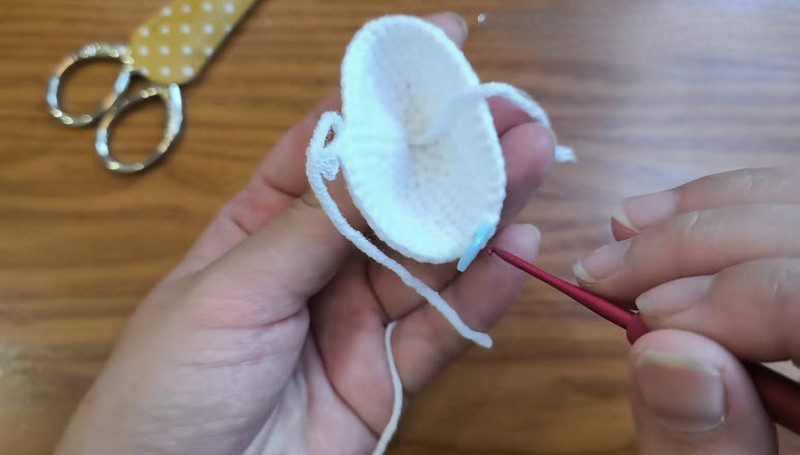
Somewhere in these rounds the flat disc starts to sink into a shallow bowl. Cup it in your left palm and keep the marker on the first stitch of the round. Two tails will hang off the piece, one from the ring and one from the working yarn. Ignore them for now, because you will hide both at the end. With no more increases, the stitches climb straight up and the walls form a small cup.
Shaping the Top and Placing the Eyes
From here the body starts closing in. Make each decrease through the front loops of two stitches together, so no little holes open up.
Round 18: (6 sc, dec) repeat 6 times. (42)
Round 19: (5 sc, dec) repeat 6 times. (36)
Round 20: (4 sc, dec) repeat 6 times. (30)
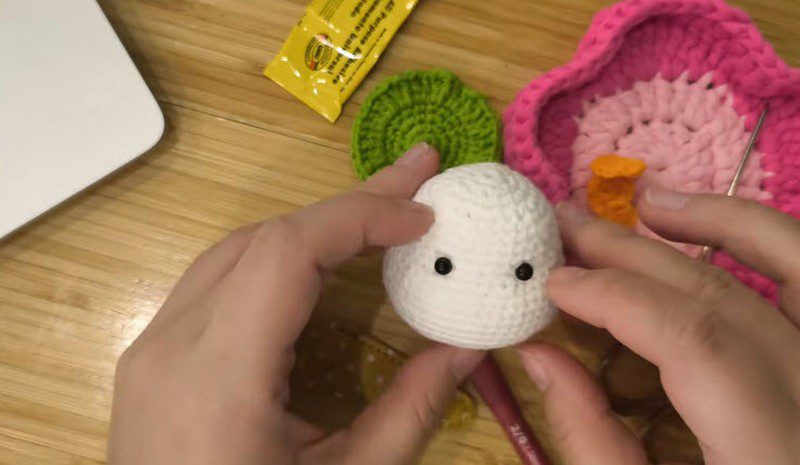
Stop now and insert the safety eyes, since your fingers can still fit inside. Place them 7 to 8 stitches apart and low on the face, set close for a sweet, wide-eyed expression. Slide each post between two stitches and snap the back washer on firmly. Then hold the chick out at arm’s length to make sure both eyes line up before you carry on.
Filling and Closing the Body
Round 21: (3 sc, dec) repeat 6 times. (24)
Time for the stuffing. Keep the body in your left hand with the hook parked in a stitch near the opening. Tuck small pinches of fiberfill along the edges first, then fill the middle. The stitches should wrap snugly around the filling without gaping. A firm chick holds its round shape much better while it dangles from a keyring.
Round 22: (2 sc, dec) repeat 6 times. (18)
Round 23: (1 sc, dec) repeat 6 times. (12)
Round 24: Dec 6 times. (6)
Should the body feel a bit soft, push in one more small piece. Cut the yarn with a tail, thread it through your needle, and run it through the front loops of the last 6 stitches. Draw it tight to shut the hole, then tuck the tail away inside the body.
Making the Wings (Two Needed)
Chain 5. Skip the 2 chains nearest the hook, then work 1 hdc and 2 dc across the last 3 chains. Cut the yarn, leaving a 6-inch tail for sewing. Repeat to make a second wing that matches the first. Each one looks like a little rounded petal, so set it against the side of the body to judge the size before you attach it.
Forming the Beak
Begin with a magic ring. Ch 2, work 2 dc into the ring, ch 2, then sl st to close. Pull the tail to tighten the ring and cut the yarn, leaving enough to sew with. You end up with a small triangle that looks almost too tiny, yet it fits the face perfectly.
Stitching the Feet (Two Needed)
Round 1: Make a magic ring and work 6 sc into it.
Round 2: Ch 2, work 1 hdc, ch 1, then sl st, ch 2, 1 hdc. Repeat for each toe, finishing with a sl st.
Nudge the toes into place with your fingertips before sewing. They should look like tiny webbed paddles.
Working the Lily Pad Hat
Round 1: Magic ring, 6 sc. (6)
Round 2: Inc in each stitch around. (12)
Round 3: (1 sc, inc) repeat 6 times. (18)
Round 4: 1 sc in each stitch around. (18)
Round 5: In every stitch, work (1 dc, ch 1, 1 dc). Join with a sl st and fasten off. Those chain-1 gaps make the wavy ruffle, so keep them relaxed.
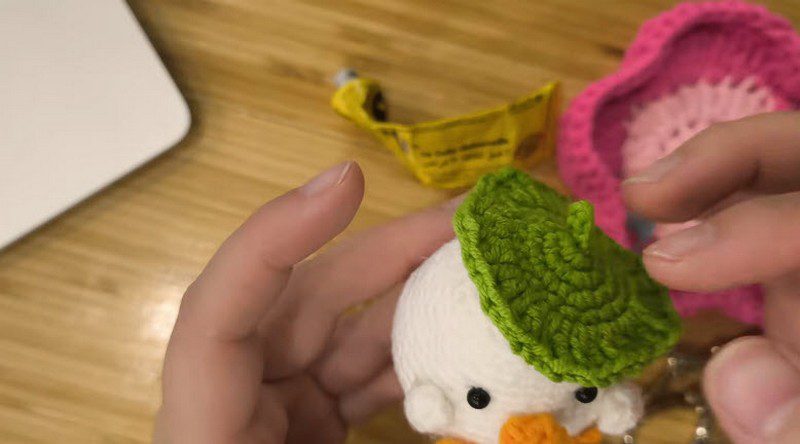
Rest the leaf on the chick’s head to check the fit. Both eyes must stay visible once the hat is on, so decide on the angle before sewing.
Putting Your Chick Together
Begin with the beak. Pin it to the middle of the face, one or two rounds under the eyes, and sew it down with small, firm stitches. Then attach a wing to each side at matching heights, angled a touch outward. Sew the feet to the lower front, set close together, so the chick can stand upright.
Next, set the lily pad on the head and tip it to one side before stitching or gluing it in place. A little slant gives your chick plenty of character, so skip the perfectly centered look. The leaf sits above the eyes, the orange beak below them, and a small wing peeks out on both sides.
To finish, make it a keychain. Chain 8 to 10 in matching yarn, fold it into a loop, and sew both ends to the top of the head beneath the leaf. Slip your keyring through the loop.
Helpful Tips for a Neat Result
- Recount regularly. Checking your total after each round keeps small slips from growing into a lopsided chick.
- Trust your marker. Move it forward every round and you will never wonder where you stopped.
- Hold steady tension. Very tight stitches fight the stuffing, and very loose ones show the filling through the gaps.
- Fill a little at a time. Small pinches spread evenly and avoid bumps.
- Bury tails carefully. Run them through the body along the stitch lines instead of straight across, so they stay put.
- Try the eyes first. Hold them in position without the backs, step away, and judge the look from a distance.
Ways to Make It Your Own
Switching the yarn color changes the entire feel. Try a blush pink chick, a sky blue one, or a sunny yellow for spring. For autumn, swap the lily pad for a tiny orange pumpkin leaf, and in winter a mini scarf looks sweet around the neck.
The face is easy to play with too. Embroider a little smile, add felt cheeks in pink, or replace the round eyes with stitched crescents for a sleepy expression.
Scale is flexible as well. Thicker yarn and a larger hook give you a jumbo plush, while finer yarn makes a miniature charm. Apart from keychains, this chick can hang on a bag, decorate a Christmas tree, dangle from a car mirror, or ride inside a greeting card as a small gift.
Mistakes Worth Avoiding
- Skipping the count. A single extra stitch can leave the body wobbly, so check every round, particularly between Rounds 5 and 11.
- Leaving a gap in the ring. Tug the tail firmly after Round 1, and again after a few more rounds if the center loosens.
- Fitting the eyes too late. Once the opening narrows, your fingers will not reach inside, so place them at Round 20.
- Stuffing too lightly. A floppy body looks droopy. Press the filling in firmly, then add a touch more.
- Placing the beak too high. It belongs just beneath the eyes, never between them.
- Hurrying the leaf border. The ruffle needs room, so keep each chain-1 space loose.
Cleaning and Care
Charms get handled constantly, so a bit of upkeep goes a long way. Wherever you can, dab the surface with a damp cloth and a drop of gentle soap. When a full wash is unavoidable, place the chick in a small mesh bag and hand wash it in cool water. Squeeze out the moisture with a towel, reshape the body, and leave it to dry flat, away from heat. Avoid hanging it by the loop while damp, as the weight can stretch the chain.
Bonus: Gift Wrapping Ideas for Your Chick
A handmade chick makes a lovely present, and the wrapping can be part of the charm. Tuck it into a small kraft box with a nest of shredded paper, or tie it onto a gift tag with a length of twine. Pairing it with a handwritten note about the yarn colors you chose makes the gift feel even more personal.
Frequently Asked Questions
Can I use a larger hook for this pattern?
Yes. A bigger hook with thicker yarn produces a larger chick, and the stitch counts do not change. Just choose bigger safety eyes to match.
Are safety eyes necessary?
They give a clean, finished face. If the keychain is meant for a young child, embroider the eyes with black yarn instead, which is the safer option.
How can I keep the filling hidden?
Go down a hook size from what the yarn label suggests and keep your stitches snug. The 2.0 mm hook used here already works well.
Can I change the colors?
Of course. Replace the cream with any soft shade, then pick a beak and feet that suit the new palette.
How long will it take?
Beginners usually need two to three hours, and quicker crocheters may finish in under two.
Why is my circle curling or rippling?
Count the stitches in your latest round. Rippling points to extra stitches, and a cupped shape points to missing ones.
May I sell what I make?
Many crafters do sell handmade charms. Read the designer’s terms first, and mention the source when you post photos.
Ready to Watch Your Chick Hatch
This crochet chick keychain pattern turns a bit of yarn into a charm small enough for your keys and cheerful enough to lift a dull day. Go slowly, keep counting, and enjoy the moment when the flat circle becomes a round little bird. Once the first one is done, you will probably want a whole flock in other colors. Share your finished chick online and tag your photo, so fellow crocheters can admire it.