Crochet Small Dog Scarf Coaster Amigurumi Pattern
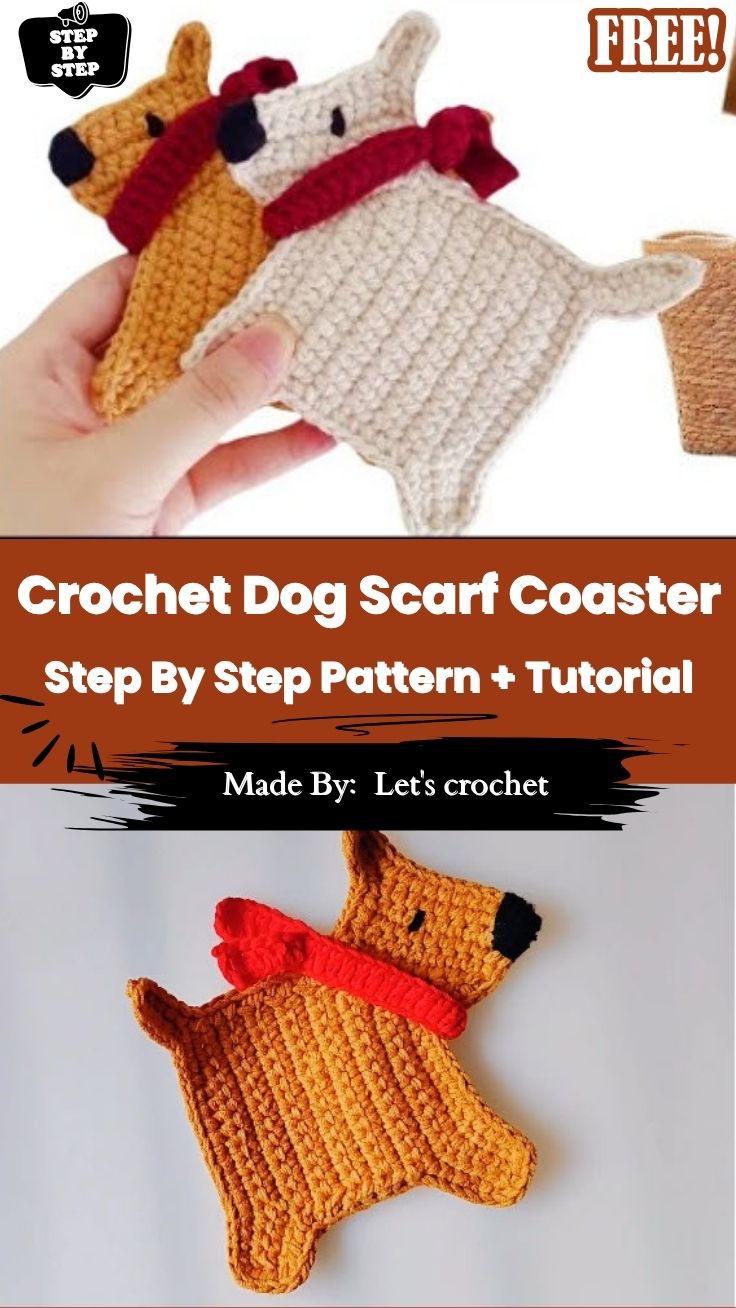
Soft golden and cream yarn curled together on a wooden tray, ready to turn into two sweet little pups. This Crochet Small Dog Scarf Coaster Amigurumi Pattern shapes each coaster into a floppy-eared dog face wrapped in a tiny crimson scarf. Perfect for warming up a coffee table or gifting to a fellow dog lover, these coasters bring handmade charm to everyday sipping.
This dog scarf coaster pattern uses flat two-panel amigurumi construction to keep the piece low-profile, and the tricky part most tutorials skip is matching both panels exactly and attaching the scarf detail without adding bulk at the neck; both are covered step by step below.
Time Box:
- Base panels: 20–30 minutes each
- Ears and muzzle detail: 15–20 minutes
- Scarf: 10 minutes
- Assembly and finishing: 15–20 minutes
Materials
Yarn
Worsted weight cotton holds its shape better than acrylic for a piece meant to sit under drinks it resists flattening from repeated pressure and washes cleanly if it picks up spills. Acrylic worsted weight yarn works fine for a display-only coaster and gives brighter color options, but expect more give under weight over time.
A single coaster this size typically uses around 15–25 grams (roughly 15–25 yards) of the main color, plus a small amount of a contrast color for the scarf and facial details comparable to other flat, single-shape crochet coaster patterns of this scale.
Hook
3.5mm–4mm, sized down slightly from what the yarn label suggests. A tighter gauge keeps the coaster sturdy and closes gaps that would otherwise show on a flat, unstuffed surface.
Other supplies
Yarn needle, stitch markers, a small amount of contrasting yarn or embroidery floss for facial features, fabric scissors.
Is Stuffing Needed?
No — a scarf coaster stays flat by design. Two matching panels (front and back) are worked separately, then joined around the edge without filling. Any stuffing added at this stage causes doming, which stops the piece from lying flat under a cup.
Safety Considerations
Small embroidered or button-style eyes should be sewn securely if the coaster will be around young children or pets who might chew on it. The piece is intended as a decorative coaster for light everyday use rather than for prolonged contact with hot mugs.
Abbreviations
Standard US terms: sc (single crochet), inc (increase), dec (decrease), sl st (slip stitch), ch (chain), sts (stitches).
Important Stitches
Single crochet worked in a tight, even tension is the primary stitch throughout the base panels and ears; flatness depends more on consistent tension than on any special stitch technique.
Before You Start
Work a quick swatch to confirm your tension produces a flat, non-curling circle before starting the actual panels. If your test swatch domes or ruffles at the edge, go down a hook size.
Dog Coaster Construction
Body/Base Panel
Step 1. Start with a magic ring and work the first round per your pattern’s stitch count.
Step 2. Increase each round evenly to keep the circle flat. Uneven increase placement is the most common cause of a wavy edge.
Step 3. Place a stitch marker at the start of each round so you always know where the round begins, especially past round 4 when miscounts become harder to catch.
Step 4. Work the second, matching panel using the identical round count.
Pro-Tip: Lay both panels on top of each other before moving on. If one is visibly larger, unravel back to where the sizes diverge rather than trying to “ease” them together at the seam. Mismatched panels are the top reason coasters end up lopsided.
Head Shaping
Step 1. Shape the head as a rounded panel following the same flat-increase logic as the body.
Step 2. Keep tension slightly firmer here than on the body;y the head carries more visual detail (eyes, muzzle) and shows unevenness more easily.
Ears
Step 1. Work each ear separately as a small flat triangle or rounded shape, per your pattern.
Step 2. Pin ears in place before sewing to check they sit symmetrically one ear even slightly higher than the other is very noticeable on a flat face.
Pro-Tip: Baste ears on with a single loose stitch first, check the look from a normal viewing distance, then sew permanently. It’s much faster than unpicking a finished seam.
Muzzle/Snout Detail
Step 1. Work the muzzle as a smaller flat circle or oval and center it on the lower half of the head panel.
Step 2. Leave a small gap between the muzzle edge and where the eyes will sit so the face doesn’t look crowded.
Facial Features
Step 1. Before joining the head to the body, position the eyes at equal height and equal distance from the center seam line use stitch or round landmarks rather than measuring by eye, which drifts easily on a small scale.
Step 2. Embroider or attach the nose last, once both eyes are confirmed level, so the whole face can be checked as one unit before it’s sewn onto the body.
Scarf
Step 1. Chain and single crochet a narrow strip, long enough to wrap once around the neck area with a small overlap.
Step 2. Keep the scarf a single layer of fabric; doubling it adds bulk that lifts the coaster off the table at the neck.
If the scarf and face use different yarn colors, weave in color-change ends flat against the back of the work rather than knotting them, so nothing shows through on the front side.
Assembly
Step 1. Join front and back body panels using a slip stitch or whip stitch around the edge, working through both loops for a clean, closed seam.
Step 2. Attach the finished head (with eyes and nose already in place) to the top of the body, then the ears, then the muzzle, checking placement against a straight edge like a ruler before sewing.
Step 3. Tie or tack the scarf around the neck last, using only one or two small stitches to hold it in place rather than sewing all the way around.
Keeping the Piece Flat (Blocking Guide)
If the joined coaster domes slightly at the center, dampen it lightly, lay it face-up on a flat towel, and pin the outer edge down at 6–8 points around the circle. Let it dry fully before unpinning. Blocking corrects minor doming from seaming tension but won’t fix a piece where the panels were mismatched in size to begin with.
Common Mistakes
- Front and back panels worked to different round counts
- Stuffing added out of habit from other amigurumi patterns
- Scarf doubled or sewn too tightly at the neck
- Ears sewn before checking placement against each other
Troubleshooting
- Edge curled after finishing: block it before assuming the panel is unusable;e light steam or a damp pin-and-dry session flattens most minor curl.
- Coaster sits crooked once joined: unpick just the seam (not the whole panel) and re-join with the smaller panel’s edge slightly stretched to match.
- Scarf bunching at the neck: pick out the tacking stitches and re-attach with a single, looser stitch instead of several tight ones.
- Coaster still wobbles under a mug after blocking: the issue is usually leftover stuffing or a thickness mismatch between the two panels, not something blocking alone fixes.
Size Modification
Add or remove one full round from both panels evenly (never just one) to scale the coaster up or down while keeping the shape proportional.
Breed/Color Variations
The same base shape adapts to different dog looks by changing ear shape (floppy vs. pointed) and color placement:nt cream and brown for a puppy look, black and white patches for a spotted breed, solid gray for a schnauzer-style face.
Care Instructions
Hand-wash in cool water and lay flat to dry rather than wringing, which helps the piece keep its shape between uses. Avoid placing it under very hot mugs until you’ve tested how your specific yarn handles sustained heat.
FAQs
Is this coaster stuffed?
No. It is worked as two flat panels joined without filling, which keeps it low enough to sit flush under a cup.
Can I use acrylic yarn instead of cotton?
Yes, though cotton yarn generally holds shape better and handles moisture more predictably for something meant to sit under drinks.
Why does my coaster keep doming in the middle?
Doming usually comes from uneven increases or tension that’s too loose. Check your test swatch and consider a smaller hook.
How much yarn do I need for one Crochet Small Dog Scarf Coaster?
Roughly 15–25 grams of main color yarn plus a small amount of contrast color for the scarf and facial details, based on comparable flat coaster patterns of this size.
Can I skip the scarf?
Yes – the dog face panel works as a standalone coaster on its own if the scarf detail isn’t needed.
Personalization Ideas
Matching sets
Crochet several coasters using the same base pattern in different color combinations for a themed set.
Gift pairing
Bundle a coaster with a small matching mug rug or keychain in the same yarn colors for a coordinated gift.
Bonus: No-Scarf Variation
Leave the scarf off entirely, and the same panels become a simple dog-face coaster or even a small appliqué for pillows and bags. The flat-panel and blocking techniques above apply the same way regardless of what the piece is used for.