
Crochet Granny Bow Pattern are having a major moment right now and once you make your first one, you will completely understand why everyone is obsessed with them.
If you have been looking for a small, satisfying project that actually turns out beautiful, this crochet granny bow pattern is exactly what you need. It uses the classic granny square stitch but shapes it into the most adorable little bow you have ever seen. Clip it on a headband, stitch it onto a bag, or wrap it around a gift however you use it, this handmade bow adds that perfect personal touch that no store-bought accessory can ever replace. Grab your hook and let us get started.
What Is This Project?
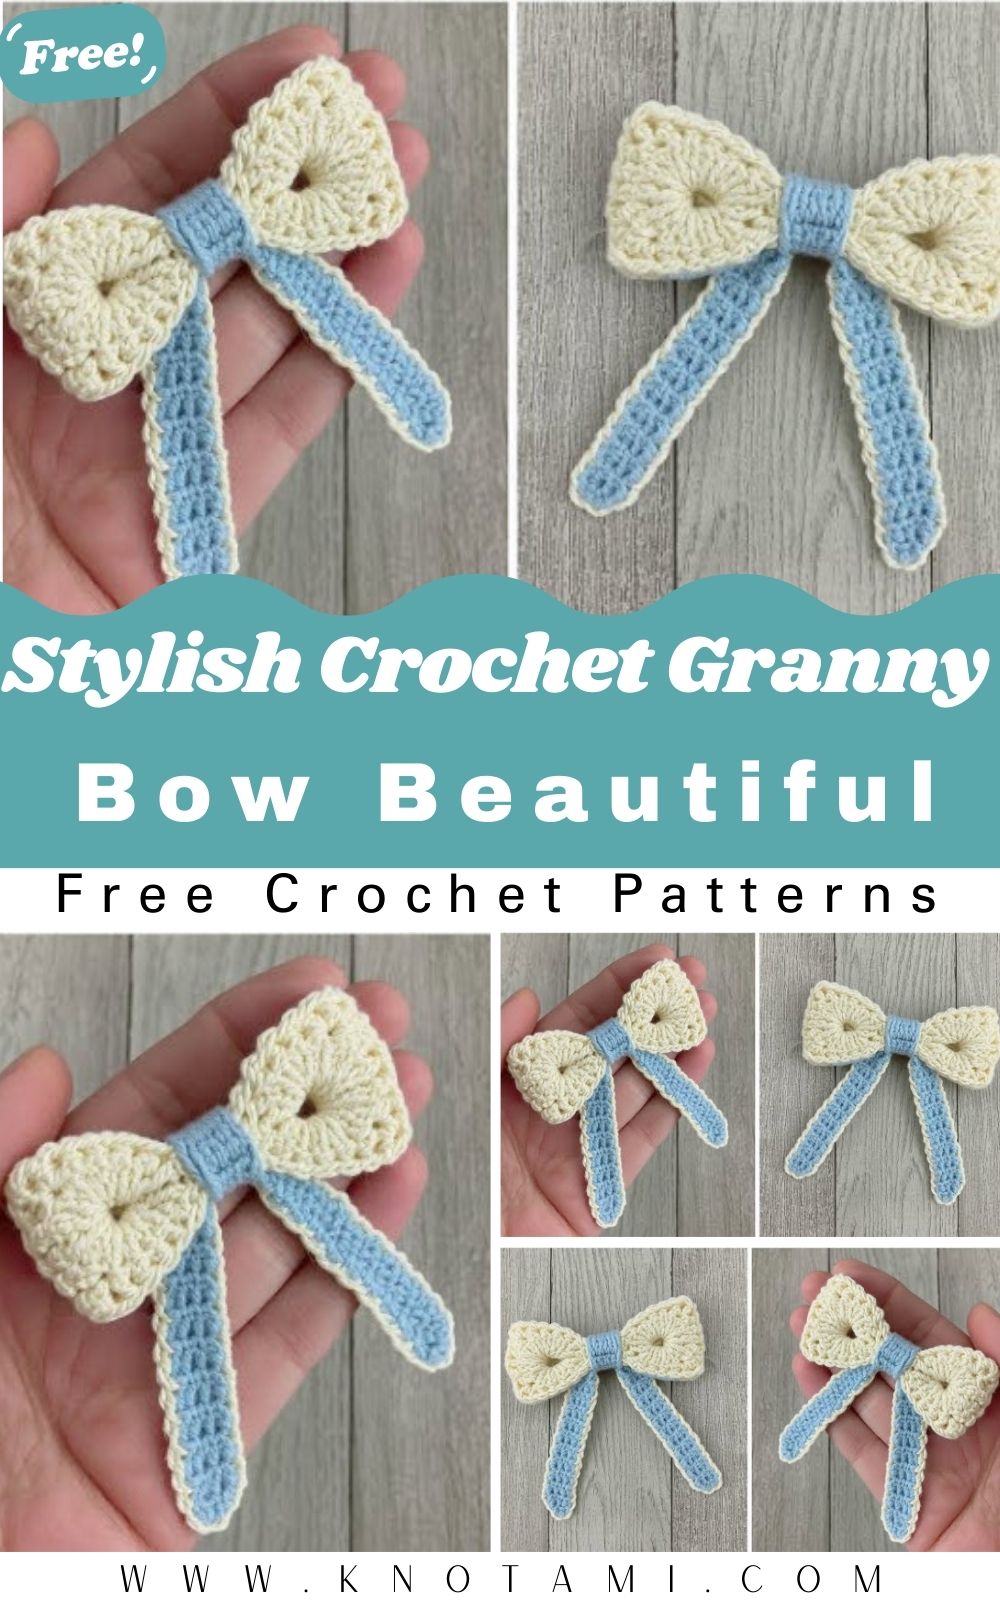
This is a small decorative crochet granny bow made using classic granny square techniques in a fresh and stylish way. The pattern creates two matching bow loops that are joined in the centre with a neat little wrap giving it that iconic, puffy bow look everyone loves.
It is compact enough to finish in one sitting, which makes it perfect for beginners who want a quick and rewarding make.
Skill Level
Beginner to Easy Intermediate
If you know how to chain, single crochet, and double crochet, you are ready. This crochet pattern is very welcoming for new crafters.
Materials and Supplies You Will Need
Yarn Colours:
- Main colour yarn (DK or worsted weight works great)
- A contrasting colour for trim or edging
- White or cream yarn for the centre knot wrap
- Optional: variegated yarn for a fun, colourful look
Crochet Hook:
- Size 3.5mm to 4.5mm depending on your yarn weight
Other Supplies:
- Tapestry needle for sewing pieces together
- Sharp scissors
- Stitch markers
- Small amount of polyfill stuffing, hair clip, headband base, or keychain ring depending on how you want to use your bow
- Pins for blocking (optional but helpful)
Yarn Tip: Cotton yarn gives the bow a crisp, clean shape. Acrylic yarn is softer and great for beginners. You only need around 30 to 50 grams total, so this is a great stash-buster project.
Crochet Techniques Used
- Magic ring (or chain loop alternative)
- Chain stitch
- Single crochet
- Double crochet
- Slip stitch
- Increase and decrease
- Working in rounds and rows
- Sewing and assembling parts together
None of these is difficult. If the magic ring feels confusing at first, simply chain 4 and join into a loop it works just as well for this pattern.
Abbreviations
- ch = Chain
- sc = Single Crochet
- dc = Double Crochet
- sl st = Slip Stitch
- MR = Magic Ring
- inc = Increase
- dec = Decrease
Step-by-Step Crochet Pattern Instructions
1 – Make the Bow Loops (Make 2)
Each bow is made of two matching granny-style pieces.
- Start with a magic ring.
- Chain 3 (this counts as your first dc), then work 2 dc into the ring.
- Chain 2, then work 3 dc, chain 2. Repeat this 3 more times around the ring.
- Join with a slip stitch to the top of your starting chain 3.
- Pull the magic ring tight.
- Round 2: Slip stitch into the corner space, chain 3, work 2 dc in the same corner, chain 1, then 3 dc in the next corner. Continue all the way around and join with a slip stitch.
- Round 3 (optional): Work one more round the same way for a fuller, more dramatic bow.
- Fasten off and leave a long yarn tail for sewing.
2 – Shape the Bow Loops
- Fold each piece gently so the opposite corners meet in the middle.
- Use your tapestry needle and yarn tail to take a few stitches through the folded layers at the centre — this holds the wing shape.
- Keep a little puffiness in each loop, do not flatten it completely.
- If you want a 3D bow, tuck a tiny pinch of polyfill inside before sewing it closed.
- Repeat for the second bow piece.
3 – Make the Centre Knot Strip
- Chain 12 with your centre colour yarn.
- Row 1: Single crochet in the 2nd chain from the hook and in each chain across. You will have 11 sc.
- Rows 2 to 5: Chain 1, turn, single crochet across each row.
- Fasten off with a long tail. This small rectangle is what you will wrap around the bow centre.
4 – Assemble the Bow
- Place your two bow loops back-to-back, with the wrong sides facing.
- Sew the two gathered centres together firmly with your tapestry needle.
- Take the centre knot strip and wrap it snugly around the pinched middle of the bow.
- Pull it tight so the loops puff out nicely on each side.
- Sew the ends of the centre strip together at the back of the bow.
- Weave in all your yarn ends.
5 – Finishing Touches
- If using cotton yarn, lightly block the bow by spritzing with water and shaping it flat for an hour.
- Attach a hair clip or headband base to the back using a needle and yarn or a dab of craft glue.
- For a bag charm, thread a keychain ring through the centre, wrap before sewing the bag shut.
- For a gift topper, simply tie or stitch the bow onto ribbon or twine.
Helpful Beginner Tips
- Keep your tension consistent. Tighter stitches give the bow a more defined shape. If your tension is too loose, the bow may look a little floppy.
- Use stitch markers. Place a marker at the start of each round so you always know where you are.
- Count your stitches after every round. It only takes a few seconds and saves you from having to unravel rows later.
- Do not overstuff. A tiny pinch of polyfill is enough. Too much stuffing makes the bow look lumpy and lose its shape.
- Sew the centre firmly. The centre knot does a lot of the structural work, so give it several passes with your needle.
- Shape while damp. Gently moulding the bow with your hands while it is slightly wet (especially if using cotton) makes a huge difference to the final look.
Design Customisation Ideas
Different Colours: Try classic black and cream, soft pastels, bold jewel tones, or a seasonal palette like red and green for Christmas. Even a simple two-colour combination can look stunning.
Cute Accessories: Sew a small button, pearl bead, or tiny crochet flower at the centre of the bow for extra personality. A metallic or sequin yarn in the centre wrap looks beautiful for special occasions.
Mini Size Variations: Use a 2mm hook with fine cotton thread to make a tiny bow for earrings or card embellishments. It is incredibly delicate and sweet.
Oversized Version: Use chunky yarn and a 6mm hook for a large, dramatic statement bow perfect for bags or wreaths.
Mix Textures: Combine a smooth main yarn with a fluffy or boucle yarn for the centre knot. The texture contrast looks really artisan and interesting.
Frequently Asked Questions
What is the best yarn for a crochet granny bow?
Cotton or cotton-blend yarn is the best choice for a bow that holds its shape well. If you want a softer result, DK-weight acrylic works great and comes in so many colours.
Do I need to stuff the bow?
No, stuffing is completely optional. It gives a puffier, more three-dimensional look which is lovely for hair accessories, but you can skip it entirely for a flat bow.
How long does this crochet pattern take?
Most crafters finish this bow in 1 to 2 hours. Beginners may take around 2 to 3 hours for their first one. Once you make a second, it goes much faster.
Can I make this without knowing granny squares?
Yes, absolutely. You do not need any prior granny square experience. If you can chain and crochet basic stitches, you are ready to start.
How do I attach the bow to a headband or clip?
Sew it on with a tapestry needle and matching yarn, or use a hot glue gun for a faster finish. Both methods hold well.
Can I sell items made from this Crochet Granny Bow Pattern?
Items made for personal use are always fine. If you plan to sell, it is a good idea to check the original creator’s terms on their YouTube channel.
Conclusion
So there you have it your Crochet Granny Bow Pattern is ready to go out into the world and turn heads! It is funny how a little yarn and a simple hook can come together to make something this charming and beautiful.
Gift it, wear it, or sell it. This bow never goes out of style, and the best thing about making it by hand is that every single one comes out slightly different, with its own little personality. That is the magic of crochet, and honestly, that is the magic of you.