
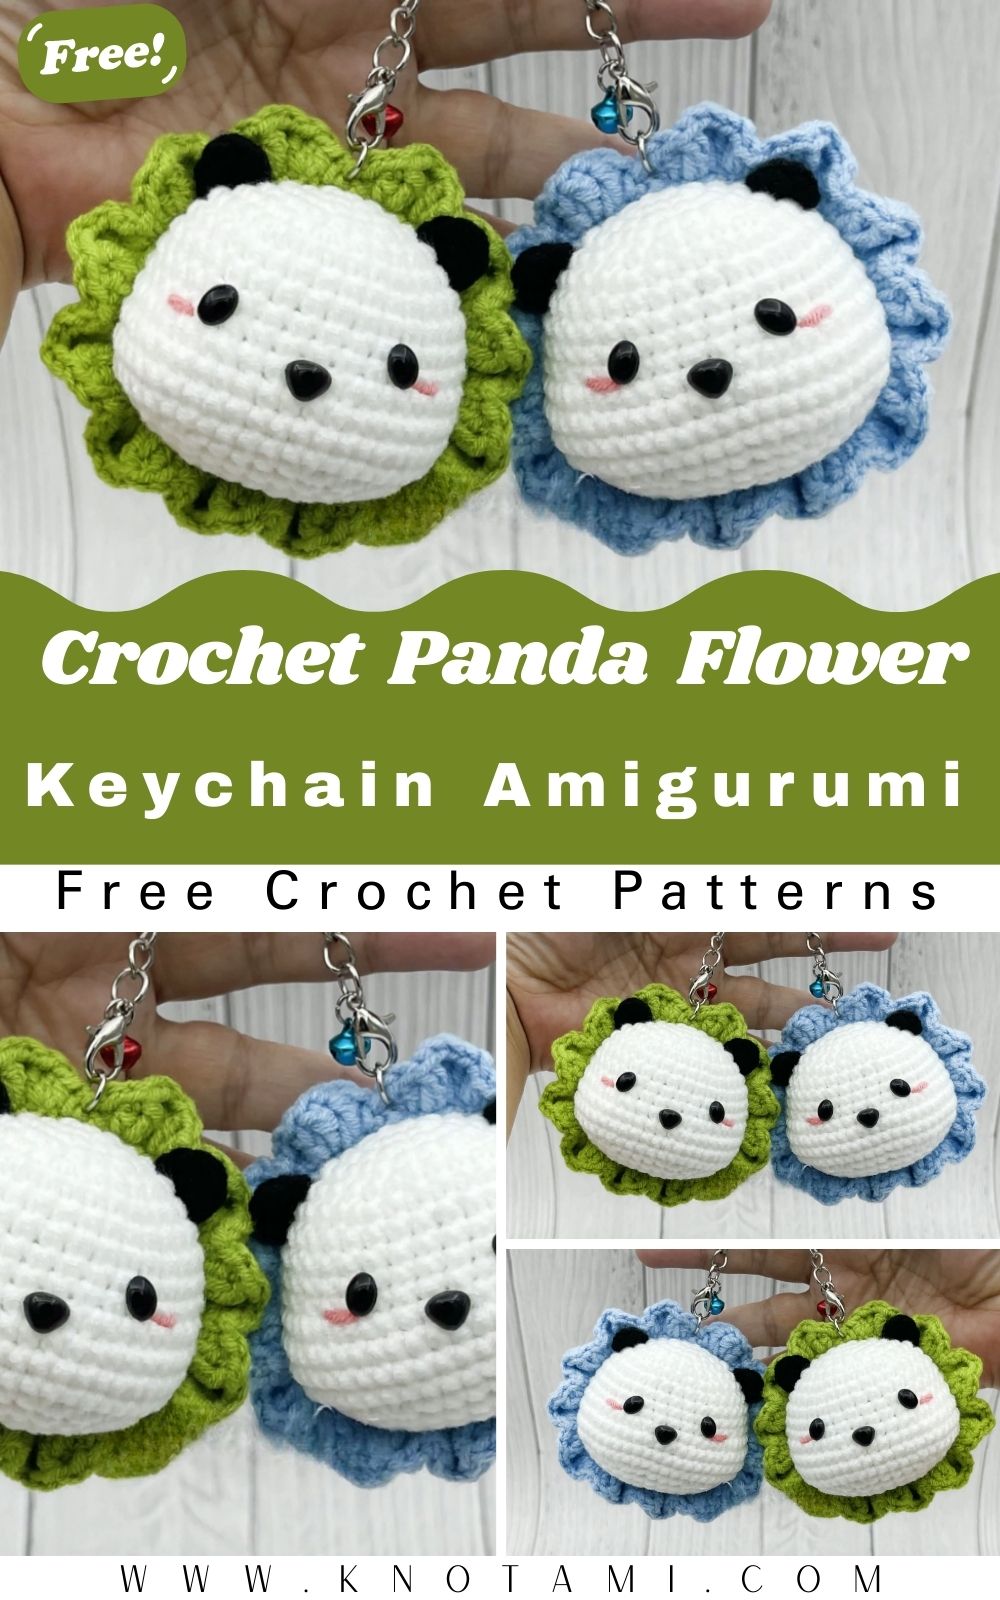
That Crochet Mini Panda Flower Keychain Amigurumi smiling next to a bright flower with your keys brings a sweet sense of joy to everyday life. This easy amigurumi project for beginners turns soft yarn into a charming handmade keychain that you’ll happily carry with you everywhere.
Panda amigurumi designs are always a favorite for their round, cute faces and playful style. When this beauty is combined with delicate floral designs, a charming mini keychain is created. These little handmade creations are perfect as cute gifts, cheerful bag charms, and cute table decorations. Despite their small size, they are full of personality and charm, combining creativity and joy into one beautiful project.
Items Needed
Gather these simple supplies before you start. Everything stays beginner-friendly and easy to find.
- 4-ply yarn in black, white, and your favorite flower color (pink, yellow, or purple works beautifully)
- 2.5 mm crochet hook – the sweet spot for tight, neat stitches with 4-ply yarn
- Polyester fiberfill stuffing – just enough to make your panda softly plump
- 5 mm oval safety eyes – they give that signature panda sparkle
- Small plastic bear nose or embroidered nose option
- Yarn needle for sewing pieces together
- Keychain ring and clasp – the star of the show for easy attachment
- Stitch markers and small scissors
These materials keep the project light on your wallet while delivering professional-looking results.
Step-by-Step Method
Step 1: Start with a magic ring using white yarn for the panda head. Work 6 single crochets into the ring and pull it closed. Place a stitch marker to track your rounds.
Step 2: Increase around to build the round panda body shape. Follow with several even rounds, then switch to black yarn for the eye patches and ears. Keep tension gentle for a smooth finish.
Step 3: Attach safety eyes and embroider or add the nose. Crochet the flower petals separately in bright colors, then stitch them around the panda’s base like a natural bloom.
Step 4: Stuff the head and body lightly. Sew all pieces together securely. Attach the keychain hardware at the top so it hangs perfectly balanced.
Step 5: Weave in all ends neatly. Add final touches like tiny blush stitches on the cheeks for extra personality.
Design Highlights
- Adorable panda shape with classic black-and-white contrast and chubby cheeks
- Flower decoration that frames the panda like it’s sitting in a garden
- Soft, squishy texture thanks to the perfect stuffing amount
- Mini keychain size that fits easily on keys, bags, or backpacks without weighing you down
The combination creates something truly special – both huggable and functional.
Uses & Benefits
This little panda flower keychain shines in so many ways. Clip it to your keys for daily smiles, or attach it to a backpack as a charming identifier.
It makes a thoughtful handmade gift for birthdays, graduations, or “just because” moments. Teachers love them as classroom rewards, and crafters enjoy them as quick wins that build confidence.
Beyond decoration, the project offers relaxing crochet practice that sharpens your amigurumi skills without a long commitment. You finish feeling accomplished and creative.
Time & Skill Level
- Time to complete: 2–4 hours spread over one or two relaxed sessions
- Skill level: Beginner to confident beginner
- Best for: Anyone who knows basic single crochet, increase, and decrease stitches
Even if you’ve only crocheted a few simple projects, you can tackle this one successfully.
Yarn & Tool Recommendations
Choose soft 4-ply cotton or acrylic yarn for the best stitch definition and cuddly feel. Brands like YarnArt Jeans or similar-weight yarns work wonderfully.
A 2.5 mm aluminum hook gives smooth glide and precise control. Ergonomic handles help if you plan longer sessions.
Safety eyes and pre-made noses save time and deliver consistent, cute expressions. Always check that small parts stay securely attached, especially for gifts going to little ones.
Final Look & Finished Appearance
When you hold the finished mini panda flower keychain, you see a perfectly round panda head nestled in vibrant petals. The black ears stand perky, the eyes sparkle with mischief, and the whole piece sways gently from its keyring. It looks polished yet homemade – exactly the kind of charm people stop to admire.
Styling & Usage Ideas
- Hang it from a backpack zipper for an eye-catching school or travel accessory
- Attach to a purse or tote bag as a functional fashion detail
- Use as cheerful room decor by clipping to a lamp or plant hanger
- Package it in a small gift box with tissue paper and a sweet note for instant smiles
The possibilities feel endless once you make your first one.
Common Mistakes & Easy Fixes
- Loose tension: Switch to a smaller hook size or practice tighter stitches
- Uneven color changes: Carry unused yarn neatly inside the work for clean transitions
- Overstuffing: Add fiberfill gradually and stop when the shape looks gently rounded
- Crooked keychain attachment: Center the ring at the very top and test the hang before securing
- Visible knots: Weave ends through multiple stitches in different directions for invisible finishes
Care Instructions
Spot clean your panda keychain with mild soap and cool water when needed. Pat dry gently and reshape while damp.
Avoid machine washing or dryers to protect the stuffing and hardware. Store away from direct sunlight to keep colors bright.
If the keychain gets crushed in a bag, simply fluff the fiberfill through the stitches with your fingers.
Customization Ideas
- Swap flower colors to match favorite outfits or seasons
- Change facial expressions with different eye placements or embroidered mouths
- Add tiny accessories like a mini bow, heart, or leaf details
- Experiment with yarn textures – try fluffy yarn for a softer look or sparkly thread for special occasions
Your personal touches turn each panda into a one-of-a-kind treasure.
Safety Tips
- Secure all small parts like eyes and nose with strong knots or extra stitching
- Keep the keychain out of reach of babies and toddlers due to choking hazards
- Test attachments by giving a firm tug before gifting
- Use child-safe materials when making for younger recipients
- Store in a clean, dry place to avoid dust buildup
Creative Value of Handmade Amigurumi
Nothing beats the satisfaction of turning a simple ball of yarn into a tiny personality that travels with you. Each stitch carries your time, care, and creativity.
- Boosts mindfulness through the calming rhythm of crochet
- Creates lasting connections when you gift something made with love
- Sparks endless creativity as you dream up new color combinations and variations
This mini panda flower keychain reminds us why we pick up our hooks again and again – to bring joy into everyday moments.
FAQs
How long does it take to crochet this mini panda keychain? Most beginners finish in 2–4 hours. The compact size makes it a perfect weekend project.
Is this pattern suitable for absolute beginners? Yes! It uses only basic stitches. The video tutorial walks you through every part clearly.
What size is the finished panda flower keychain? It measures about 8.5 cm across, ideal for keys and bags without adding bulk.
Can I sell the finished keychains I make? Absolutely. Many crafters sell them at markets or online. Just avoid copying the pattern itself for resale.
What if I don’t have safety eyes? Embroider the eyes with black yarn instead. The result stays just as adorable and safer for very young children.
Conclusion
Your hands hold the power to create something genuinely charming. This crochet mini panda flower keychain combines sweet design, practical use, and handmade warmth in one tiny package.
Every time you reach for your keys, you’ll feel that spark of pride knowing you made it yourself. So grab your yarn, settle into your favorite spot, and let the hooks fly. Your new favorite accessory, and maybe someone else’s too, awaits. Happy crocheting!
Meta Description: Learn to crochet a charming mini panda flower keychain amigurumi. Easy beginner pattern with step-by-step instructions for cute handmade gifts and bag charms.