

Crocheting adorable handmade projects is a wonderful way to relax while creating something unique and useful. This DIY Cute Crochet Small Dog Scarf Coaster Amigurumi Pattern is a fun project that combines the charm of a tiny puppy with the practicality of a coaster. Whether you want to decorate your coffee table, create a thoughtful handmade gift, or add a cute item to your crochet collection, this pattern is an excellent choice.
Designed with beginners in mind, this project uses basic crochet stitches and simple amigurumi techniques. The finished piece can be used as a coaster for mugs and cups or displayed as a decorative crochet accessory. Add a colorful scarf around the puppy’s neck to give it extra personality and a cozy handmade touch.
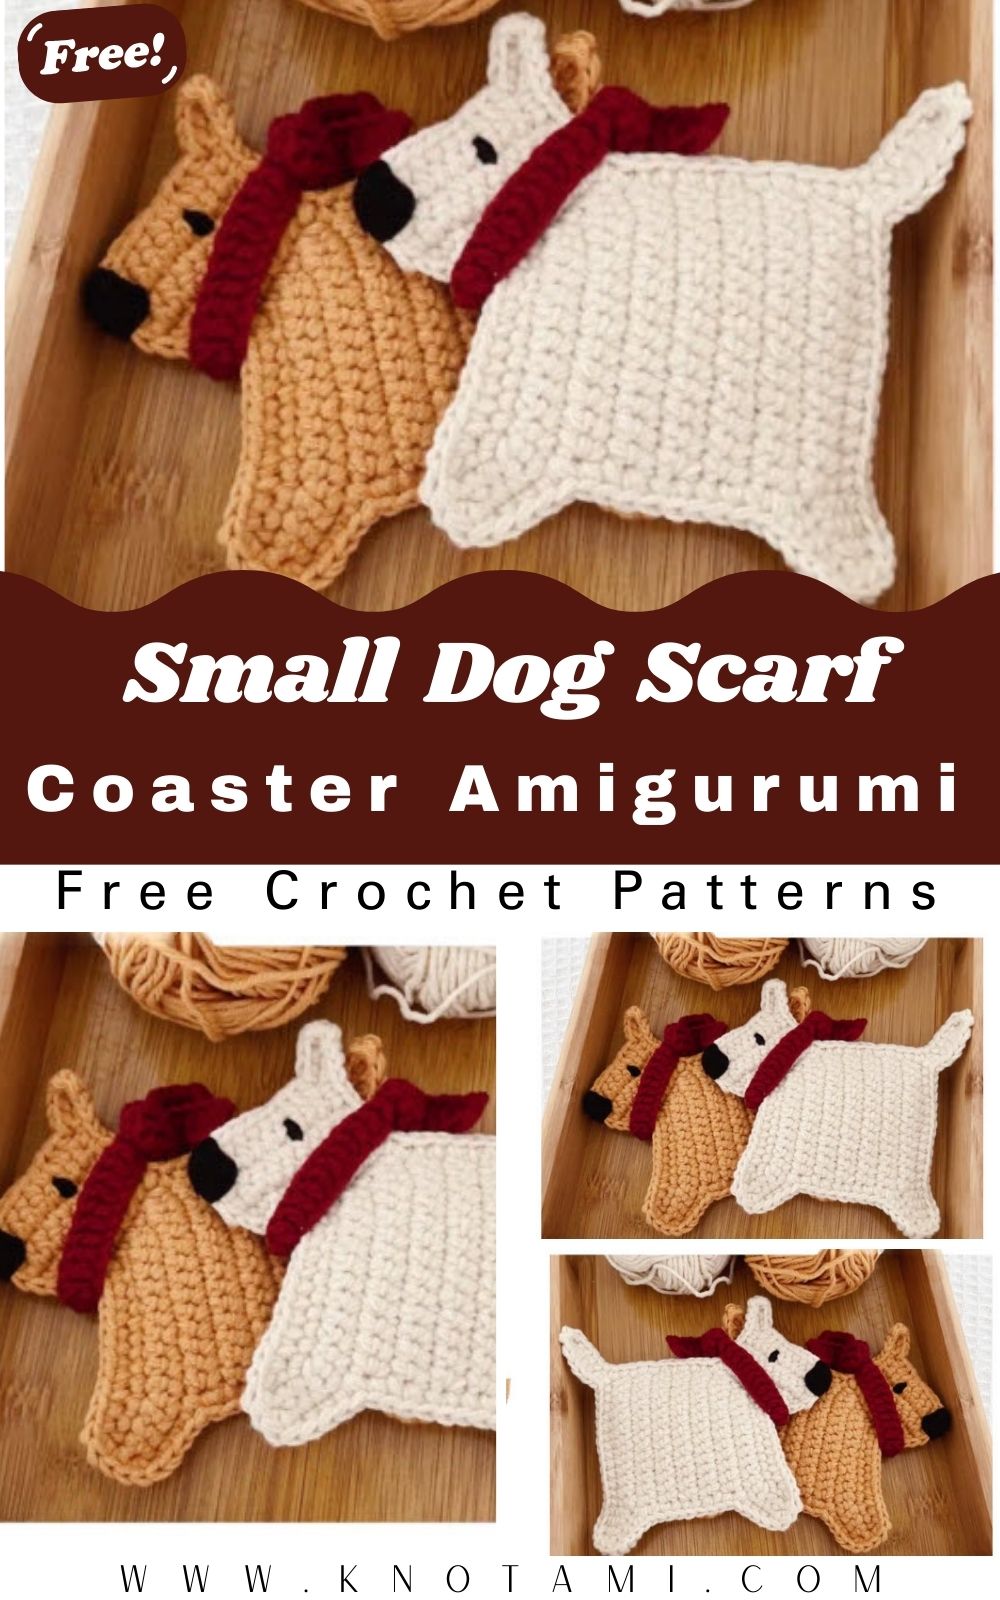
Skill Level
Difficulty: Easy
This project is perfect for beginners who already know the basic crochet stitches.
You should be familiar with:
- Magic Ring (MR)
- Chain Stitch (ch)
- Single Crochet (sc)
- Slip Stitch (sl st)
- Increase (inc)
- Invisible Decrease (dec)
- Fasten Off (FO)
No advanced shaping techniques are required, making this pattern suitable for anyone looking to start making amigurumi.
Project Information
| Project Details | Information |
|---|---|
| Skill Level | Easy |
| Pattern Type | Amigurumi Coaster |
| Finished Size | 12–15 cm |
| Time Required | 3–5 Hours |
| Yarn Weight | DK or Sport Cotton |
| Crochet Hook | 3.0 mm |
| Crochet Terms | US Terms |
Materials Needed
Gather all your supplies before starting your crochet project.
Yarn Colors
- Light Brown or Cream (main body)
- White (muzzle)
- Black (nose and eyes)
- Red, Blue, Green, or Yellow (scarf)
- Pink (inside ears)
- Brown (optional spots)
Recommended Yarn
Cotton yarn works best because it provides excellent stitch definition and helps the coaster keep its shape.
Popular choices include:
- YarnArt Jeans
- Hobbii Rainbow Cotton
- Paintbox Cotton DK
- Drops Safran
- Schachenmayr Catania
Other Supplies
- 3.0 mm crochet hook
- Polyester fiberfill (small amount for head)
- Stitch marker
- Yarn needle
- Sharp scissors
- Measuring tape
- Safety eyes (6–8 mm) or black embroidery thread
- Fabric glue (optional)
- Blush powder (optional)
Crochet Abbreviations
| Abbreviation | Meaning |
| MR | Magic Ring |
| ch | Chain |
| sc | Single Crochet |
| inc | Increase |
| dec | Invisible Decrease |
| sl st | Slip Stitch |
| st | Stitch |
| FO | Fasten Off |
Before You Begin
Take a few minutes to organize your yarn and tools before starting. Using a stitch marker will help you keep track of each round, especially if you’re working in continuous rounds. Read through the entire pattern once before crocheting so you understand how the different pieces come together.
Keeping your stitches even throughout the project will help your finished dog coaster look smooth and professional.
Step 1 – Crochet the Dog’s Head
Begin with a Magic Ring and crochet 6 single crochet stitches into the ring.
Increase evenly over the next few rounds until you have 30–36 stitches, depending on the size you want. Continue crocheting several rounds without increasing to create a smooth, round head.
Lightly stuff the head with polyester fiberfill before closing. Avoid overstuffing, as this can stretch the stitches and change the puppy’s shape.
Fasten off, leaving a long yarn tail for sewing.
Step 2 – Crochet the Coaster Body
The body of this project also functions as the coaster.
Start with another Magic Ring and crochet 6 single crochet stitches.
Increase evenly in each round until the circle reaches approximately 12–15 cm in diameter. Keep the coaster flat by spacing your increases evenly. If the coaster begins to curl, your tension may be too tight, while wavy edges usually mean too many increases.
Once the coaster reaches the desired size, finish with one round of slip stitches around the edge for a neat border. Fasten off and weave in the yarn ends.
Step 3 – Crochet the Ears
The floppy ears give the puppy its adorable personality.
Using your main yarn color, make a Magic Ring with 4 single crochet stitches. Increase slightly in the second round, then crochet a few rows without increasing to create a soft oval shape.
Flatten each ear gently before sewing it to the head. Make two identical ears and position them evenly on both sides of the head for a balanced appearance.
Step 4 – Make the Muzzle
Using white or cream yarn, crochet a small oval piece that will become the puppy’s muzzle.
Lightly stuff it if desired, then sew it onto the lower center of the face. Embroider a small black nose and a smiling mouth to give your puppy a friendly expression.
Safety eyes can be attached before sewing the muzzle, or you can embroider the eyes for a child-safe version.
Step 5 – Crochet the Front and Back Legs
The small legs complete the puppy’s adorable appearance and help give the coaster a three-dimensional amigurumi look.
For each leg, begin with a Magic Ring (MR) and crochet 6 single crochet (sc) stitches into the ring. Work several rounds without increasing until the leg measures about 2–3 cm long. Add a tiny amount of polyester fiberfill if you want slightly raised paws, or leave them unstuffed for a flatter coaster.
Repeat the same process to make four legs. Sew two legs to the front of the coaster and two to the back, making sure they are evenly spaced. Taking your time during this step helps the finished puppy look balanced and symmetrical.
Step 6 – Crochet the Puppy Tail
The tail is a small detail that adds charm to your finished project.
Chain 10–12 stitches, then work one single crochet in each chain back to the beginning.
Fasten off and leave a long tail for sewing.
Attach the tail to the back of the coaster. You can leave it straight or gently curl it for a playful look.
Step 7 – Crochet the Cute Scarf
The colorful scarf gives your little puppy a warm and cozy personality.
Using your favorite color, chain 25–35 stitches, depending on how long you want the scarf.
Work one or two rows of single crochet across the chain.
Fasten off and weave in the loose ends.
Wrap the scarf around the puppy’s neck and either tie a simple knot or sew it in place. You can also add tiny fringes to both ends for extra detail.
Try different colors such as:
- Red
- Sky Blue
- Mint Green
- Mustard Yellow
- Lavender
- Pink
Changing the scarf color is one of the easiest ways to create different puppy designs.
Step 8 – Assemble Your Crochet Dog
Now it’s time to bring all the pieces together.
Start by sewing the head securely onto the top edge of the coaster.
Next, attach both ears, making sure they sit evenly on each side of the head.
Sew the muzzle in place, then attach or embroider the eyes and nose.
Attach all four legs around the coaster, followed by the tail at the back.
Finally, wrap the scarf around the puppy’s neck.
Before weaving in the final yarn ends, place the coaster on a flat surface to check that everything is centered and symmetrical.
Common Mistakes to Avoid
Uneven Tension
Try to keep your stitches consistent throughout the project. Uneven tension may cause the coaster to curl or become misshapen.
Incorrect Stitch Count
Count your stitches after every round to maintain the correct shape.
Overstuffing
Only the head needs light stuffing. Too much filling can stretch the stitches and distort the puppy’s face.
Crooked Facial Features
Before attaching the eyes and nose permanently, check their placement carefully. Even a slight adjustment can create a much cuter expression.
Uneven Assembly
Use sewing pins to temporarily hold all pieces in place before sewing.
Care Instructions
To keep your crochet coaster looking its best:
- Spot clean with a damp cloth whenever possible.
- Hand wash gently using mild detergent.
- Do not bleach.
- Lay flat to air dry.
- Avoid wringing or twisting.
- Store in a dry place away from direct sunlight.
Proper care will help preserve the shape and colors for years.
Frequently Asked Questions
Is this pattern beginner friendly?
Yes. Anyone familiar with basic crochet stitches can complete this project successfully.
How long does it take?
Most crocheters finish the project within 3–5 hours.
What yarn works best?
Cotton yarn is recommended because it provides excellent stitch definition and helps the coaster remain flat.
Can I make it larger?
Yes. Simply use thicker yarn and a larger crochet hook.
Is it washable?
Yes. Hand washing is recommended to protect the shape and details.
Can I sell finished items?
Absolutely. Handmade crochet dog coasters are popular at craft fairs and online shops. Be sure to respect the copyright of any original pattern if applicable.
Final Thoughts
The DIY Cute Crochet Small Dog Scarf Coaster Amigurumi Pattern is a fun, beginner-friendly project that combines creativity with practicality. Whether you’re making it for yourself, as a thoughtful handmade gift, or to sell at craft markets, this adorable puppy coaster is sure to bring smiles.
With simple stitches, colorful yarn, and a little patience, you can create a charming crochet accessory that is both decorative and useful. Don’t forget to watch the accompanying video tutorial for extra guidance, and experiment with different colors and scarf styles to make each puppy unique.
Happy crocheting, and enjoy creating your own collection of cute handmade dog coasters!