
Bright blue and white stripes coil into a smooth, seamless body in this crochet snake keychain amigurumi pattern. The finished snake can wrap around a bag strap or hang from a regular key ring, and its coiled shape stands out on any bag or set of keys.
The whole snake is worked in one continuous piece, from head to tail tip, using only single crochet in a spiral. That keeps the construction beginner-friendly while still giving you a polished result, and it’s good practice for basic amigurumi skills like increasing, decreasing, and color changes.
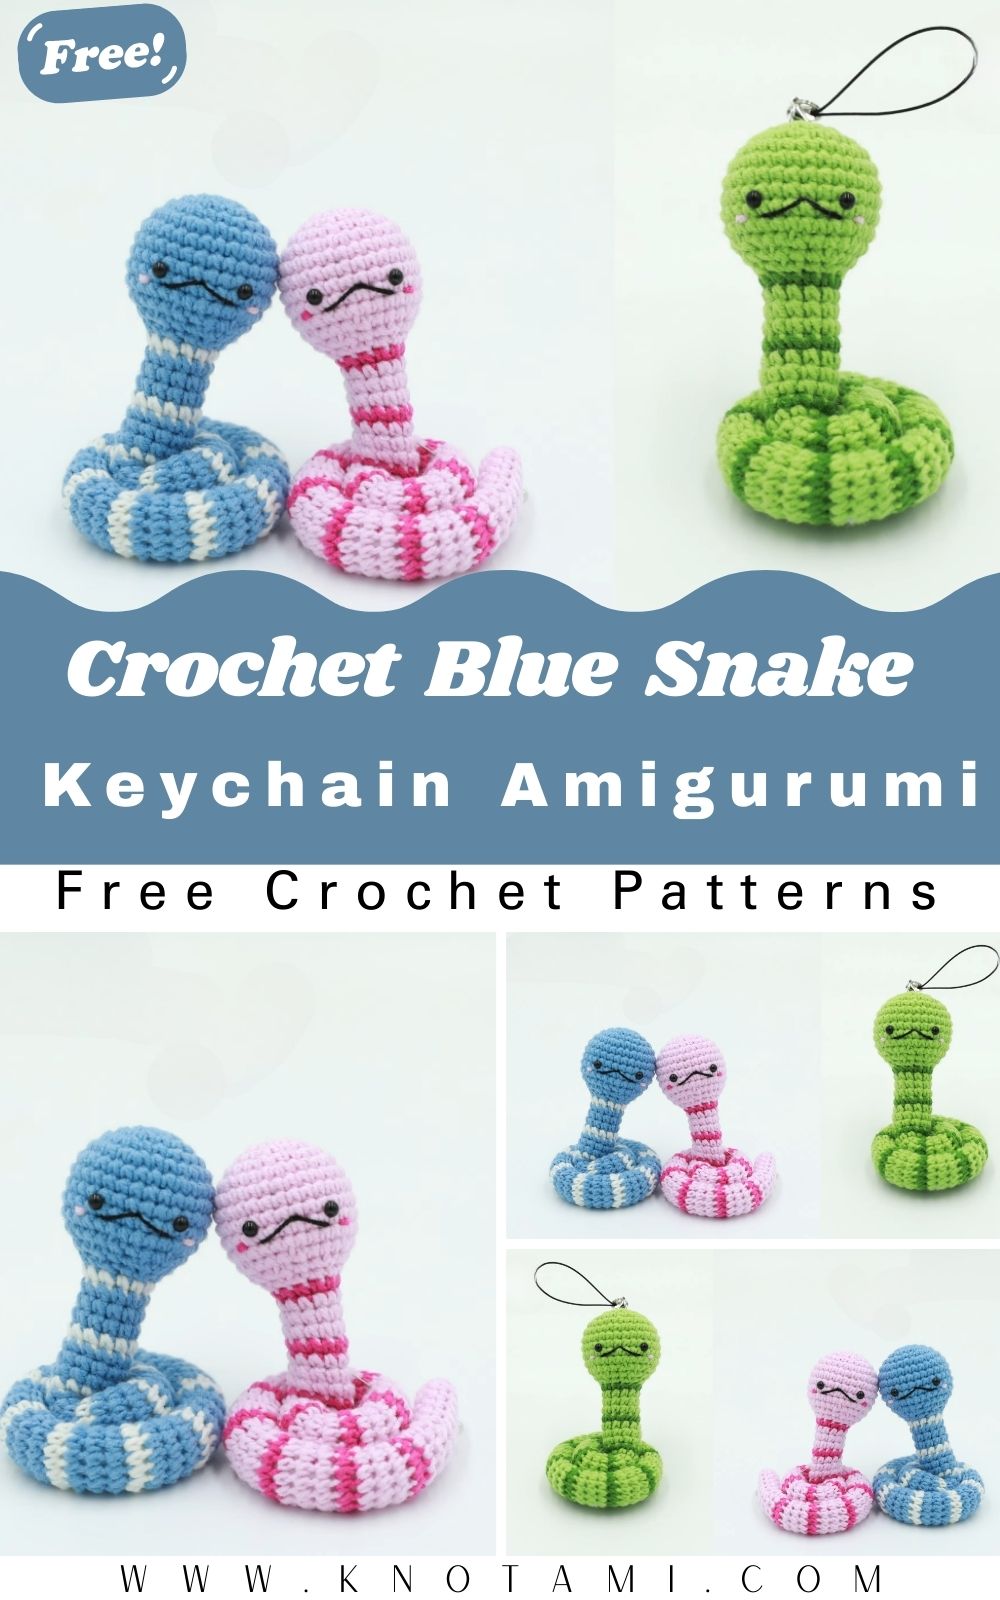
Pattern Overview
- One continuous piece (head, body, and tail), so the main shape needs no sewing
- Worked in continuous spiral single crochet throughout
- Solid-color head with an optional two-color striped body
- Finished length depends on how long you make the body (see the length guide in Step 6)
- Keychain hardware attached at the back of the head after finishing
Materials
- Yarn: Sport or light DK weight cotton or cotton-acrylic blend, about 40–50 g total (two colors if you’re making stripes)
- Hook: 2.0 mm crochet hook (go down to 1.75 mm for a denser, firmer fabric)
- Eyes: 6 mm safety eyes with locking washers, or embroidered eyes if the keychain is for a child under three
- Stuffing: A small amount of polyester fiberfill for the head
- Stitch markers: At least two, ideally four
- Hardware: Keychain ring with swivel clasp and a jump ring
- Tools: Yarn needle and small scissors
- Optional: A scrap of red yarn for the tongue
Abbreviations (US Terms)
- MR – magic ring
- sc – single crochet
- inc – increase (2 sc in the same stitch)
- dec – invisible decrease
- st(s) – stitch(es)
- Rnd – round
- FO – fasten off
Before You Start
The snake uses single crochet in a continuous spiral, with no slip stitches to join rounds and no turning chains. The one technique worth practicing is the invisible decrease, which keeps the neck taper smooth instead of leaving small holes.
Lay your two yarn colors side by side before you begin. If the head and body shades are too close, the snake shape gets lost, especially in photos. Choose a hook size that gives you a fabric you can’t see stuffing through when you stretch it slightly. Holding a small swatch up to a window is an easy way to check.
Time Estimate
- Gathering materials: about 10 minutes
- Head shaping and eye placement: 30–40 minutes
- Body tube: 45–90 minutes, depending on length
- Tail taper, tongue, and finishing: about 20 minutes
How to Crochet the Snake Keychain
Step 1: Start the Head
Work the head in your solid head color (blue in the pictured snake). Place a stitch marker in the first stitch of every round. In a long spiral, it’s very easy to lose track of where each round starts and drift off count.
- Rnd 1: 6 sc in MR, pull tight (6 sts)
- Rnd 2: inc in each st around (12 sts)
- Rnd 3: (sc, inc) around (18 sts)
- Rnd 4: (2 sc, inc) around (24 sts)
- Rnd 5: (3 sc, inc) around (30 sts)
Step 2: Build the Head Height
- Rnds 6–9: sc around (30 sts each)
Step 3: Widen for the Eye Ridge
- Rnd 10: (sc, inc) around (45 sts)
- Rnds 11–12: sc around (45 sts each)
Tip: Before placing the eyes, fold the head flat and count the stitches from the marker to the fold on both sides. The counts should match exactly. If they’re off by even one stitch, the eyes will sit at an angle once the head is stuffed, so fix the count now.
Step 4: Place the Eyes
Insert the safety eyes between Rounds 8 and 9, spaced 5 stitches apart and centered on either side of your marker line. Push the posts through from the outside and secure the washers on the inside before you stitch any further. Locking washers are very hard to remove once they’re on, so double-check the placement first. It’s also much easier to fit the washers now than after the head is stuffed.
Step 5: Taper the Neck
- Rnd 13: (13 sc, dec) x3 (42 sts)
- Rnd 14: (4 sc, dec) x7 (35 sts)
- Rnd 15: (3 sc, dec) x7 (28 sts)
- Rnd 16: (2 sc, dec) x7 (21 sts)
- Rnd 17: (sc, dec) x7 (14 sts)
- Rnd 18: dec x7 (7 sts)
Stuff the head firmly now. Work small pinches of fiberfill into the cheeks first so they hold their shape, then fill the center. Roll the head gently between your palms to check the shape. A lump means uneven stuffing, and it’s much easier to fix through the 7-stitch opening than after the body is worked.
Step 6: Crochet the Body Tube
Continue working sc around all 7 stitches, with no increases or decreases, until the body is as long as you want.
- Stripes: Change colors in a regular sequence, such as 1 round of white followed by 3 rounds of blue, as shown on the pictured snake.
- Clean color changes: Work the last stitch of the old color until two loops remain on your hook, then pull the new color through to finish the stitch. On the next round, work the first stitch of the new color as normal. This reduces the stair-step “jog” so each stripe looks like a clean ring instead of a diagonal.
- Check for twisting: Every 8–10 rounds, lay the tube flat. If the stitch line drifts to one side instead of running down the middle, fix it now rather than later.
- Length guide: About 6–8 inches (15–20 cm) of tube makes a compact bag charm. About 10–12 inches (25–30 cm) makes a longer keychain that can coil.
Step 7: Taper the Tail
Work decreases around until only 3–4 stitches remain. Fasten off, leaving a 6-inch tail. Weave the tail through the remaining stitches, pull it closed, and bury the end back through the tube for at least 2 inches so it can’t work loose.
Assembly
The head, body, and tail are all one piece, so the only assembly steps are the tongue and the keychain hardware.
- Tongue: With red yarn, chain 6. Sc in the second chain from the hook and in each chain across, then slip stitch to split the last stitch into a small V. Tuck it just under the mouth line, between Rounds 12 and 13 and centered on the marker, and tack it down with two small stitches.
- Keychain ring: Attach the jump ring through two or three stitches at the very top-back of the head, not the neck. The neck bends constantly with handling, while the top of the head stays firm and holds the hardware better.
Stuffing Tips
Only the head needs fiberfill. An unstuffed or lightly stuffed body lets the snake coil naturally around a wrist or bag strap, which is a big part of its appeal. For a little more structure, stuff only the first 2 inches of the tube, tapering to nothing. A fully stuffed tube turns stiff and won’t coil.
Round-by-Round Stitch Count Table
| Round | Instructions | Stitch Count |
|---|---|---|
| 1 | 6 sc in MR | 6 |
| 2 | inc around | 12 |
| 3 | (sc, inc) around | 18 |
| 4 | (2 sc, inc) around | 24 |
| 5 | (3 sc, inc) around | 30 |
| 6–9 | sc around | 30 |
| 10 | (sc, inc) around | 45 |
| 11–12 | sc around | 45 |
| 13 | (13 sc, dec) x3 | 42 |
| 14 | (4 sc, dec) x7 | 35 |
| 15 | (3 sc, dec) x7 | 28 |
| 16 | (2 sc, dec) x7 | 21 |
| 17 | (sc, dec) x7 | 14 |
| 18 | dec x7 | 7 |
| Body | sc around to desired length | 7 |
| Tail | dec around until 3–4 sts remain, FO | 3–4 |
If a count is off, count back from your most recent marker instead of from the beginning. The error is almost always in the latest increase or decrease round.
Common Mistakes to Avoid
- Losing the round marker: On a long, plain tube, it’s easy to drift one stitch off count.
- Stuffing before checking the eyes: Confirm eye symmetry before you add fiberfill and lock the washers.
- Tight color changes: Pulling the yarn too tight when changing colors puckers the tube.
- Attaching the ring to the neck: Hardware on the soft neck works loose. Attach it to the firm top of the head.
Troubleshooting
- Lumpy head: Usually the stuffing went in from one side only. Remove some, then refill through the neck opening in small pinches.
- Slanted stripes: A slight spiral is normal when you work in continuous rounds. Using the clean color change method in Step 6 helps the stripes look like even rings.
Size and Color Variations
- Shorter body: A shorter tube makes a flat keyring charm rather than one that wraps around a strap.
- Longer body: Lengthening the tube past 15 inches works, but use slightly denser tension so the tube doesn’t sag under its own weight.
- Corn snake colors: Try classic orange and black bands.
- Ombré effect: Hold two strands together and gradually swap out one color every few rounds.
Personalization Ideas
- Birthstone stripes: Work the stripes in a color matching the recipient’s birth month.
- Initial charm: Add a small crocheted letter charm to the same jump ring as the snake.
- Year of the Snake gift: Make a short-bodied version with a 4-inch tube as part of a zodiac gift set.
Looking for more quick bag charms? The crochet kawaii ladybug keychain and crochet watermelon keychain are fun small projects to try next.
Finishing and Care
Trim all yarn tails close and weave in any loose ends twice through different stitches for security. Give the head a final squeeze to check for lumps before calling it done.
To clean the snake, spot clean it with a damp cloth. Avoid machine washing, since tumbling strains the keychain attachment and can loosen the safety eyes over time.
Photo-Ready Coiling
For photos, coil the snake into a loose figure eight with the head resting on top of the first loop. It looks more lifelike than a straight line and shows off the stripes from more angles in a single shot.
Frequently Asked Questions
Can I make this without safety eyes?
Yes. Embroider a small satin-stitch X or a French knot at the same positions given for the safety eyes. This is the safer choice for a keychain going to a child under three.
Why do my stripes look slanted?
Continuous spiral rounds naturally create a small jog at each color change. Keep your marker in the first stitch of every round and use the color change method in Step 6 for neater stripes.
How long should the body be for a standard keychain?
Six to eight inches gives you a compact charm that won’t tangle with your keys. Go longer only if you want it to wrap around a bag strap or wrist.
Does the body need to be stuffed?
No. Many makers leave the body empty for a soft, coilable feel and stuff only the head.
Final Notes
This crochet snake keychain amigurumi comes together in one continuous piece, with clear counts for the head and a simple tube for the body. Pick your colors, set the length, and you’ll have a playful little snake ready for your keys or bag. Happy crocheting!