
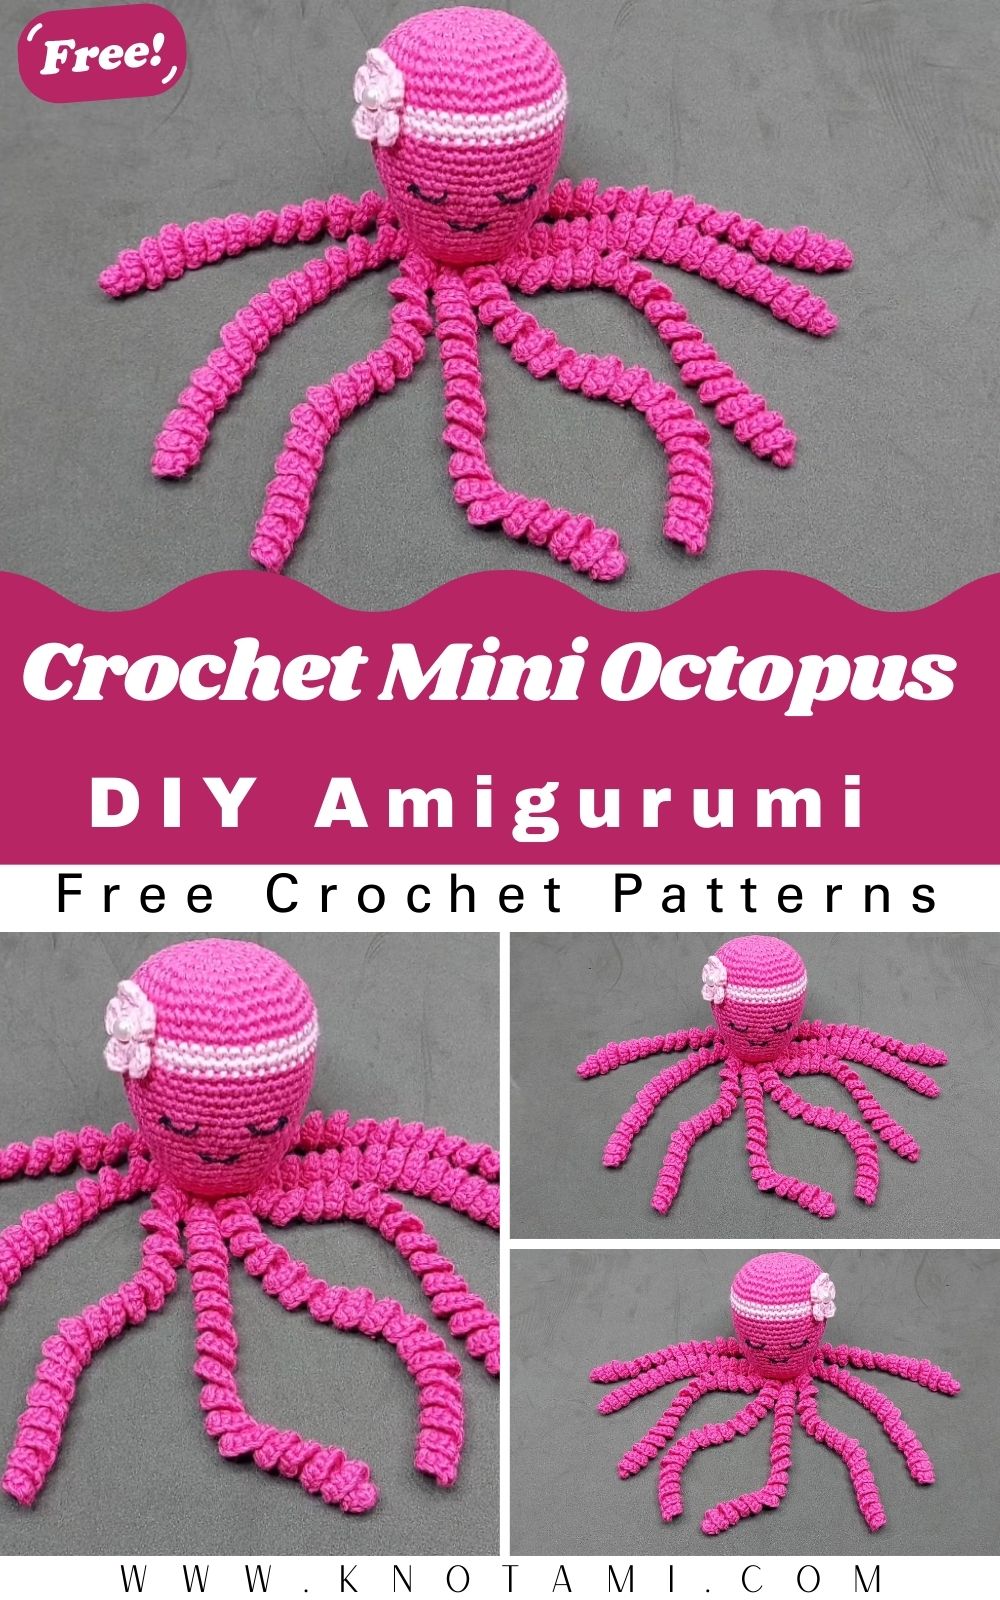
If you are looking for a project that is both adorable and rewarding, you have come to the right place because this free crochet octopus amigurumi pattern is exactly what you need. Crocheting toys, often called amigurumi, might seem intimidating at first, but this specific design is tailored for success. Whether you want to make a soft companion for a newborn or a quirky gift for a friend, this octopus is a versatile choice. You will love how quickly the head takes shape, and seeing the curly tentacles come to life is truly magical.
Moreover, using a free crochet octopus amigurumi pattern allows you to experiment with different colors and textures without any financial pressure. This guide focuses on using soft cotton yarn, which ensures your creation is durable and safe for little hands to hold. Since the pattern uses basic stitches like the single crochet and simple increases or decreases, you will find it very easy to follow along. Furthermore, the added decorative touches like the tiny flowers and expressive eyes give your octopus a unique personality that store-bought toys simply cannot match.
After you watch the embedded video above, you will have a much clearer vision of how the stitches should look. While the written instructions are detailed, seeing the hand movements in the video helps clarify the tricky parts, especially when you are working on the spiraling tentacles. Consequently, combining the visual demonstration with this written free crochet octopus amigurumi pattern creates the perfect learning environment for any crafter.
Skill Level: Beginner to Intermediate
This project is rated as easy because it primarily utilizes the single crochet stitch. However, because it involves working in a magic ring and performing invisible decreases, it provides a great learning opportunity for a motivated beginner. If you know how to hold a hook and pull through loops, you can definitely master this free crochet octopus amigurumi pattern.
Tutor’s Suggestions
To get the best results from this free crochet octopus amigurumi pattern, I suggest paying close attention to your stitch tension. If your stitches are too loose, the stuffing might peek through the holes, which can take away from the professional look of your amigurumi. Additionally, I recommend using a stitch marker at the beginning of every round. Since we are working in continuous spirals, it is very easy to lose track of where a new row starts. Finally, always choose high-quality stuffing to ensure your octopus keeps its round shape even after many hugs.
Materials Needed
To start your journey with this free crochet octopus amigurumi pattern, gather the following supplies:
-
Cotton Yarn: You will need fuchsia pink for the main body and a lighter pink for the decorative stripe.
-
Black Yarn: A small amount of black yarn is necessary for embroidery.
-
Crochet Hook: A 2.5 mm hook is recommended for a tight, neat finish.
-
Fiberfill Stuffing: Use high-quality stuffing to give the octopus its plush feel.
-
Yarn Needle: Essential for sewing the opening shut and embroidering the face.
-
Tension: Keep it consistent throughout the project.
Step-by-Step Guide to the Octopus Amigurumi
Phase 1: Crafting the Head and Body
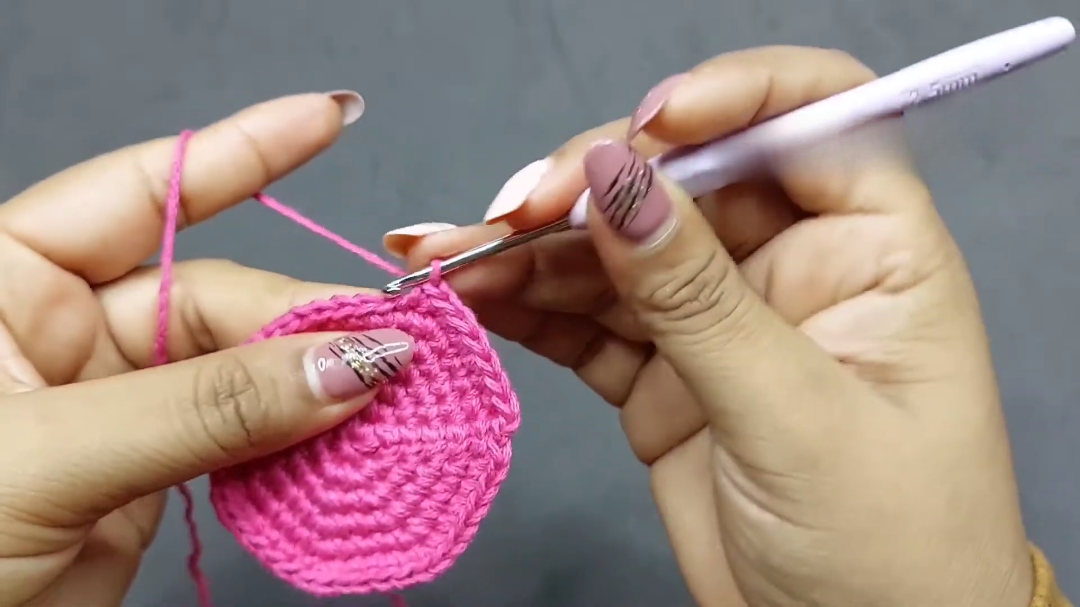
You begin this free crochet octopus amigurumi pattern by creating a magic ring with your fuchsia yarn. Inside this ring, you will work 8 single crochet stitches. After you pull the tail to close the circle, you will start the increasing rounds. In the second round, you must crochet two stitches into every single space, which brings your total to 16 stitches.
Following this, the third round involves a pattern of one single crochet followed by one increase. For the fourth round, you will do two single crochets and then an increase. Continue this mathematical progression until you reach round six, where you will have four single crochets followed by an increase. Transitioning from here, you will work two full rounds without any increases to give the head its height.
Phase 2: Color Changes and Shaping
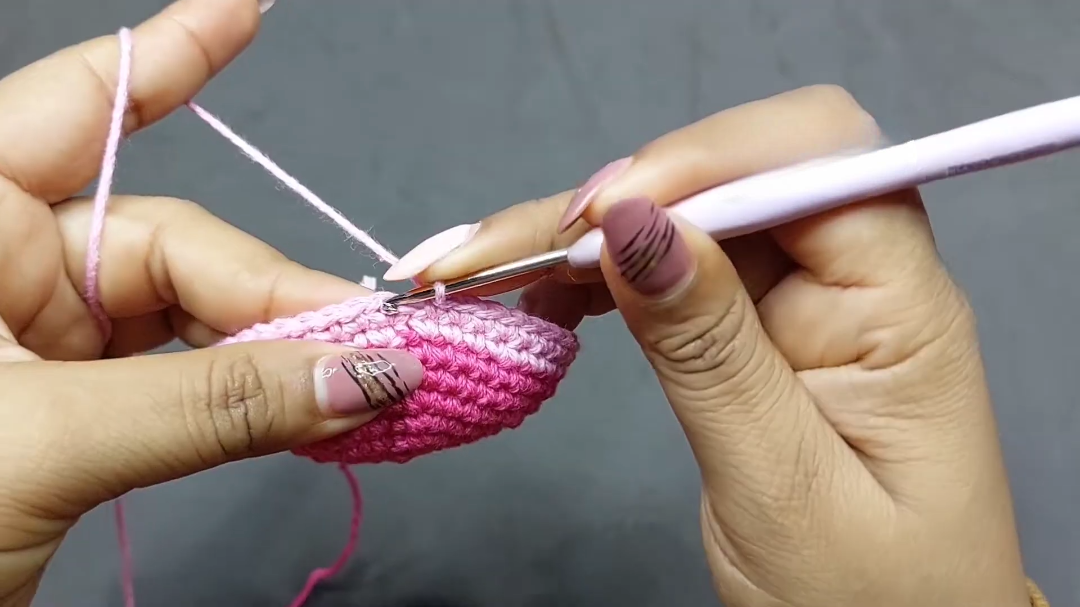
Now, it is time to add some flair to your free crochet octopus amigurumi pattern. Switch to your light pink yarn to create a beautiful stripe. You should work two rounds in this lighter shade. Afterward, switch back to the fuchsia yarn and crochet six more rounds of plain single crochet. This section forms the main “face” area of your octopus.
Once the height is established, you must begin the decreasing phase. You will start by crocheting four stitches and then performing a decrease. To keep the shape smooth, you will work two rounds of plain stitches between each decrease round. Eventually, you will decrease down to three stitches and a decrease, then two stitches and a decrease, and finally one stitch and a decrease.
Phase 3: Stuffing and Closing
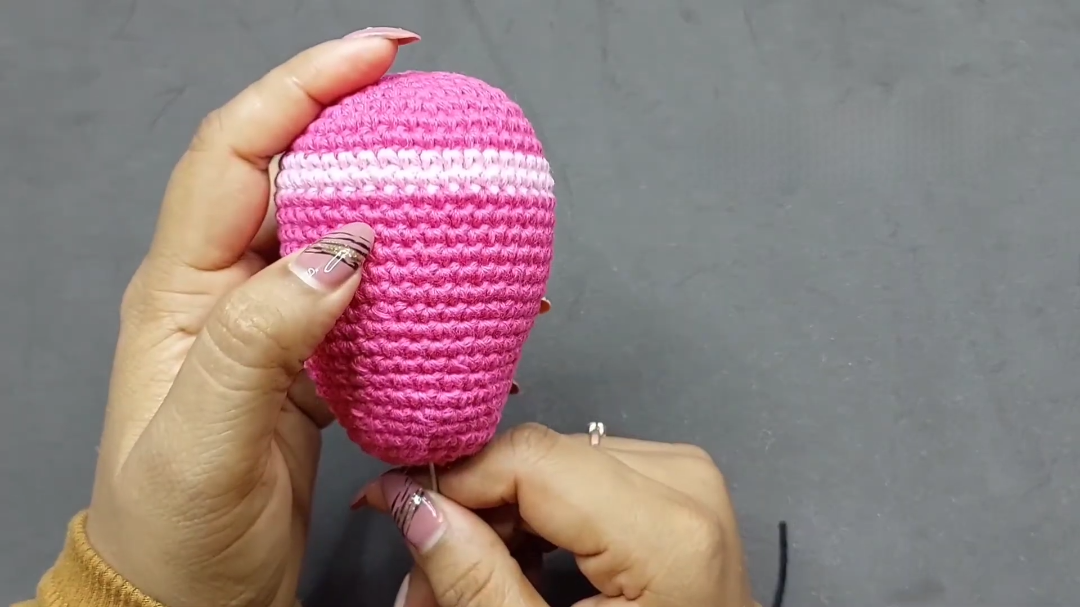
Before the opening becomes too small, you must firmly pack the head with fiberfill. Use your fingers or the end of your crochet hook to push the stuffing into the sides to ensure a perfect sphere. Once stuffed, perform a final round of pure decreases. Cut your yarn, leaving a long tail, and use your needle to weave through the remaining loops to pull the hole closed tightly.
Phase 4: Creating the Spiraling Tentacles
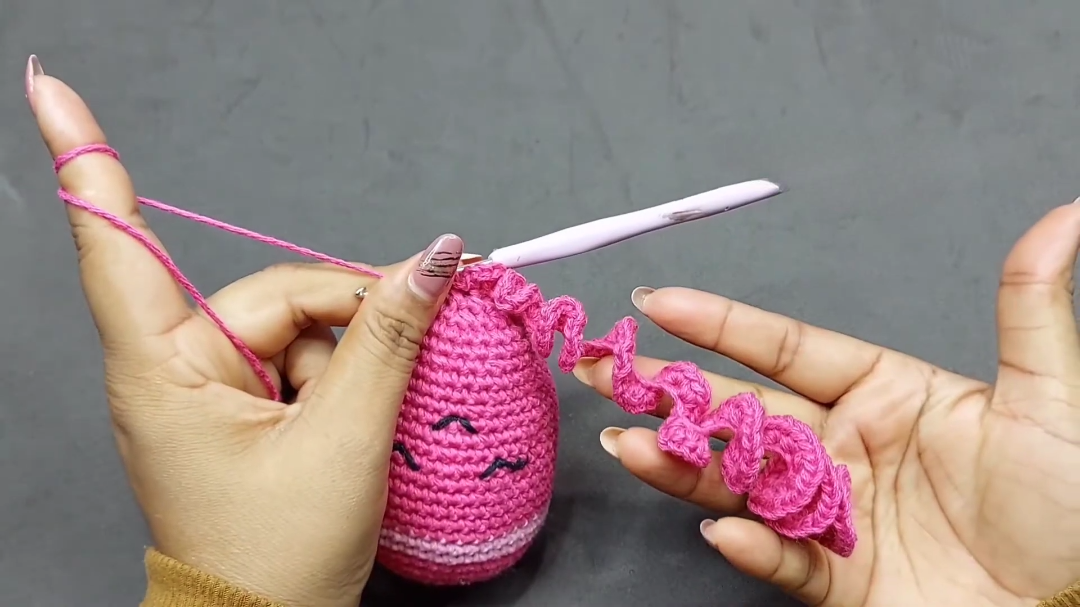
The most exciting part of this free crochet octopus amigurumi pattern is making the tentacles. Join your yarn at the bottom of the body. You will chain 60 for each tentacle. To create the “curl,” you must work three single crochet stitches into every single chain stitch starting from the second chain from the hook. Because you are putting so many stitches into a small space, the chain will naturally twist into a beautiful spiral. Repeat this process eight times around the base of the body.
Where Can We Use This Octopus?
This handmade creation is incredibly versatile. It is primarily used as a sensory toy for babies, as the curly tentacles mimic the feel of an umbilical cord, providing comfort to newborns. Furthermore, you can use it as a vibrant nursery decoration or a “worry pet” for older children. Because it is so cute, it also makes a fantastic keychain if you scale down the yarn size.
Tips and Tricks
-
Invisible Decrease: Instead of a standard decrease, use the invisible decrease method by picking up only the front loops of the next two stitches. This makes the “seam” of the decrease nearly disappear.
-
Spiral Management: If your tentacles aren’t curling enough, ensure you are definitely putting three stitches in every single chain.
-
Steam Blocking: If the tentacles look a bit messy, you can lightly steam them with an iron (don’t touch the yarn!) to set the curls.
-
Safety First: If you are giving this to a baby, always embroider the eyes rather than using plastic safety eyes to prevent choking hazards.
Common Mistakes to Avoid
One frequent error when following a free crochet octopus amigurumi pattern is forgetting to count stitches. Even one extra stitch can make the head look lopsided. Another mistake is stuffing the toy too lightly; over time, the stuffing settles, and your octopus might look deflated. Lastly, be careful not to split the yarn with your hook, as this can create fuzzy spots on the surface of your toy.
Frequently Asked Questions
1. What is the best yarn for this free crochet octopus amigurumi pattern?
Cotton yarn is the best choice because it has great stitch definition and does not pill as much as acrylic. It is also washable, which is a huge plus for baby toys.
2. How long does it take to finish this project?
For an intermediate crocheter, this octopus usually takes about 3 to 4 hours. Beginners might need a bit more time to get the hang of the tentacle curls.
3. Can I make the tentacles longer?
Yes, you can simply increase the initial chain count. For instance, if you want very long legs, you could chain 80 or 100 instead of 60.
4. Why is my octopus head not round?
This usually happens if the increases or decreases are not placed evenly. Make sure you are following the count in the free crochet octopus amigurumi pattern exactly.
5. How do I clean my crochet amigurumi?
You should hand wash it in cool water with mild soap and let it air dry completely to maintain the shape and integrity of the stitches.