
Bright red stitches curve into two pincer claws and a squishy round shell in the how to crochet crab amigurumi pattern, a free beach theme project. It turns into a huggable little sea creature for your desk or shelf, and its round eyes give it a curious, playful look.
The crab uses basic amigurumi shaping and a 2 mm hook, so it’s friendly for newer crocheters while still coming out neat and sturdy. Every piece is written out with exact round and stitch counts: the shell, two claws and six legs. Many makers end up crocheting a whole crab family in different colors for a beachy display, and it makes a fun handmade gift for anyone who loves quirky sea life.
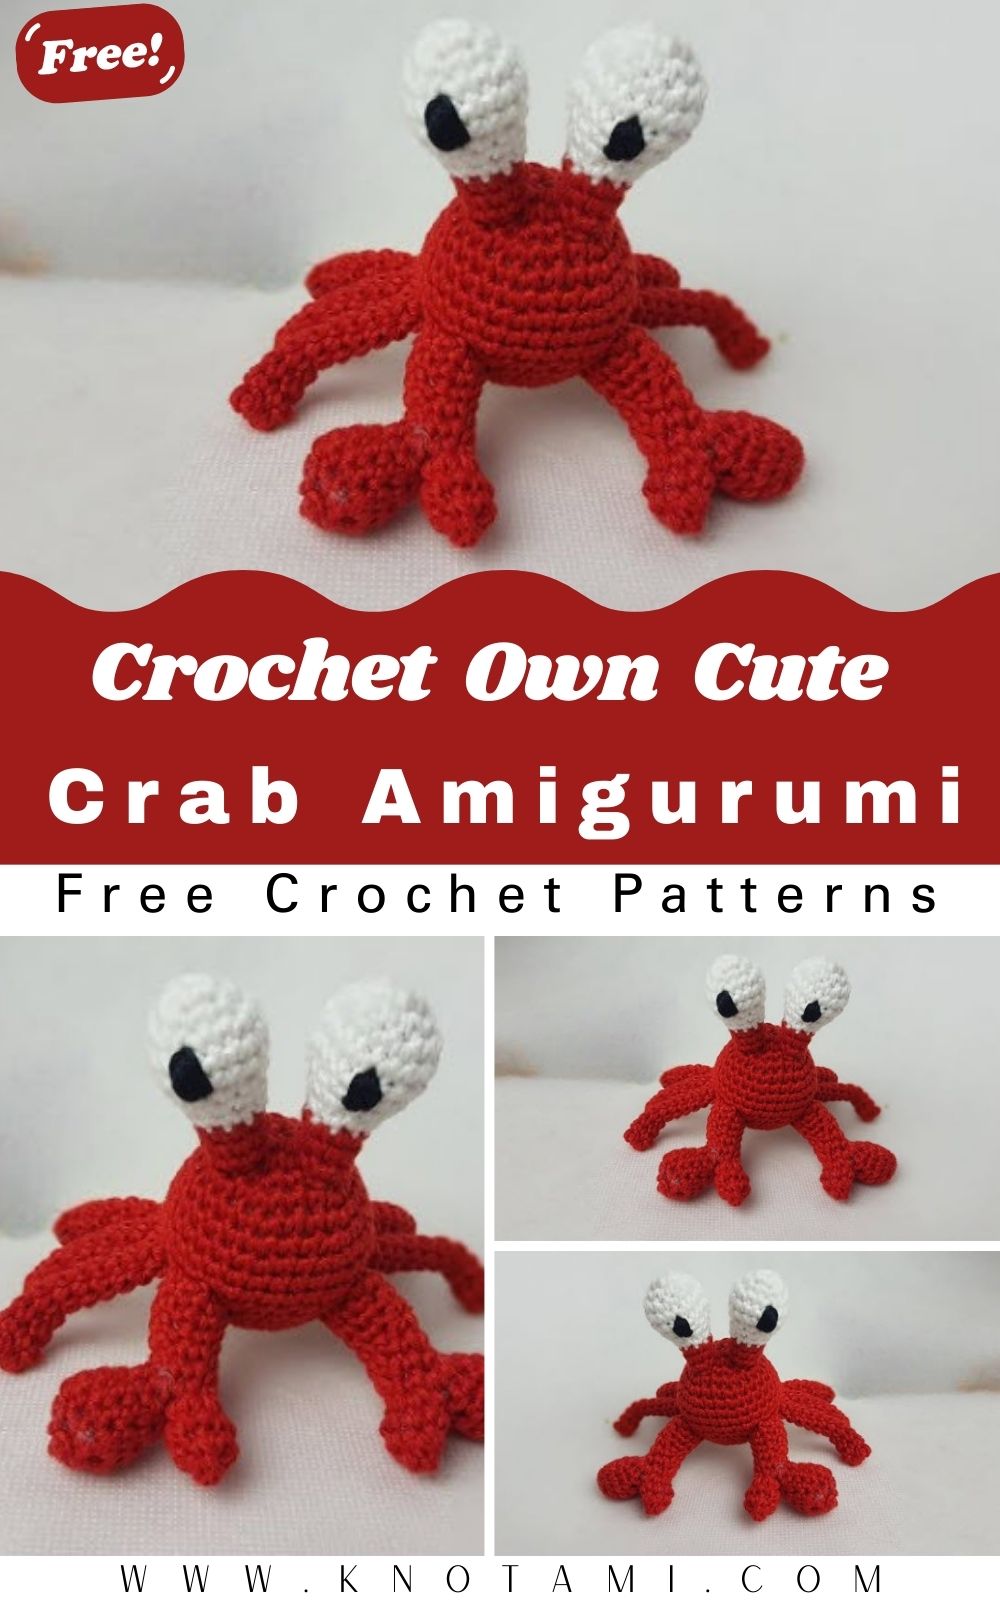
Amigurumi Crab Overview
The finished crab has a rounded shell body, two matching claws, three small legs on each side, and eyes set toward the front for a curious expression. Classic crab red is always a winner, but coral, sandy tan and seafoam look lovely too. You’ll need a magic ring, single crochet, and basic increases and decreases.
- Time: 10 minutes of prep, about 1.5 to 2 hours of stitching, and 30 minutes for stuffing and assembly
- Construction: The shell is worked in the round and stuffed. The claws and legs are small separate pieces sewn on at the end.
- Finished size: The shell is about 2 in (5 cm) across and 1.5 in (4 cm) tall. With the claws attached, the crab spans about 3.5 in (9 cm).
Materials
- Yarn: Sport or light DK cotton, about 15 g or 50 yd (46 m) in your shell color. Use the same color for the claws and legs, or a contrast color if you prefer.
- Hook: 2.0 mm (US 4 steel / B-1)
- Eyes: Two 6 mm safety eyes, or about 1 yd (1 m) each of black and white yarn to embroider them
- Stuffing: About 8 g polyester fiberfill
- Notions: Stitch markers, tapestry needle, scissors, pins
- Optional: Felt scraps for small beach details
Gauge
With the 2.0 mm hook, 7 sc and 7 rounds make a 1 in (2.5 cm) square worked in the round. The 42-stitch shell round should measure about 6 in (15 cm) around. Gauge only changes the size, but even tension keeps the shell round instead of flaring or pulling in.
Abbreviations
- MR – magic ring
- sc – single crochet
- inc – increase (2 sc in the same stitch)
- dec – invisible decrease
- sl st – slip stitch
- st(s) – stitch(es)
- Rnd – round; the number in brackets is the stitch count at the end of the round
Before You Start
Work in continuous rounds without joining or slip stitching between rounds. Keep a stitch marker in the first stitch of each round and move it up as you go.
Read through the whole pattern once before you start. The shell gets stuffed and closed first, the claws get a light stuffing, and the legs stay unstuffed. You’ll need 1 shell, 2 claws and 6 legs in total.
Step-by-Step Crab Pattern
Step 1: Crochet the Shell
The shell starts at the top center and works down.
- Rnd 1: 6 sc in MR (6)
- Rnd 2: inc in each st around (12)
- Rnd 3: (sc, inc) x 6 (18)
- Rnd 4: (2 sc, inc) x 6 (24)
- Rnd 5: (3 sc, inc) x 6 (30)
- Rnd 6: (4 sc, inc) x 6 (36)
- Rnd 7: (5 sc, inc) x 6 (42)
- Rnds 8–14: sc around (42), 7 rounds total
Stitch check: Count 42 stitches at the end of Rnd 7 before you start the even rounds. One missed increase here shows as a flat patch on the finished shell.
Pro tip: Stagger the increases from Rnd 4 onward. Work half the leading sc, the increase, then the rest of the sc to close each round, and the shell stays round instead of hexagonal.
Step 2: Add the Eyes, Stuff and Close
Pick one side of the shell as the front. If you’re using safety eyes, insert them between Rnds 7 and 8, with 6 stitches between them, and fasten the backs from inside.
Then decrease to close the bottom:
- Rnd 15: (5 sc, dec) x 6 (36)
- Rnd 16: (4 sc, dec) x 6 (30)
- Rnd 17: (3 sc, dec) x 6 (24). Start stuffing.
- Rnd 18: (2 sc, dec) x 6 (18)
- Rnd 19: (sc, dec) x 6 (12). Top up the stuffing.
- Rnd 20: dec x 6 (6)
Stuff in small pinches so the shell is firm and round without stretching the stitches. Fasten off, weave the tail through the front loops of the last 6 stitches, pull the hole closed and weave the end inside. Press the top of the shell down gently as you close it. A slightly flattened dome looks more like a crab than a perfect ball.
Step 3: Crochet the Claws (Make 2)
- Rnd 1: 6 sc in MR (6)
- Rnd 2: (sc, inc) x 3 (9)
- Rnd 3: (2 sc, inc) x 3 (12)
- Rnds 4–5: sc around (12), 2 rounds total
- Rnd 6: (2 sc, dec) x 3 (9)
- Rnd 7: (sc, dec) x 3 (6). Stuff the rounded pincer end lightly.
- Rnds 8–10: sc around (6), 3 rounds total for the arm
Sl st into the next stitch and fasten off with a 10 in (25 cm) tail for sewing. Each claw is about 1.4 in (3.5 cm) long.
Shape the pincer: Thread a length of matching yarn and bring it out at the center of Rnd 1. Take a stitch straight down over the tip to Rnd 3, then back up. Repeat once more, pulling snugly so the tip splits into a V-shaped pincer. Knot the yarn and hide the end inside.
Match check: Hold the two claws side by side. Both should have 10 rounds and the same V depth before you sew them on.
Step 4: Crochet the Legs (Make 6)
- Rnd 1: 4 sc in MR (4)
- Rnds 2–5: sc around (4), 4 rounds total
Sl st into the next stitch and fasten off with an 8 in (20 cm) tail. Each leg is about 0.75 in (2 cm) long. Legs don’t need stuffing; the tight 4-stitch tube holds its shape on its own.
Step 5: Assemble the Crab
- Claws: Find the front center of the shell, midway between the eyes. Pin one claw on each side along Rnd 11, with 10 stitches between them. Angle the pincers slightly upward and forward.
- Legs: Pin 3 legs on each side along Rnd 13. Start 3 stitches behind each claw and leave 3 stitches between legs.
Look at the crab from the front and from above to check that everything is balanced. Then sew each piece on around its full opening, going through several layers of yarn, not just one surface stitch.
Step 6: Finish the Face
If you didn’t use safety eyes, embroider them now with black yarn between Rnds 7 and 8, 6 stitches apart. Add a small white highlight to each for extra sparkle. A 2-stitch smile between Rnds 9 and 10, centered under the eyes, is a sweet optional touch.
Watch the Video Tutorial
The video is a helpful visual companion for the magic ring, the claw shaping and the assembly. All the round-by-round counts are written above, so you can finish the crab from the text alone.
Common Mistakes
- Claws or legs of different sizes because the round counts drifted between pieces
- Adding safety eyes after Rnd 17, when the opening is too small to fasten the backs
- Sewing parts on before pinning and checking the balance
- Loose tension, which leaves gaps in the shell
Troubleshooting
- The shell looks floppy or too big: Your tension was loose during Rnds 2 to 7. Go down to a 1.75 mm hook and keep your stitches snug.
- The claws or legs don’t match: The counts drifted between pieces. Recount both and redo the one that’s off.
- Stuffing shows through: The stitches are too loose or the shell is overstuffed. Use a bit less stuffing, and tighten your tension next time.
- The crab tips forward: The claws are sewn too low or are too heavily stuffed. Move them up to Rnd 10 or take out a little stuffing.
Finishing and Safety
Weave every tail into the inside of the body. Check that the claws, legs and eyes are anchored firmly. If the crab is going to a baby or young child, embroider the eyes instead of using safety eyes.
Washing and Care
Hand wash gently in cool water when needed, reshape the crab while it’s damp, and lay it flat to dry away from direct heat.
Tide Pool Display Ideas
A crab looks even cuter when it has a little scene to live in. Here are a few easy ways to show it off.
- Shell dish: Set the crab in a shallow bowl with real seashells and a bit of sand for a mini tide pool.
- Glass jar scene: Place a crab inside a wide glass jar with a layer of sand and a few pebbles.
- Bookshelf beach: Line up a crab family in different colors along the edge of a shelf, as if they’re walking across it.
- Bathroom decor: A coral or seafoam crab adds a light beach feel next to a soap dish, away from splashes.
- Summer party table: Scatter a few crabs around snack bowls at a beach-themed birthday.
To build a full sea-life set, add the crochet turtle amigurumi and the octopus amigurumi next to your crab. For something wearable to go with the beach theme, the crochet beach skirt is a fun summer make.
Tiny Accessories for Your Crab
- Sun hat: 6 sc in MR, then inc in each st around (12), then (sc, inc) x 6 (18) in front loops only for the brim. Tack it to the top of the shell.
- Hair bow: Chain 10, tie the chain in a knot at the center, and sew it just above one eye.
- Felt starfish: Cut a small yellow felt star and glue it to one claw, as if the crab is holding a treasure.
- Name tag: Stitch a tiny loop to the back of the shell and hang a paper tag with a name or date for a gift.
FAQs
Can I use worsted weight yarn instead?
Yes. Use a 3.5 mm hook and the same rounds, and keep your stitches tight. The shell comes out about 2.75 in (7 cm) across, and the whole crab spans about 5 in (12.5 cm).
Do I need to stuff the legs?
No. The 4-stitch legs hold their shape on their own. Only the shell and the rounded ends of the claws need stuffing.
How many legs does the crab have?
Six, three on each side, plus the two claws. For a more realistic eight-legged crab, make 8 legs and space them 2 stitches apart along Rnd 13.
Is the crab safe for babies?
Use embroidered eyes and sew every part on very firmly. Safety eyes and small parts are not recommended for children under three.
A Little Beach Buddy for Every Season
Whether it’s the middle of summer or a gray winter afternoon, a little red crab brings a bit of the seaside indoors. Once the shell is stuffed and the claws are on, you’ll probably want a second one in another color. And if two legs don’t quite match on your first try, that just gives your crab a little character.