
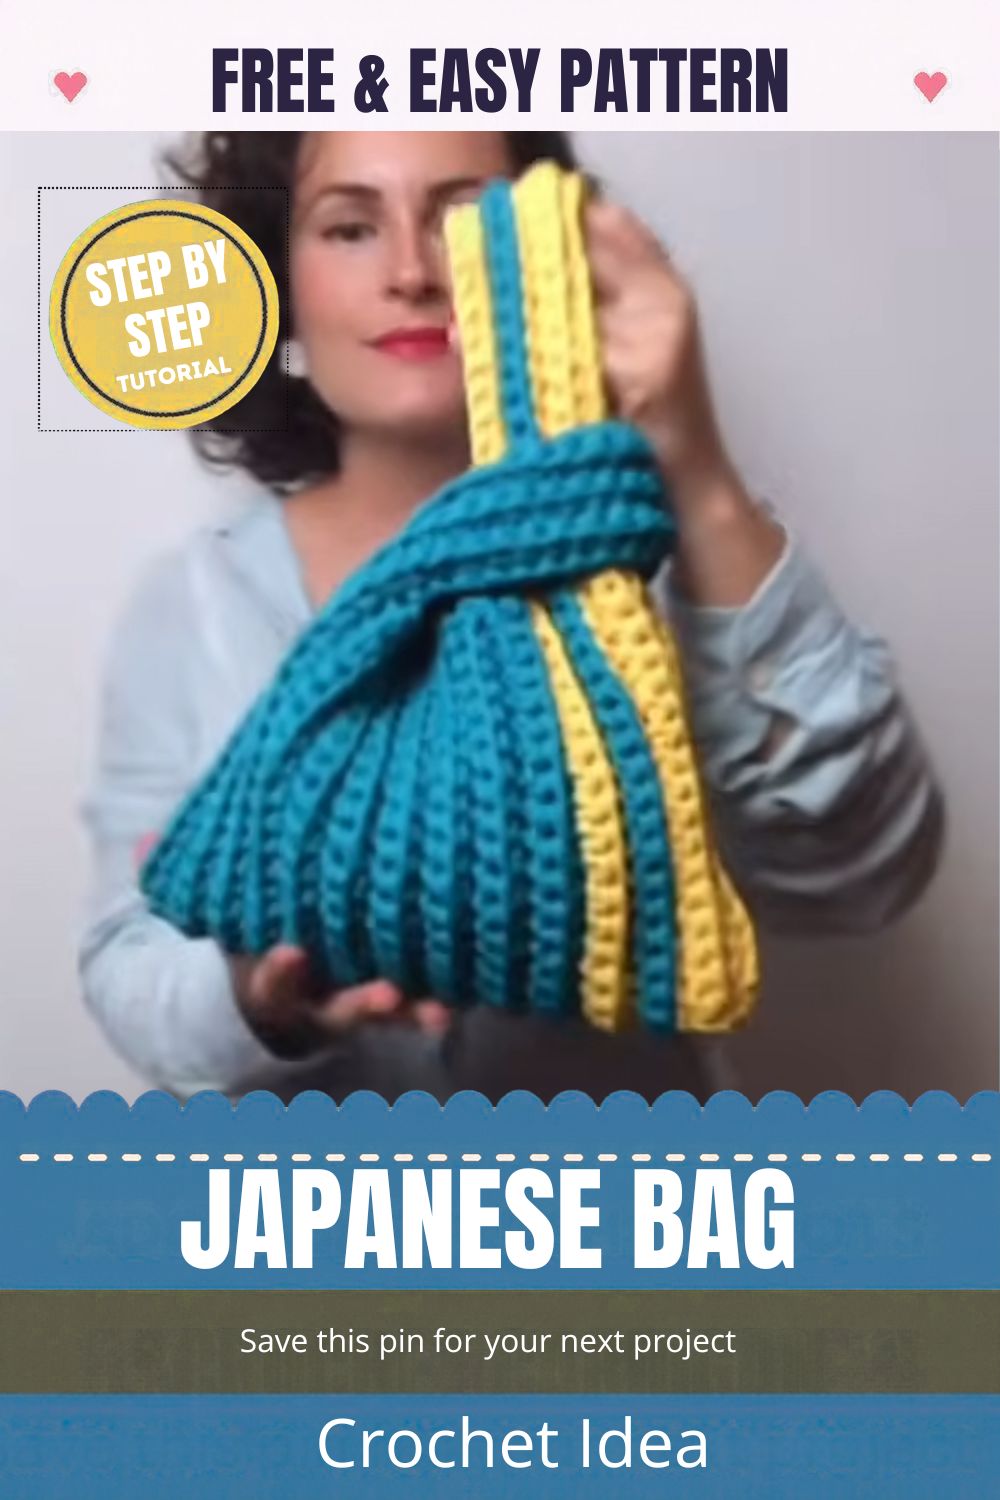
A long teal strap slides through a shorter yellow-edged loop, and with one gentle tug the top of the Style Crochet Japanese Bag With a Knot Handle gathers shut. No zipper, no button, just a soft knot that holds everything in place.
So why does the design stand out? Mainly, it’s the closure. Instead of hardware, the two handles do the work, so the bag opens and closes in a second. On top of that, chunky T-shirt yarn gives the body a firm shape, and back-loop rows add a ribbed texture without any tricky stitches. As a result, the crochet Japanese bag becomes a small tote for keys, a phone, and a wallet. Along the way, you’ll build the teal body, add yellow stripes, and finish the knot handle, with a quick check at every stage.
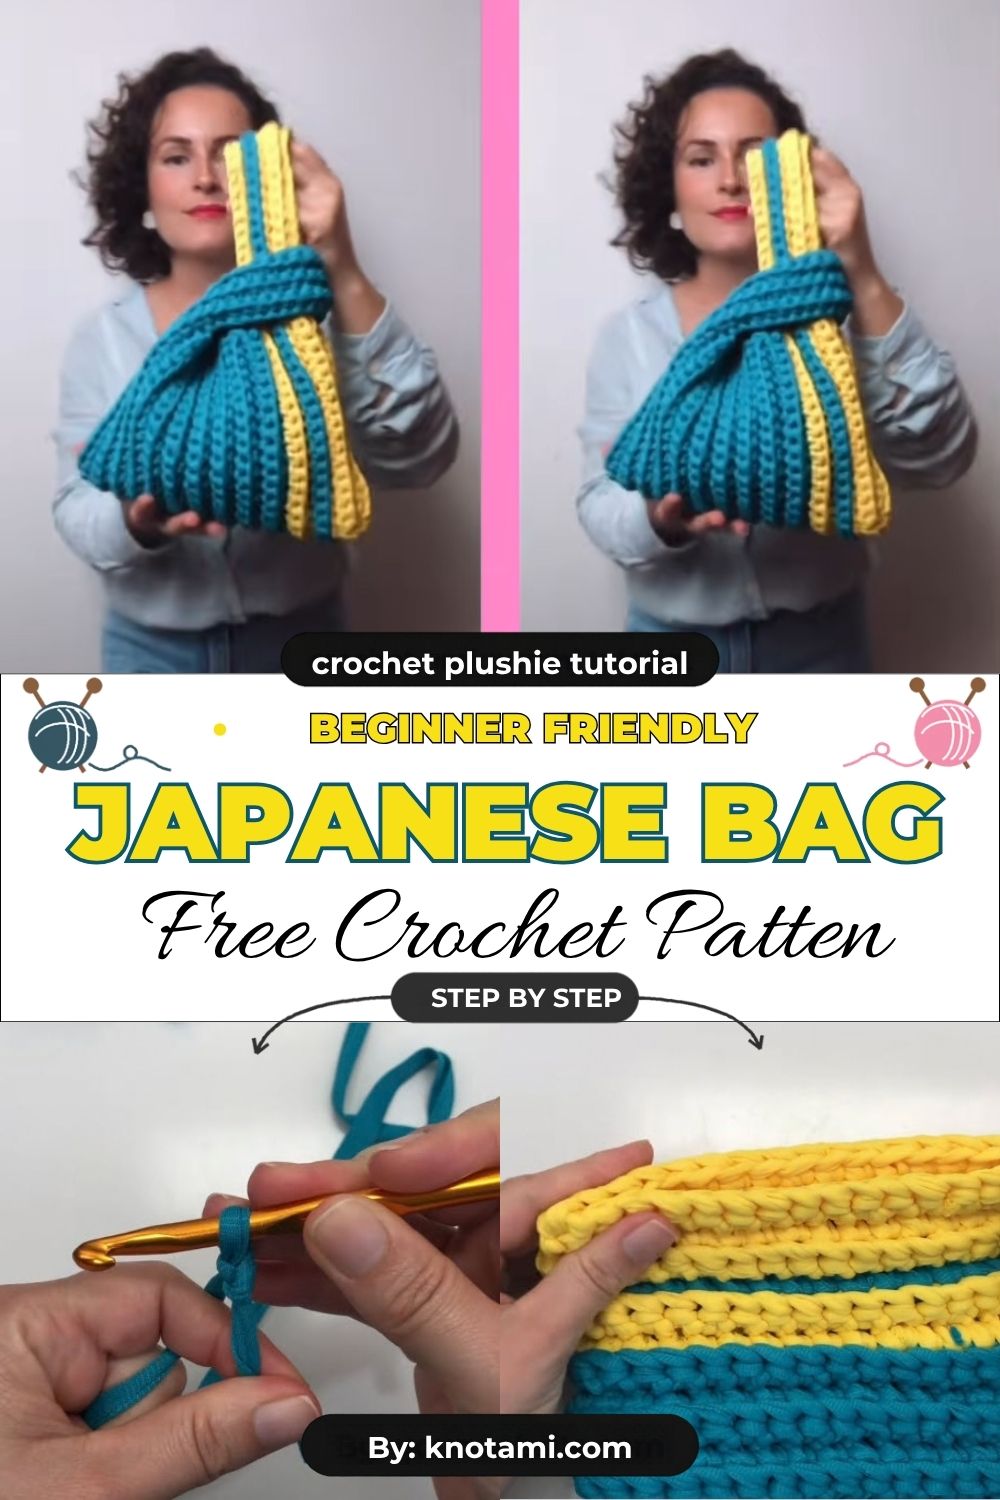
Crochet Japanese Bag at a Glance
A Japanese knot bag has two handles of different lengths. First, the long one threads through the short one. Then you pull it snug, and the top closes. The idea borrows from furoshiki, the Japanese art of wrapping and carrying goods in knotted cloth.
Here, teal yarn forms the body, while yellow covers the stripes and trim. Because each row is worked in the back loop, it leaves a raised ridge, so the fabric looks ribbed. Since the yarn is thick, the rows also build up fast.
- Finished size: about 12 inches (30 cm) wide and 9 inches (23 cm) tall, handles not included
- Skill level: easy
- Gauge: about 10 hdc and 10 rows = 4 x 7 inches (10 x 18 cm) in back-loop hdc
What You’ll Need for a Crochet Japanese Bag
- About 1 cone of teal T-shirt yarn and half a cone of yellow
- 9 mm (US M/N-13) crochet hook
- 2 stitch markers
- Large-eye tapestry needle and sharp scissors
- Tape measure
T-shirt yarn usually falls in the jumbo group. If your cone uses a different label, compare it with the Craft Yarn Council weight chart before you buy a substitute.
Time Box
- Prep: 15 minutes to check the cones for joins
- Stitching: about 2 to 3 hours for the body, stripes, and handles
- Finishing: 30 to 45 minutes for seaming and hiding ends
Before You Crochet a Japanese Bag
T-shirt yarn has very little give. For that reason, keep your tension loose, or the hook will drag. On the bright side, cut ends curl instead of fraying, so they’re easy to hide.
Next, check your yarn for joins. Many cones have sewn seams inside the strand. If you hit one mid-row, cut it out and restart at the end of the row.
How to Crochet a Japanese Bag Step by Step
The pattern uses US terms. You’ll work half double crochet (hdc) for the body and single crochet (sc) for the edging and seams.
Step 1: Make a Slip Knot and Start the Chain
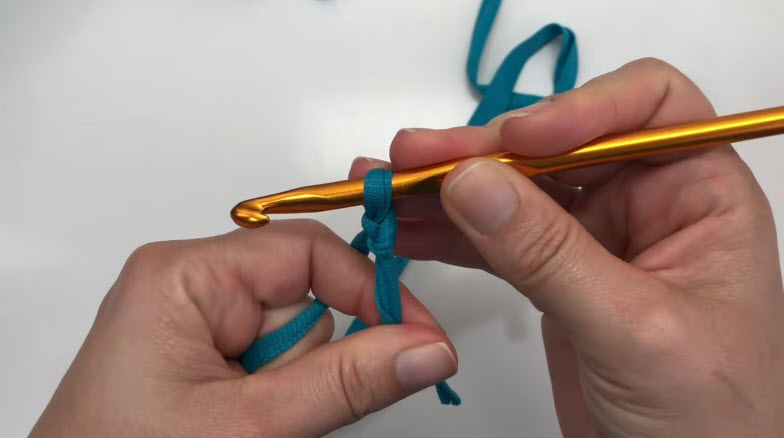
First, tie a slip knot in the teal yarn and place it on the 9 mm hook. Then chain 31.
Keep the chains loose, since tight chains in thick yarn make the first row hard to work.
Loop check: the knot should sit close to the hook, and the loop should slide freely with no pinch.
Step 2: Work the First Row
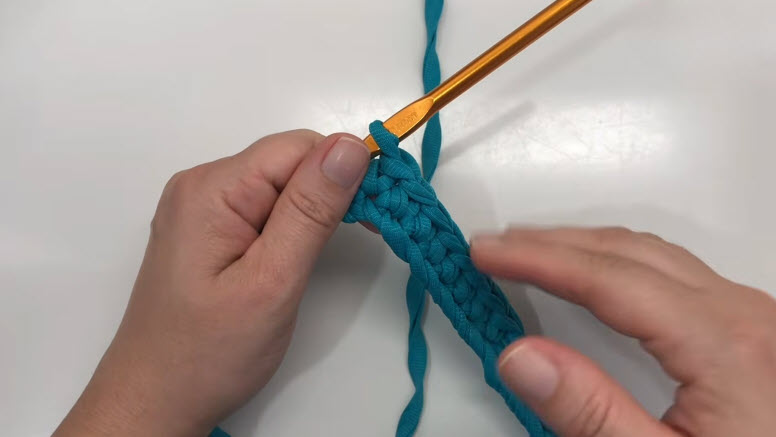
Next, hdc in the 3rd chain from the hook. After that, work 1 hdc in each chain across, for 29 stitches.
As you go, pinch the work right under the hook. That way, the strip won’t twist.
Measure now: the strip should lie flat at about 12 inches. If it spirals, a chain most likely twisted before you started.
Step 3: Build the Main Teal Panel
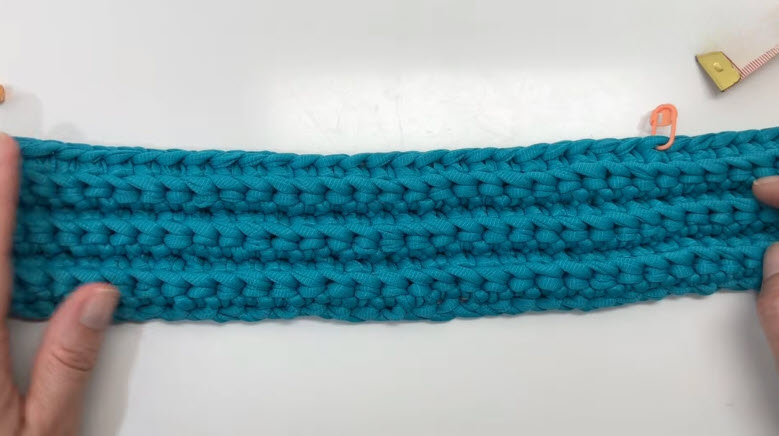
Now chain 1 and turn. Work 1 hdc in the back loop only of each stitch across. Then repeat that row until you have 20 rows in total.
The back loop creates the raised ridge on every row. Meanwhile, keep 29 stitches in each row.
Edge check: lay the panel flat. Both side edges should run straight, with no slant. Also, a marker on the edge helps you count rows later.
Step 4: Work the Long Teal Strap
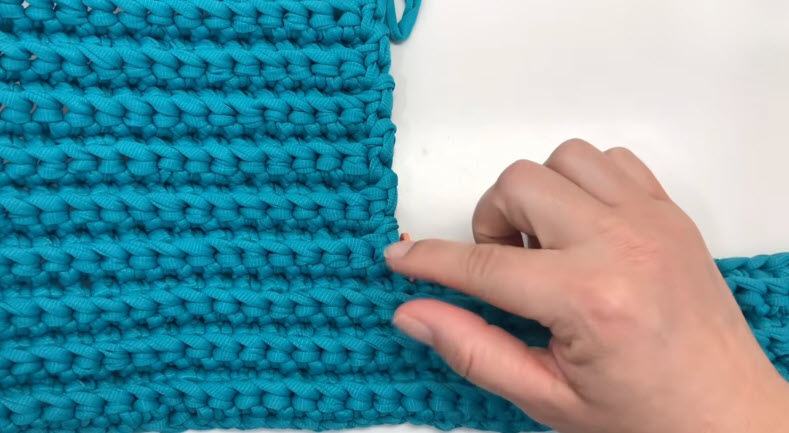
The panel doesn’t stay one width. Instead, a narrow section continues past the body at one end, and it becomes the long strap.
For Row 21, place a stitch marker after the 8th stitch. Then work back-loop hdc over those 8 stitches only. Continue for 24 rows, or about 17 inches (43 cm), and fasten off with a long tail.
Corner check: where the wide panel meets the strap, the corner should be crisp, with the marker right at the turn. Count 8 stitches on every strap row.
Step 5: Join the Yellow Yarn
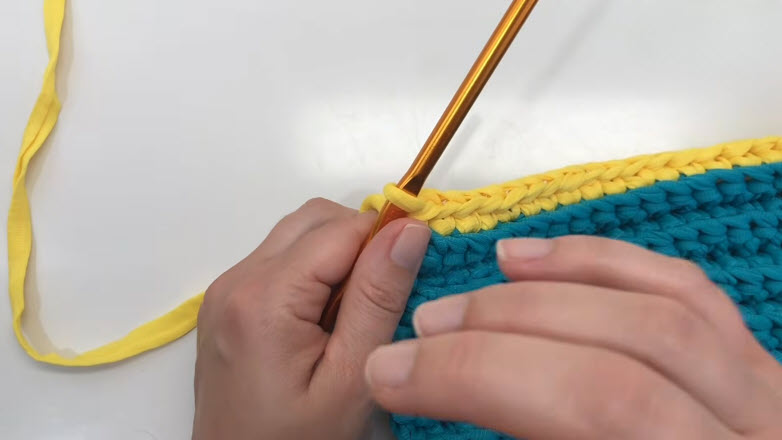
After that, turn the panel so the foundation chain edge faces up. Join yellow at the right corner with a slip stitch.
Then work 1 sc in each chain along the edge, for 29 sc. Keep every stitch the same size so the stripe lies flat.
Why it matters: if the yellow row ruffles, you added stitches; if it pulls in, you skipped some.
Step 6: Add the Yellow Stripes
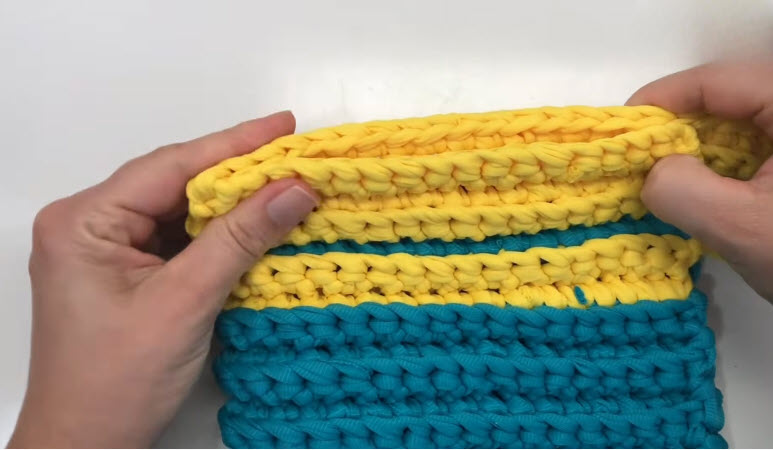
Now build the stripes in back-loop hdc. Work 2 yellow rows, then 1 teal row, and finally 2 more yellow rows.
Rather than cutting, carry the unused color up the side. As a result, you’ll have far fewer ends to weave in.
Stretch test: gently pull the top edge between your hands. The yellow rows should feel as firm as the teal ones.
Step 7: Make the Short Handle
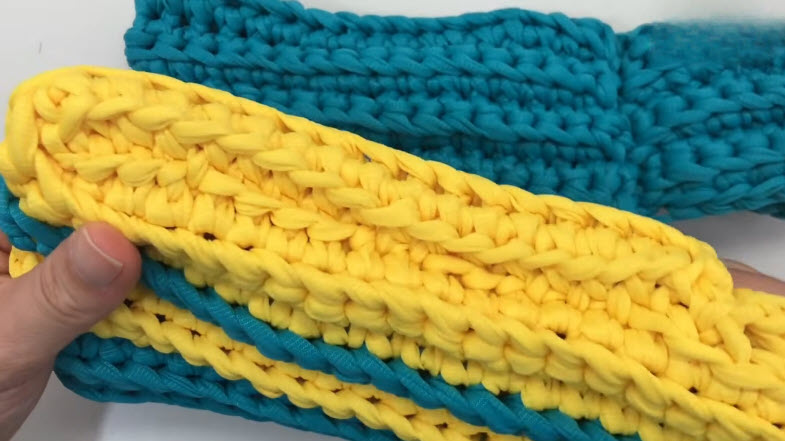
Next, work the short handle from the yellow end. Use the 8 stitches on the same side as the long strap, so both handles line up after folding. Work 10 rows in yellow, with 1 teal row in the middle.
Keep the tension the same as on the body. Otherwise, the handle may curl toward one side.
Width check: hold the short handle next to the long strap. Both should match at 8 stitches wide.
Step 8: Shape the Bag and Make the Knot Handle
Then fold the panel in half with the right sides out, so the teal and yellow ends meet at the top. Sc through both layers to join each side. After that, sew the end of each handle to the opposite top corner.
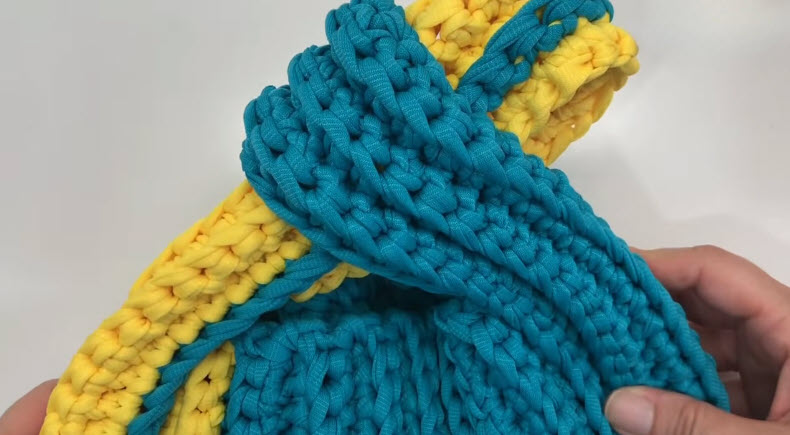
To close the bag, pass the long teal strap through the short yellow loop. Pull it snug, and the top gathers into a soft knot.
Fit check: the long strap should slide through without forcing. If it sticks, add 2 more rows to the short handle so the loop opens to about 4 inches.
Common Crochet Japanese Bag Mistakes
- Working too tight. Thick yarn barely stretches, so tight stitches are hard to enter.
- Losing count at the strap. To avoid it, move your marker up every few rows.
- Skipping the turning chain. Without it, the edges slant inward.
- A narrow short handle. After all, the long strap needs room to pass through.
- Pulling the color change tight. As a result, the stripe puckers.
Keeping the Crochet Japanese Bag Strap From Stretching
T-shirt yarn can grow once the bag holds weight. In fact, even a phone and a wallet can add length over time.
To slow it down, work a row of slip stitches along the inside edge of the strap. That way, the stitches act like a spine and resist the pull.
Another option is a strip of cotton ribbon threaded through the strap rows. Tack it at both ends with needle and thread, and the ribbon then takes the load instead of the yarn.
If the strap has already grown, undo the last few rows. Then finish it a little shorter than you think you need. For a cute extra, tie a small bow from our easy granny bow tutorial onto the strap end.
Bonus Section: Line Your Crochet Japanese Bag
Although the ribbed fabric is firm, small items like lip balm can still slip between stitches. So a quick lining helps.
- First, trace the folded bag on cotton fabric and add half an inch all around.
- Next, sew the two side seams and fold the top edge under.
- Finally, slip it inside and whip stitch the top edge to the last crochet row.
Caring for Your Crochet Japanese Bag
Hand wash the bag in cool water with mild soap. Afterward, press out the water with a towel instead of wringing it.
Then lay it flat to dry so the strap keeps its length. However, skip the dryer, because heat can shrink cotton T-shirt yarn.
Crochet Japanese Bag FAQs
What is a Japanese knot bag?
It’s a small bag with two handles of different lengths. To close it, you slip the long handle through the short one.
Can I use regular yarn instead of T-shirt yarn?
Yes, but the bag will feel softer. For a sturdier result, hold two strands of worsted cotton together.
Is the pattern good for beginners?
Mostly, yes. The rows are simple; still, the strap and seaming need care, so slow down there.
How do I stop T-shirt yarn from splitting?
Use a hook with a rounded head and keep your tension loose. Also, aim for the full loop, not the middle of the strand.
What fits inside the finished bag?
A phone, keys, and a slim wallet fit easily. For a matching set, our crochet pink wallet pattern slides right in.
Carry It, Then Make Another
Once the long strap glides through the yellow loop, your crochet Japanese bag is ready to carry. Next time, try navy with white or olive with cream for a fresh look. And if you’d like a hands-free option, the granny crochet fanny pack pattern makes a fun next bag.