
A cute pizza slice dangling from your keys gives off a charming feeling like you’re carrying a secret with you. This crochet pizza keychain pattern transforms amigurumi food into a quick and positive change, perfect for trinkets, gift tags, and keyrings, while its cute details will capture everyone’s attention.
Crochet trends have now moved beyond simple animals to food-themed designs, where small and interesting ideas are gaining traction. Food amigurumi is popular because its shapes are instantly recognizable and the colors stand out even in small sizes. Pizza slices are a great choice for this style, as their triangular shape remains visible even on a keychain, and the edge of the crust makes it even more appealing.
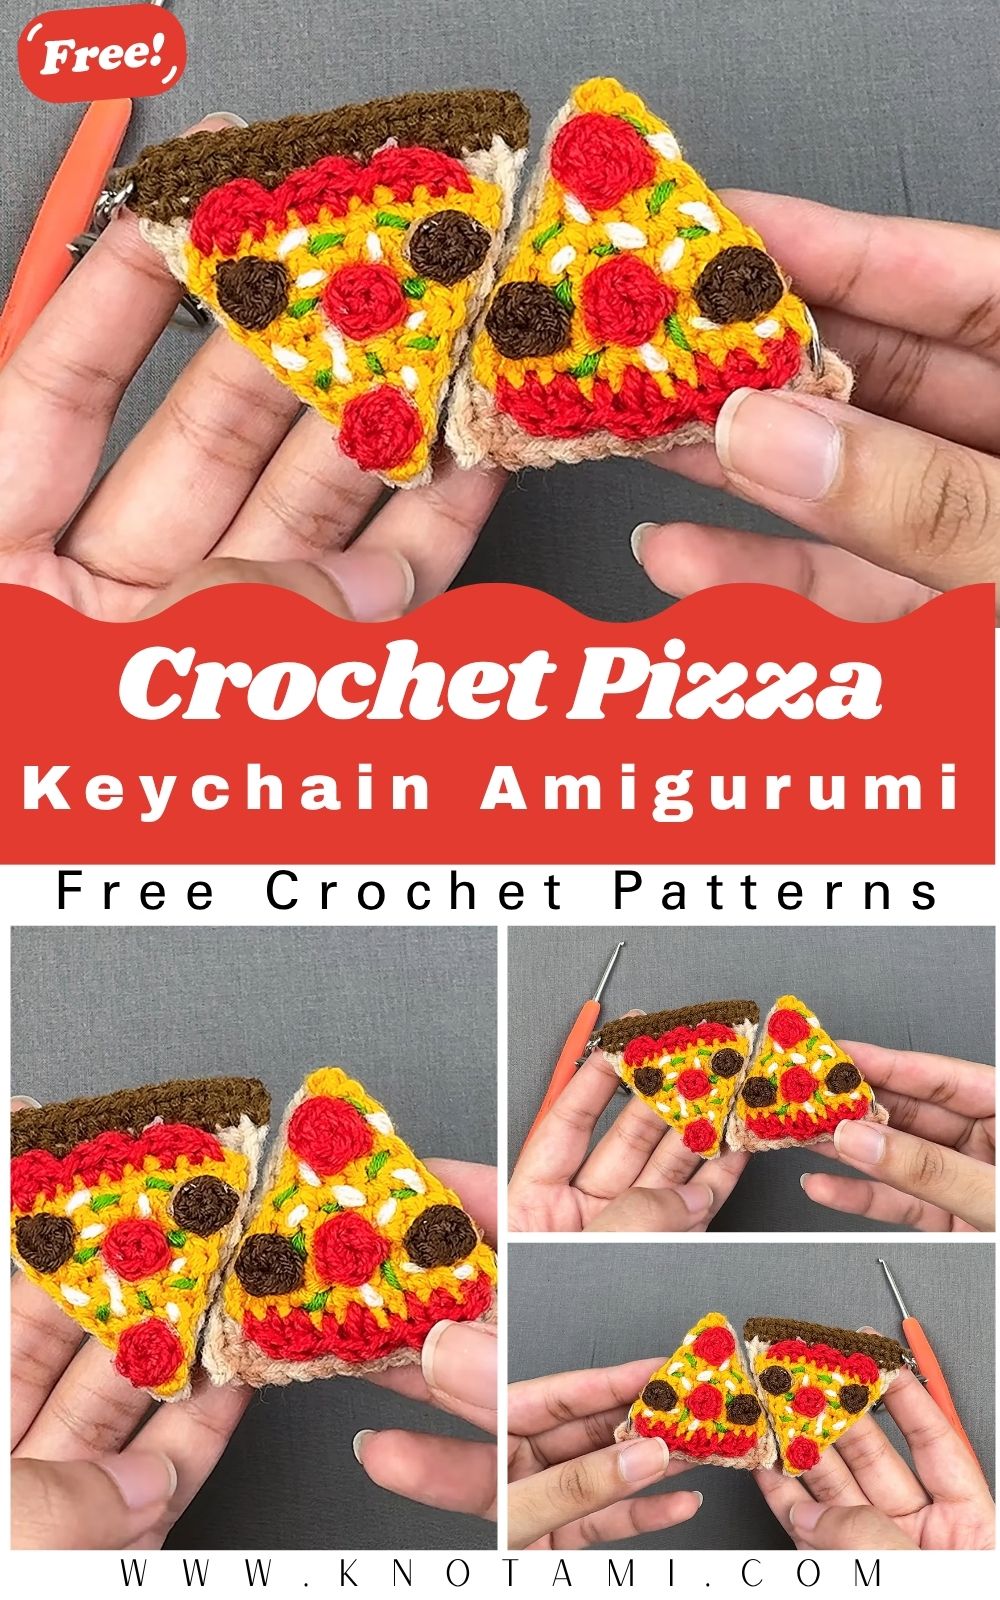
These mini projects also shine as gifts. You can crochet one in a short session, add a clasp, and turn it into a charming everyday accessory. Every slice comes out slightly different, which keeps it personal. You pick the crust tone, choose toppings, and decide on a sweet little face to match the owner.
Needed
- Yarn
- Yellow (cheese)
- Light brown/tan (crust)
- Red (sauce or pepperoni)
- Optional: black (olives), green (peppers), beige (mushrooms)
- Hook
- Small hook suited to your yarn (often 2.0–3.5 mm for keychain amigurumi)
- Needle
- Yarn/tapestry needle for sewing and weaving in ends
- Stuffing
- Polyester fiberfill (or yarn scraps for a firmer fill)
- Accessories
- Keychain ring or lobster clasp
- Jump ring
- Stitch marker
- Small safety eyes or black embroidery thread (for the face)
- Optional felt scraps (extra toppings)
Procedure
Step 1: Crochet the pizza base triangle
Begin on the cheese side and crochet a flat triangle, placing increases evenly so the edges stay clean. Keep your tension firm to prevent gaps. The video shows the stitch counts and exact increase placement.
Step 2: Add the crust edge
Switch to tan or light brown and stitch along the wide end to create the crust band. Shape the corners neatly so the crust curves slightly. That curve makes the slice look more realistic.
Step 3: Crochet the back and join
Make a second triangle for the back, using cheese or sauce color depending on your look. Join the two pieces with stitching or single crochet around the edge. Leave a small opening for stuffing, then close the seam tightly.
Step 4: Make and attach toppings
Crochet small circles for pepperoni, skinny strips for peppers, or tiny blobs for melted-cheese texture. Sew them down firmly so they don’t snag. Use the video’s placement as a visual guide.
Step 5: Add the face and keychain hardware
Embroider simple eyes and a smile, or insert safety eyes before you close the final seam. Create a secure loop at the top point, then attach a jump ring and clasp. The video demonstrates an easy way to keep the hardware from twisting.
Design Highlights
- Pizza slice shape
- Sharp triangle profile with a rounded crust edge
- Colors (cheese, crust, toppings)
- Cheese yellow, warm tan crust, bold topping accents
- Texture
- Tight amigurumi stitches, optional raised toppings for depth
- Cute details
- Small face, smooth edges, toppings arranged to read as “pizza” fast
Uses & Benefits
- Keychain
- Attach to keys, backpack zippers, or a work lanyard
- Gift
- Add to birthday cards, party favors, or teacher gifts
- Decor
- Hang on a pegboard, craft cart, or mirror area (without blocking view)
- Collectible
- Make different “flavors” and swap them anytime
A small amigurumi keychain gives you a quick finish and a portable project. It also helps use up short yarn lengths while still looking intentional and polished.
Time & Skill Level
- Time: 45–90 minutes (depends on toppings and sewing)
- Skill level: Confident beginner to intermediate
- Skills used: Single crochet, increases/decreases, shaping, basic sewing
Yarn & Tools Guide
- Yarn choices
- Cotton for crisp stitches and durability
- Acrylic for soft feel and easy color matching
- Yarn weight
- DK or worsted for a thicker, chunkier slice
- Sport/fingering for a smaller, detailed slice
- Hook tip
- Use a hook 0.5–1.0 mm smaller than the label suggests for tighter fabric
- Needle
- Blunt tapestry needle helps prevent splitting
- Hardware
- Lobster clasp for quick clip-on
- Split ring for classic keys
- Jump ring to reduce twisting at the loop
Final Look
Your finished slice should feel firm, keep its triangle shape, and show a clear crust band. The toppings should sit flat without curling up at the edges. When you press it gently, it should bounce back instead of folding.
Usage Ideas
- Clip it onto a lunch bag zipper
- Use it as a stocking stuffer
- Tie it onto gift wrapping as a reusable charm
- Make party favors for pizza night
- Turn it into a phone charm with a strap adapter
- Attach it to a crochet hook case as a fun tag
Common Mistakes (and how to avoid them)
- Loose stitches
- Gaps show stuffing and weaken the shape; size down your hook and tighten the tension.
- Overstuffing
- The slice turns puffy and loses edges; add small pinches and shape as you go.
- Understuffing
- The triangle collapses; fill the wide crust end a bit more for structure.
- Uneven increases
- Random shaping bends the edges; place increases consistently on both sides.
- Weak hanging loop
- A thin loop stretches; reinforce with extra stitches and multiple passes of sewing.
Care Instructions
- Spot clean with mild soap and a damp cloth
- Air dry completely
- Avoid machine washing unless you use a mesh bag and a gentle cycle
- Keep away from rough Velcro to prevent fuzzing
- Check jump rings and clasps occasionally for tight closure
Customization Ideas
- Add cheese drips using surface crochet lines
- Create a “stuffed crust” by making the edge slightly raised
- Change toppings:
- Pepperoni circles
- Olive rings
- Pineapple squares
- Mushroom half-circles
- Stitch an initial on the back with embroidery thread
- Add a tiny felt “pizza box” tag on the keyring
Safety Tips
- Use embroidered eyes for items meant for small children
- Close jump rings tightly so they don’t open
- Weave in ends securely to prevent unraveling
- Avoid long dangling cords for toddlers
- Store hooks and needles safely, especially near pets
Why It’s Trending
Food plushies add personality to everyday items, and pizza always gets recognition at a glance. This crochet pizza keychain also looks great in photos, which helps it spread quickly on craft feeds and short videos.
- The shape stays readable at a small size
- Toppings allow easy personalization without changing the base
- It matches the cute-accessory trend while staying practical
FAQs
1) What stitches do I need for a crochet pizza keychain amigurumi?
You’ll mainly use single crochet, increases, and decreases, plus simple sewing for assembly.
2) What yarn holds up best on a keychain?
Cotton lasts well and keeps stitch definition. Acrylic also works if you keep the tension tight and pick a smooth yarn.
3) How do I stop the triangle from curling?
Place increases evenly and doesn’t pull corners too tight. Light blocking of flat pieces before stuffing can help.
4) Can I resize the pattern?
Yes. Use thicker yarn and a bigger hook for a larger slice, or thin yarn and a smaller hook for a mini one.
5) How do I attach the keychain securely?
Make a sturdy loop and sew it through multiple layers. A jump ring between the loop and clasp reduces strain.
Ending
This crochet pizza keychain amigurumi pattern gives you a fast, character-filled project with plenty of room to personalize. The triangle base stays simple, while the crust, toppings, and tiny face bring it to life. Keep your stitches tight, shape the corners carefully, and reinforce the top loop so the keychain handles daily use. For exact counts, shaping, and assembly angles, follow the tutorial and crochet along step by step.