
After watching the video above, you will have a clear visual understanding of how the “bubbles” or spheres are formed. This visual aid is crucial because it shows you exactly where to place your stuffing and how to manage the tension between each section of your Crochet Plush Balloon Dog Amigurumi. Seeing the folding process in action will help you realize how a long string of spheres magically transforms into a four-legged friend.
Skill Level: Intermediate Beginner
This project is perfect for someone who knows the basics of crochet but wants to try something slightly more structural. You should be comfortable with the magic ring, single crochet, and basic shaping. The difficulty lies mainly in the assembly and ensuring the stuffing is firm enough to hold the dog’s shape.
Tutor’s Suggestions
Before you start your balloon dog amigurumi, I highly recommend choosing a yarn with good stitch definition. A mercerized cotton or a high-quality acrylic works best because it prevents the stuffing from peeking through the stitches. Additionally, keep your tension consistent. If your stitches are too loose, the “joints” of the dog will look floppy rather than crisp like a real balloon animal. Lastly, don’t be afraid to use bright, neon colors to mimic the look of actual latex balloons.
Materials Needed
To create this stunning Crochet Plush Balloon Dog Amigurumi, you will need the following supplies:
-
Yarn: Approximately 100g of 2mm thickness yarn (Cotton or Acrylic).
-
Hook: A 2.5 mm crochet hook to keep stitches tight.
-
Stuffing: Synthetic poly-fill or fiberfill.
-
Tools: A yarn needle (wool needle), scissors, and a stitch marker.
Step-by-Step Guide to Creating Your Balloon Dog
Section 1: Starting the Tail and Small Spheres
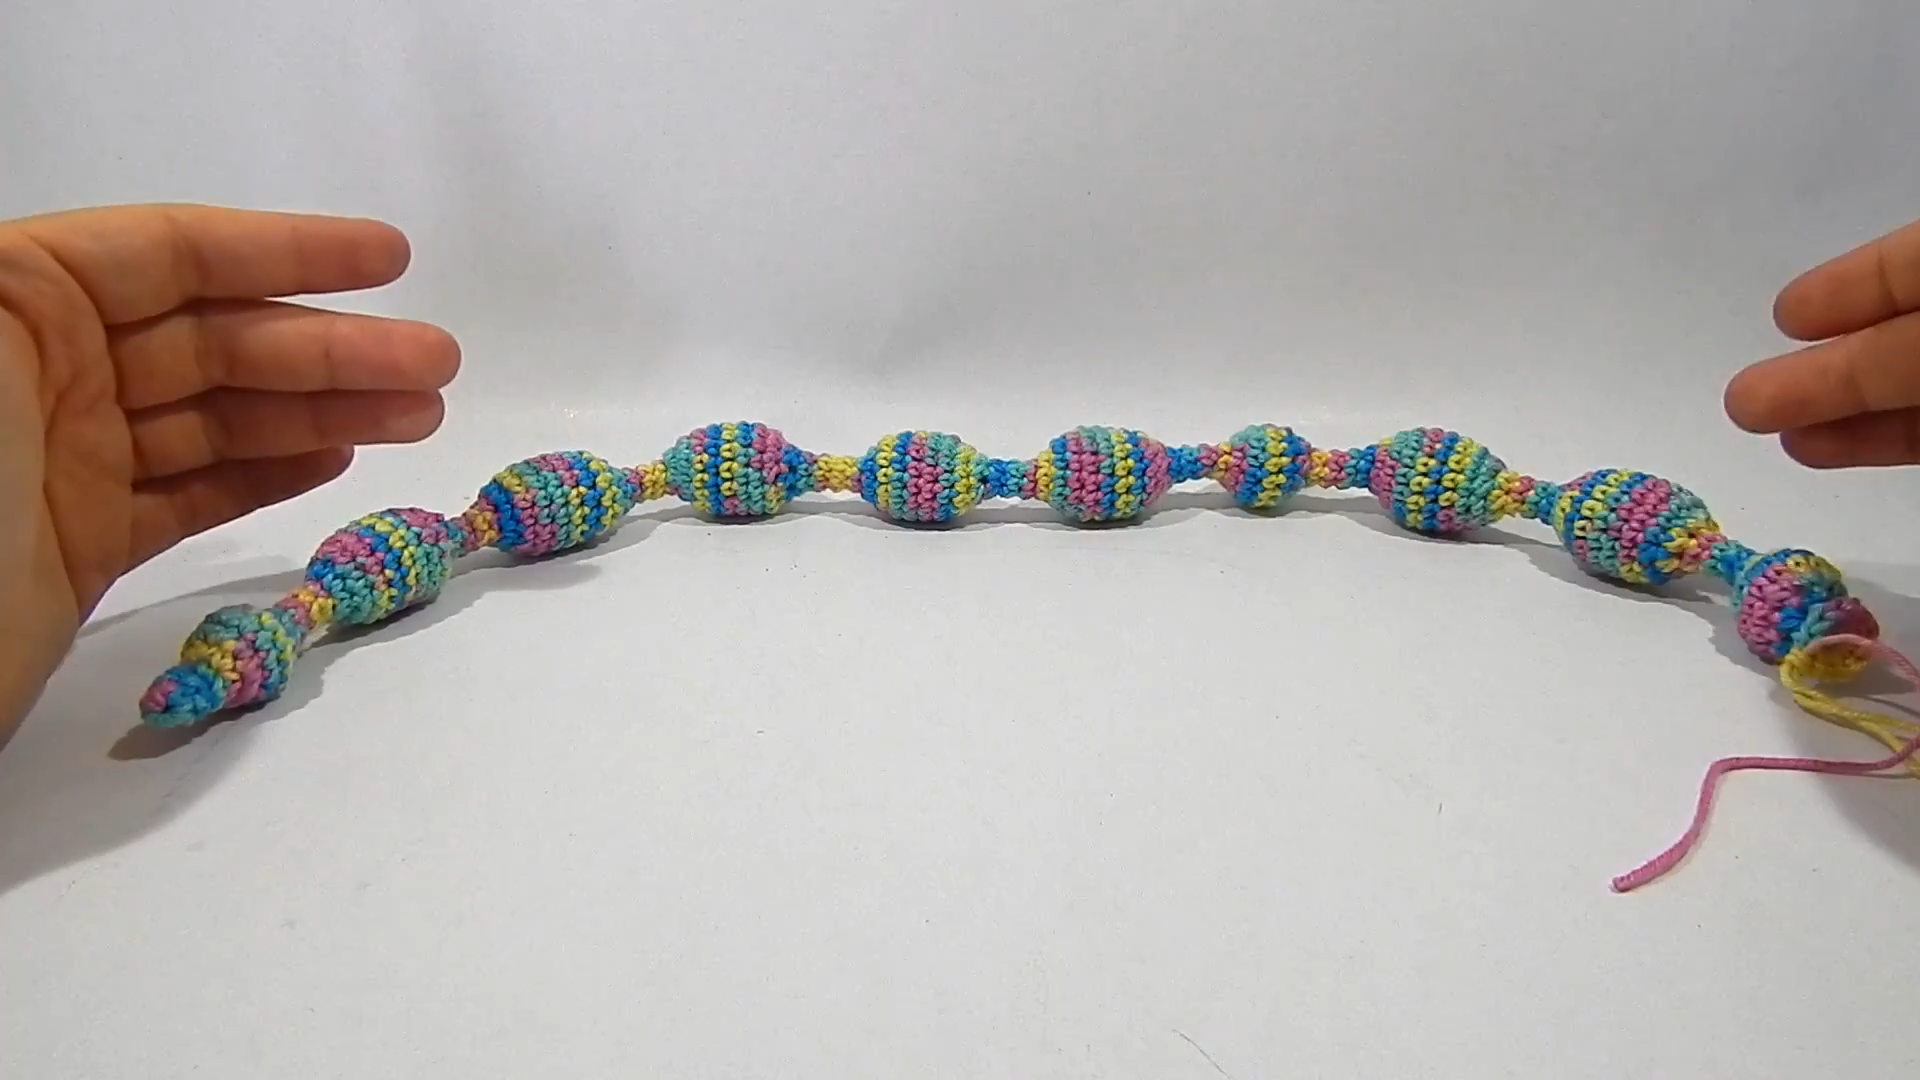
To begin your crochet plush balloon dog, start with a magic ring. Work 6 single crochets into the ring and pull it tight. You will work in a spiral, so place your marker in the first stitch. For the first four rows, simply work 6 single crochets in each round. This creates the small “tip” or the tail of the dog.
Now, we move on to the first small sphere. In the next row, perform 6 increases (2 single crochets in each stitch) to get 12 stitches. For the second row of the sphere, work a pattern of 3 single crochets followed by an increase. Then, work one round of plain single crochets. To close the sphere, work 3 single crochets followed by a decrease, and then a final round of 6 decreases. Remember to stuff the sphere firmly before the hole gets too small.
Section 2: Creating the Large Spheres (The Body and Legs)
After completing a sphere, you must create a “neck” or separation. Work 4 rows of 6 single crochets without any stuffing in this part. This allows the piece to bend easily. For a large sphere, follow the same increase pattern as the small one, but add five rounds of plain single crochets in the middle instead of just one. This extra length creates the larger “balloon” effect.
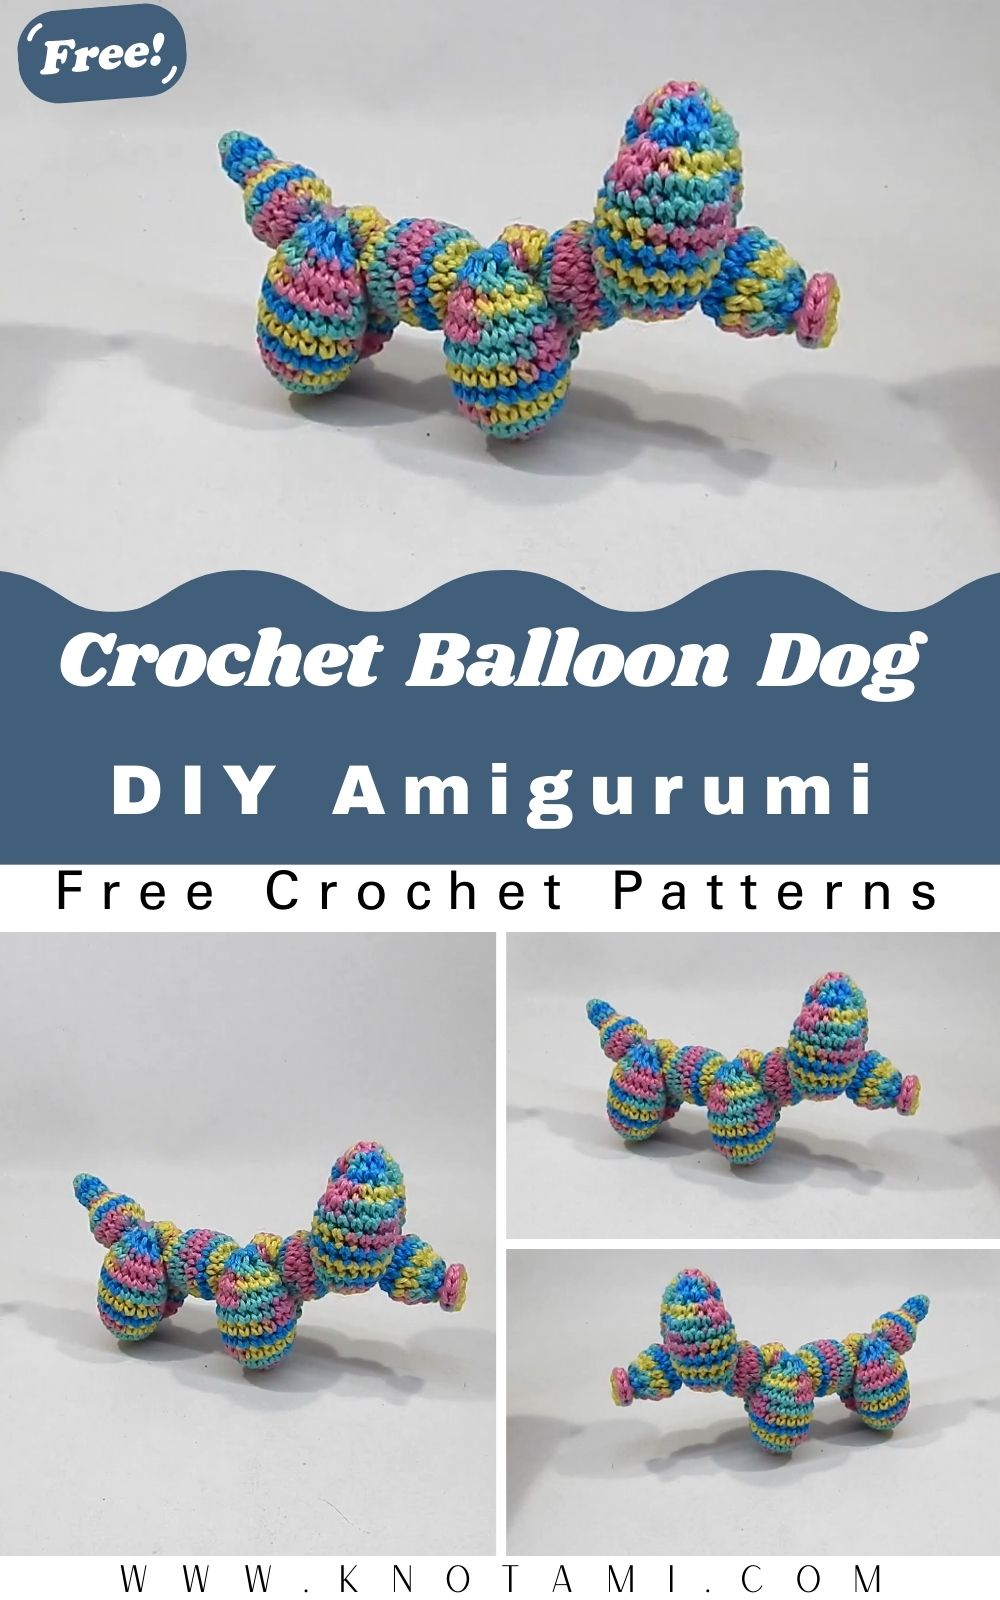
You will need to repeat this process until you have a total of seven large spheres and three small spheres. Specifically, follow this sequence: 1 small sphere (tail), 5 large spheres (back legs, body, front legs), 1 small sphere (neck), 2 large spheres (ears), and 1 final small sphere (nose). Following this specific order is vital for the balloon dog crochet pattern to fold correctly at the end.
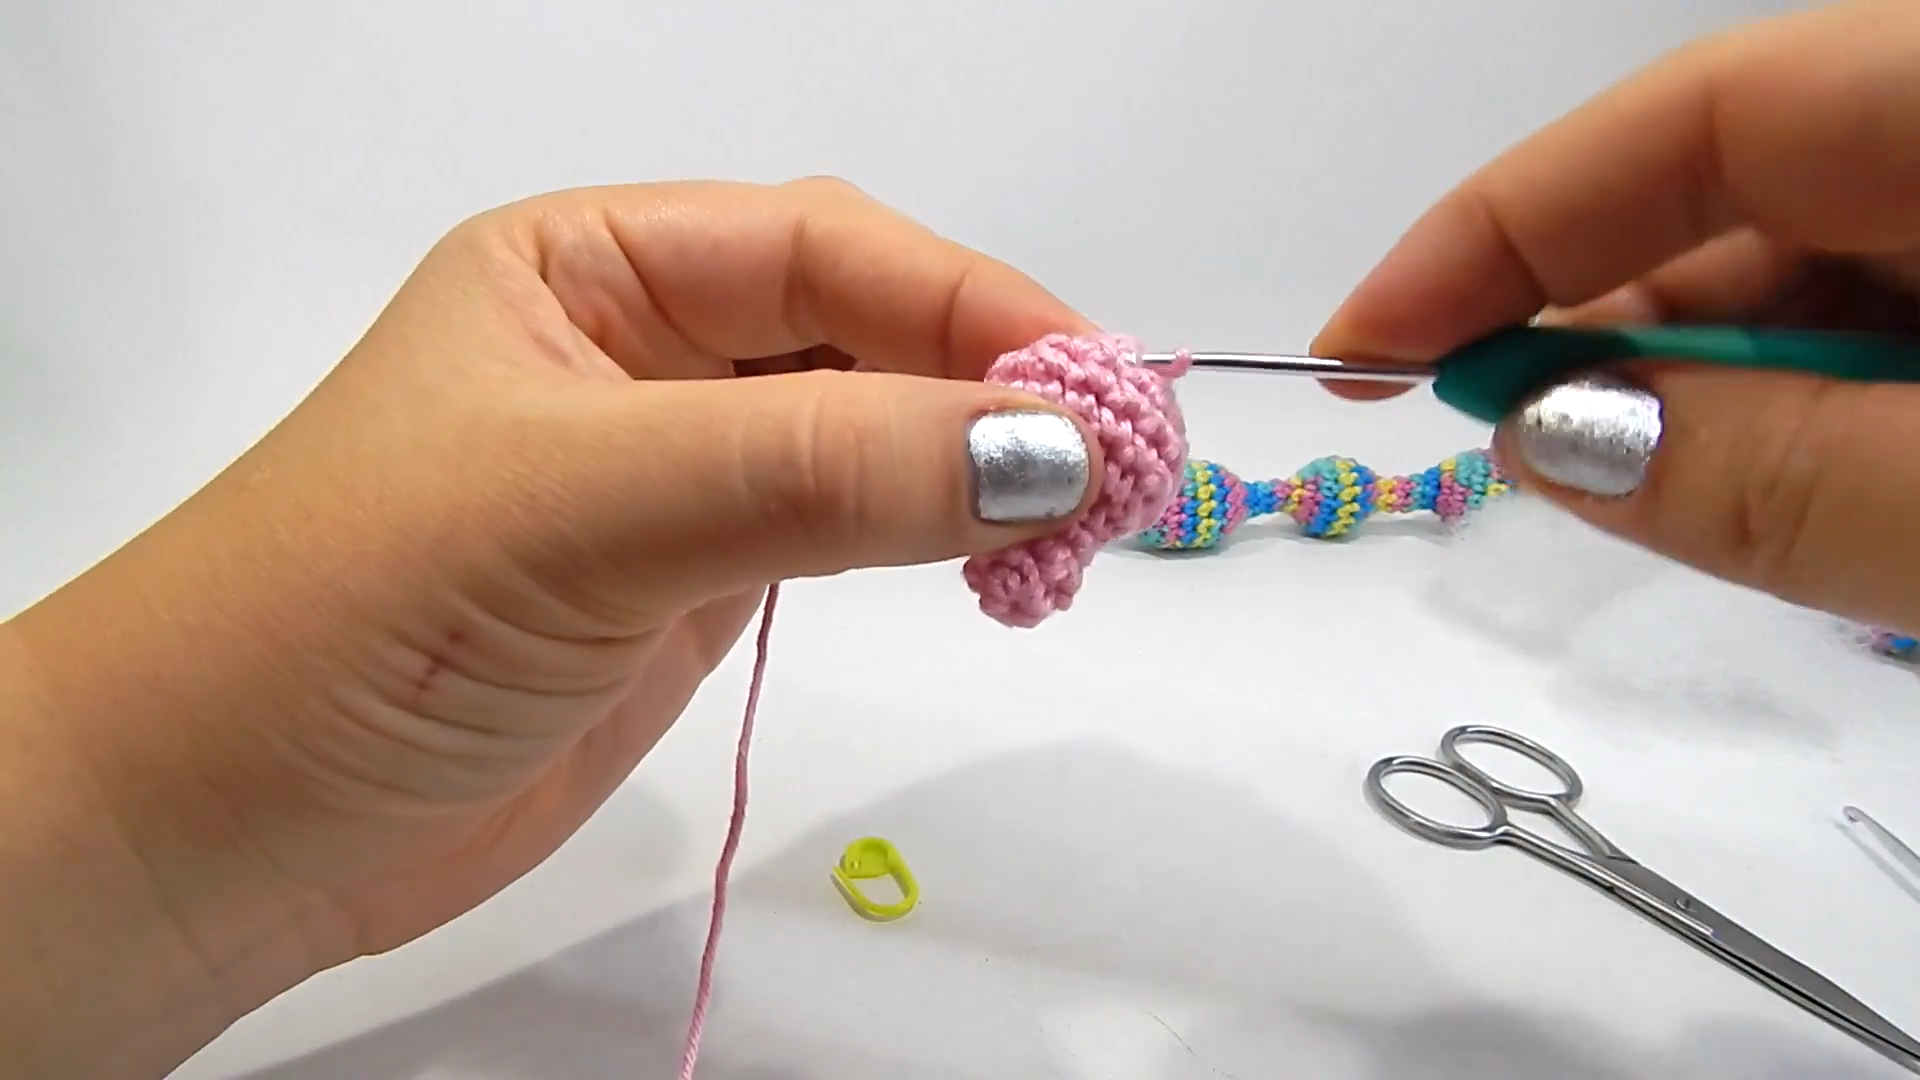
Section 3: Final Folding and Assembly
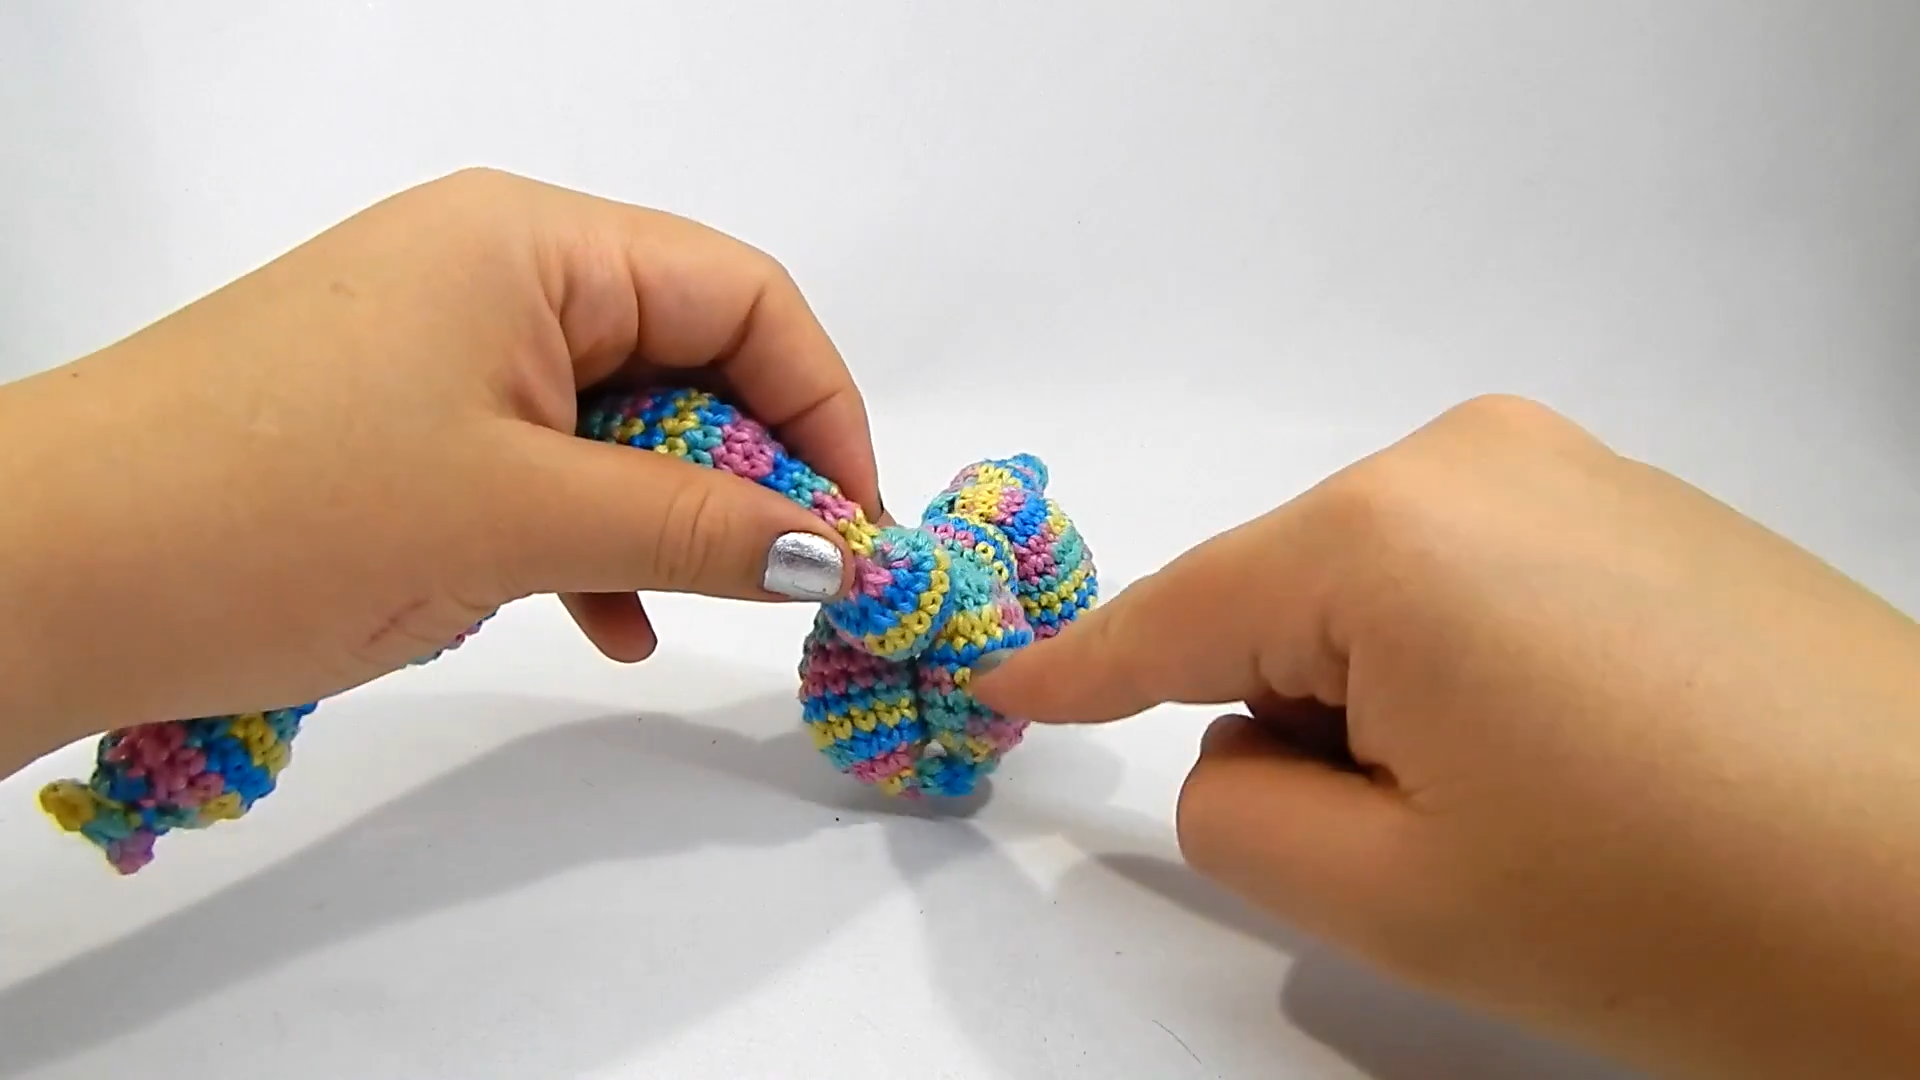
Once you have your long chain of spheres, it is time for the magic part. Start at the tail end. Take the first two large spheres and fold them together; these are your back legs. Twist them around the “tail” section to lock them in place. Move down the chain and skip one large sphere (the belly).
Next, take the following two large spheres and fold them together to create the front legs. Twist these around the neck section. Finally, take the remaining two large spheres at the top to form the ears. Twist the nose section (the last small sphere) through the ears to secure the head. You now have a completed Crochet Plush Balloon Dog Amigurumi that stands on its own.
Where Can You Use This Amigurumi?
This handmade crochet balloon dog is incredibly versatile. It makes a perfect addition to a nursery or a child’s bedroom as a whimsical decor piece. Because it is made of soft yarn, it is much safer and longer-lasting than a real balloon. You can also use it as a unique desk accessory or a conversation starter on a bookshelf. If you make it in a smaller size with thinner yarn, it can even serve as a quirky keychain or a bag charm. Many crafters also sell these at craft fairs, as they are eye-catching and very popular with shoppers looking for modern crochet items.
Tips and Tricks for Success
-
Invisible Decreases: Always use the invisible decrease method for amigurumi. This keeps the surface of your crochet balloon animal smooth and professional.
-
Firm Stuffing: Pack the stuffing in tightly. Since the dog relies on the tension of the spheres to stand up, soft spheres will result in a sagging dog.
-
Color Choices: While variegated yarn looks beautiful, solid bright colors like red, blue, or yellow really emphasize the “balloon” aesthetic.
-
Mark Your Rounds: Because we are working in a spiral, it is very easy to lose your place. Always use a stitch marker.
-
Tension Control: Try to maintain a slightly tighter tension than usual so that the “neck” pieces between spheres remain thin and flexible.
Common Mistakes to Avoid
One common mistake is stuffing the “neck” sections between the spheres. These must remain empty so they can act as hinges during the folding process. If you stuff them, the dog will be too stiff to twist. Another error is losing count of the middle rows in the large spheres. If one leg is shorter than the others, your dog will not stand straight. Finally, ensure you don’t over-stuff to the point where the stitches stretch and show the white fiberfill inside, as this ruins the look of your plush balloon dog.
Frequently Asked Questions (FAQs)
1. How long does it take to make a crochet balloon dog?
Usually, an experienced crocheter can finish this project in 3 to 4 hours. Beginners might take a bit longer as they get used to the sphere construction.
2. Can I use a different hook size?
Yes, but remember that a larger hook will require thicker yarn. If you use a large hook with thin yarn, the stuffing will fall out through the gaps.
3. What is the best yarn for this project?
Cotton yarn is excellent because it is sturdy and doesn’t pill, which helps the dog maintain its iconic shape over time.
4. Does the dog need a wire frame?
No, this pattern is designed to be free-standing without any wire. The structure comes entirely from the way the spheres are twisted together.
5. How do I clean my crochet amigurumi?
You can spot clean it with a damp cloth and mild soap. If it needs a deep clean, hand wash it gently and let it air dry completely.
Conclusion
In conclusion, crafting your own Crochet Plush Balloon Dog Amigurumi is a rewarding project that blends technical skill with creative expression. By following these steps, you will create a piece that is not only a joy to make but also a delightful item to display or share. Remember to practice your tension, keep your stitches tight, and most importantly, have fun with the process. Because you have now learned the structure of this design, you can experiment with different yarn textures or even add small accessories like a tiny collar to make your creation truly one of a kind. Therefore, grab your hook and yarn, and enjoy every stitch of this wonderful journey into the world of handmade fiber arts. Happy crocheting!