Crochet Owl Keychain Pattern With Wooden Perch
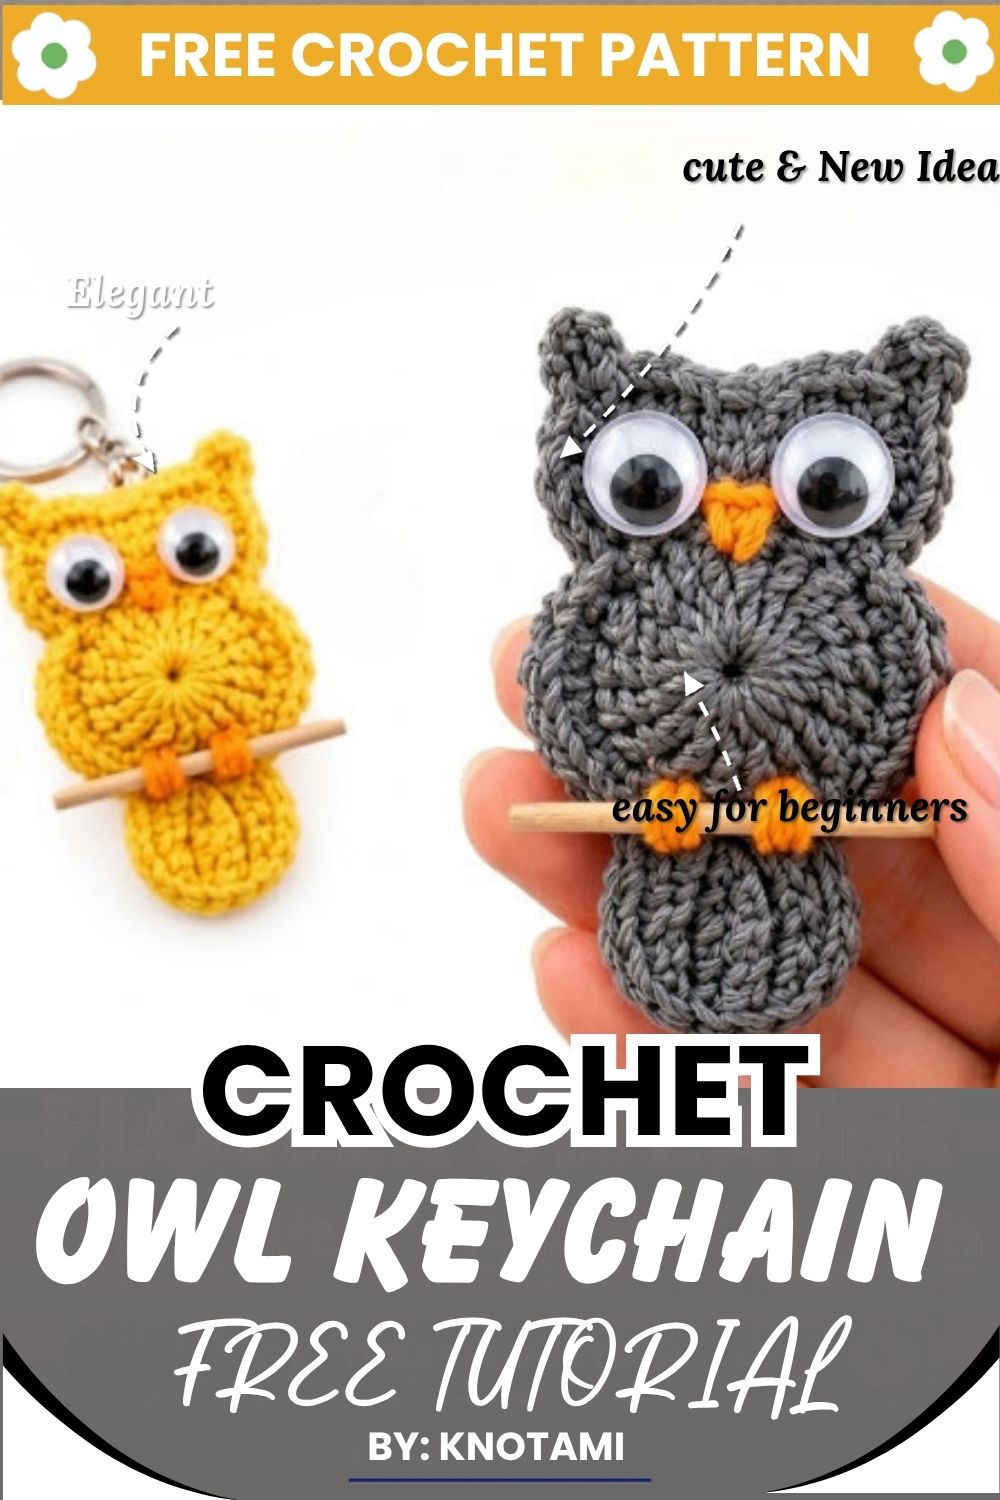
This crochet owl keychain pattern makes a tiny owl with big round eyes, two ear tufts, and a small orange beak. Its body is worked in a ridged, spoke-like texture, and the finished owl sits on a real wooden perch, as if it has stopped to rest on a branch. It is small enough to clip onto your keys, a backpack, or a purse, and it also makes a sweet handmade gift.
The pattern is beginner-friendly, but you should be comfortable with a magic ring and taller stitches such as treble and quadruple crochet. The most charming detail is the pair of orange feet that wrap around the perch, so the owl really seems to grip its branch. A keyring completes the project and turns the owl into a keychain.
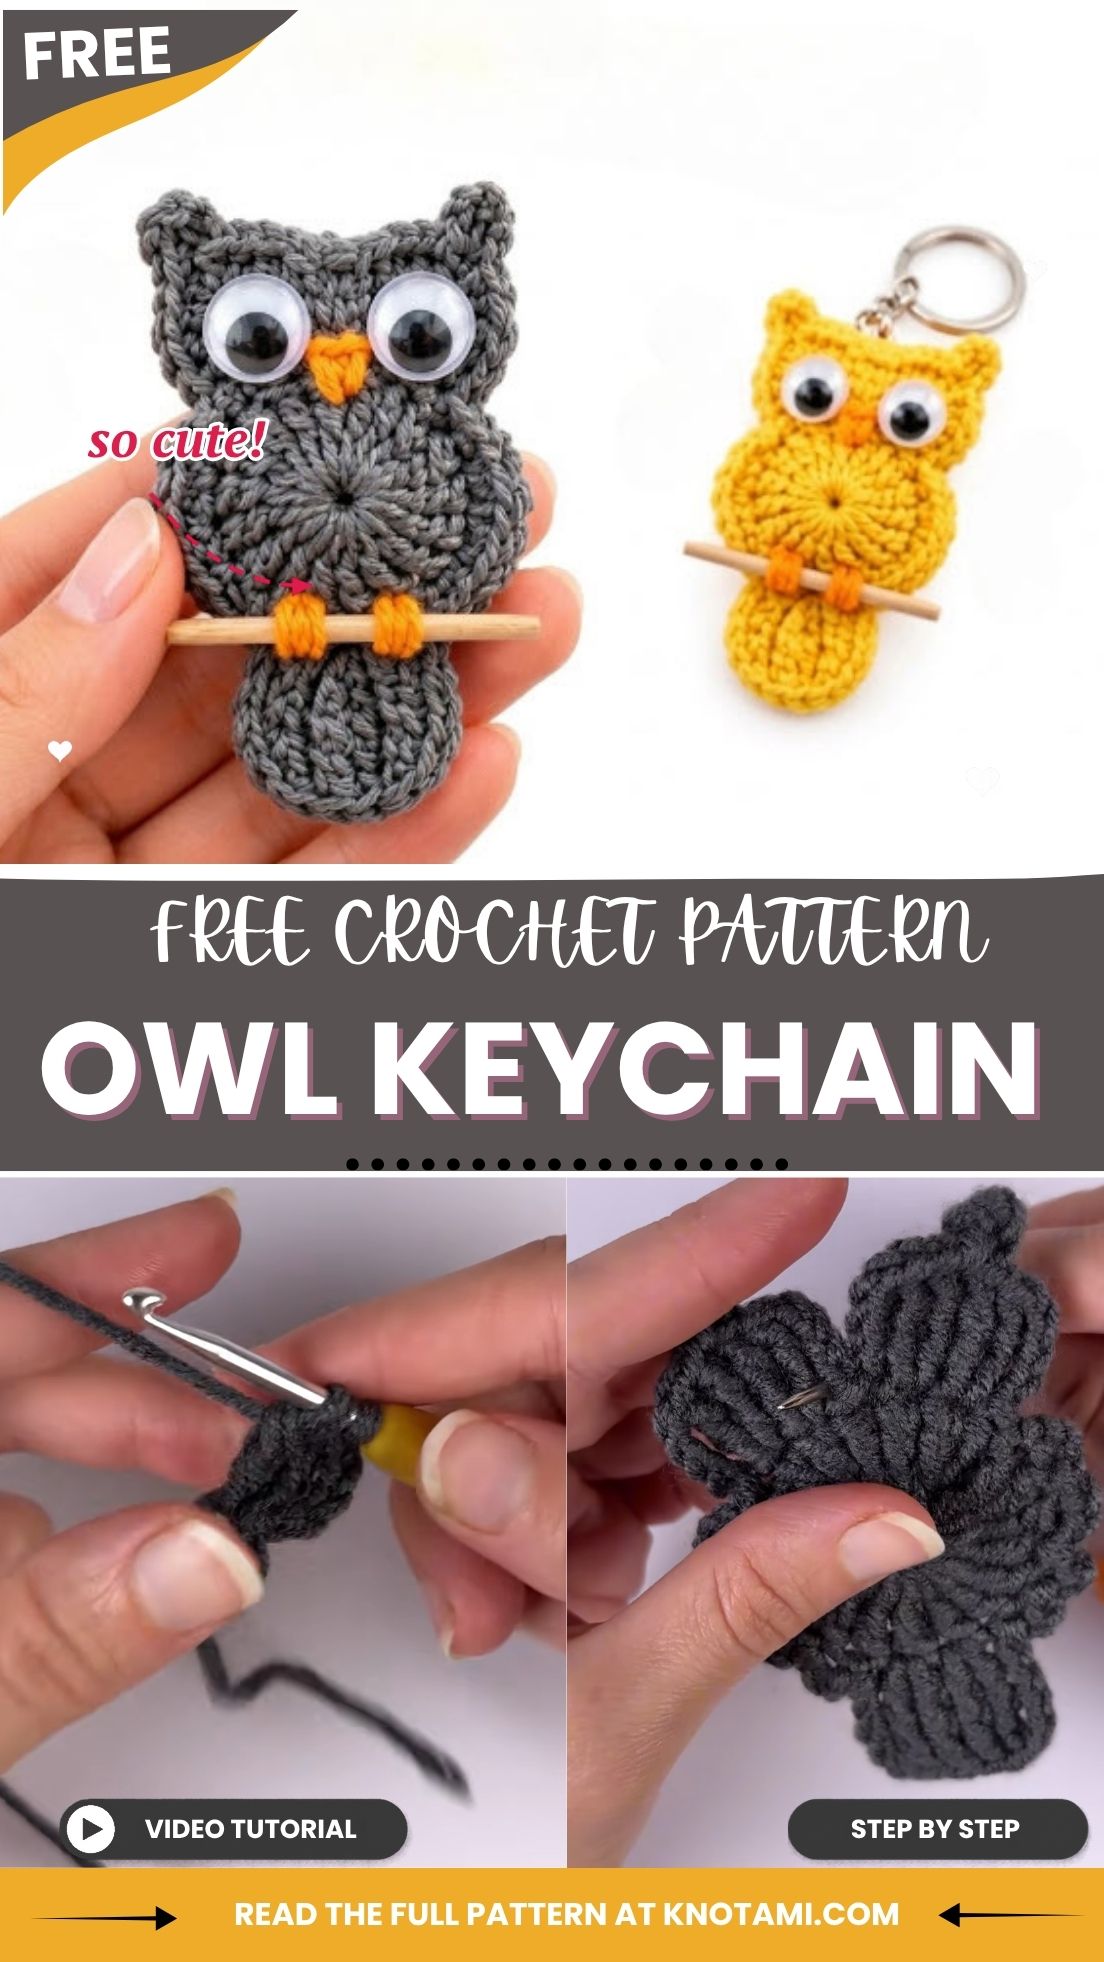
Here is what you will find in this post:
- Finished item: a flat mini owl with ear tufts, a beak, eyes, feet, and a wooden perch
- Difficulty: beginner-friendly
- Special features: orange feet that wrap around a real wooden stick, and a keyring so it works as a keychain
- The pattern includes: materials, abbreviations, step-by-step instructions with photos, assembly, finishing, safety notes, tips, FAQs, and a video tutorial
If you can make a magic ring, you can make this owl. So pick your yarn and let’s begin.
Materials & Supplies for the Crochet Owl Keychain Pattern
- Medium-weight acrylic yarn for the body (gray in the sample, but any color works)
- A small amount of contrasting yarn for the beak and feet (orange in the photos)
- 3.5 mm crochet hook
- Yarn needle
- Scissors
- Small craft eyes (the photos show googly eyes)
- Craft glue for the eyes
- Keyring or jump ring
- Pliers, if your keyring or jump ring needs closing
- Thin wooden stick for the perch
Skill Level & Required Skills
This easy owl keychain crochet project is suited to beginners. However, you should be comfortable with:
- Making a magic ring
- Chaining
- Slip stitching
- Treble crochet
- Quadruple (double treble) crochet
- Sewing on small details with a yarn needle
Abbreviations & Special Terms
- MR: magic ring
- ch: chain
- sl st: slip stitch
- tr: treble crochet
- qtr: quadruple (double treble) crochet
- Perch: the thin wooden stick the owl’s feet wrap around
- Jump ring: the small metal ring that connects the owl to the keyring
Gauge & Finished Measurements
Gauge is not specified for this pattern, and a mini owl like this does not depend on it. Just stitch tightly enough that the body keeps its shape. A finished size is not given either. Because it varies with your yarn and hook, hold your owl up to the perch before attaching it.
Complete Step-by-Step Crochet Owl Keychain Pattern
The owl is worked flat from the center out. The treble stitches fan around the ring, which creates the ridged, spoke-like texture you can see in the photos.
Make the magic ring
- First, gather your medium-weight acrylic yarn and your 3.5 mm hook.
- Next, wrap the yarn around two fingers to form a loop, insert your hook, and pull up a loop through the center.
- Then chain 1 to lock the ring in place.
- Leave the ring loose in the center, because the next stitches are worked into it.
- Finally, keep the tail end long and do not cut it, since you will weave it in later.

Work the treble crochets into the ring
- To begin, work 20 treble crochets into the ring. This is the base of the owl’s body.
- For each treble, yarn over twice, insert the hook into the ring, and complete the stitch.
- Keep every stitch the same height so the body fans out evenly.
- After all 20 are done, pull the tail to close the center. As a result, you get a rounded body with a spoke-like pattern.

Shape the head and ears
- Next, work along the top edge using chains, slip stitches, and treble and quadruple crochets, as shown in the video.
- Shape one ear tuft on each side of the head, as small rounded bumps.
- Then check that both ears are the same size before you continue.
However, the exact stitch placement for the ears is not listed in the written notes, so follow the video for each stitch in this step.

Fasten off and weave in the ends
- First, cut the yarn, leaving a tail, and pull it through the last loop.
- Then thread the tail onto your yarn needle.
- Next, weave the tail through the stitches on the back.
- Do the same with the tail from the magic ring.
- Finally, trim any excess yarn close to the work.

Separate Parts Instructions
The owl is mostly one piece, with the ears and head shaped along the top edge in the steps above. The beak and feet are the separate details. You add them with a needle and contrasting yarn in the next section.
Assembly & Joining Instructions
Stitch the beak
- First, thread the needle with a short length of orange yarn.
- Then find the center of the head, between where the two eyes will sit.
- Stitch a small beak, going over the same spot a few times so it stands out.
- Finally, secure the end at the back.


Glue on the eyes
- First, hold the two eyes against the upper front of the body, one on each side of the beak.
- Next, check that they are level before gluing.
- Then add a little craft glue to the back of each eye and press it on firmly.
- Lastly, let the glue dry fully before handling the owl much.

Add the feet and the wooden perch
- To start, slide the wooden stick across the lower part of the body.
- Next, thread the needle with orange yarn.
- Then pass the yarn through the owl and around the stick so it wraps the perch.
- Pull it snug so the feet hold the stick in place.
- After that, repeat for the second foot.
- Finally, secure the orange yarn at the back so it cannot slip.

Add the keyring
- First, attach a small jump ring and keychain loop through the back, as shown in the video.
- Then close it tightly with pliers.
- Lastly, check that the owl hangs level and the stick stays in place.
Finishing Instructions
Before you call your owl done, run through this quick check:
- All yarn ends are woven in and trimmed.
- The eyes are firmly glued.
- The beak is secure.
- The stick is snug and does not slide.
- The keyring is closed tightly.
Estimated Completion Time
Your time will depend on how comfortable you are with treble stitches and how carefully you finish the small details. Since the owl is small, it makes a project you can pick up and work on in short sessions.
Safety Notes
Craft eyes, a loose stick, and metal rings are small parts and are not safe for babies or young children. Therefore, glue the eyes securely, close the rings tightly, and keep the owl away from small kids.
Sizing Options
For a larger or smaller owl, use a thicker or thinner yarn with a matching hook. The pattern gives no other sizing details, so test your owl against your perch first.
Owl Color Ideas (Bonus Section)
The photos show two colors: a classic gray owl and a bright yellow one, both with orange details. For example, a dark body makes the orange beak and feet stand out, while a light body pairs nicely with a darker contrast color for the details.
Crochet Owl Keychain Pattern Tips & Troubleshooting
- Keep your stitches even so the owl stays flat.
- Weave in all ends before gluing on the eyes.
- Hold the eyes in place before gluing so they sit level.
- Use contrasting yarn for the beak so it shows clearly.
- Check that the stick fits snugly before you secure the feet.
FAQs About This Crochet Owl Keychain Pattern
What yarn do I need?
Medium-weight acrylic yarn, plus a small amount of contrasting yarn.
What hook size should I use?
A 3.5 mm hook.
Is this good for beginners?
Yes. It is a beginner-friendly amigurumi pattern.
Can I make it a keychain?
Yes. Simply attach a jump ring and keychain loop at the back.
Are the eyes safe for children?
No. Please see the Safety Notes above.
One Small Owl, Ready to Go
You now have a tiny owl with its own wooden perch, ready to ride along on your keys or bag. This crochet owl keychain pattern also makes a lovely quick handmade gift, so why not stitch a few in different colors?