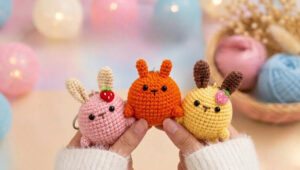
Crochet Round Bear Keychain With Blue Nose
Light blue rounds form the base, then white stitches build a stuffed ball topped with round ears. A blue muzzle finishes the Crochet Round Bear Keychain With Blue Nose. It clips onto a bag, and the pattern suits anyone comfortable with single crochet.
Beyond bags, it also makes a small gift or, without the clasp, a soft toy. The body is one ball worked from the bottom up, so there’s very little sewing. You can swap the blue for pink or mint, or size up with worsted yarn. This Crochet Round Bear Keychain pattern lists every round with stitch counts, along with photo checkpoints and assembly help.
What Makes This Round Bear Different
Most bear keychains have a separate head and body. This one skips that step: the whole bear is a single stuffed ball, so there are fewer parts to sew. If you enjoy round, one-piece keychains, the crochet blueberry keychain uses a similar ball shape.
The blue base looks like a little pair of shorts, and the same blue appears in the ear centers and the nose patch. That repeat ties the colors together without any extra effort.
Materials for the Crochet Round Bear Keychain With Blue Nose
This pattern uses US crochet terms.
- White yarn: DK or light worsted (weight 3) milk cotton, about 15 g
- Light blue yarn: same weight, about 6 g
- Black yarn or embroidery floss for the face
- 3.00 mm crochet hook (Japanese size 5/0)
- One stitch marker
- Fiberfill stuffing
- Yarn needle and scissors
- Keychain ring with a lobster clasp and a small jump ring
The finished ball is about 2.5 inches (6.5 cm) wide, not counting the ears. Gauge isn’t critical, but keep your stitches tight so no stuffing shows through. For help choosing yarn, see the Craft Yarn Council yarn weight chart.
Abbreviations (US Terms)
- MR – magic ring
- ch – chain
- sc – single crochet
- inc – increase (2 sc in one stitch)
- dec – decrease (sc 2 together)
- sl st – slip stitch
- st(s) – stitch(es)
- Rnd – round
- FO – fasten off
Step-by-Step Instructions
Each stage builds on the last, so compare your work with each photo before you move on.
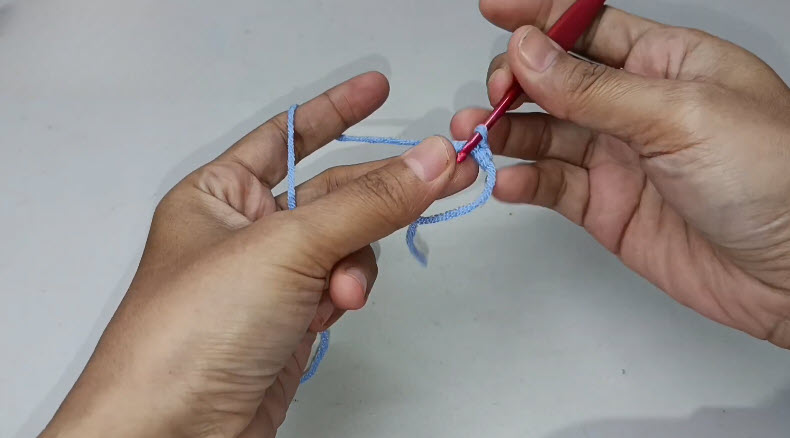
Step 1: Start the Blue Base
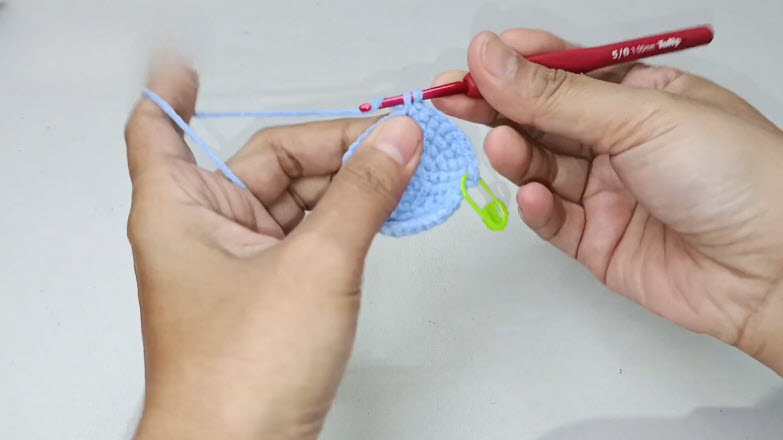
Begin with a magic ring in blue. Work the first round, then pull the tail tight.
- Rnd 1: 6 sc in MR (6)
Keep the working yarn draped over your left index finger, as shown in the photo. That steady tension helps the first stitches stay even.
Next, increase each round to grow a flat circle. Place your stitch marker in the first stitch of every round.
- Rnd 2: inc in each st around (12)
- Rnd 3: (sc 1, inc) x6 (18)
- Rnd 4: (sc 2, inc) x6 (24)
- Rnd 5: (sc 3, inc) x6 (30)
- Rnd 6: (sc 4, inc) x6 (36)
- Rnd 7: (sc 5, inc) x6 (42)
At this point, the circle should lie flat against your fingers. If it cups already, you may have missed an increase. If it ripples, you likely added one too many.
Step 2: Finish the Blue Base
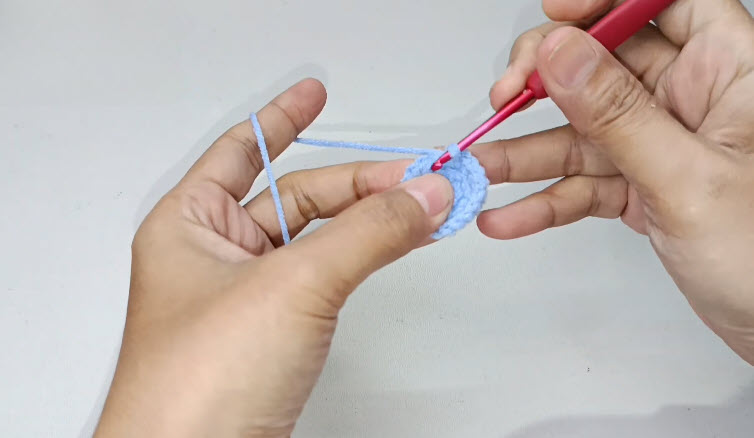
Stop increasing now. Two plain rounds turn the flat circle into a shallow bowl.
- Rnds 8–9: sc in each st around (42)
Notice the stitch marker at the edge in the photos. The piece now cups slightly, which forms the round bottom of the bear. Count to 42 before you switch colors.
Step 3: Switch to White
Change colors on the last pull-through of the final blue stitch in Rnd 9, so the first white stitch starts cleanly. Cut the blue, leaving a short tail to knot inside.
- Rnd 10: with white, sc in each st around (42)
Step 4: Build the Ball Body
Keep working even rounds in white. As you go, the sides rise and the piece takes on a cup shape.
- Rnds 11–17: sc in each st around (42)
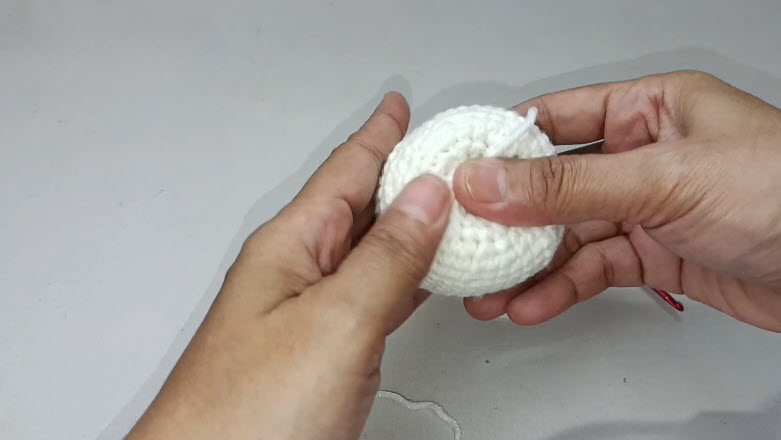
Your first white round should form a tidy ring around the blue edge. Watch for a small jog where each round begins, and turn that spot toward the back of the bear.

Step 5: Stuff and Close the Top
Shape the top with even decreases.
- Rnd 18: (sc 5, dec) x6 (36)
- Rnd 19: (sc 4, dec) x6 (30)
- Rnd 20: (sc 3, dec) x6 (24)
- Rnd 21: (sc 2, dec) x6 (18)
Stuff firmly now, before the opening gets too small. Push fiberfill into the blue base first so the bottom stays round. By this stage, the blue covers only the lower part, and white makes up most of the height.

- Rnd 22: (sc 1, dec) x6 (12)
- Rnd 23: dec x6 (6)
FO and leave a tail. Thread the tail through the front loops of the last 6 stitches and pull the hole shut.
The top should look smooth, with the closing point in the center. Roll the ball in your palm to spread the stuffing evenly, then run the tail through the ball and trim it.
Step 6: Make the Ears
Each ear is a small white cup with a blue center sewn on top.
Outer ear (white, make 2):
- Rnd 1: 6 sc in MR (6)
- Rnd 2: inc in each st around (12)
- Rnd 3: (sc 1, inc) x6 (18)
- Rnd 4: sc in each st around (18)
Sl st, FO, and leave a long tail for sewing. Don’t stuff the ears.
Inner ear (blue, make 2): Work 6 sc in a MR, pull tight, and sl st to the first st. FO with a tail, then sew one blue circle to the center front of each white ear.
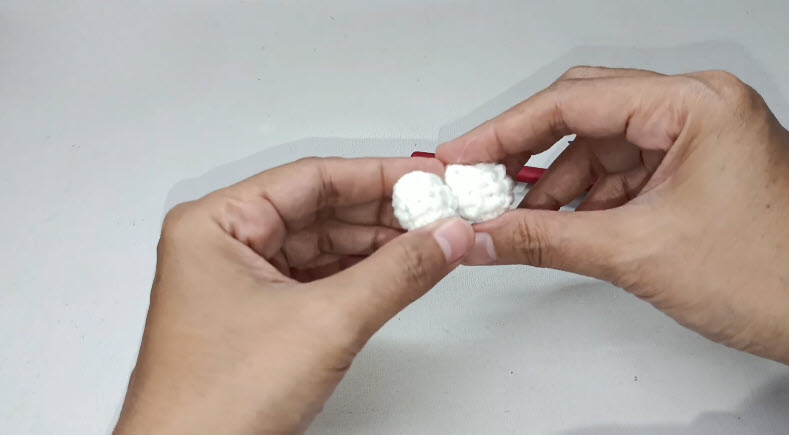
Hold both ears side by side, as in the photo. They should match in size and shape. If one comes out larger, redo it now rather than after sewing.
Step 7: Crochet the Blue Nose Patch
The nose patch is a small, flat blue oval.
- Ch 4.
- Rnd 1: inc in 2nd ch from hook, sc 1, 4 sc in last ch. Working along the other side of the chain, sc 1, then inc in the last ch (10)
- Rnd 2: (sc 1, inc) x5 (15)
Sl st to the next st, FO, and leave a long tail. Before attaching the patch, stitch the face with black yarn: make a short straight line across the top, then one short line down from its center.
Step 8: Assemble Your Round Bear Keychain
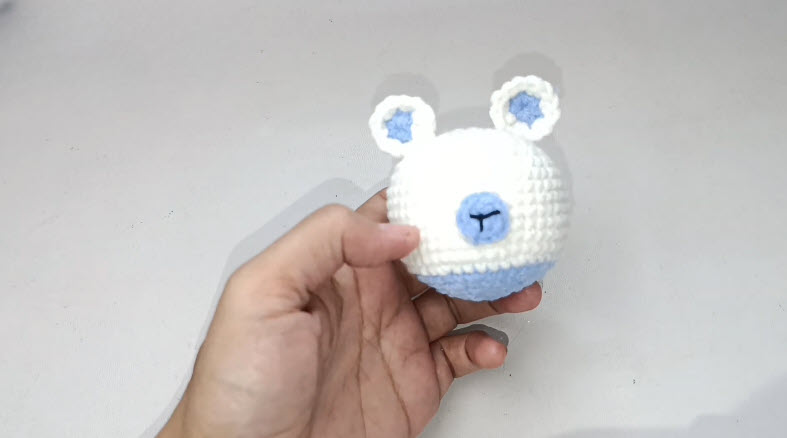
Pin the ears on top of the ball between Rnds 18 and 21, leaving about 12 stitches between them. Then pin the nose patch on the front, between Rnds 12 and 15, centered below the ears.
View the bear face-on before sewing. Both ears should tilt at matching angles, with the nose patch centered below them. Once everything looks right, sew each piece down with small whipstitches, then knot the tails inside the ball and hide them.
Finally, sew the jump ring to the top center, through the Rnd 23 closing point, and attach the keychain clasp.
Common Mistakes to Watch For
- Loose base: A loose magic ring leaves a hole in the blue bottom. Pull the tail firmly and knot it inside.
- Under-stuffing: A soft ball dents and loses its round shape. Add stuffing in small bits until it feels firm.
- Uneven ears: Ears sewn at different heights make the face look tilted. Pin both before sewing either one.
- Lost rounds: Without a marker, counts drift quickly on a small ball. Move the marker up every round.
Bonus Section: Making the Keychain Tough Enough for Daily Use
A keychain gets pulled, dropped, and tossed into bags, so the hardware joint needs extra care. Sew the jump ring through several stitches around the top, not just one, to spread the pull.
For more strength, run a short loop of white yarn through Rnds 21–23 and knot it inside the ball. Hook the jump ring through that loop instead of a single stitch, and give the ring a firm tug before you gift it.
Tight stitches help too, since they keep fiberfill from working out through gaps over time. If the bear is going to a small child, skip the metal clasp and keep it as a soft toy instead.
FAQs About This Crochet Bear Keychain
How long does this bear take to make?
Expect about 2 to 3 hours. The ball body takes the most time, while the ears and nose patch go quickly.
Can I make it bigger?
Yes. Use worsted yarn and a 4 mm hook with the same counts. The bear keeps its shape, just larger. For a full-body bear with separate parts, try this crochet teddy bear amigurumi.
Can I use other colors?
Sure. Pink and white or mint and cream both work well. Keep the base, ear centers, and nose patch in one shade so the design stays unified.
Is this safe as a baby toy?
Not with keychain hardware attached. Remove the clasp and sew all parts very securely first. For more small projects, browse patterns like this crochet cat face keychain.
Final Stitches on Your Round Bear
Once the jump ring is on, give the whole bear one last squeeze. The ball should feel firm, and the ears shouldn’t wobble. If anything shifts, add a few more stitches now rather than later.
After your first crochet round bear keychain with a blue nose, the next one goes much faster because you already know the counts. Try a new base color or make a set of three, and save the leftover blue for a matching nose on your next bear.