Free Open Front Crochet Cardigan Pattern Guide
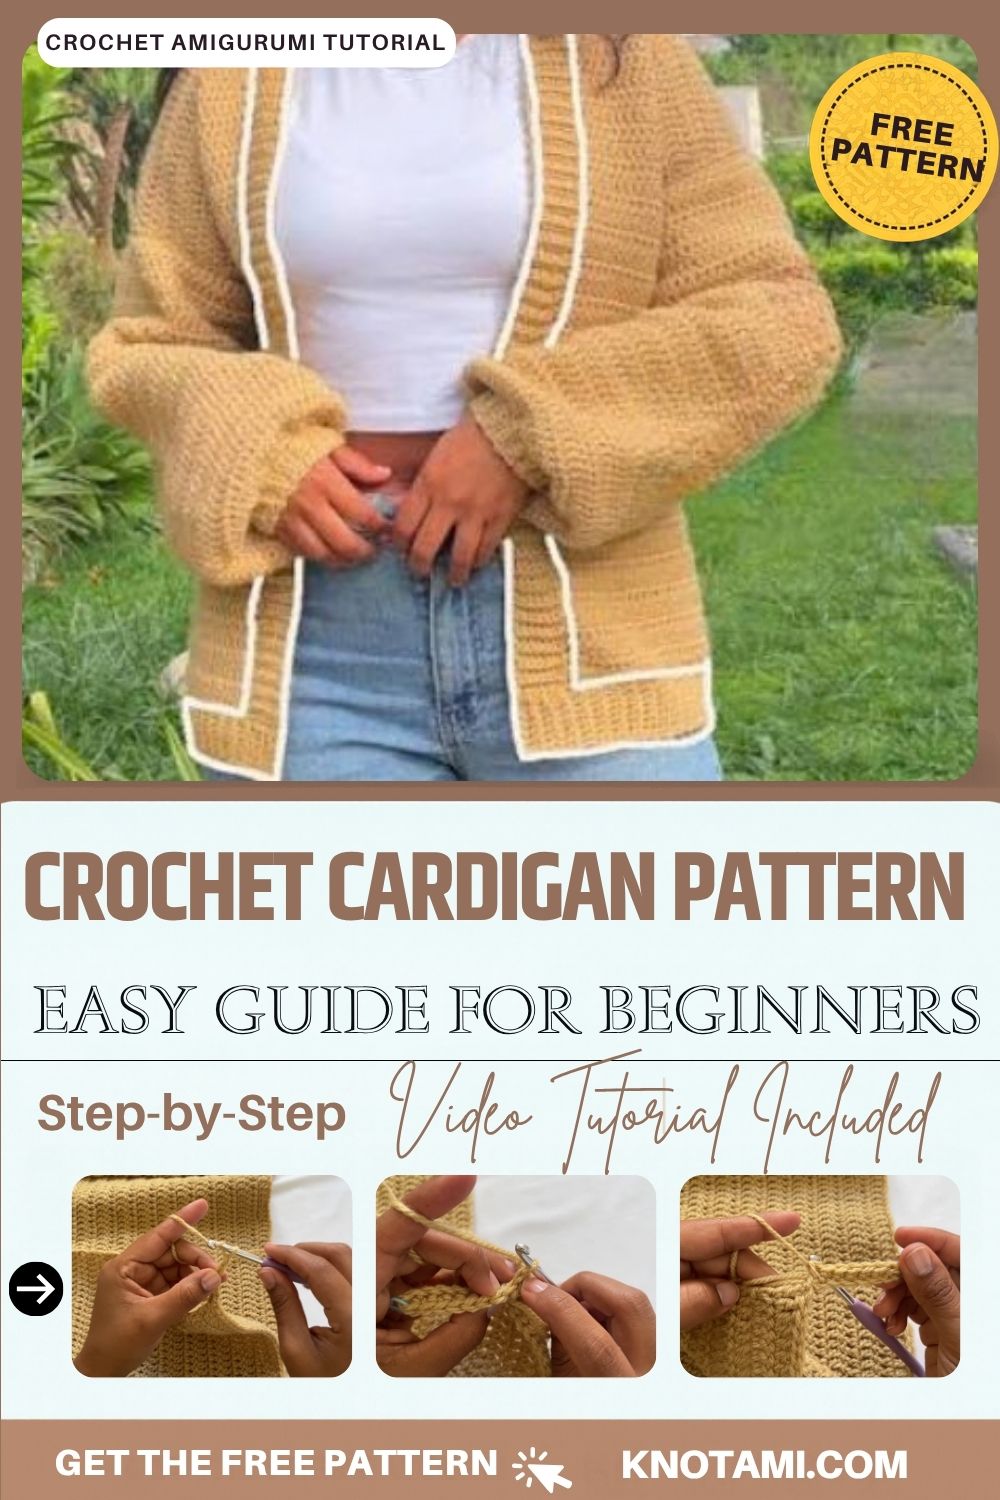
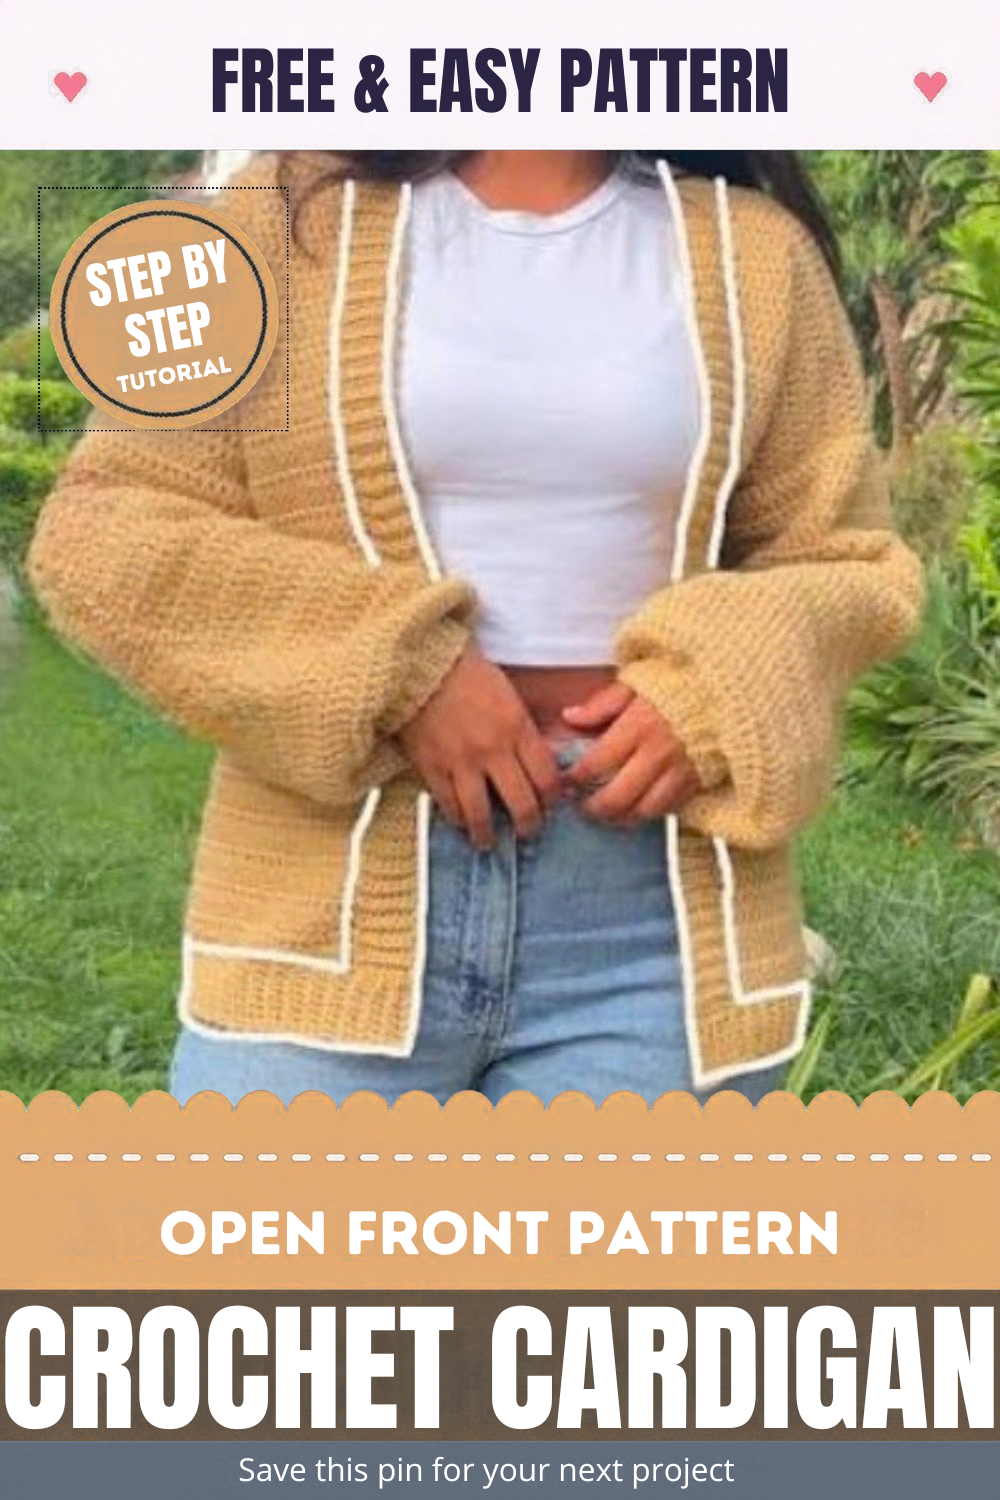
Warm mustard stitches set the tone for the Cozy Open Front Crochet Cardigan Pattern Guide, where a relaxed textured body meets neat ribbed edges. The finished piece drapes loosely over the shoulders, layers over light tops, and keeps a chilly morning from feeling harsh.
What sets the open-front crochet cardigan pattern apart is its finishing method. The ribbed trim is not sewn on at the end. Instead, it grows sideways and joins the body as it goes. As a result, the edges lie flat and look store-bought. Meanwhile, the body relies on a simple textured stitch, so the free crochet cardigan pattern stays approachable. For anyone chasing a first beginner crochet sweater, the steps feel manageable yet rewarding.
Stage 1: Planning Your Open Front Crochet Cardigan Pattern
Who the Pattern Suits Best
An open front crochet cardigan works well for anyone who wants a practical layer rather than a showpiece. It slips on over a tee for errands, covers bare arms in air-conditioned offices, and adds warmth on breezy evenings without buttons to fuss over.
Crocheters who already know single crochet and half double crochet will feel at home here. Likewise, anyone who has finished a scarf or blanket and wants a first garment will find a gentle step up. However, makers who dislike repetitive rows may find the ribbed bands slow going.
Time and Skill Reality Check
Plan for three stages of work. First, prep and swatching take about one to two hours. Next, the body panels and sleeves need roughly 12 to 18 hours, depending on size. Finally, the sideways bands, cuffs, and seaming add another four to six hours.
In terms of skill, the open front crochet cardigan pattern sits at an advanced-beginner level. Nothing requires tricky techniques. Still, joining a band to the body edge with steady tension takes patience and a little practice.
What You’ll Need
- Yarn: worsted-weight (#4) acrylic or cotton blend, about 900 to 1,200 yards, in a camel or mustard shade
- Hook: 5 mm (H-8), plus a 4.5 mm option for tighter ribbing
- Markers: two locking stitch markers in contrasting colors
- Needle: a blunt-tip tapestry needle for seams and tails
- Extras: sharp scissors and a flexible measuring tape
Quick Fit Tweaks Before the First Chain
Measure a favorite loose top before starting, or compare your bust with the Craft Yarn Council women’s size chart. Then add two to four inches of ease at the bust for a relaxed drape. For longer sleeves, simply add rows before the cuff. Similarly, a cropped look only needs fewer body rows.
Stage 2: Crocheting the Open Front Cardigan Pattern Bands
Step-by-Step Process
Once the body and sleeves are assembled, the open front crochet cardigan pattern moves on to its signature sideways bands.
Step 1: Join the Yarn and Chain the Band Width
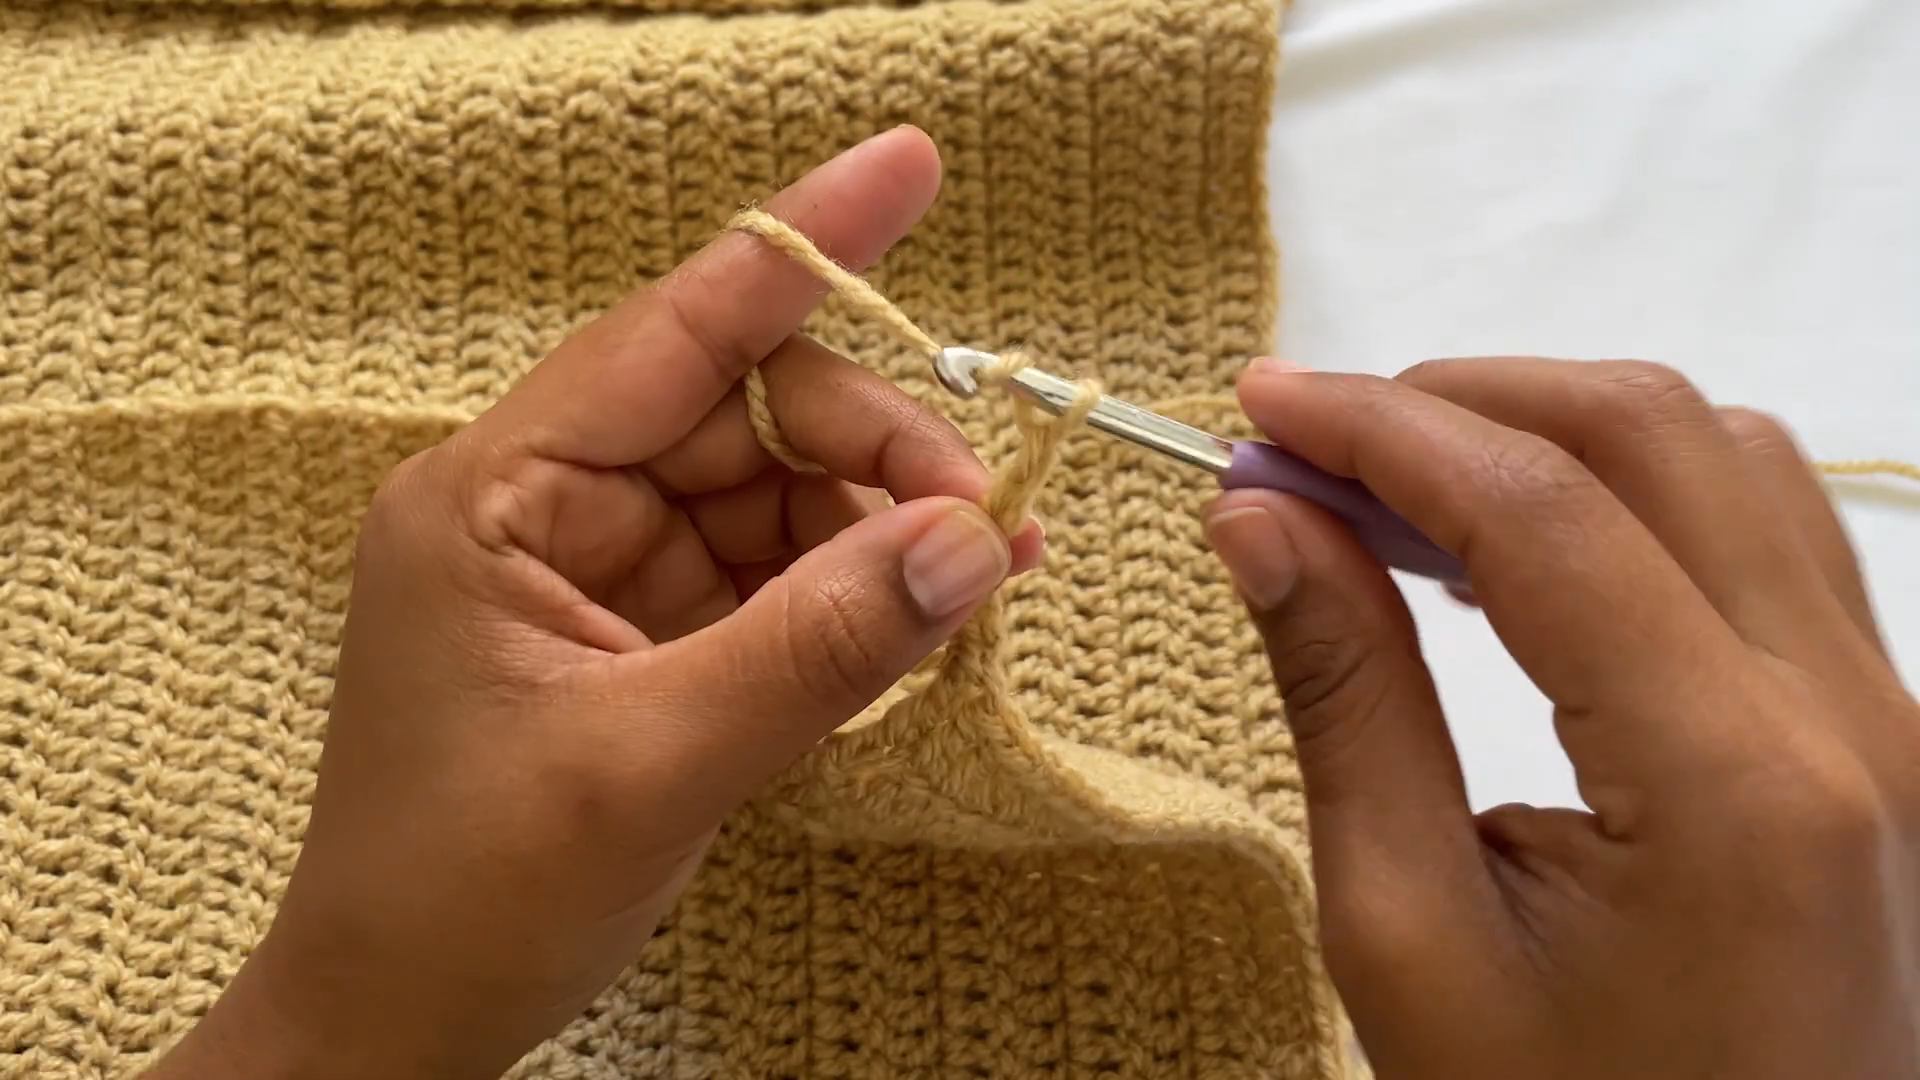
Attach the yarn with a slip stitch at the lower front corner of the body. Keep the working yarn draped over the index finger for control. Next, chain nine stitches. Those chains set the width of the front band, roughly two inches.
Micro-note: the band width decides how much the fronts overlap visually, so pick it once and keep it consistent.
Step 2: Work Back Along the Chain and Attach
Skip the first chain from the hook. Then single crochet in each chain back toward the body. At the body edge, slip stitch into the next two edge stitches. Those slip stitches anchor the band and act as the turning point.
Pro tip: Space the slip stitches evenly along the edge. Too many cause ruffling, while too few pull the front upward.
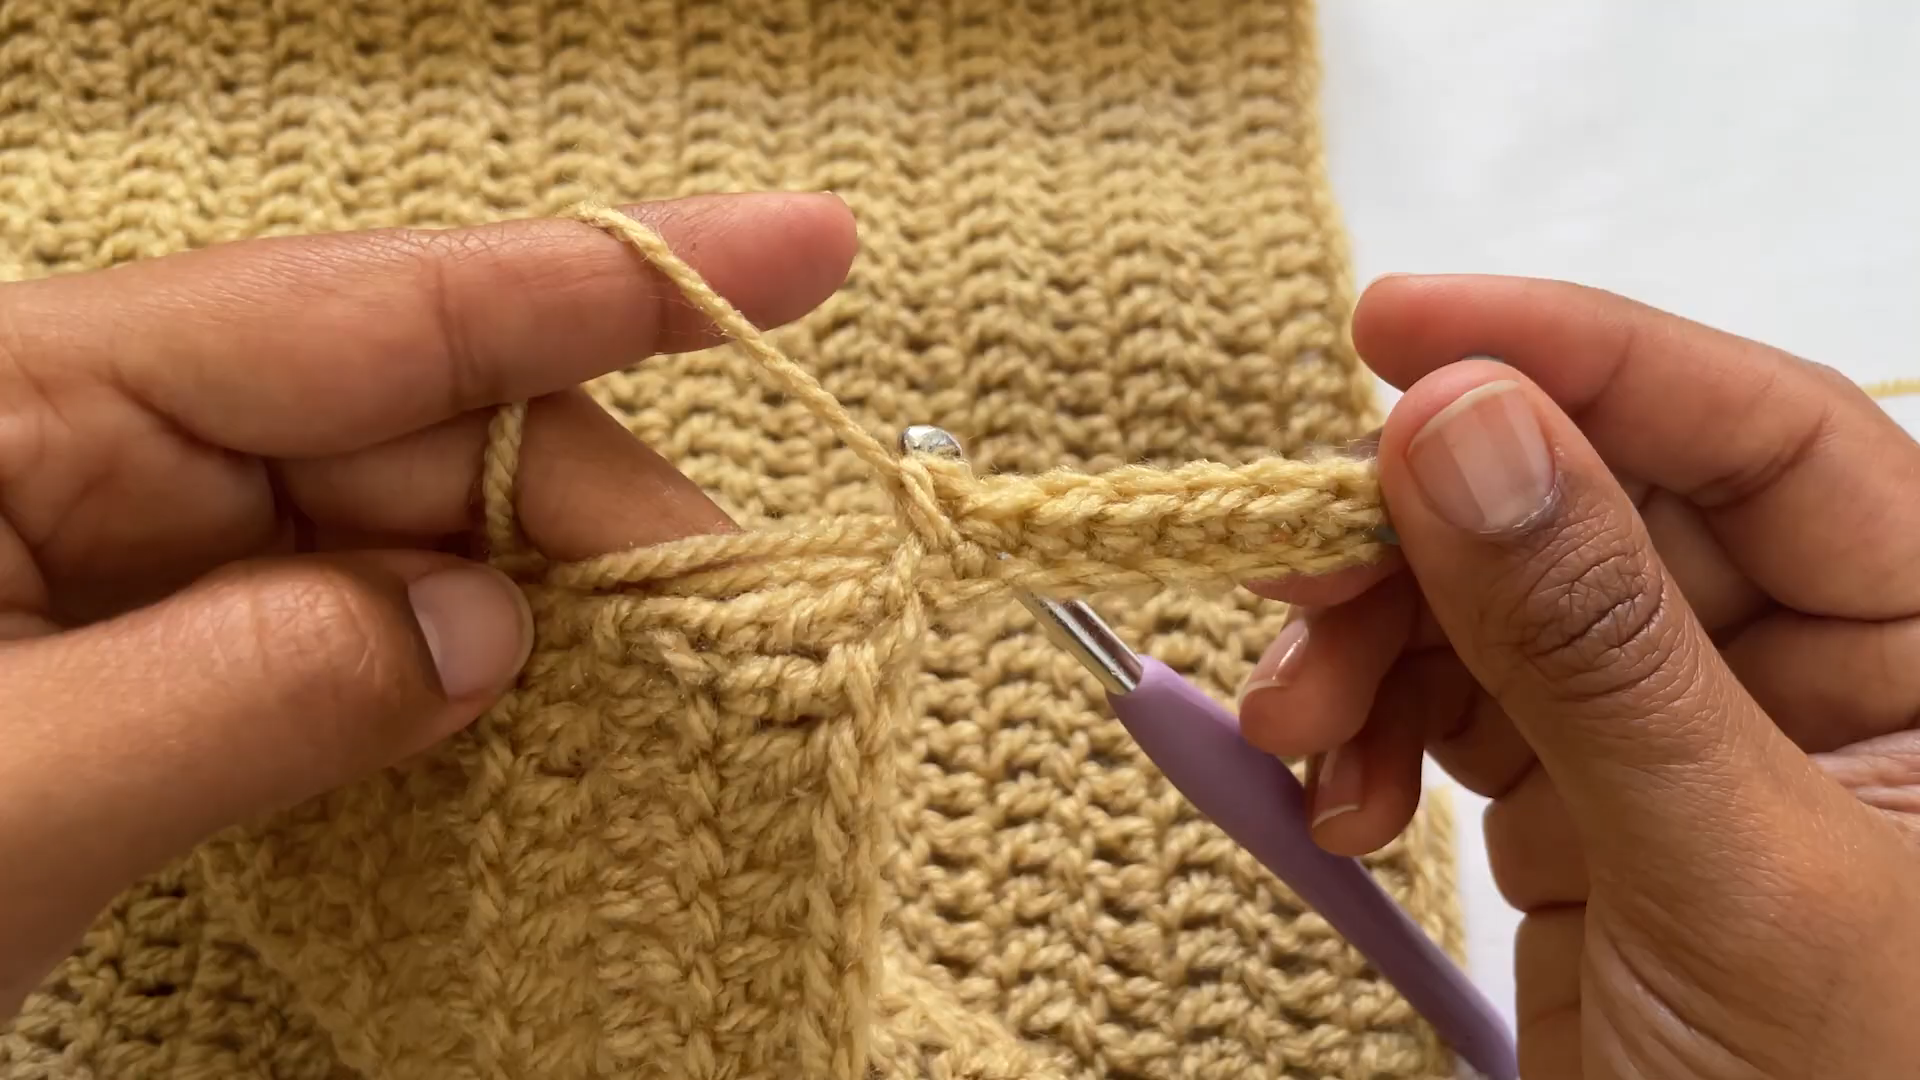
Step 3: Build the Ribbing in Back Loops
Turn the work and skip the slip stitches. After that, single crochet through the back loop only across the band. Chain one, turn, and work back loops toward the body again. Clip a marker on the outer edge to track the row count. Then repeat up the front, around the neckline, and down the second front.
Stitch check: every band row should hold the same count as Step 2, because a missing stitch will show as a slanted edge on the open front crochet cardigan later.
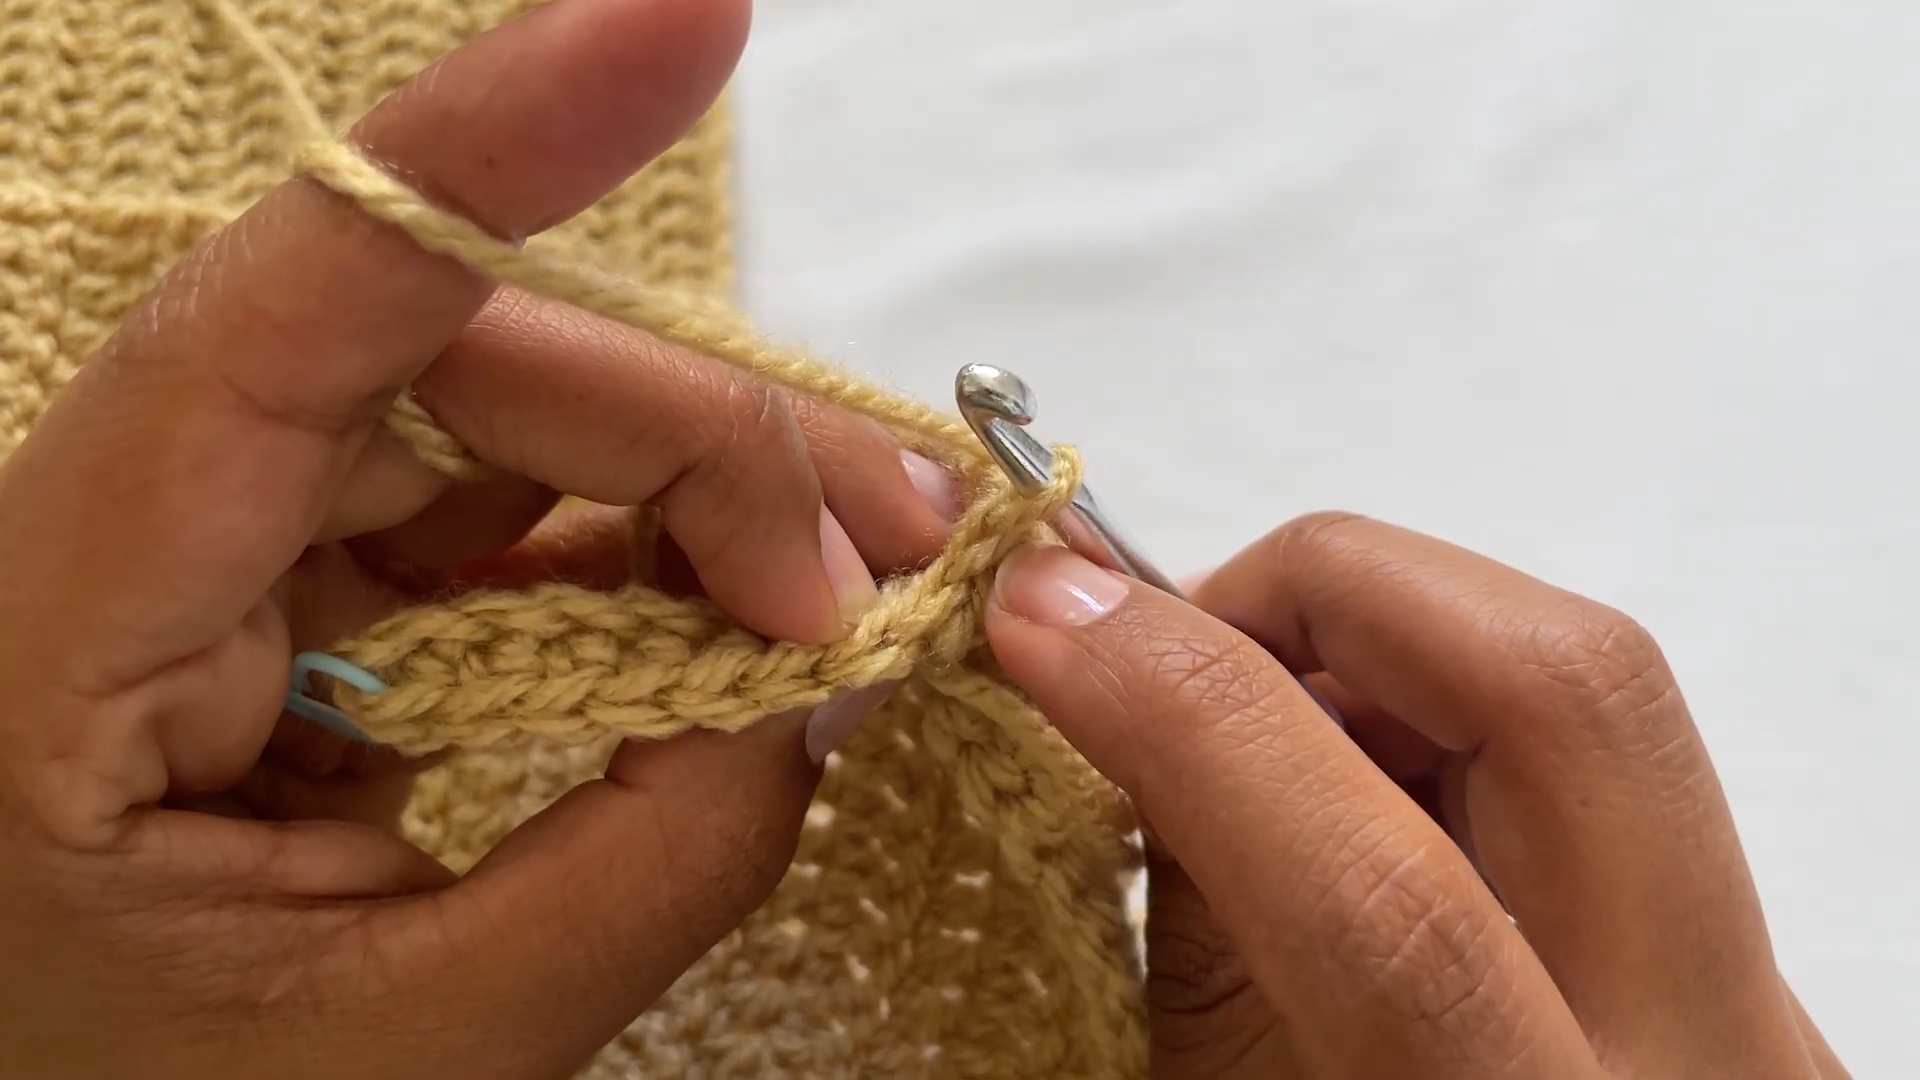
Step 4: Start the Sleeve Cuff
Move to the sleeve opening. Join the yarn at the underarm seam and place a pink marker there, since the marker flags where each cuff round begins and ends. Then chain eleven for a slightly deeper cuff than the front band.
Fit check: wrap the sleeve around the wrist now. A snug cuff should slide over the hand without strain.
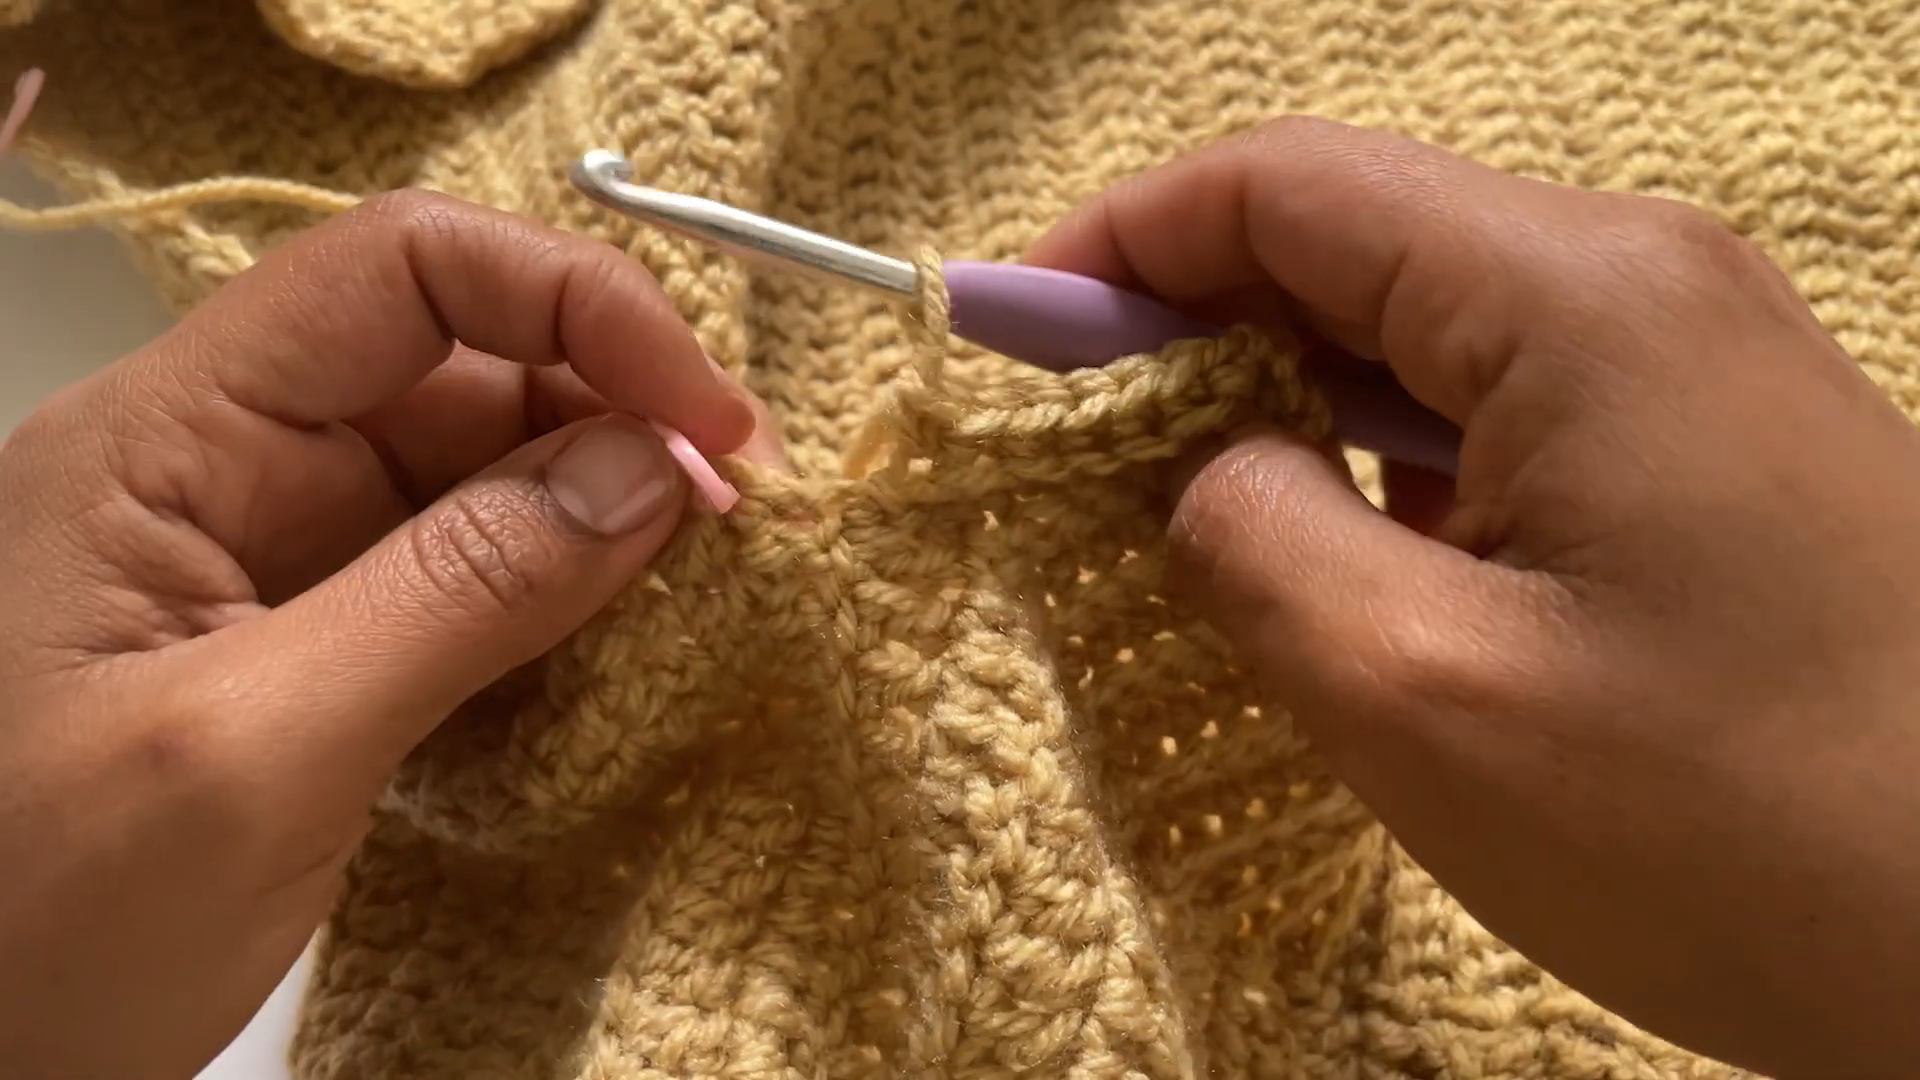
Step 5: Work the Cuff Around the Sleeve
Repeat the back-loop ribbing pattern from Step 3. On each return row, slip stitch into the sleeve edge. For a gathered cuff, skip one sleeve stitch every fourth join. Consequently, the sleeve narrows neatly into the band.
Micro-note: gathering at the cuff keeps a roomy sleeve from sliding over the hand.
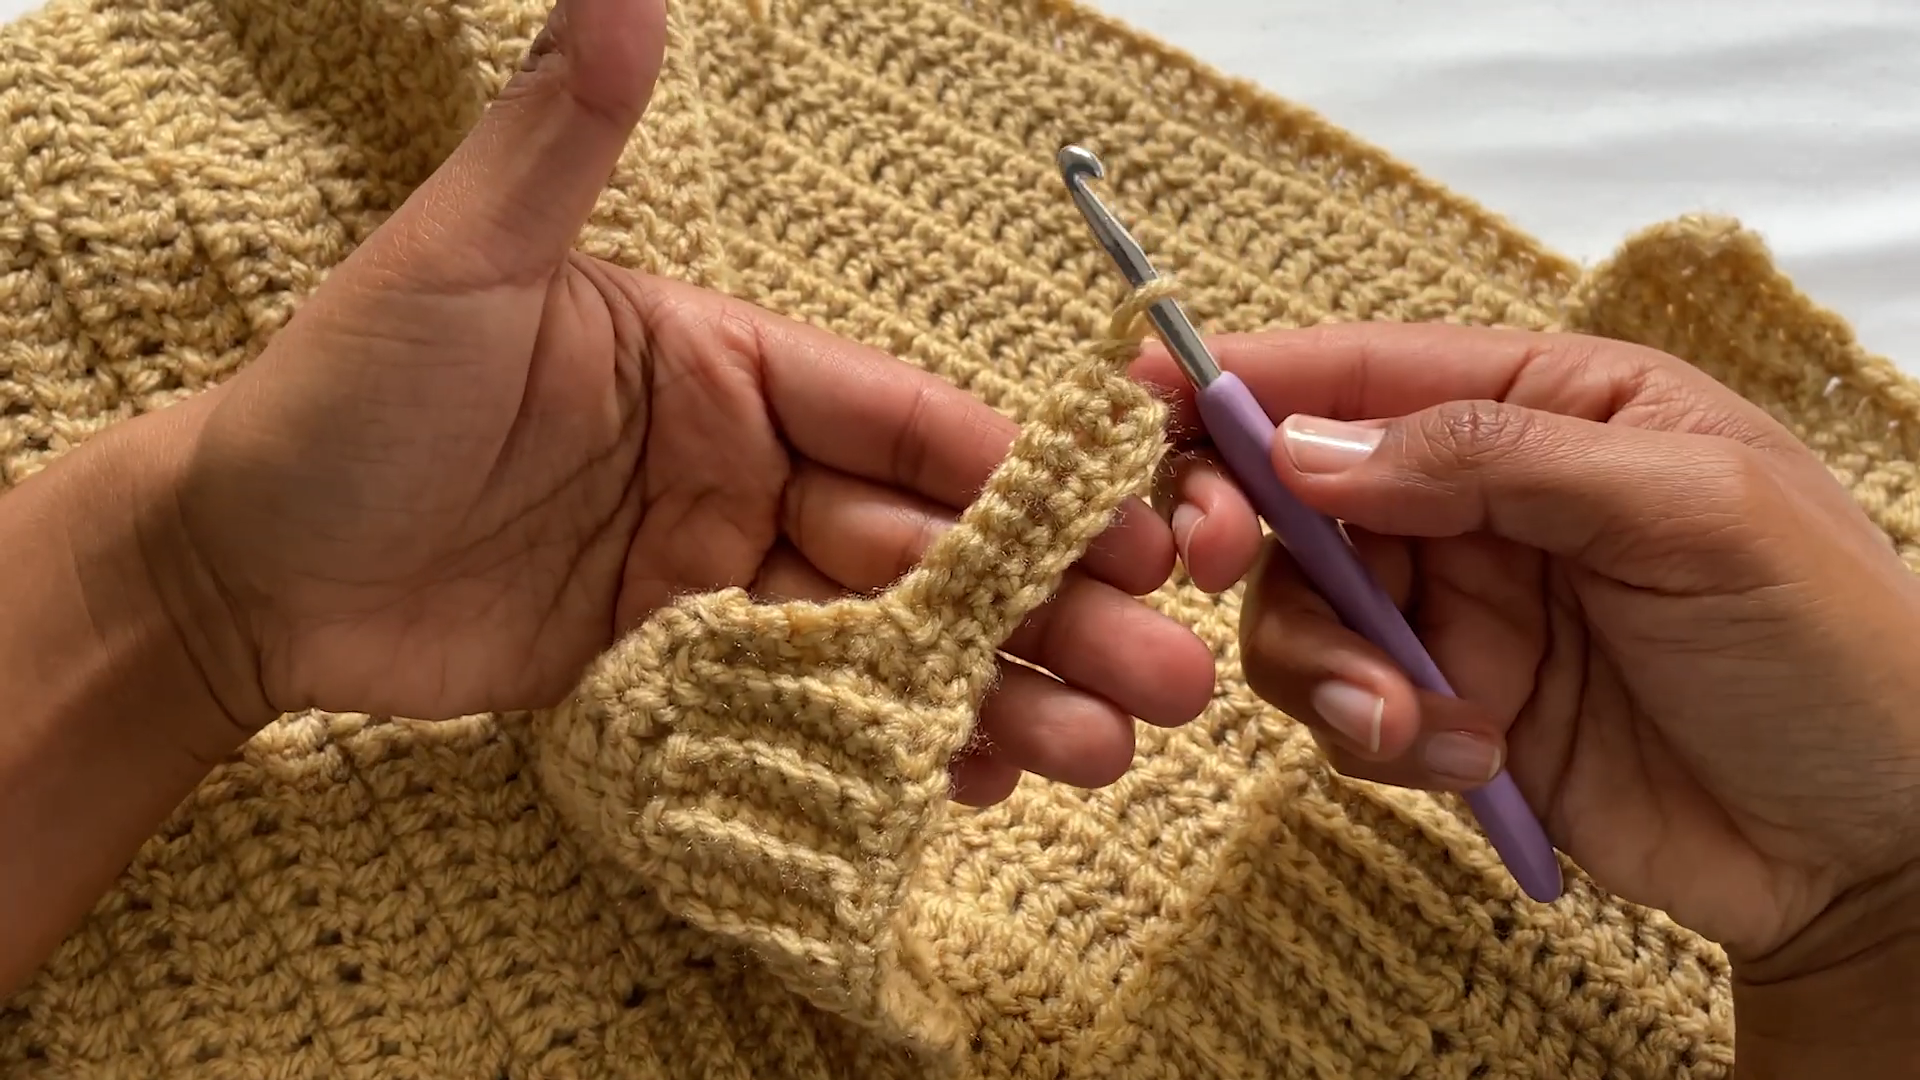
Step 6: Seam the Ends and Weave In Tails
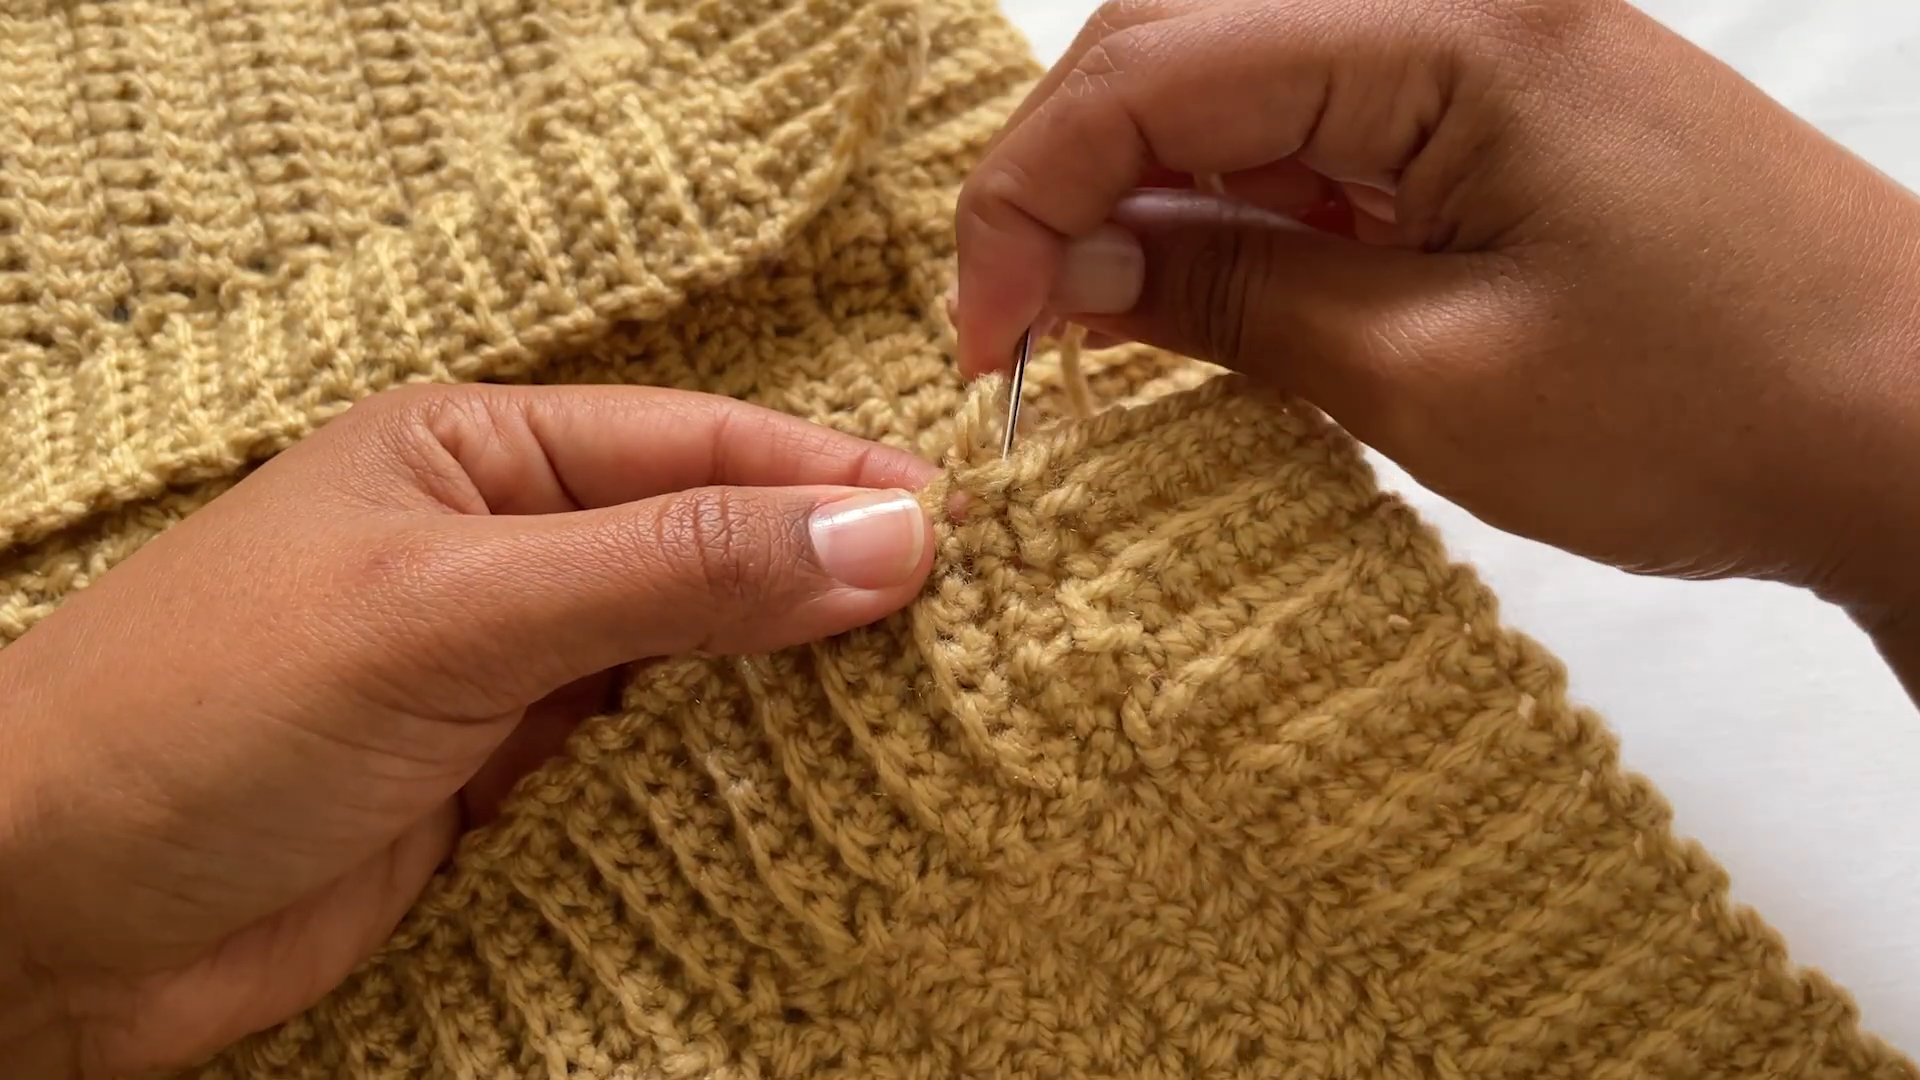
Once the cuff meets the pink marker, fasten off with a long tail. Thread the tail onto a tapestry needle. Next, whipstitch the last row to the starting chain through matching loops. Finally, weave the tail through several ribs in opposite directions and trim.
Measure now: lay both sleeves flat and confirm the cuffs match in width before finishing the second one.
Where Beginners Usually Go Wrong
- Band rows drift in count. Stitches vanish at the turn. Fix: count every few rows and keep a marker in the last stitch.
- Front edges ripple. Too many slip stitches crowd the edge. Fix: skip an edge stitch every few joins.
- Ribbing looks flat. Front loops were used by mistake. Fix: work only through back loops on every row.
- Cuffs feel loose. No gathering happened on the sleeve edge. Fix: skip sleeve stitches at regular intervals.
Troubleshooting Extra
Fronts flare outward after wearing. The band stretched more than the body. To fix it, steam the band lightly and pin it flat to dry.
Neckline gapes at the back. The band was worked too loosely around the curve. Instead, rework that section with a 4.5 mm hook.
Seam shows through the cuff. Tension on the whipstitch was pulled too hard. Therefore, redo the seam using the mattress stitch for an invisible join.
Signs You Did It Right
- The front bands hang straight with no waves or puckers.
- Ribbed lines run vertically and look evenly raised.
- Both cuffs measure the same and hug the wrists lightly.
- Seams blend into the ridges instead of forming a bump.
- The finished open front crochet cardigan pattern piece sits evenly on both shoulders when worn.
Stage 3: Keeping Your Crochet Cardigan Looking Good
Washing and Care Basics
Hand wash in cool water with a mild wool-safe soap. Avoid wringing, since twisting stretches the ribbing. Instead, press water out gently with a towel. Afterward, lay the piece flat on a dry towel and reshape the bands. Following those habits keeps an open front crochet cardigan soft and true to size for years.
Storage Tips
Fold the cardigan rather than hanging it, because hangers pull the shoulders out of shape over time. Additionally, tuck it into a breathable cotton bag between seasons. A few cedar blocks nearby also discourage moths.
Creative Projects You Can Make With the Pattern
The sideways ribbed band technique transfers easily to other projects. For example, it adds a neat border to a crochet blanket edging. Similarly, the textured body stitch works well for a cozy shawl or a simple vest. Makers who enjoy the cuff method can also apply it to slippers or a chunky beanie brim. For more garment ideas, browse our crochet wearables collection.
Ways to Style or Display It
Pair the cardigan with a white tee and wide-leg trousers for a clean everyday look. Alternatively, layer it over a slip dress for evening plans, or throw it over our crochet preppy pleated skirt for a matching handmade outfit. It also pairs well with the crochet strappy pixel crop top on warmer days. For market stalls or photos, drape it over a wooden chair back so the ribbed fronts stay visible.
Why It’s Popular Right Now
Handmade layers keep rising in demand as slow fashion gains ground. Moreover, warm earthy shades like mustard fit easily into autumn outfits.
- Open fronts flatter many body shapes without fitting fuss.
- Textured stitches look modern yet stay easy to learn.
- Ribbed edges give handmade pieces a polished, boutique finish.
Bonus: Quick Patch Pocket Add-On
Patch pockets make the cardigan even more practical. First, crochet two small squares, about five inches wide, in the same textured body stitch. Then add two or three rows of back-loop ribbing along the top edge of each one, so the pocket openings match the front bands.
After that, pin the pockets to the fronts at hip height and check both sides line up in a mirror. Finally, whipstitch around three sides with matching yarn, leaving the ribbed edge open.
Open Front Crochet Cardigan Pattern FAQs
Can a beginner handle the open front crochet cardigan pattern?
Yes. Anyone comfortable with single crochet and turning rows can finish it with patience.
What yarn weight works best?
Worsted weight (#4) gives the best balance of drape and structure. Lighter yarn, however, needs a smaller hook and more rows.
How can the length change?
Add or remove body rows before starting the front bands. After that, the band method adapts to any length.
Is acrylic yarn a good choice?
Acrylic is durable, affordable, and easy to wash. However, a cotton blend breathes better in warmer weather.
Your Cardigan, Ready for Cool Mornings
Clean ribbed edges turn a simple textured layer into something that looks bought, not just made. Once the sideways band feels natural, the open front crochet cardigan pattern becomes a base you can reshape with pockets, a hood, or a longer length.
So pick your yarn, swatch that first band, and let each row build your confidence for the next garment on your hook.