Oversized Crochet Sweater Pattern With Bold Stripes
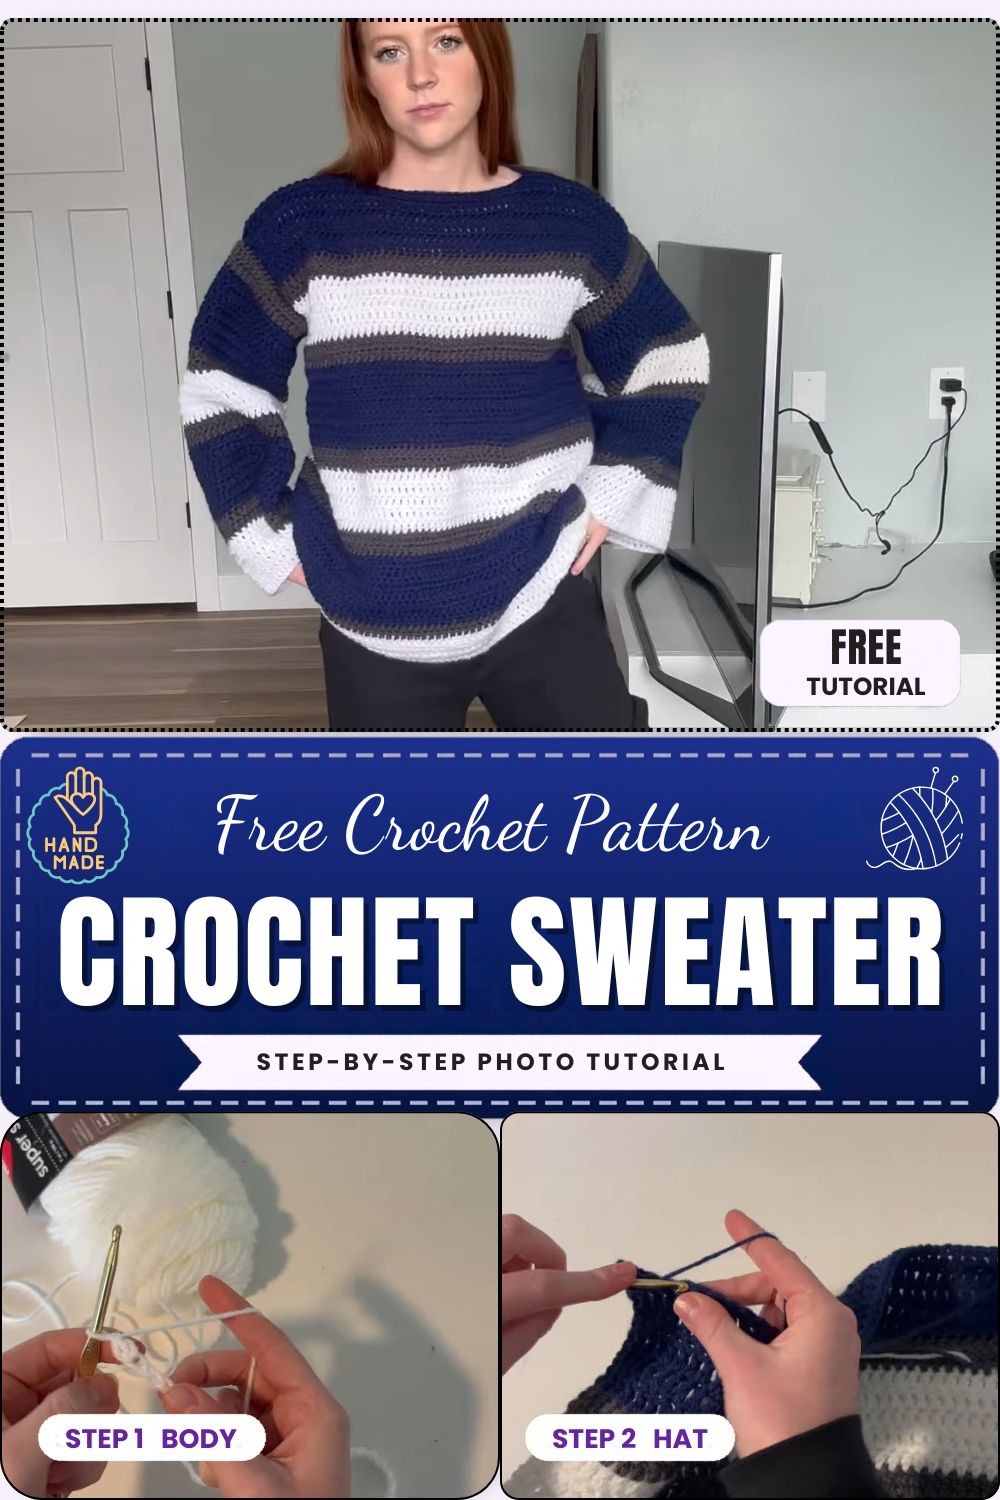
Navy, charcoal, and crisp white stacked in thick, confident bands give the Oversized Crochet Sweater Pattern With Bold Stripes a relaxed varsity look that never feels fussy. The roomy fit drapes past the hips, the sleeves hang loose, and every body row is simple half double crochet.
Because the stripes do all the talking, the oversized crochet sweater pattern stays calm to work while still looking impressive. Newer makers ready for a first crochet garment will feel right at home, and seasoned crocheters craving a cozy, mindless project will enjoy watching each color block grow.
About the Oversized Crochet Sweater Pattern
Flat panels form the whole garment, so nothing here needs complicated shaping. First, you make a front and a back. Then you join them at the shoulders, crochet the sleeves straight off the armhole edges, and finally add ribbed white bands at the hem and cuffs.
Most of the charm, however, comes from the roomy silhouette. Half double crochet builds a soft, slightly squishy fabric with enough weight to hang nicely, while the back-loop ribbing adds a store-bought touch at the edges. As a result, anyone who can count stitches and change colors cleanly can finish the oversized crochet sweater pattern in a couple of relaxed weekends.
Project Details
- Skill Level: Advanced beginner
- Finished Size: One oversized size that fits bust sizes S–L; the body measures about 24 inches wide laid flat and roughly 26 inches long
- Estimated Time Required: 18–25 hours in total (about 1 hour for a swatch and prep, 15–20 hours of stitching, and then 2–4 hours of seaming and weaving ends)
- Recommended Yarn Weight: Worsted weight (#4), acrylic or an acrylic blend (see the Craft Yarn Council yarn weight chart if you’re unsure which yarns fit)
- Crochet Hook Size: 6 mm (J-10) for the body and sleeves; 5 mm (H-8) for the ribbed bands
Materials for the Oversized Crochet Sweater
- Worsted weight yarn in three colors:
- Navy blue, about 650 yards (main stripe color)
- Charcoal grey, about 350 yards (thin accent stripes)
- White, about 550 yards (wide stripes and all ribbing)
- 6 mm (J-10) crochet hook
- 5 mm (H-8) crochet hook
- Tapestry needle with a large eye
- Four to six locking stitch markers
- Sharp scissors
- Measuring tape
- Optional: blocking mats, rust-proof pins, and a spray bottle
Navy uses the most yardage in the oversized crochet sweater pattern, so buy that color first. Why two hooks? A smaller hook tightens the ribbing, so the hem and cuffs hug the body gently instead of flaring out.
Crochet Stitches & Techniques
Chain (ch)
Every piece starts from a foundation chain. Keep chains relaxed, because a tight chain pulls the bottom edge inward and fights the drape of the panel.
Slip Stitch (sl st)
Slip stitches join the shoulders, attach the ribbing, and close the seams. Also, they create a firm, flat join that sits neatly inside the garment.
Half Double Crochet (hdc)
Nearly the entire body relies on hdc. Yarn over, insert the hook, and pull up a loop; then yarn over again and draw through all three loops on the hook.
Half Double Crochet in Back Loop Only (hdc blo)
Working into only the back loop leaves a raised ridge on every row. When you stack those ridges together, they mimic knit ribbing and give the bands their stretch.
Double Crochet (dc)
Sleeves switch to dc, since it makes a lighter, faster fabric that moves easily around the arms.
Color Changes
Stripes always change at the end of a row. Work the last hdc of the old color until three loops remain, then pull the new color through all three to complete it.
Seaming and Weaving Ends
Side seams, sleeve seams, and dozens of yarn tails get handled at the end. Still, a tapestry needle and some patience turn a pile of pieces into a clean, polished sweater.
Oversized Crochet Sweater Pattern Instructions
Gauge: 12 hdc and 9 rows = 4 inches with a 6 mm hook. Swatch first, since the fit of the oversized crochet sweater pattern depends on matching the gauge closely.
Stripe order for the body: 8 rows navy, 3 rows grey, 8 rows white, 3 rows grey. After that, repeat the sequence as written.
Step 1: Chain the Foundation for the Ribbed Band
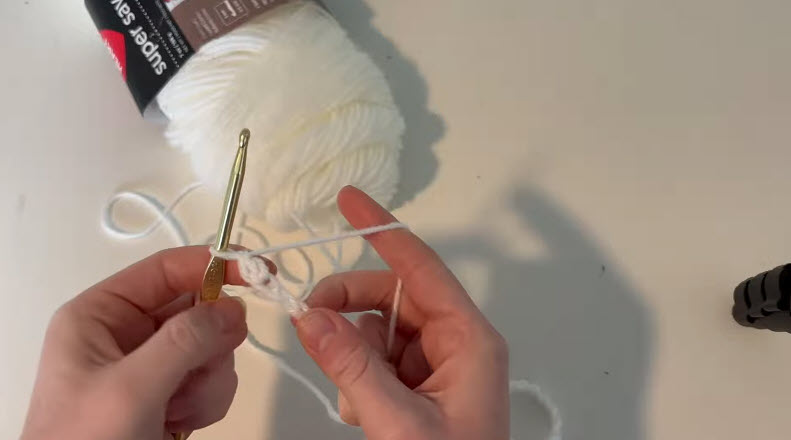
Grab the white yarn and the 5 mm hook. Make a slip knot, place it on the hook, and hold the working yarn over your left index finger so the tension stays steady.
- Chain 11 loosely.
- Then check that the chain lies flat without twisting.
- Also, leave a 6-inch tail at the start for weaving in later.
Starting with the ribbing lets you test your tension on a small, low-risk piece before you tackle the big panels.
Step 2: Build the Long White Ribbing Strip
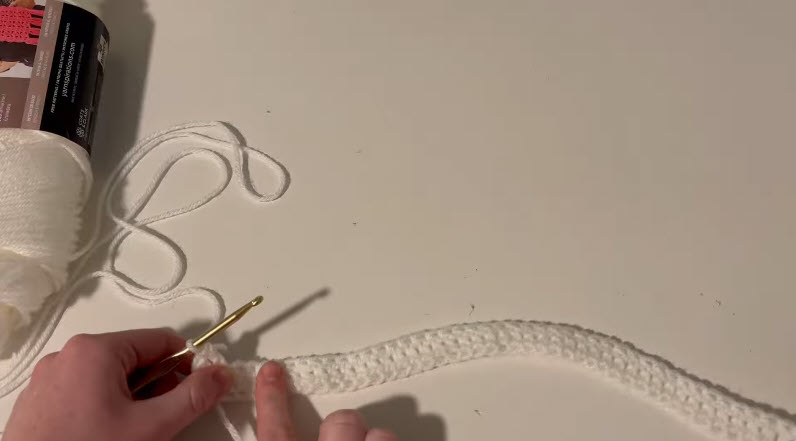
Now the chain becomes a stretchy band worked sideways. Rows run across the short width, so the strip grows in length as you go.
- Row 1: Hdc in the third chain from the hook and in each chain across (9 hdc).
- Row 2: Ch 2 (does not count as a stitch), turn, hdc blo in each stitch across (9 hdc).
- Repeat Row 2 until the strip reaches about 24 inches, roughly 60 rows.
- Then fasten off, leaving a long tail for attaching later.
- Finally, make a second strip the same length, plus two shorter strips of about 10 inches each for the cuffs.
Measure now: Lay the strip flat without stretching it. It should match the planned panel width closely; otherwise, a strip that runs short will pucker the hem.
Pro Tip: Stretch the band gently after every 20 rows. A bit of give confirms your back-loop ridges are forming properly and not twisting.
Step 3: Join a Fresh Color at the Panel Edge
Every stripe change happens at the edge of the work, which keeps the color lines crisp and straight. So once you finish the final row of a stripe, bring the new yarn into play right at the corner.
- Work the last hdc of the old color until three loops sit on the hook.
- Next, drop the old color and pull the new yarn through all three loops.
- Then ch 2 with the new color and turn to begin the next row.
- Cut the old yarn, leaving a 5-inch tail, unless the next stripe uses it within two rows.
Short grey stripes let you carry the unused color loosely up the side instead of cutting it, which saves you a few ends to weave.
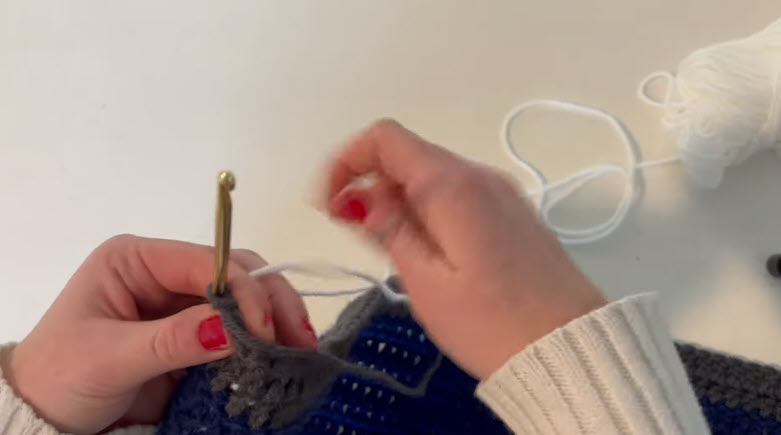
Step 4: Stack the Bold Stripes on the Front and Back Panels
Switch to the 6 mm hook for the main body. Both panels follow the same steps, so finish one and then repeat for the second.
- With navy, ch 74.
- Row 1: Hdc in the third chain from the hook and in each chain across (72 hdc).
- Row 2: Ch 2, turn, hdc in each stitch across (72 hdc).
- Repeat Row 2, following the stripe order: 8 navy, 3 grey, 8 white, 3 grey.
- Continue until the panel measures about 23 inches, ending on a complete stripe.
- Finally, fasten off and set the panel aside.
Stitch check: Count to 72 at the end of every color block, because losing or gaining a stitch at the turning edge can slant the whole panel.
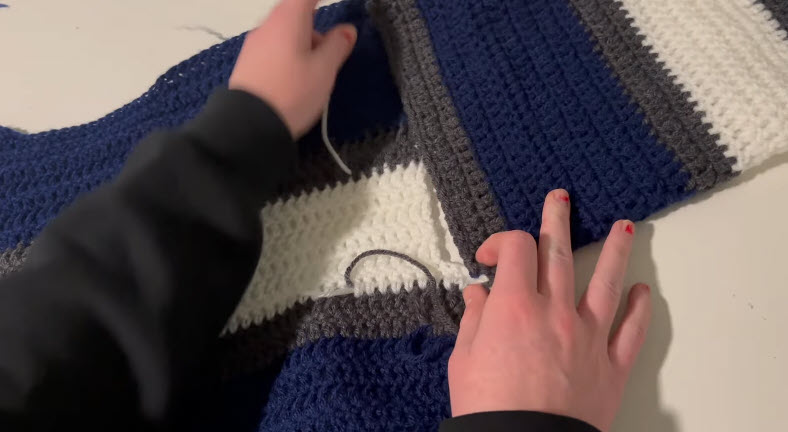
Pro Tip: Leave the loose tails hanging for now, just like the panel in the photo. Weaving them all at once later is faster, and it also keeps your stitching rhythm going.
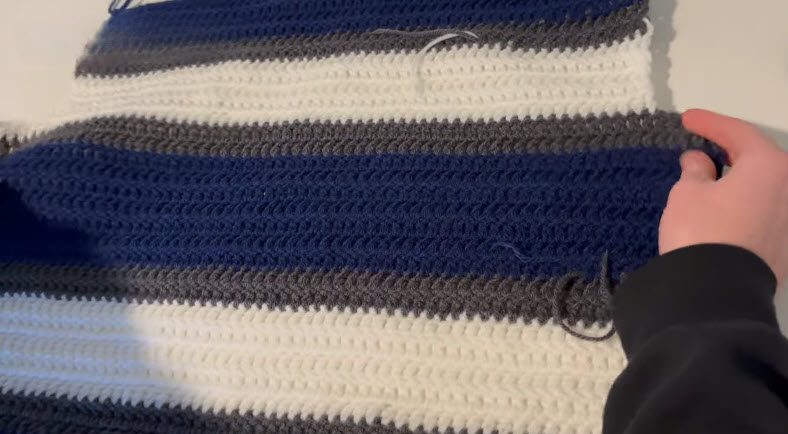
Step 5: Line Up the Panels and Join the Shoulders
Lay the front and back panels on top of each other with the right sides facing in. Then match the stripes row for row so the color bands align at the sides.
- Place a stitch marker 22 stitches in from each outer edge along the top.
- Join white yarn at the outer corner, working through both layers.
- Slip stitch across 22 stitches, then fasten off.
- After that, repeat on the opposite shoulder.
- Leave the center 28 stitches unworked to form the neck opening.
Fit check: Slip the joined panels over your head before going further. The neck should pass through easily, with a little room to spare.
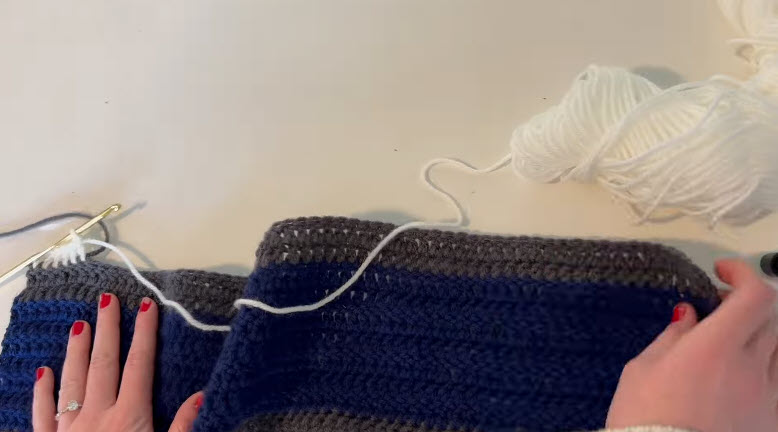
Step 6: Crochet the Sleeves Off the Armhole Edge
Open the joined panels flat so the shoulder seam sits in the middle. Next, measure 9 inches down from the shoulder on the front and back and mark both points; the space between them forms the armhole.
- Join navy yarn at one marker.
- Row 1: Ch 3 (counts as dc), then work about 3 dc for every 2 row ends until you reach the second marker, aiming for roughly 54 stitches.
- Row 2: Ch 3, turn, dc in each stitch across.
- Follow the same stripe order as the body, although you can scale each block down for a slimmer look.
- Decrease rows: On every fourth row, dc2tog at the start and end of the row.
- Keep going until the sleeve measures about 16 inches and holds roughly 40 stitches.
- Then fasten off and repeat on the other side.
Working the sleeves straight from the body removes an entire seam. Besides, it lets you try the fit as you go.
Pro Tip: Keep the first row relaxed, since a tight join at the armhole restricts movement and makes the shoulder pull awkwardly.

Step 7: Attach the White Ribbing to the Hem
Grab the long white strips from Step 2. Each one runs along the bottom edge of a panel, framing the stripes with a clean border.
- Lay the ribbing along the foundation edge with the ridges facing out.
- Join white yarn at one corner through both the band and the panel.
- Slip stitch across through every panel stitch, spacing the band rows evenly along the way.
- If the band runs slightly short, ease it gently so the stretch spreads evenly.
- Then fasten off and repeat on the second panel.
- Finally, attach the shorter cuff strips to each sleeve end the same way.
Quick look: Hold the panel up after attaching the band. The hem should hang straight, without ripples or puckers.
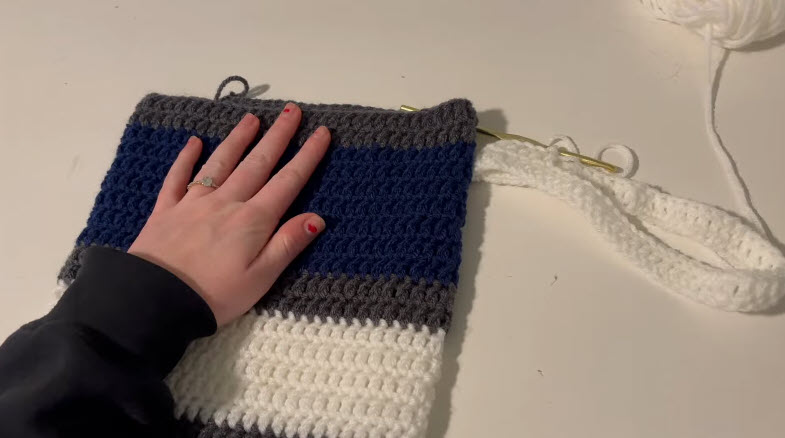
Step 8: Seam the Sides and Tidy Every End
Fold the sweater along the shoulders with the right sides facing in. Then line up the side edges, the armhole markers, and the sleeve seams.
- Starting at the cuff, slip stitch or mattress stitch up the underside of the sleeve.
- Continue straight down the side of the body to the bottom of the ribbing.
- Repeat on the opposite side.
- After that, turn the sweater right side out and inspect every seam.
- Thread each loose tail onto the tapestry needle and weave it through at least 2 inches of matching color, changing direction once.
- Optional: Work one round of single crochet in white around the neckline for a smoother finish.
Weaving tails into the same color hides them completely, whereas crossing into a different stripe leaves tiny visible flecks.
Tips for Success
Solid garments start with steady habits. In fact, a few small adjustments make a big difference across the dozens of rows in the oversized crochet sweater pattern:
- Swatch before you commit. A 4-inch square takes 20 minutes and saves hours of frogging if your gauge runs loose.
- Mark every tenth row. Stitch markers along the side help you track stripe lengths without counting from the bottom.
- Keep tension consistent between colors. Some yarns feel slightly thicker than others, so check that white rows aren’t worked tighter than navy ones.
- Block the panels before seaming. Mist them with water, pin them to size, and then let them dry overnight for straighter edges.
- Weave ends in batches. Tackling five or six tails at once feels far less tedious than facing sixty at the finish.
Personalization Ideas
Once you know the basic construction, the oversized crochet sweater pattern adapts easily to new colors and sizes.
Soft Neutral Palette
Swap navy and charcoal for oatmeal, camel, and cream. As a result, the sweater reads calm and minimal while keeping the same cozy shape.
Team or School Colors
Pick the colors of a favorite sports team or school, because bold contrasting stripes suit the varsity silhouette perfectly.
Seasonal Versions
Deep burgundy and forest green feel right for winter, while pastel lilac and mint turn the sweater into a lighter spring layer.
Cropped Length
Stop the body panels around 16 inches for a boxy cropped version. It pairs nicely with high-waisted jeans, and it also looks sweet over our crochet high-waisted ruffle shorts.
Kid-Size Mini
Scale the foundation down to 42 stitches and shorten the panels for a matching child’s sweater. For the tiniest family members, try our crochet unisex baby pattern as well.
Chunky Upgrade
Switch to bulky yarn and a 9 mm hook, then adjust the stitch counts to your new gauge. Consequently, the sweater works up in about half the time.
Common Mistakes With an Oversized Crochet Sweater
- Skipping the gauge swatch. A difference of just one stitch per inch can change the finished width by 6 inches or more, so always measure first.
- Drifting stitch counts. Missing the last stitch of a row slowly narrows the panel. For that reason, count at every color change.
- Mismatched stripes at the seams. Panels with different row counts create stripes that won’t line up, so keep a written tally for each panel.
- Tight foundation chains. A snug chain pulls the hem inward. Instead, chain with a hook one size larger if the edge curls.
- Rushing the ends. Tails trimmed too short tend to poke out after washing, so weave at least 2 inches before cutting.
Washing and Caring for Your Striped Sweater
Acrylic yarn handles machine washing on a gentle cold cycle. However, turn the sweater inside out and place it in a mesh laundry bag first. Wash it with similar dark colors for the first few cycles, since navy dye can occasionally bleed onto the white stripes.
Dry the sweater flat on a towel, gently reshaping the ribbing and shoulders while it’s damp. Hanging a wet crochet garment stretches it permanently, so fold it on a shelf once it’s dry rather than putting it on a hanger.
FAQs About the Oversized Crochet Sweater Pattern
Can a complete beginner make the sweater?
Makers comfortable with chains and half double crochet can manage the oversized crochet sweater pattern. Still, practicing color changes and slip-stitch seams on a small swatch first builds confidence.
How much yarn will I need in total?
Plan on about 1,500–1,600 yards of worsted weight yarn across all three colors. Also, buy an extra skein of navy to be safe, especially if you lengthen the body or sleeves.
Can I make the sweater larger?
Add 6 stitches to the foundation chain for every 2 extra inches of width. Then remember to lengthen the ribbing strips to match.
Why are my stripes wavy instead of straight?
Wavy stripes usually come from uneven tension or changing colour mid-row. So keep changes at the edges and relax your grip on lighter colors.
Does the sweater stretch after wearing?
Acrylic holds its shape well, although the fabric relaxes slightly with wear. Blocking and flat drying keep it close to its original size.
Can I use cotton yarn instead?
Cotton works for a warm-weather version, but it’s heavier and less stretchy. Therefore, expect more drape and a slightly longer fit after washing.
Bonus: Fixing a Stripe That Went Wrong
Even careful makers sometimes finish a stripe one row too short or too long. Before you rip back the whole panel, count the rows in each stripe and compare them with the order in the oversized crochet sweater pattern.
- One row short: if the stripe sits near the top of the panel, add the missing row before moving on to the next color.
- One row long on both panels: leave it, because matching mistakes still line up at the side seams.
- One row long on a single panel: undo back to that stripe, since the seams will otherwise show a clear step.
Stripes Stacked, Sweater Season Ready
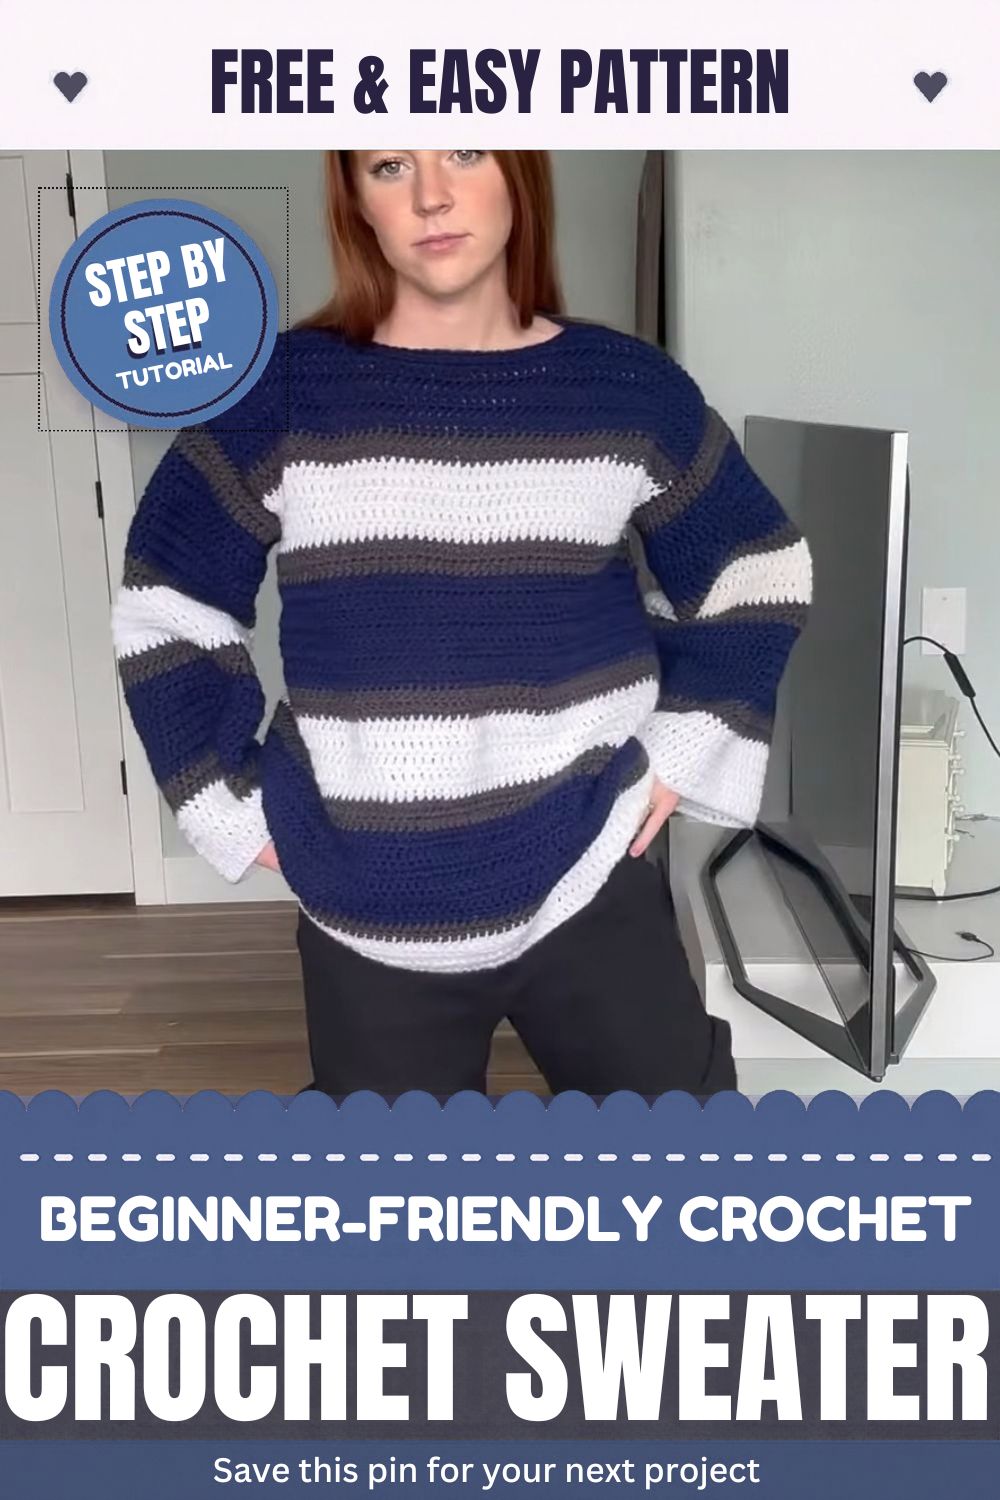
Few things feel as satisfying as pulling on a sweater you stitched row by row. Once the rhythm kicks in, the navy and white blocks climb quickly, and each closed seam brings the oversized crochet sweater pattern closer to a piece you’ll grab all season.
So choose your colors, check your gauge, and start that first ribbed strip. Afterward, if you want more handmade pieces to wear, browse our crochet wearables collection or pair your sweater with the crochet preppy pleated skirt for a full varsity outfit.