Tiny Crochet Horse Two-Inch Amigurumi Pattern
Dusty pink thread a bristly charcoal mane and four black-tipped hooves shape this tiny crochet horse two-inch amigurumi pattern a pony small enough to rest between two fingers. Fine thread and a steel hook keep the micro stitches tight and neat.
Every part of the pony is worked separately, then shaped with needle sculpting so the eyes sit in soft hollows. Below you’ll find the round counts for each piece, how to place the eyes with pins, how to embroider glossy black eyes, and how to add a latch-hooked, brushed mane. Tips on thread tension and stuffing tiny pieces keep the pony firm and wobble-free.
Pattern Overview
The pony is made from eight small crocheted pieces (a head, a body, two ears and four legs), plus a latch-hooked mane and tail. Everything is worked in continuous spiral rounds. Two steps that many horse patterns skip give the face its character: sculpting shallow eye sockets with sewing thread, and embroidering glossy black eyes by hand.
- Finished size: About 2 inches with fine thread and a 1.0 mm hook. Your tension may change that slightly.
- Time: About 15 minutes of prep, 2–3 hours of stitching, and 60–90 minutes for sculpting, eyes, assembly and mane
Materials
- Fine cotton or cotton blend thread in dusty pink (lace to light fingering weight)
- Black thread or embroidery floss for the hooves and eyes
- Charcoal gray fingering or DK yarn for the mane and tail
- Steel crochet hook, 0.9–1.25 mm
- A second fine hook for latch-hooking the mane
- Polyester fiberfill
- White sewing thread and a long, sharp needle for sculpting
- Tapestry needle, colored-head pins and tweezers
- A small pet slicker brush or stiff toothbrush for the mane
- A stitch marker (a scrap of contrasting thread works best)
Thread Choice
Smooth, tightly plied cotton shows every stitch clearly, which matters when a round holds only 18 stitches. A slightly fuzzy cotton blend gives a softer, velvety look but makes counting harder. Pick one of those two, and skip anything thick or loosely spun, since split plies are nearly impossible to fix at this scale.
Hook Size and Gauge
Go down in hook size until no light shows through the fabric when you stretch it gently. With lace weight thread, that’s usually 0.9–1.0 mm. Gauge isn’t critical, but consistency is. Make every piece in one sitting where you can, because tension drifts between sessions and the legs can end up mismatched.
Safety
Don’t use safety eyes, beads or wire if the pony may reach a child under three. Embroidered eyes are the best choice at 2 inches anyway, and at this size the horse is a display piece or keepsake rather than a play toy.
Abbreviations (US Terms)
- MR: magic ring
- sc: single crochet
- inc: 2 sc in the same stitch
- dec: invisible decrease (sc2tog through the front loops)
- BLO: back loop only
- sl st: slip stitch
- (n): stitch total at the end of the round
Watch the Video Tutorial
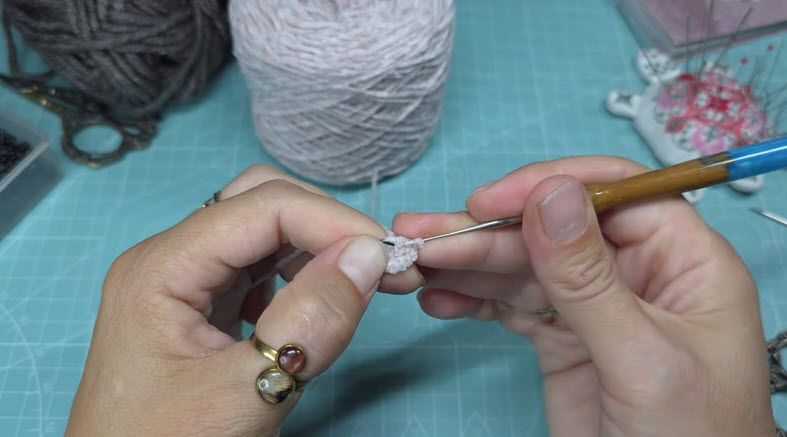
Working at this size is much easier once you’ve seen it done. The video shows the tiny rounds, the eye sculpting and the latch-hooked mane up close.
Step-by-Step Pony Pattern
Step 1: Head (dusty pink)
Work the magic ring and early rounds holding the piece close to your fingertips, with the working thread wrapped around one finger so the tension stays even.
- Rnd 1: 6 sc in MR (6)
- Rnd 2: inc x6 (12)
- Rnd 3: (1 sc, inc) x6 (18)
- Rnds 4–7: sc around (18)
- Rnd 8: (1 sc, dec) x6 (12). Stuff firmly, pushing the fiberfill in with tweezers.
- Rnds 9–10: sc around (12). These rounds form the muzzle.
- Rnd 11: dec x6 (6). Fasten off, weave the tail through the front loops and pull closed.
Stitch check: Count Round 3 twice. A missed increase here shows up as a flat side on the head.
Tip: Move your marker every single round. With only 18 stitches, it’s easy to lose your place, and frogging thread this fine makes it fray.
Step 2: Ears (make 2, dusty pink)
- Rnd 1: 4 sc in MR (4)
- Rnd 2: (1 sc, inc) x2 (6)
- Rnd 3: sc around (6)
Fasten off, leaving a tail. Don’t stuff the ears. Pinch the tip between your fingers to sharpen the point.
Step 3: Body (dusty pink)
- Rnd 1: 6 sc in MR (6)
- Rnd 2: inc x6 (12)
- Rnd 3: (1 sc, inc) x6 (18)
- Rnds 4–8: sc around (18)
- Rnd 9: (1 sc, dec) x6 (12). Stuff firmly.
- Rnd 10: sc around (12). This round forms the neck.
- Rnd 11: dec x6 (6). Top up the stuffing in the neck, close the opening, and leave a long tail for sewing.
Step 4: Legs (make 4)
- Rnd 1: With black, 5 sc in MR (5)
- Rnd 2: BLO sc around (5). The back loop round makes a crisp hoof edge.
- Rnds 3–6: Switch to dusty pink, sc around (5)
Because the pony sits, you can work the two front legs to Round 7 for a taller, more upright pose. Just make sure both front legs match each other and both back legs match each other.
Add a pinch of stuffing to the hoof end only, and leave the top soft so the leg sews on flat. Line up all four legs side by side before assembly. A leg that’s a round longer than its partner throws the pony off balance.
Step 5: Pin and Sculpt the Eyes
Push two colored pins into the head where the eyes will go, about two rounds above the muzzle decreases. Turn the head and look at it straight on, then adjust the pins until they’re level.
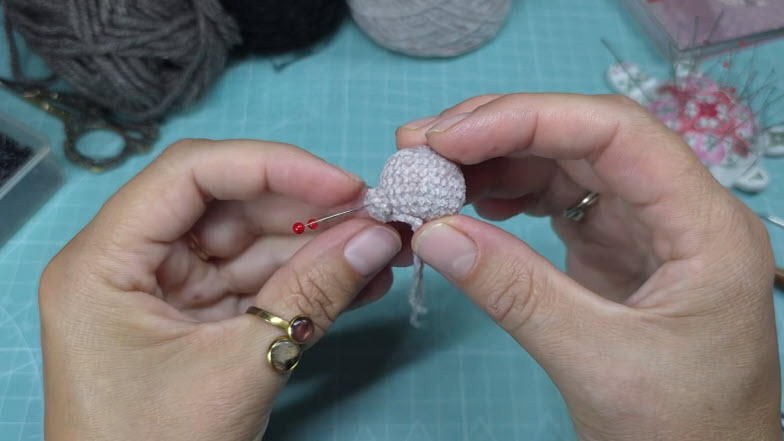
Thread a long needle with white sewing thread. Pass it from the base of the head up to one pin, then back down, and repeat for the second pin. Tug gently so the pinned spots dip inward. Two gentle passes work better than one hard pull. Tweezers help pull the needle through the dense fabric.
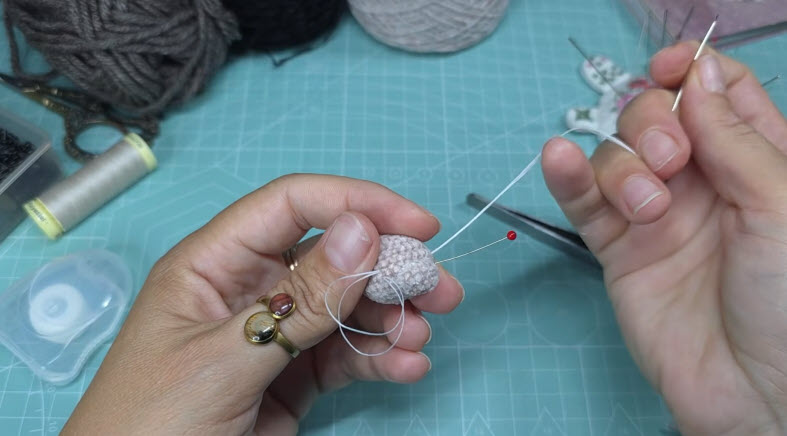
Step 6: Stitch the Eyes
With black floss, stitch each eye into its sculpted hollow. Wrap the stitches several times in the same spot for a raised, glossy eye.

Step 7: Add the Ears
Sew both ears to the top of the head, pointing upward and slightly apart. Check the face from the front before tying off.
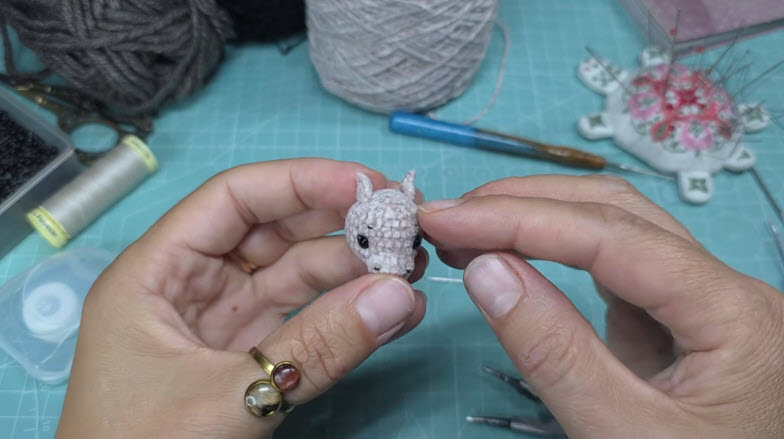
Step 8: Assemble the Pony
Pin every part first and look at the horse from all sides before sewing anything.
- Sew the head to the neck with a slight forward tilt.
- Sew the front legs close together under the chest, with the black hooves facing forward.
- Sew the back legs splayed slightly outward, so the pony sits upright.
Step 9: Mane and Tail
Cut the charcoal yarn into short strands. With a small hook, latch each strand along the top of the head and down the back of the neck, keeping the rows close together. Latch a small bunch of longer strands at the back of the body for the tail.

Brush the mane and tail until they fluff into a soft halo, then trim them to shape. Weave all remaining ends inside the body with a sharp needle.

Common Mistakes
- Skipping the marker: Stitch counts drift within two rounds.
- Overstuffing the legs: They swell and won’t sit flat against the body.
- Sculpting too hard: The head dents unevenly.
- Eyes placed too high: The horse looks surprised. Keep them near the muzzle.
Troubleshooting
- Gaps show the stuffing: Go down a hook size, or yarn over from the back of the hook for a tighter stitch.
- The head leans sideways: Unpick the neck seam and restuff the neck more firmly.
- The mane looks thin after brushing: Add a second row of strands behind the first.
- The pony tips over: Compare the legs again. One of a pair is probably a round longer.
Setting Up a Micro-Crochet Workspace
Tiny work tires your eyes and hands faster than regular amigurumi. A few setup choices help:
- Background: Work over a cutting mat or plain cloth in a contrasting color, so pale thread stands out.
- Light: A daylight lamp placed on the side opposite your hook hand stops the hook from casting a shadow. Magnifying glasses help too.
- Tools: Keep pins, tweezers and scissors in one tray so nothing tiny rolls away.
- Breaks: Rest every 30 minutes and stretch your fingers. Cramped hands tighten your tension without you noticing.
Real Horse Coat Colors to Try
Once you’ve made the pink pony, try copying real horse coats. Small embroidery details make a big difference at this size.
- Chestnut: A warm reddish-brown body with a matching or slightly darker mane.
- Palomino: A golden cream body with a pale caramel or cream mane and tail.
- Bay: A brown body with a black mane and tail. Work the lower legs in black up to Round 4 for “black points”.
- Appaloosa: A white body with tiny black French knots scattered over the back and hips.
- Pinto: A white body with a few brown or black patches embroidered in satin stitch.
- Dapple gray: A gray body with small white satin-stitch circles and a charcoal mane.
- Unicorn: Any coat plus a tiny gold horn: 4 sc in MR, then 3 more rounds of 4 sc.
Love tiny farm animals? The mini cow amigurumi and the goat keychain amigurumi make perfect stablemates. For a taller animal, try the crochet giraffe amigurumi, or add the mallard duck to your farmyard.
Keepsake and Display Ideas
Tuck the pony into a matchbox bed lined with fabric, set it on a bookshelf, or hang it from a thin ribbon as an ornament.
Care
Dust the pony with a soft brush and spot clean with a damp cloth only, since soaking can flatten the brushed mane.
FAQs
Can I use regular yarn instead of thread?
Yes, but the horse grows to roughly 4–5 inches with fingering yarn and a 2.0 mm hook.
Why not use safety eyes?
Even the smallest safety eyes overwhelm an 18-stitch head. Embroidery keeps the proportions right.
How do I see my stitches?
Use a daylight lamp and magnifying glasses, and work over a plain, contrasting surface.
How much thread do I need?
Only a few grams of the main color, so a small ball or spool is plenty.

Small Enough to Pocket, Sweet Enough to Keep
This little pony asks for patience more than advanced skill. Keep your marker moving, pin the eyes before sculpting, and match the legs in pairs before sewing. Your reward is a miniature horse with a brushed mane and soft, sculpted face that fits in the palm of your hand. Each new coat color comes together a little faster than the last.