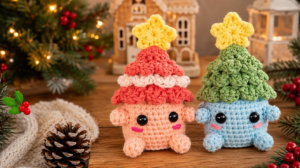
Free Crochet Winter Tree Doll Amigurumi Pattern
Rows of powder-pink stitches stack into little tiers in this free crochet winter tree doll amigurumi pattern, finished with glossy bead eyes and a shy smile. The palm-sized tree can hang from a branch, ride along on a bag strap, or brighten any winter display.
Two flat panels, a few edge increases and some slip stitches shape the stepped outline, and that simplicity is what sets this tree doll apart. There’s no working in the round and no color changes, just steady single crochet rows. Beginners get an easy amigurumi, and experienced makers can stitch a whole gift-ready forest over one cozy weekend.

Project Details
- Finished size: About 7 to 8 cm (3 in) tall and 6 cm (2.5 in) wide at the base
- Yarn weight: Fine / sport weight (#2), such as milk cotton or a 4-ply cotton blend
- Hook: 2.0 mm
- Construction: Two flat panels worked in rows, joined with a single crochet border
- Time: About 10 minutes of prep, roughly 80 minutes of stitching (40 per panel), and 30 minutes for the border, stuffing and face, plus a few hours for the glue to dry
Materials
- Sport weight milk cotton yarn in soft pink (about 15 g)
- Optional second color, such as moss green, for extra trees
- 2.0 mm crochet hook
- Two 6 mm black half-bead eyes, or small safety eyes
- A little brown or dark embroidery thread for the mouth
- Clear craft or fabric glue
- A pinch of polyester fiberfill
- Tapestry needle, stitch marker and scissors
Safety note: Glued-on bead eyes can come loose and are a choking hazard. For babies and toddlers, embroider the eyes with black thread instead.
Stitches and Techniques
- Chain (ch): Starts the first row and gives you the turning chain at the start of each row.
- Single crochet (sc): Makes up the whole body of each panel for a dense, tidy fabric.
- Increase (inc): Two sc in the same stitch, placed at both ends of a row to widen the tier.
- Slip stitch (sl st): Used to step in at the start of a new tier, which creates the zigzag edge.
- Border join: Both panels are held together and joined with sc through both layers at once.
- Simple embroidery: A couple of straight stitches form the smile.
Pattern Instructions
From Row 2 onward, every row begins with ch 1, and that chain doesn’t count as a stitch. Turn at the end of each row. Stitch counts are in brackets.
Step 1: Start the Tip of the Tree
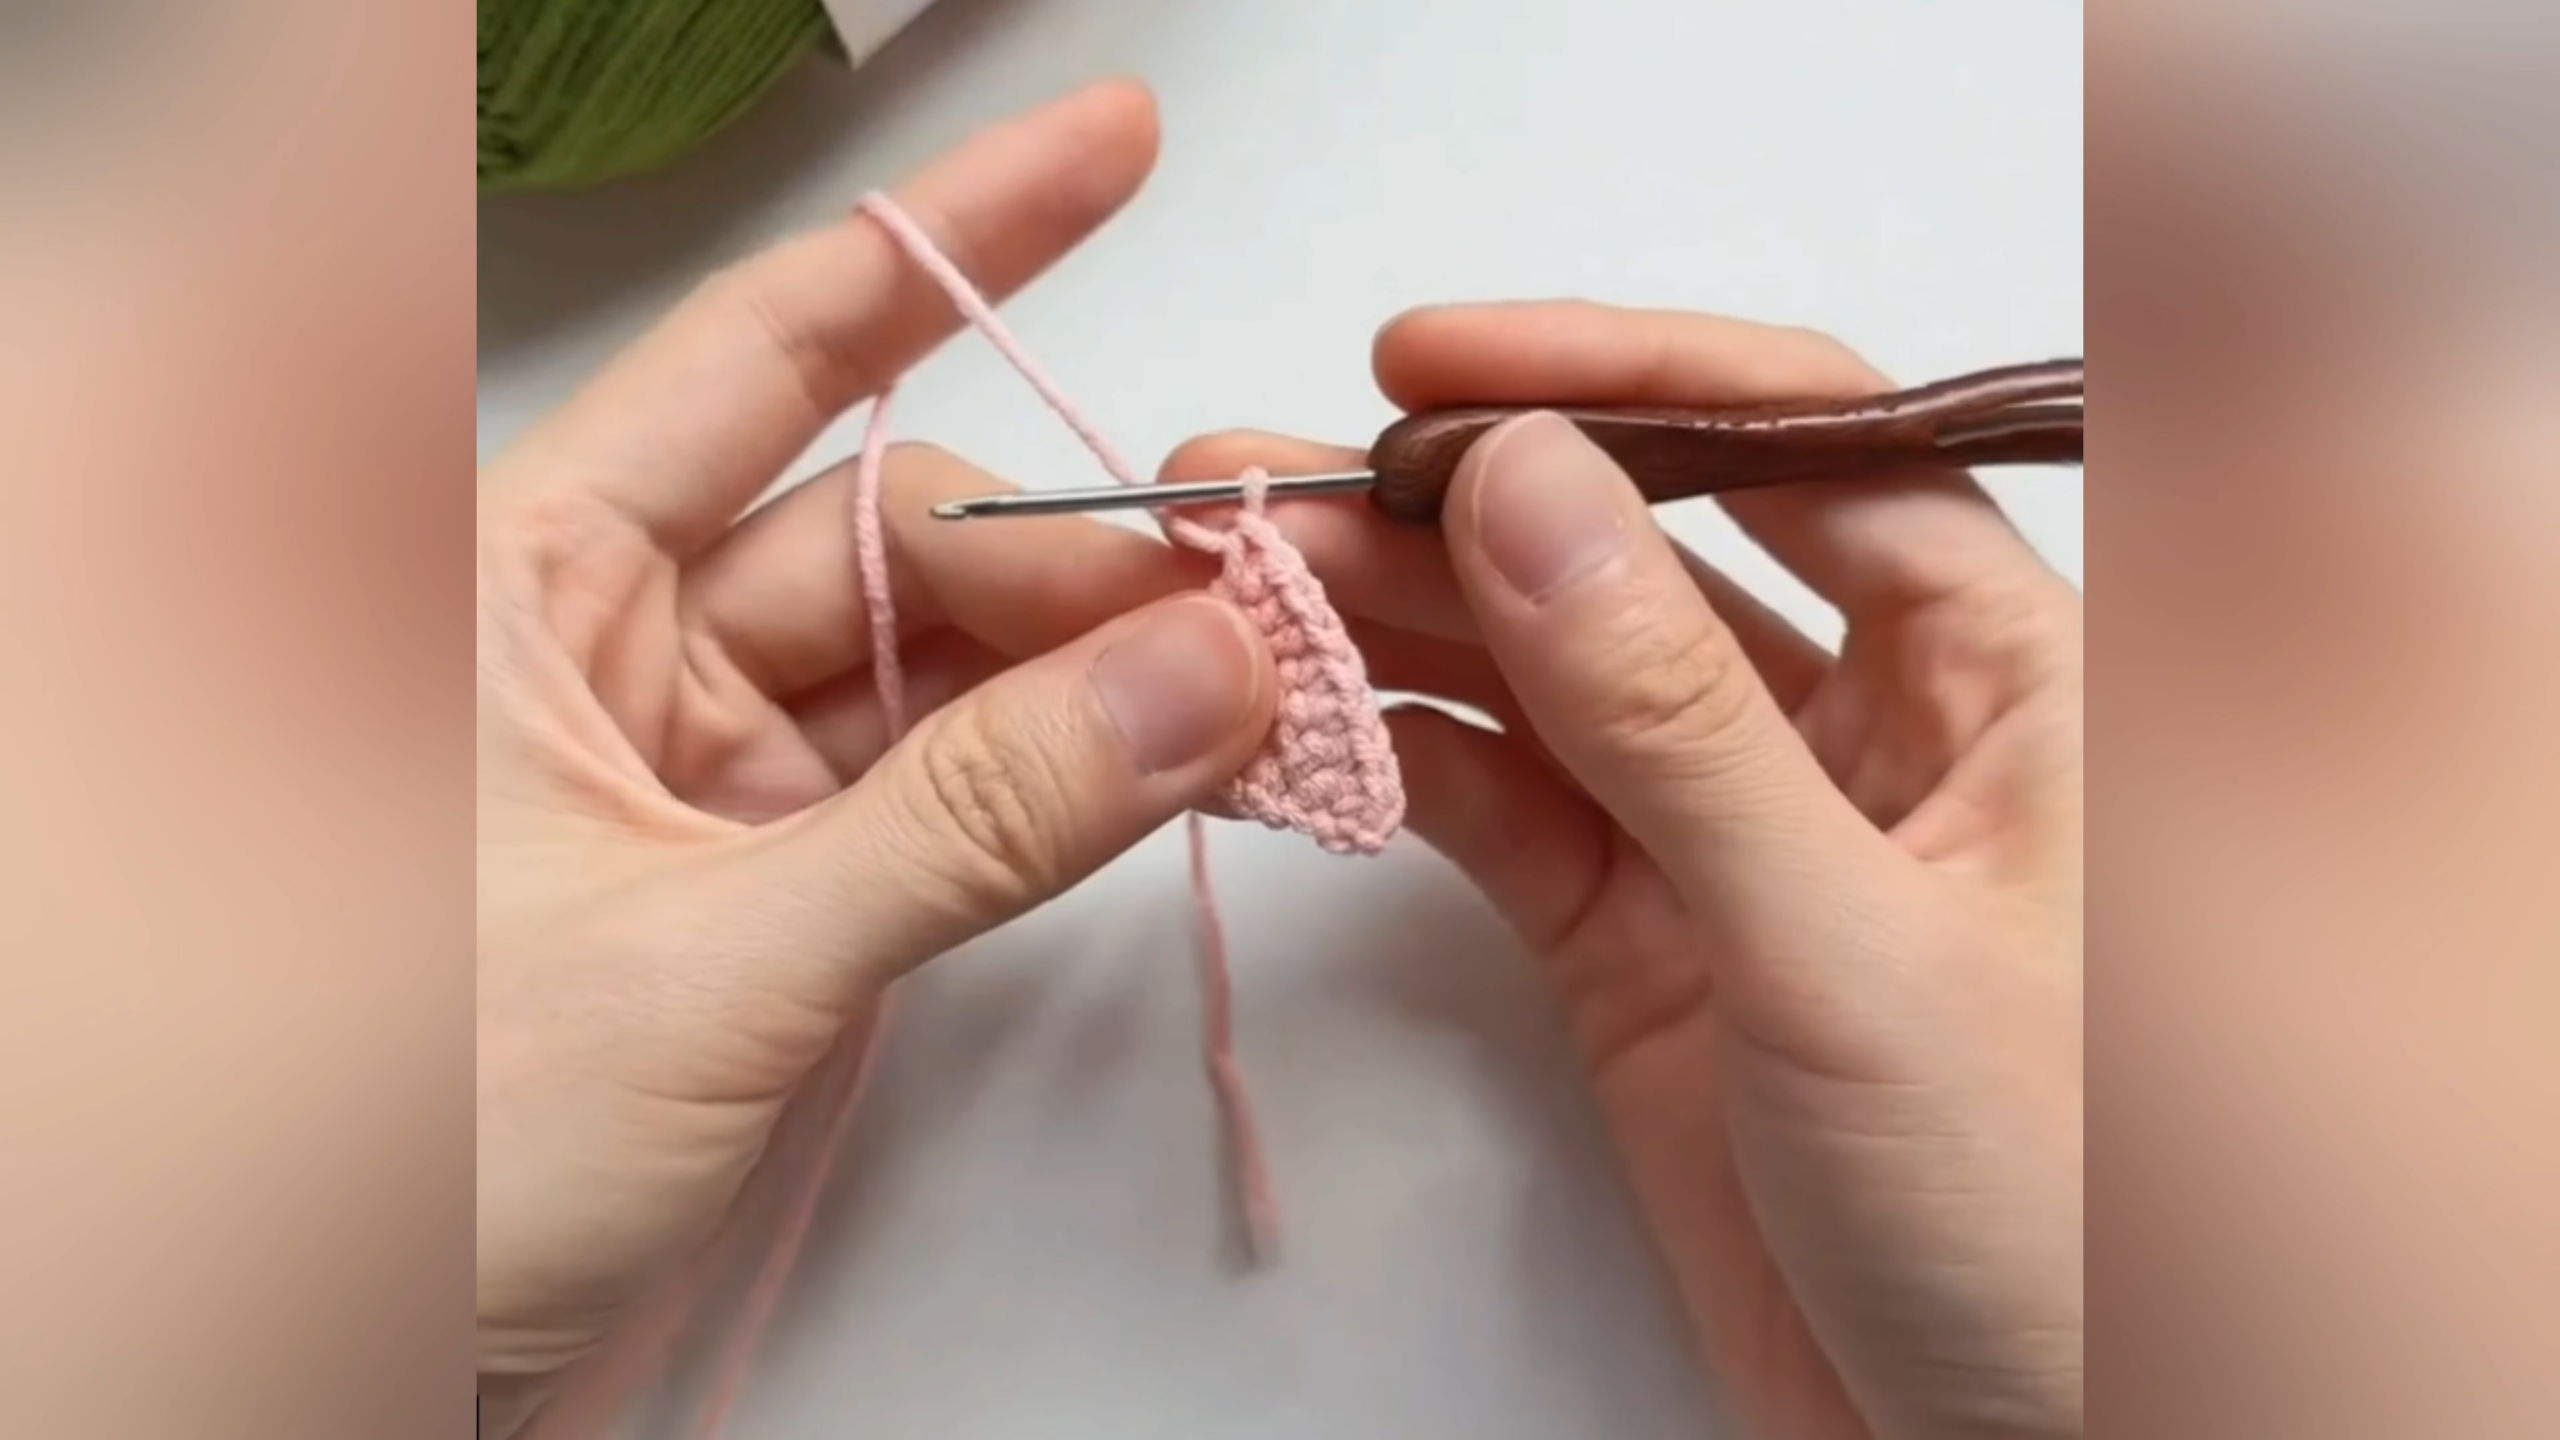
Chain 2 to begin.
- Row 1: 3 sc in 2nd ch from hook, ch 1, turn (3)
- Row 2: inc, sc 1, inc (5)
- Row 3: sc across (5)
At first the piece looks like a small knot on your hook. Pinch it between your thumb and finger so the stitches stay flat while you work into them.
Tip: Early rows are so small that the last stitch hides easily. Put a stitch marker in it and you’ll never skip it.

Step 2: Build the First Tier
- Row 4: inc, sc 3, inc (7)
- Row 5: sc across (7)
- Row 6: inc, sc 5, inc (9)
You now have a narrow, pointed triangle. Short rows curl a little, and a gentle tug downward straightens them. The plain rows between increases keep the sides from flaring too fast, so the tier stays slim and tree-like.
Step 3: Step In for the Second Tier
The zigzag edge comes from starting the next row a little further in.
- Row 7: sl st in the first 2 sts, ch 1, sc in the next 5 sts, leave the last 2 sts unworked, turn (5)
- Row 8: inc, sc 3, inc (7)
- Row 9: sc across (7)
- Row 10: inc, sc 5, inc (9)
- Row 11: sc across (9)
- Row 12: inc, sc 7, inc (11)
- Row 13: sc across (11)
Stitch check: Row 13 should total 11. A small shoulder now sticks out on each side where the two tiers meet.
Tip: Keep your slip stitches loose. Tight slip stitches pull the step inward and flatten the zigzag.

Step 4: Finish the Third (Base) Tier
- Row 14: sl st in the first 2 sts, ch 1, sc in the next 7 sts, leave the last 2 sts unworked, turn (7)
- Row 15: inc, sc 5, inc (9)
- Row 16: sc across (9)
- Row 17: inc, sc 7, inc (11)
- Row 18: sc across (11)
- Row 19: inc, sc 9, inc (13)
- Row 20: sc across (13)
- Row 21: inc, sc 11, inc (15)
- Row 22: sc across (15)
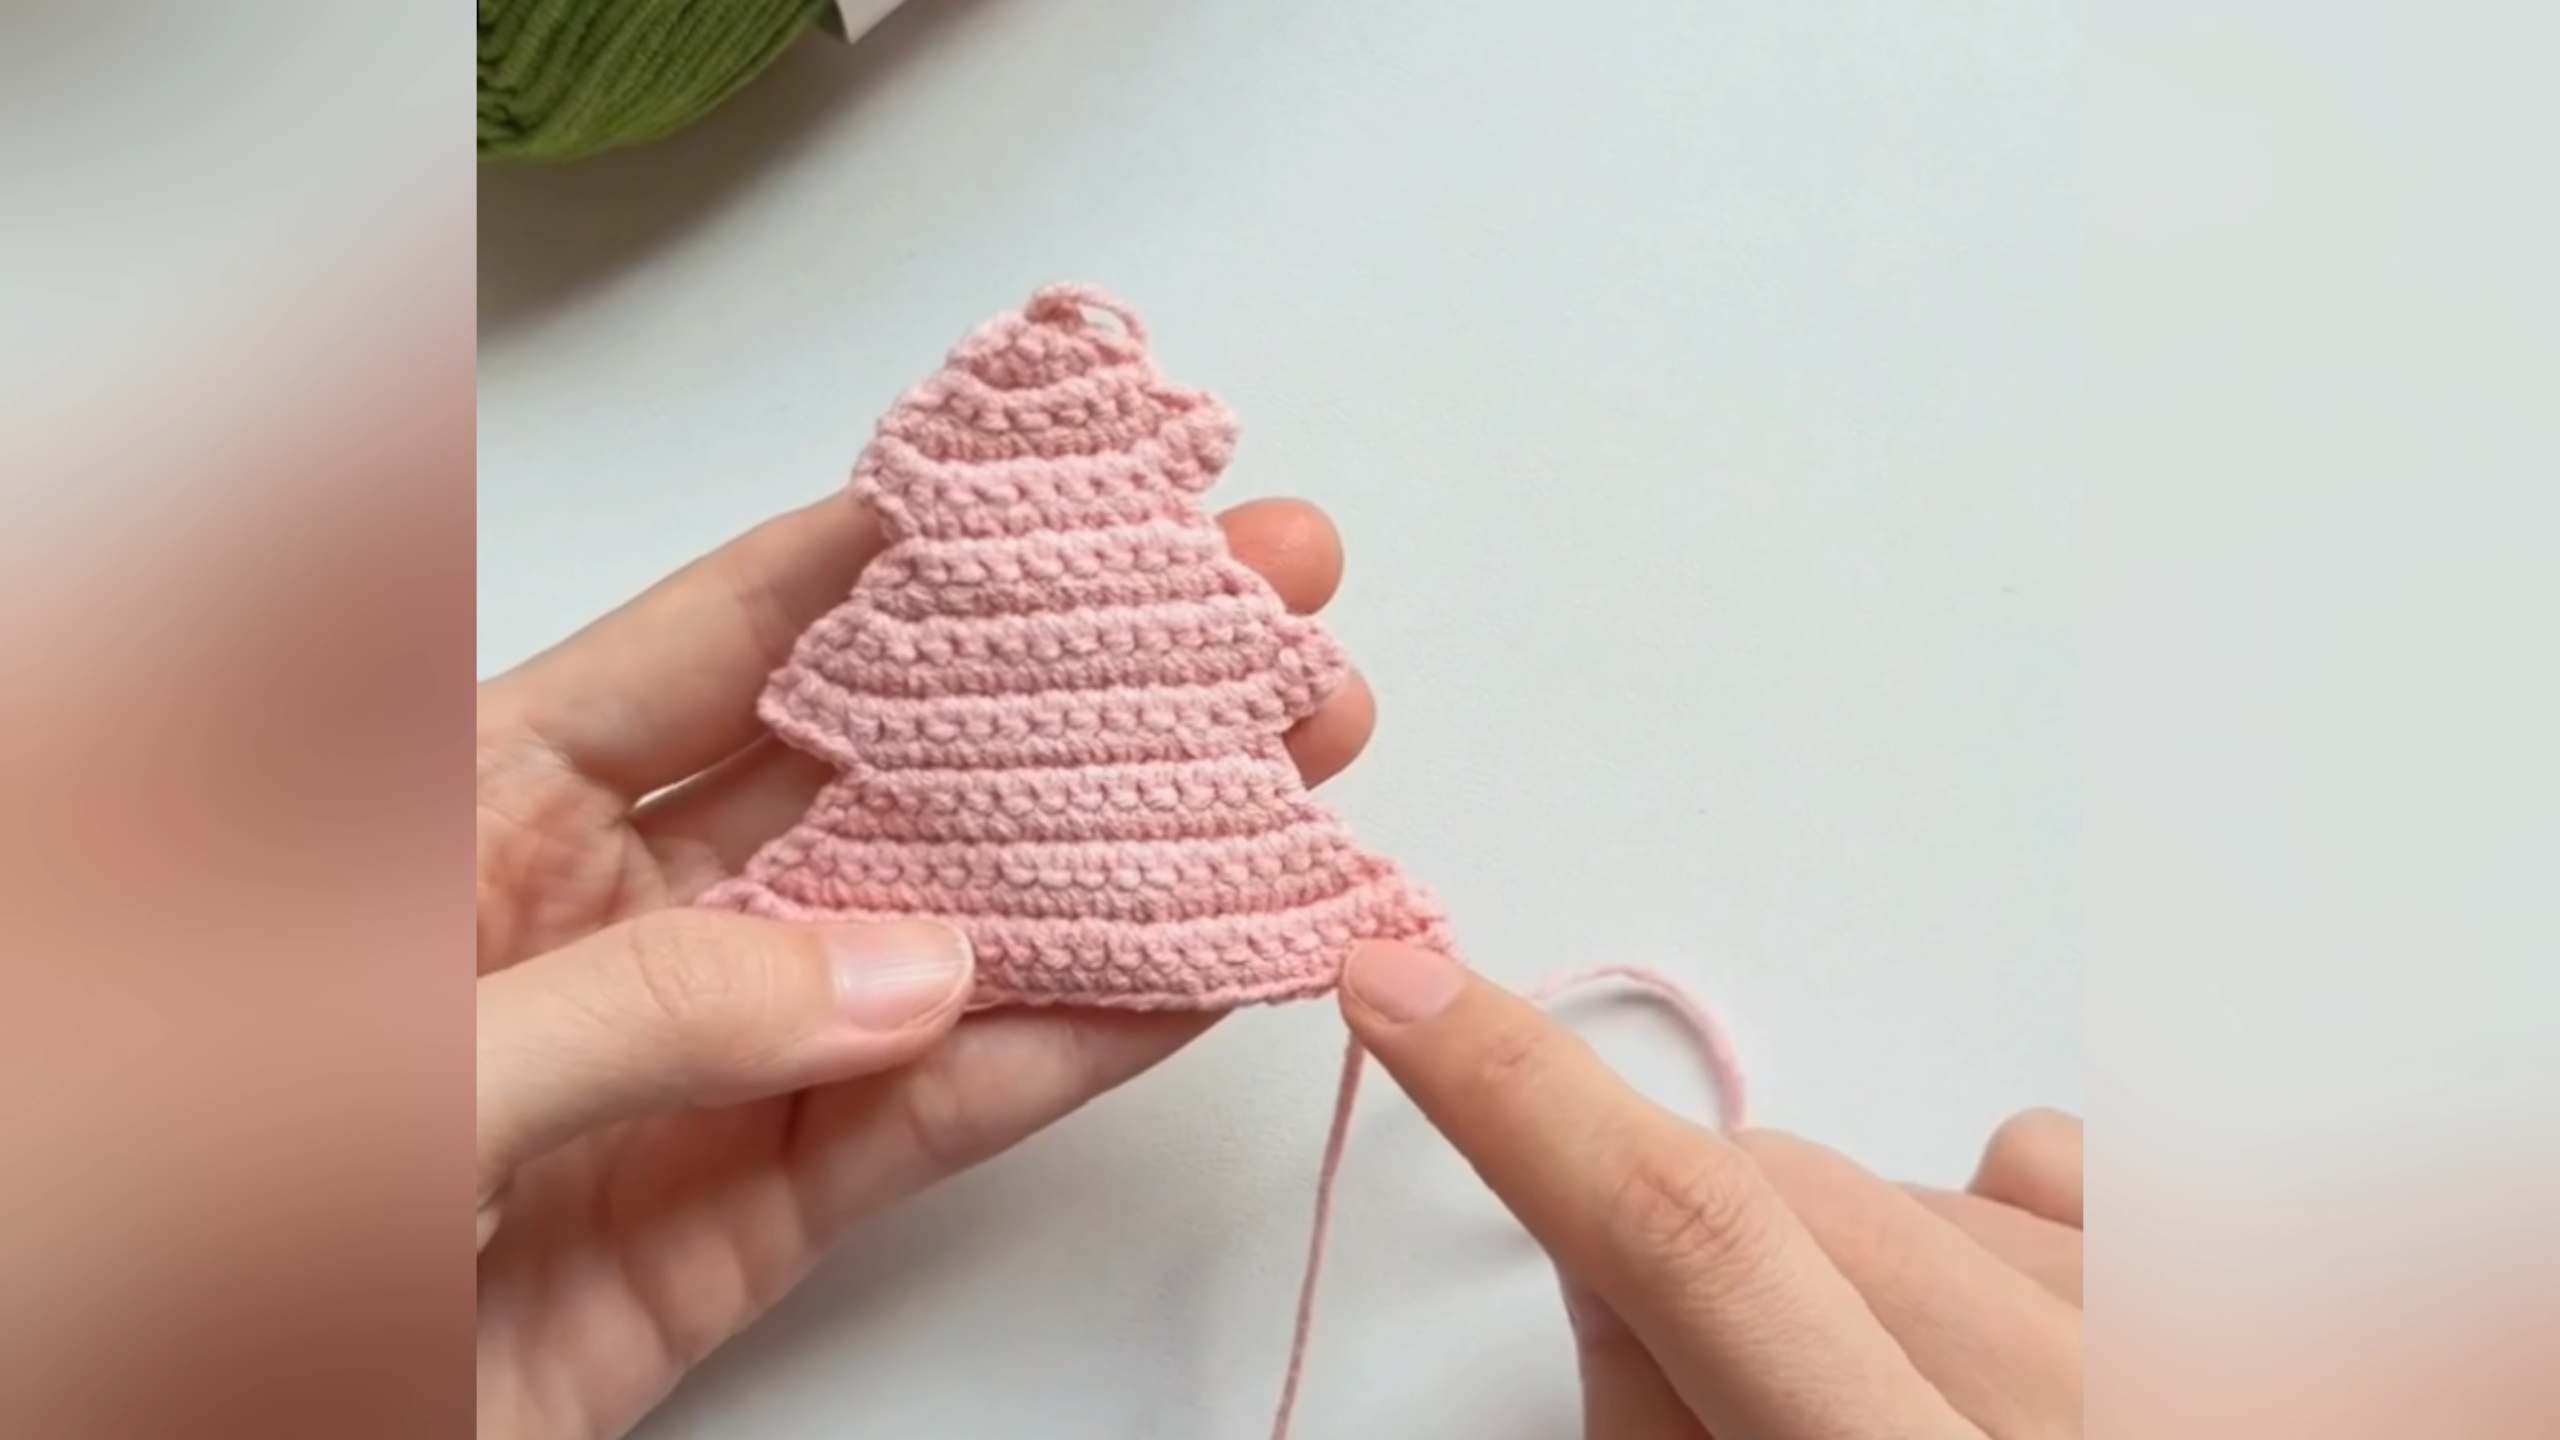
Fasten off the first panel with a short tail. Lay it flat and check the shape: three tiers, a pointed top and a wide, straight base.
Step 5: Make the Second Panel
Repeat Steps 1 to 4 for a matching panel, but don’t fasten off. Keep the working loop on your hook, because you’ll use it straight away for joining.
Match check: Lay both panels on top of each other. The steps should line up. A one-row mismatch is easy to fix now and frustrating to fix later.
If you’re using safety eyes instead of glue-on eyes, choose which panel will be the front and fit them in now, halfway up the middle tier and about 4 stitches apart. Lock the backs on the wrong side, so they end up inside the tree.
Step 6: Join the Panels With a Border
Place the panels wrong sides together, with the one holding the live loop facing you. Your hook sits at a bottom corner of the base. Work sc through both layers all the way around the outline:
- 3 sc into each outer corner at the base
- 1 sc into each stitch along the base
- 1 sc into the side of each row along the slanted edges
- 2 sc into the outer point of each tier shoulder, so the corners stay crisp
- 1 sc, with no increase, into each inner corner where a tier steps in
- 3 sc into the very tip
Stop about 3 cm before you reach the start again. Push small tufts of fiberfill in through the gap until the middle rounds out while the edges stay flat. The tree should feel soft and slightly puffy, not firm.
Finish the border, sl st into the first sc and fasten off. Thread the tail onto a tapestry needle, run it into the stuffing and trim it close.
Tip: Tear the fiberfill into small wisps before adding it. One big clump makes a lumpy middle and thin corners.

Step 7: Add the Face
Choose the smoother side for the front. Mark the eye spots about halfway up the middle tier, roughly 4 stitches apart. Eyes set a little low look cuter than eyes placed high, so avoid the top tier.
- Embroider the mouth first. Bring the brown thread up just below and between the eye marks, and make a small curved smile with two short stitches.
- Put a small dot of craft glue on the back of each half-bead eye and press it in place for about 30 seconds.
- Add a tiny dab of glue behind the mouth stitches with the nozzle tip. The glue locks the thread so the smile won’t loosen.
Leave the doll flat until the glue is completely dry, usually a few hours.

Watch the Video Tutorial
The step-in slip stitches and the border join are easiest to follow on screen. Watch the full walkthrough below.
Tips for Success
- Keep tension even. Hold the working yarn the same way for the whole piece, and the tiers come out the same width on both sides.
- Count after every increase row. Rows grow by two stitches, and a missed increase shows right away as a lopsided tier.
- Mark the first stitch of each row. The turning chain can hide it.
- Stuff lightly and evenly. A thin layer spread to the edges looks better than a round middle.
- Block the panels before joining. A light steam and a few pins straighten crooked tiers.
Common Mistakes to Avoid
- Skipping the turning chain: The edges pull in, and the tiers lose their straight sides.
- Working into the turning chain: The ch 1 isn’t a stitch, so put your first sc into the first real stitch.
- Tight slip stitches: Tight steps pucker the fabric and blur the zigzag outline.
- Overstuffing: Too much fiberfill stretches the border and opens gaps between stitches.
- Gluing before the embroidery is done: Glue stiffens the yarn and makes stitching through it very hard.
- Rushing the drying time: The eyes shift if you handle the doll too soon.
Troubleshooting
- One side of a tier is wider: An increase landed one stitch in from the edge. Frog back to that row and place it in the very first or last stitch.
- The panels don’t line up: One panel has an extra plain row. Count the rows in each tier and remove the extra one.
- The border ripples: Too many stitches went into the slanted edges. Work one sc per row side, not two.
Personalization Ideas
- Evergreen classic: Swap the pink for forest or moss green for a traditional little fir. A white border looks like snow on the branches.
- Frosty pastels: Mint, lilac or baby blue trees in a row make a soft winter display.
- Different expressions: Try sleepy closed eyes stitched as small curves, rosy cheeks in pink thread, or a tiny “o” mouth for a surprised look.
- Tiny accessories: Sew a yellow star to the tip, glue on tiny pom-poms as ornaments, or wrap gold thread around the tiers like garland.
- Mini and large sizes: Lace yarn and a 1.5 mm hook make a thumb-sized tree. Worsted yarn with a 3.5 mm hook makes a bigger shelf version.
- Keychain or ornament: When the border reaches the tip, work (sc, ch 12, sc) into the tip stitch instead of 3 sc. The chain makes a hanging loop for a branch, or add a split ring for a bag charm.
Winter Tree Appliqué Ideas
Skip the stuffing, and a single panel or a joined pair becomes a flat appliqué you can sew onto almost anything. It’s a quick way to add a handmade touch to winter gifts.
- Beanie badge: Stitch a green tree to the folded brim of a knit or crochet hat.
- Tote bag: Sew three trees in different colors across a canvas tote for a holiday market bag.
- Christmas stocking: Add a tree beside the name on a stocking cuff.
- Greeting card: Glue a flat tree to the front of a folded kraft card for a card that doubles as a keepsake.
- Sweater patch: Sew a tree onto a child’s sweater elbow or pocket for a cute winter update.
For more holiday makes, try the crochet Christmas tree keychain, the crochet Christmas snowman, or the standing crochet Christmas tree amigurumi. The crochet hat keychain makes another quick bag-charm gift.
Gift Wrapping Ideas
Tuck a tree into a small kraft box lined with shredded paper, or clip it to a gift bag handle with a wooden clothespin instead of a gift tag. For a stocking filler, pair it with a mini hot chocolate sachet and tie them together with baker’s twine. Teachers, neighbors and crochet friends will all love a little tree they can hang on their own branches year after year.
FAQs
Is the winter tree doll suitable for beginners?
Yes. Everything is single crochet worked in rows, with edge increases and a few slip stitches. If you can chain and single crochet, you can finish it.
What yarn works best?
Sport weight milk cotton gives a soft, matte finish and clear stitches. Any fine cotton or cotton blend of a similar weight works too.
Can I use safety eyes instead of glue-on eyes?
Yes. Insert them into the front panel before joining, since the backs need to sit inside the tree. For babies or toddlers, embroider the eyes instead.
How long does one tree take?
Most crocheters finish a tree in 1.5 to 2 hours, plus glue drying time. The next one goes faster once the tier rhythm is familiar.
Can I skip the stuffing?
Yes. An unstuffed tree lies flat and makes a lovely ornament or appliqué.
How do I wash the finished doll?
Spot clean with a damp cloth and mild soap, then let it dry flat. Avoid soaking and the washing machine, since glued eyes may come off.

A Pocket Forest in Pink
A small ball of cotton, a 2.0 mm hook and one quiet afternoon give you a smiling little tree that fits in the palm of your hand. Hang it on a branch, clip it to a bag or tuck it into a card. After the pink one, try moss green or mint, and your tiny forest will start growing on its own. We’d love to hear which color you chose in the comments.