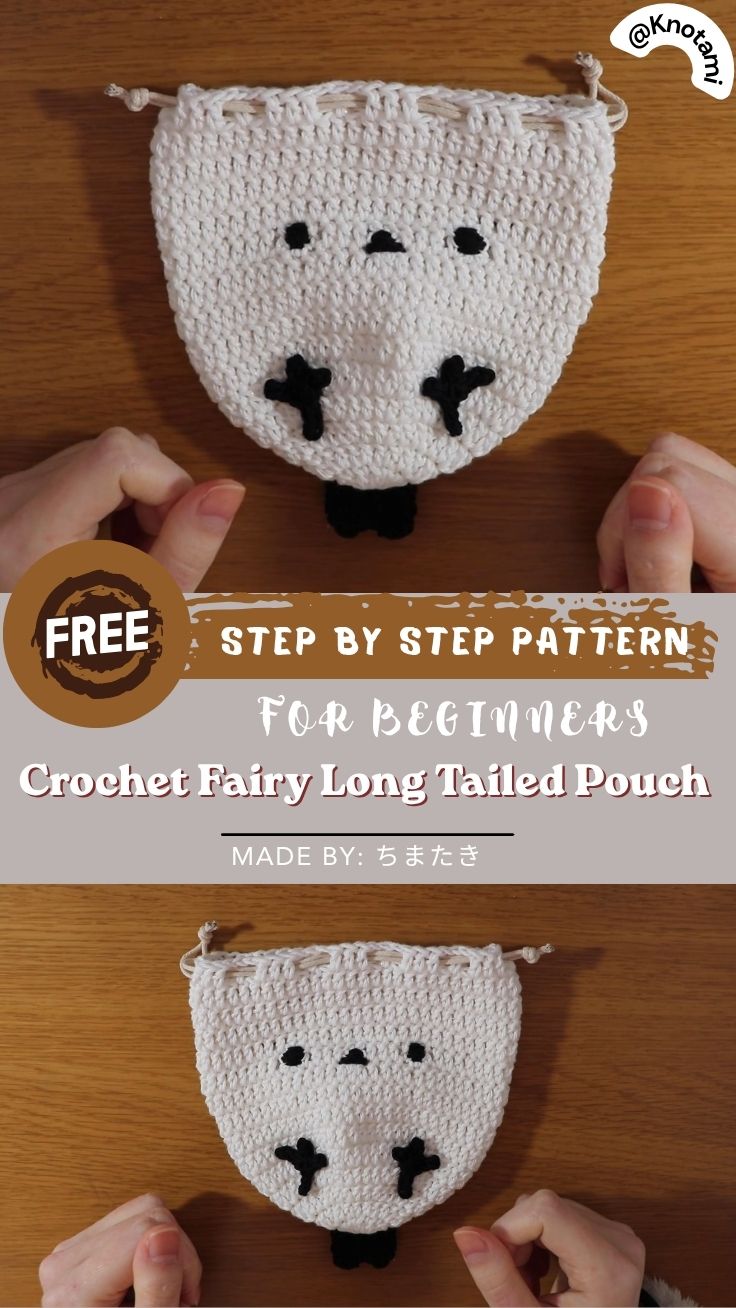
Crochet Fairy Long Tailed Pouch Amigurumi Pattern
This crochet fairy long-tailed pouch amigurumi pattern turns white yarn into a sweet little “snow fairy” bird pouch. It has tri-color wings, tiny feet, a wide feathered tail, and a drawstring top for tucking away small treasures.
The round body works up in simple rounds and closes with a drawstring, so it’s both cute and useful. Use it to hold a coin, a small keepsake, or a tiny gift, or clip it to a bag as a charm.
Skill Level and Time
- Skill level: Confident beginner. You’ll use a magic ring, double crochet, increases, simple color changes, and some sewing.
- Time: About 3 hours in total, including assembly.
Materials
- Yarn: Worsted-weight yarn in white for the body, plus brown and black for the wings, tail, and details.
- Crochet hook: A size suited to your yarn, such as 3.5 mm (E-4) for worsted weight.
- Eyes: 6 mm safety eyes, or embroidery floss for stitched eyes.
- Drawstring: A thin cord or narrow ribbon to close the pouch.
- Tools: A yarn needle, stitch markers, pins, and scissors.
Abbreviations (US Terms)
- ch – chain
- dc – double crochet
- sl st – slip stitch
- inc – increase (2 stitches in the same stitch)
- st(s) – stitch(es)
How to Crochet the Fairy Long-Tailed Pouch
Step 1: Make the Pouch Body
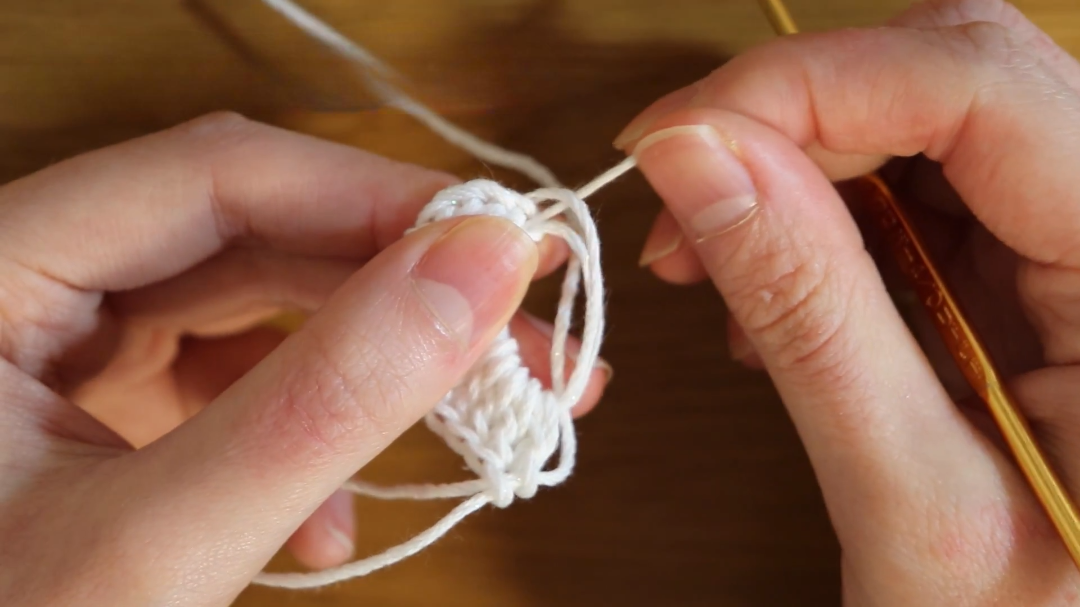
With white yarn, start with a magic ring. Work every round in the same stitch as Round 1.
- Round 1: Ch 3 (counts as the first stitch) and work 12 dc into the ring. Pull the ring tight.
- Round 2: Inc in every stitch around. (24 sts)
- Round 3: *1 st, inc* around. (36 sts)
- Round 4: *2 sts, inc* around. (48 sts)
- Round 5: *3 sts, inc* around. (60 sts)
- Rounds 6–14: Work 1 st in each stitch around. (60 sts) These rounds build the height of the pouch.
- Round 15 (drawstring round): *Work 3 sts, ch 1, skip 1, work 1 st, ch 1, skip 1* around. The chain spaces make openings for the drawstring.
Step 2: Make the Tri-Color Wings (Make 2)
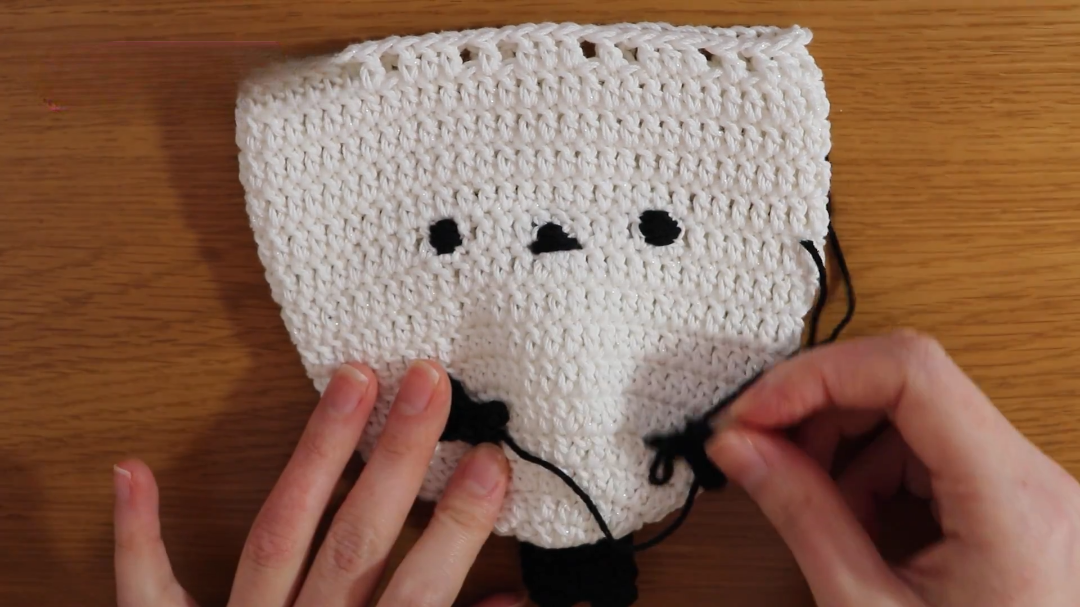
The wings use brown, white, and black yarn to look like real feathers.
- With brown yarn, work 4 dc into a magic ring.
- In the next row, increase in every stitch to make a semicircle.
- Switch to white yarn and keep increasing along the edges to widen the wing.
- Finish with two rows in black yarn for the wing tips.
Step 3: Make the Tail and Feet
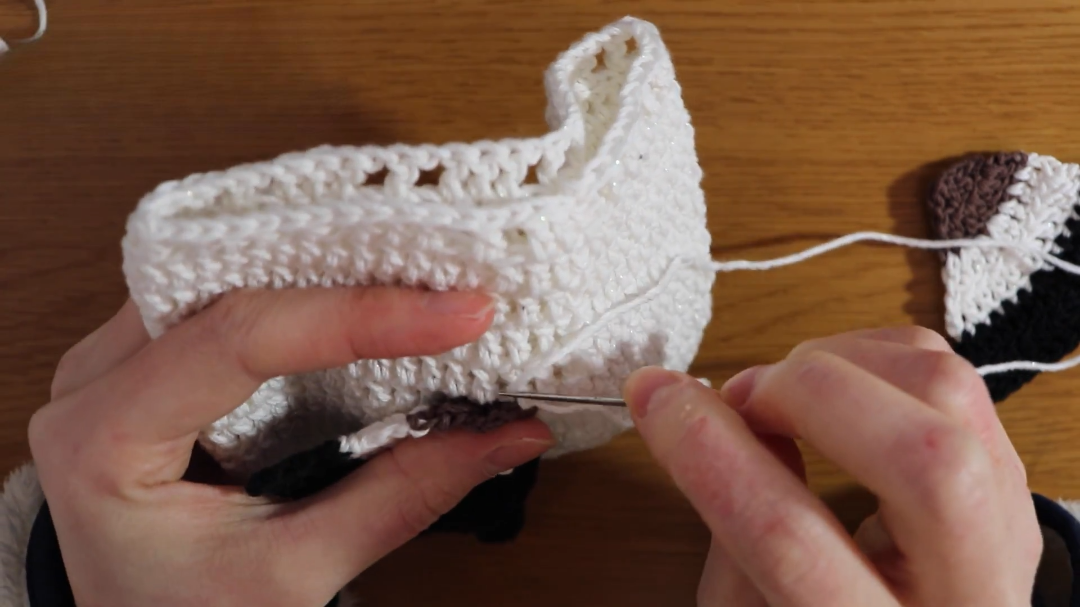
- Tail: Crochet two small circles and join them, then work upward to form a flat, wide feather shape, as shown in the photo.
- Feet (make 2): Make a short chain, then form the little toes with slip stitches and small chain clusters.
Leave a long yarn tail on every piece for sewing.
Step 4: Assemble and Add the Face
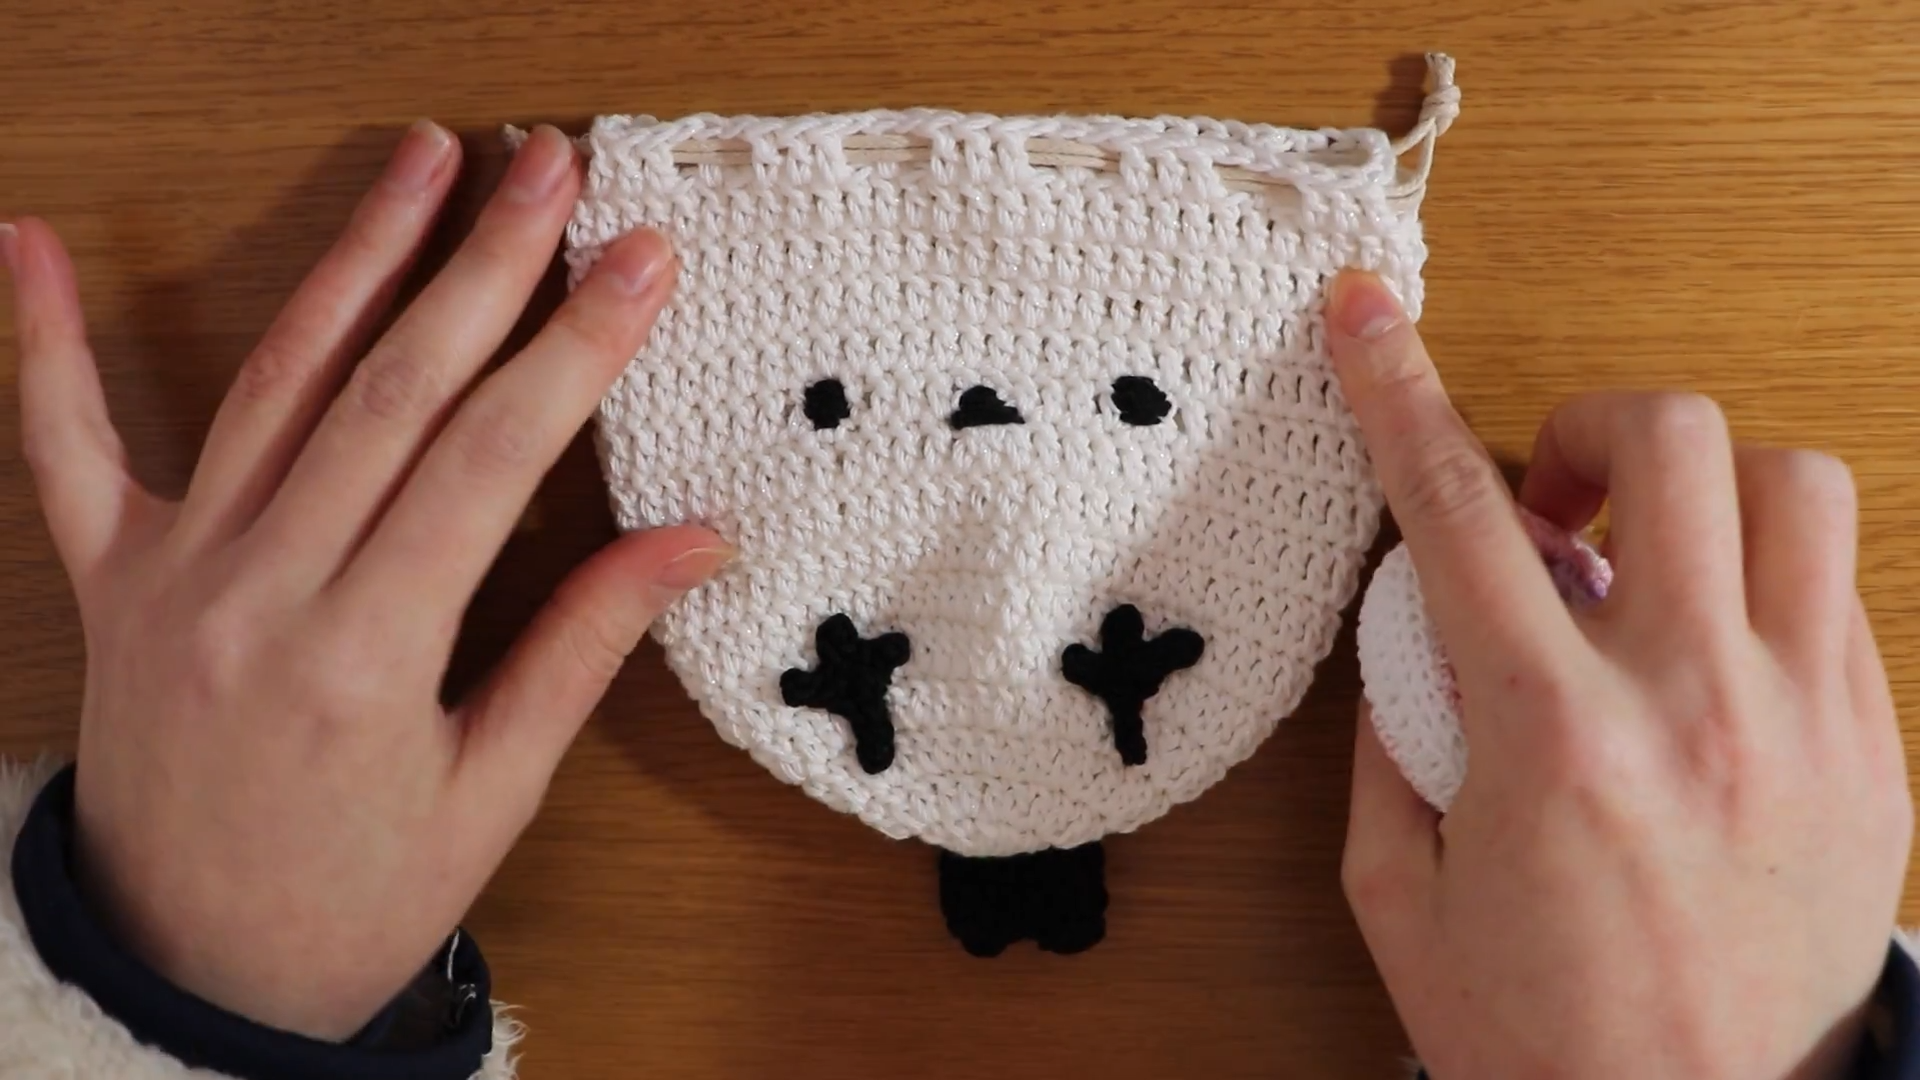
- Attach the safety eyes to the front of the pouch, or embroider them with floss.
- Pin the wings to each side of the body and check that they’re even before you sew them on.
- Sew the tail to the back and the feet to the bottom.
- Add any small details, such as a beak or markings, with embroidery.
- Thread the drawstring through the chain spaces in Round 15 and pull it closed.
Common Mistakes to Avoid
- Skipping stitch counts: One missed increase can make the pouch lean or look lopsided. Check your count at the end of each round.
- Uneven tension: A loose top makes the pouch gape instead of closing neatly.
- Crooked wings: Always pin them before sewing, since symmetry matters on a small piece.
How to Fix Common Issues
- Pouch gapes at the top: Pull the drawstring snugly, or use a thicker cord so it grips better.
- Body leans: Pull back to the last round with the correct stitch count and rework from there.
- Curled wing or tail edges: A light steam can relax them. Hold the iron above the yarn without touching it.
What to Tuck Inside
- Tooth fairy pouch: A child can leave a lost tooth inside and find a coin the next morning.
- Mini gift wrap: Hide a pair of earrings, a ring, or a small charm inside for a handmade gift box.
- Lucky keepsake: Store a wish note, a special coin, or a tiny crystal.
- Everyday helper: Keep earbuds, hair ties, or lip balm handy in your bag.
If you like useful little pouches, try this crochet candy bag, or make a crochet chick keychain for another sweet bird project.
Ways to Display It
Clip the pouch to a bag zipper, set it on a windowsill or bookshelf, or hang a few together on a nursery mobile for a soft, storybook look.
Color Ideas
- Classic snow bird: White body with brown, white, and black wings, as shown.
- Moonlit: Lavender body with silver-gray wings.
- Woodland: Moss green body with copper-toned wings.
- Spring: Pale yellow body with white and gold wings.
Finishing and Care
Weave in your ends along the inside seams so the outside stays smooth. Spot clean the pouch with a damp cloth, and lay it flat to dry.
Frequently Asked Questions
Do I need to stuff the pouch?
No. The body stays hollow so you can store small items inside.
Can I make the pouch bigger?
Yes. Use a thicker yarn with a larger hook, or add a few extra even rounds before the drawstring round.
Can I skip the safety eyes?
Yes. Embroidered eyes work well and are safer if the pouch will be used by a young child.
Final Notes
This crochet fairy long-tailed pouch is a sweet mix of cute and useful. Crochet the round body, add the tri-color wings, feathered tail, and tiny feet, and thread the drawstring, and your little snow fairy is ready to keep your treasures safe. Happy crocheting!