Free Crochet Goomi Green And White Amigurumi Pattern
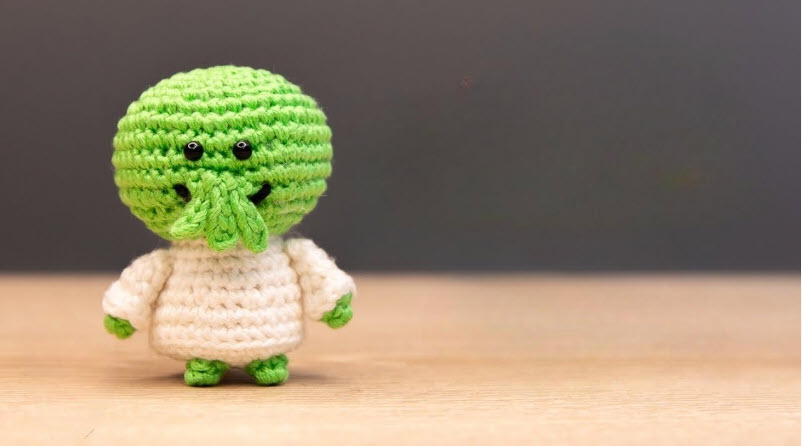
Soft green loops, shiny black eyes and a tiny sprout stem bring this crochet Goomi green and white amigurumi pattern to life. Stitch a pocket-sized buddy that dangles from a bag, brightens a desk, or tucks into a small handmade gift.
What sets Goomi apart is the two-tone build. A rounded green cap slides over a snowy white body, and curly leaf tufts give the face real personality. Every piece uses basic spiral rounds, so it suits newer makers, and the cap hides the only seam. Plan on one relaxed afternoon for a finished plush.
What You’ll Be Making
Goomi is built from two main pieces: a rounded green head shaped like a little cap, and a soft white body that tucks up inside it. Both are worked in continuous spirals of single crochet. A sprout stem, two curly leaf tufts and two tiny arms finish the look before everything is joined with a yarn needle.
- Finished size: Roughly 6 to 7 cm tall, small enough to clip onto a backpack zipper or perch on a desk
- Skill level: Beginner. If you can make a magic ring and work increases in a spiral, you’re ready. The only fiddly step is sewing the cap rim neatly around the body.
- Time: About 10 minutes of prep, 2 hours of stitching, and 45 minutes for stuffing and assembly
Materials and Supplies
- Green yarn: Cotton or cotton blend, light/DK weight, about 25 g
- White yarn: Cotton in the same weight, about 15 g
- Optional: A scrap of pink for blush spots
- Hook: 2.5 or 3 mm, one size smaller than your yarn label suggests, for tight, gap-free fabric
- Eyes: Two black safety eyes, 6 to 8 mm. For a baby or toddler, embroider them with black yarn instead.
- Stuffing: A small handful of polyester fiberfill
- Tools: Blunt-tip yarn needle, small sharp scissors, sewing pins and stitch markers
- Optional: A metal keychain ring or lobster clasp
Cotton gives crisp stitch definition, which suits a small plush like Goomi.
Techniques Used
- Magic ring: An adjustable loop that pulls closed tightly, leaving no hole at the top of the head or bottom of the body.
- Single crochet (sc): Short, dense stitches that keep the stuffing hidden.
- Increase (inc): 2 sc in the same stitch.
- Decrease (dec): 2 stitches worked together. An invisible decrease through the front loops looks neatest.
- Whip stitch: Joins the cap rim, arms and curls. Slow, even stitches make a clean seam.
Step-by-Step Goomi Pattern
Work in continuous rounds without joining, and move your stitch marker up at the start of every round.
Step 1: Start the Head (Green)
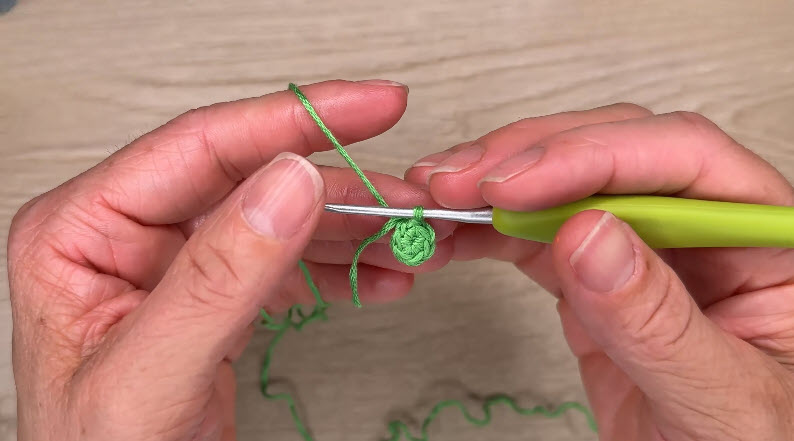
- Round 1: 6 sc into a magic ring, then pull the tail snug (6)
Step 2: Build the Flat Circle
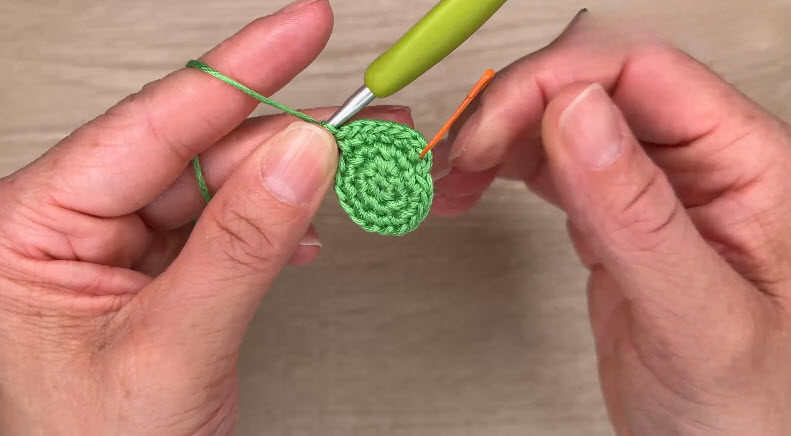
- Round 2: inc in every stitch (12)
- Round 3: (sc, inc) x 6 (18)
- Round 4: (2 sc, inc) x 6 (24)
Finish the Increases
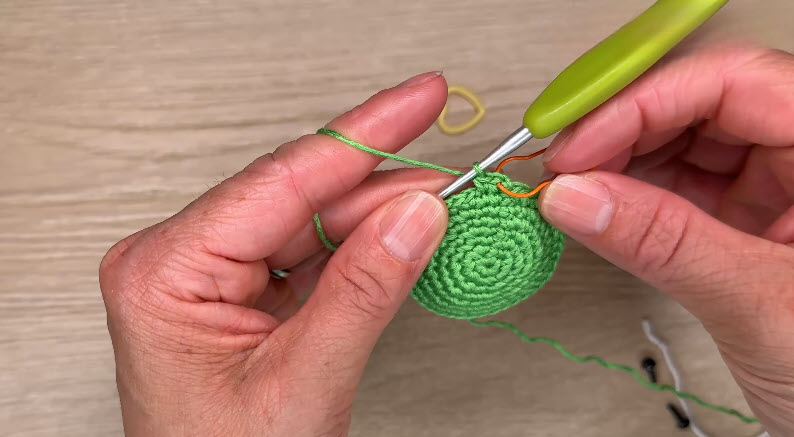
- Round 5: (3 sc, inc) x 6 (30)
- Round 6: (4 sc, inc) x 6 (36)
Tip: On Round 6, try working (2 sc, inc, 2 sc) instead of (4 sc, inc). The count stays the same, but shifting where the increases fall keeps the circle round instead of turning it into a hexagon.
Shape the Cap
- Rounds 7 to 13: sc around (36)
Fasten off, leaving a long tail of about 40 cm for sewing. Leave the bottom open, since the white body tucks up inside.
Stitch check: Round 13 should still total 36. A cap with fewer stitches won’t fit over the body.
Step 5: Place the Eyes
Insert the safety eyes between Rounds 9 and 10 of the head, about 7 stitches apart. Mark the spots with pins first and look at the expression from the front. Then lock the washers from inside while the cap is still open. Once they click on, they won’t come off.
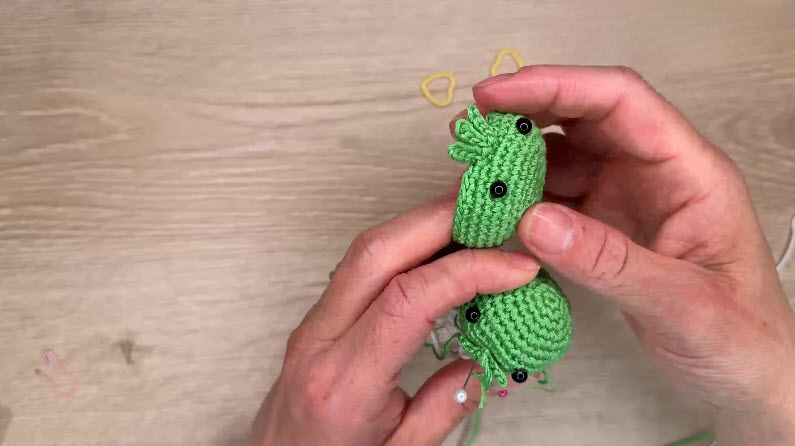
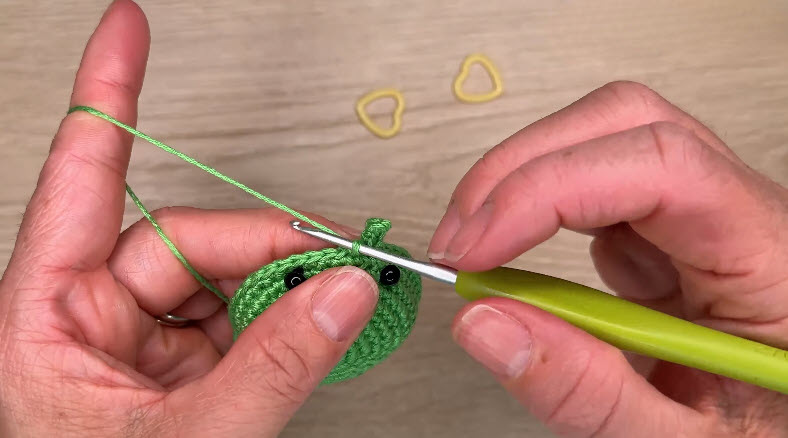
For extra charm, stitch two small pink blush spots just under the eyes with a scrap of yarn.
Step 6: Start the Body (White)
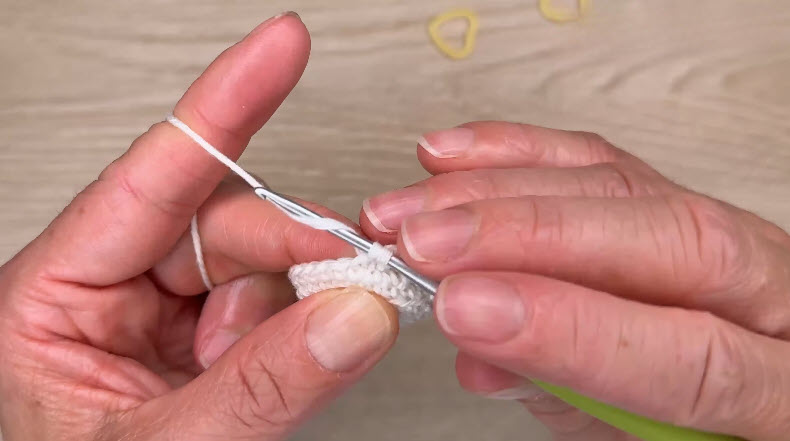
- Round 1: 6 sc in a magic ring (6)
- Round 2: inc x 6 (12)
- Round 3: (sc, inc) x 6 (18)
- Round 4: (2 sc, inc) x 6 (24)
- Round 5: (3 sc, inc) x 6 (30)
Step 7: Work the Body Sides
- Rounds 6 to 10: sc around (30)
Fasten off and weave in the tail. The body stays open at the top. It’s 6 stitches narrower than the head on purpose, so the cap can overlap it and hide the seam.
Step 8: Sprout Stem
Join green yarn at the center top of the head, around Round 1.
- Ch 4.
- Starting in the 2nd ch from the hook, sc 3 back down the chain.
- Sl st into the head to secure, then fasten off and hide the tail inside.
Step 9: Curly Leaf Tufts (make 2)
- Ch 8.
- Starting in the 2nd ch from the hook, work 2 sc in each chain back to the start (14).
- The strip twists into a spiral on its own. Leave a tail for sewing.
Step 10: Tiny Arms (make 2)
- Round 1: 6 sc in a magic ring (6)
- Rounds 2 to 3: sc around (6)
Fasten off with a sewing tail. No stuffing is needed. For a leafy tip, add a mini curl to each arm: ch 5, then work 2 sc in each chain back, starting in the 2nd ch from the hook.
Step 11: Stuff and Join the Cap
- Stuff the white body firmly, letting the stuffing dome slightly above the last round.
- Add a light layer of fiberfill inside the green cap.
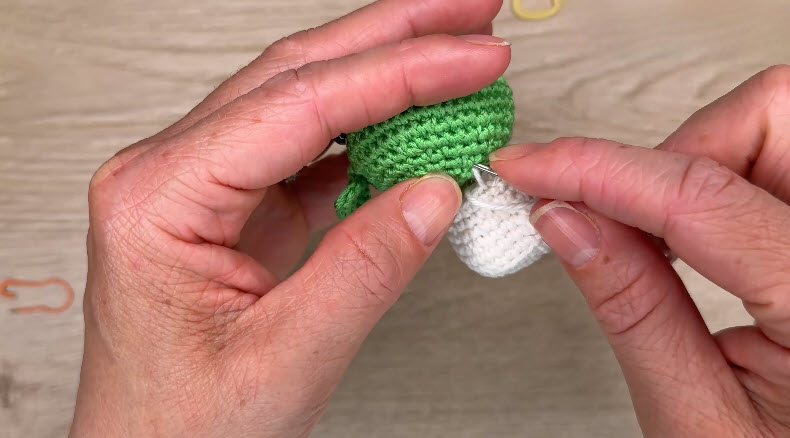
- Slide the cap over the body until the green rim sits about two rounds below the top of the white body. Pin it evenly all around.
- Turn the plush all the way around to check the rim sits at the same height on every side.
- Using the long green tail, whip stitch the rim to the body. The rim has 36 stitches and the body 30, so ease in the extra rim stitches evenly as you go, rather than bunching them in one spot. Keep the stitches small so they sink under the rim.
Step 12: Attach the Curls and Arms
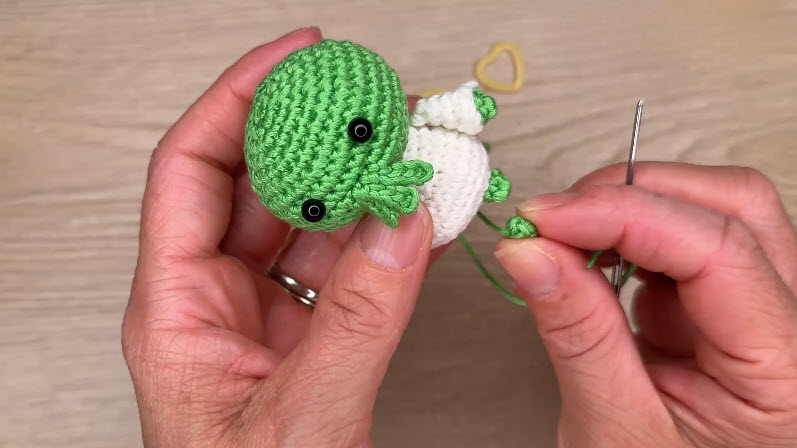
- Pin both curls first, one on each side of the head just beside the eyes, and check they sit at the same height before sewing either one.
- Sew the arms to the white body, one on each side, just below the green rim.
- Weave every tail inside the body and snip the excess. Roll the plush gently between your palms to settle the stuffing.
Charm version: Sew a short yarn loop through three or four stitches at the top of the head, right beside the stem, and thread the keychain ring onto it. The stem alone is too thin to carry keys.
Watch the Video Tutorial
The trickiest part is sewing the cap rim evenly, and it’s much easier to follow on screen. Watch the full walkthrough below.
Common Mistakes
- Cap and body the same width: The rim can’t overlap, so the seam shows.
- Understuffing the body: The cap slumps and the plush looks squashed.
- Adding eyes after sewing: The washers can no longer be locked from inside.
- Curls at different heights: The face looks tilted. Pin both before sewing either.
Troubleshooting
- The cap sits crooked: Unpick a few rim stitches on the low side and resew them one round higher.
- The circle looks like a hexagon: Shift where the increases fall on alternate rounds, as in the tip in Step 3.
- Stuffing shows through: Go down half a hook size on your next one.
- The curls won’t spiral: Tug the strip lengthwise, then twist it once in the direction it wants to curl.
Helpful Beginner Tips
- Keep stitches tight: Use a smaller hook and steady tension, since gaps let stuffing peek through.
- Always use a stitch marker: Spiral rounds have no visible start, and one marker saves a lot of frogging.
- Stuff in small pieces: Tear fiberfill into small tufts, add a bit at a time, and use the back of your hook to push it into the edges.
- Count after every round: A quick count takes ten seconds. Fixing a wrong round five rounds later takes much longer.
Customization Ideas
- New colors: Swap green for soft pink to make a radish buddy, orange over white for a carrot friend, or pastel purple for a dreamy fantasy sprout.
- Cute accessories: Add a tiny crochet bow on the stem, a mini scarf made from a chain and one row of sc, or a little felt flower near one curl.
- Other sizes: Fingering weight yarn with a 2 mm hook makes a smaller keychain version, and chunky yarn with a 4 mm hook makes a squishy desk buddy. Keep the same round counts.
Plant Your Goomi: Mini Garden Display Ideas
Goomi already looks like a little sprout, so it feels right at home in a tiny garden scene. Here are a few fun ways to show it off.
- Terracotta pot: Fill a small clay pot with crinkle paper or dried moss and nestle Goomi on top, like it just popped out of the soil.
- Egg carton garden: Paint a cardboard egg carton brown and sit a few Goomis in different colors in the cups, like a seedling tray.
- Windowsill row: Line up a green Goomi, a pink radish and an orange carrot along a kitchen windowsill.
- Plant marker: Sew a Goomi onto a wooden craft stick and push it into a real houseplant pot as a cheerful plant buddy.
- Desk terrarium: Set it inside an open glass jar with a few pebbles and a sprig of faux greenery.
Looking for your next small make? Try the crochet onion doll amigurumi for another veggie friend, the mini cactus amigurumi for your garden shelf, the crochet coffee cup keychain for a quick bag charm, or the tiny crochet turtle amigurumi for a pocket-sized desk pal.
Gift Packaging Ideas
- Kraft paper pouch: Tuck Goomi inside with a handwritten tag.
- Mini glass jar: Sit the plush on shredded green paper for a “garden” look.
- Card backing: Punch two holes in a small card and tie the keychain version on, like a shop-bought charm.
- Care note: Add a tiny slip with the washing tips below.
Washing and Care
Spot clean with a damp cloth and mild soap, or hand wash in cool water for a deeper clean. Press out the water in a towel, reshape the cap, and air dry away from direct heat.
FAQs
Which yarn works best for Goomi?
Cotton or cotton blend yarn in light or DK weight holds the cap shape, shows clean stitches and doesn’t fuzz much. Acrylic is a fine budget choice for a practice version.
How do I keep the plush firm?
Crochet tightly with a smaller hook, then stuff the body a little more than feels necessary, until it feels solid but not stretched.
How long does the project take?
Most beginners finish in 3 to 4 hours. Experienced crocheters can wrap up in about 2 hours, with most of that time spent sewing and shaping.
Can I make Goomi without safety eyes?
Yes. Embroider the eyes with black yarn using a few small satin stitches. Embroidered eyes are the safer choice for babies and toddlers.
Why is the body smaller than the head?
A body 6 stitches narrower lets the green cap overlap it, which hides the seam and gives Goomi its mushroom-cap shape.
A Little Sprout Ready to Grow on You
Two simple pieces a curly pair of leaves and one careful seam are all it takes to bring Goomi to life. Clip it to your bag or set it by your laptop, and it will quietly cheer up your day. Once the first one sprouts, a pink radish or orange carrot friend is sure to follow.