Crochet Santa Claus Keychain Doll Pattern with Hats
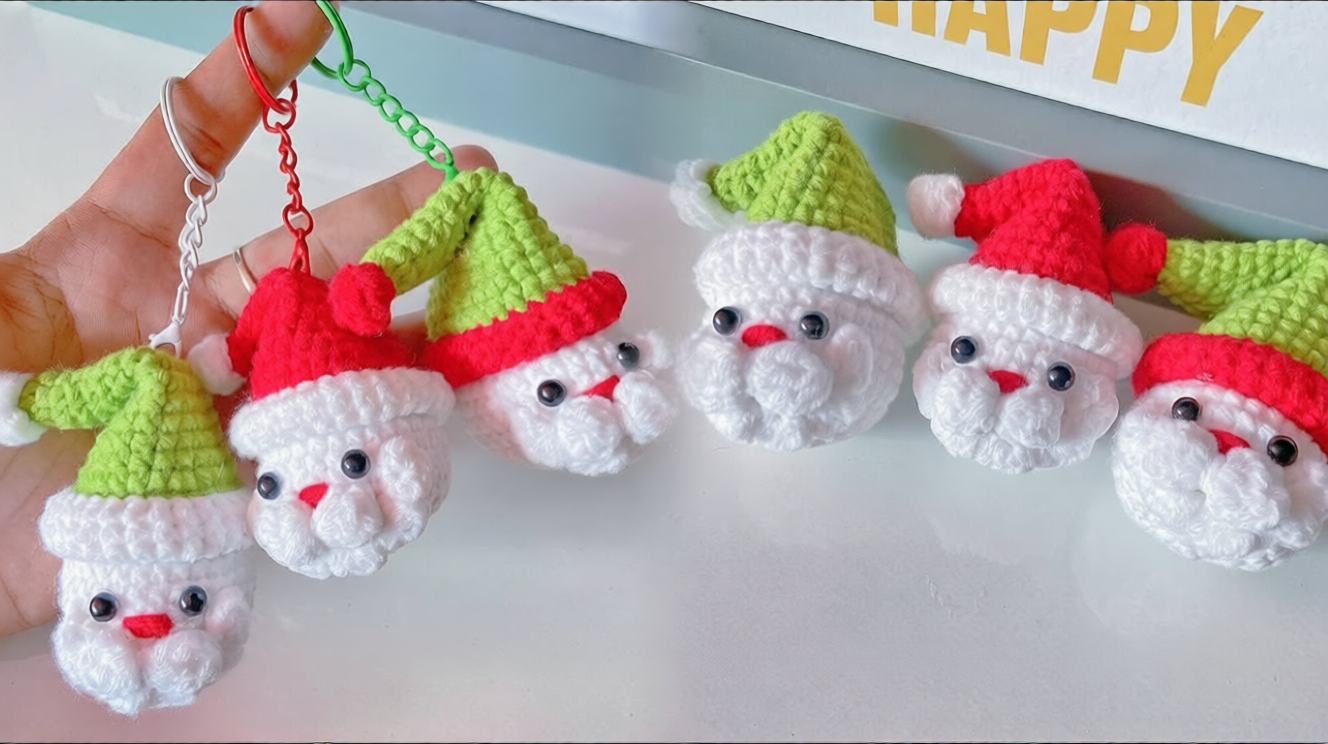
Tiny white stitches, a green pointed hat that flops to one side and a pom at the tip give the crochet Santa Claus keychain doll pattern with hats its playful look. At about 3 inches tall, the little doll is ready to dangle from keys, zippers or gift bags all season long.
Small enough to sit in one hand, Santa comes together from just a few parts: a stuffed white base, a cone-shaped hat, safety eyes, a red nose and a soft beard. Every round is written out below with its exact stitch count, so making a holiday keychain or Christmas bag charm feels clear from start to finish.
Pattern Overview
The doll has four main parts: a white base that forms the face and body, a pointed hat with a white brim and pom tip, simple facial details, and a fluffy beard. Everything is crocheted in spiral rounds, so a stitch marker matters from the very first round. Because the piece is so small, neat, firm stitches are more important than speed.
- Time: About 10 minutes of prep, 1 to 1.5 hours of stitching, and 30 to 45 minutes for the face, beard, assembly and keyring
- Finished size: About 3 in (7.5 cm) tall with the hat tip folded, and about 1.5 in (4 cm) wide across the brim, not counting the keyring
Materials
- White yarn: Sport or DK cotton, about 8 g or 20 yd (18 m) for the base, brim and pom
- Green yarn: Same weight cotton, about 5 g or 12 yd (11 m) for the hat, or any hat color you like
- Beard yarn: Fluffy or brushable white yarn, about 2 yd (2 m)
- Red yarn: About 20 in (50 cm) for the nose, or a 5 mm red bead or felt dot
- Hook: 2.5 mm (US B/C). Drop to 2.0 mm if your stitches show gaps.
- Eyes: Two 6 mm black safety eyes
- Stuffing: About 5 g fiberfill
- Notions: Yarn needle, stitch marker, pins and scissors
- Hardware: A keyring or lobster clasp with a 6 to 8 mm jump ring
Gauge
With the 2.5 mm hook, 6 sc and 6 rounds make a 1 in (2.5 cm) square worked in the round. Gauge isn’t critical for a keychain, but a looser gauge makes a bigger doll and lets stuffing peek through, so aim for tight stitches.
Abbreviations (US Terms)
- MR – magic ring
- ch – chain
- sc – single crochet
- inc – 2 sc in one stitch
- dec – single crochet 2 together
- sl st – slip stitch
- BLO – back loop only
- Rnd – round; the number in brackets is the stitch count at the end of the round
Watch the Video Tutorial
The video is a handy visual guide for the magic ring, the hat shaping and the beard. The full round-by-round pattern is written below, so you can finish the doll from the text alone.
Step-by-Step Instructions
Step 1: Start the Magic Ring
The base starts at the bottom of the doll. With white yarn and the 2.5 mm hook:
- Rnd 1: 6 sc in MR (6)
Pull the tail tight, then place your stitch marker in the first stitch. Pull firmly, because even a small hole here will show on the finished doll.

Step 2: Build the Flat Circle
Increase by 6 stitches each round to grow a flat disc:
- Rnd 2: inc in each st around (12)
- Rnd 3: (sc, inc) x 6 (18)
- Rnd 4: (2 sc, inc) x 6 (24)
Size check: The finished circle measures about 1.25 in (3.2 cm) across and should lie flat in your palm. Ruffled edges mean extra increases slipped in, and a bowl shape means one was missed. Move the marker up at the end of every round.
Step 3: Work Even Rounds for the Sides
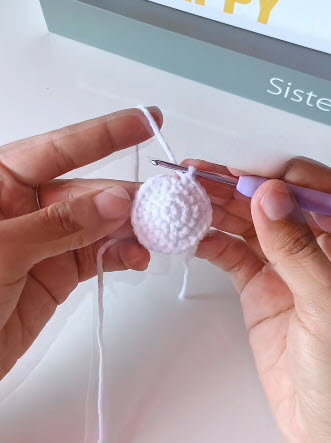
- Rnd 5: BLO sc around (24)
- Rnds 6–13: sc around (24), 8 rounds total
Working Rnd 5 in back loops only gives the doll a crisp, flat bottom so it sits upright on a shelf too. The edge will curl up into a cup, and after Rnd 13 the sides stand about 1.5 in (3.8 cm) tall. Keep your tension steady here, because loose side rounds make the base look taller and softer than intended.
Step 4: Add the Eyes, Then Stuff and Close
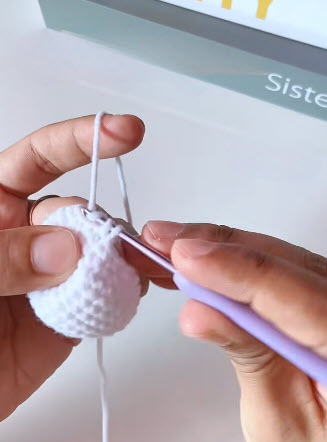
Before closing, insert the 6 mm safety eyes between Rnds 10 and 11, with 4 stitches between them. Count from the round start on both sides so they match, then lock the backs from inside.
Stuff the base firmly, shaping it with your fingers as you go, and work the top decreases:
- Rnd 14: (2 sc, dec) x 6 (18)
- Rnd 15: (sc, dec) x 6 (12). Top up the stuffing.
- Rnd 16: dec x 6 (6)
Fasten off, weave the tail through the front loops of the last 6 stitches and pull the hole closed. Run the tail through the fabric in a few directions before trimming so it stays hidden. The finished base is about 1.75 in (4.5 cm) tall.

Step 5: Begin the Hat
The hat is worked from the tip down in green with the same hook. The first rounds form the narrow, pointed tip, so keep them snug; they’ll carry the pom, and loose stitches will stretch.
- Rnd 1: 4 sc in MR (4)
- Rnd 2: sc around (4)
- Rnd 3: (sc, inc) x 2 (6)
- Rnd 4: sc around (6)
- Rnd 5: (sc, inc) x 3 (9)
- Rnd 6: sc around (9)

Step 6: Grow the Hat Into a Cone
Keep adding 3 stitches every other round:
- Rnd 7: (2 sc, inc) x 3 (12)
- Rnd 8: sc around (12)
- Rnd 9: (3 sc, inc) x 3 (15)
- Rnd 10: sc around (15)
- Rnd 11: (4 sc, inc) x 3 (18)
- Rnd 12: sc around (18)
- Rnd 13: (5 sc, inc) x 3 (21)
- Rnd 14: sc around (21)
- Rnd 15: (6 sc, inc) x 3 (24)
- Rnd 16: sc around (24)
- Rnd 17: (7 sc, inc) x 3 (27)
Stagger the increases by starting each increase round one stitch later than the last one. Stacking them in one spot creates corners.
Fit check: Before Rnd 17, hold the hat opening over the white base. The 24-stitch opening should just hug the top of the head; Rnd 17 adds the little bit of room the brim needs. The unfolded hat is about 2.75 in (7 cm) long.

Step 7: Add the Brim and Pom, Then Attach the Hat
- Brim Rnd 1: Join white yarn with a sl st in any stitch of hat Rnd 17, ch 1, sc in each st around, sl st to first sc (27).
- Brim Rnd 2: ch 1, sc in each st around, sl st to first sc (27). Fasten off with a 12 in (30 cm) tail.
- Pom: With white, 6 sc in MR (6), then dec x 3 (3). Add a pinch of stuffing, close the hole and sew the pom to the hat tip.
- Slouch: Fold the top 1 in (2.5 cm) of the hat, around Rnd 8, over to one side so the pom sits level with Rnd 14. Tack it in place with two or three stitches in green yarn.
Pin the hat onto the base so the lower edge of the brim sits along Rnd 12, just above the eyes. Rotate the doll and check it from the front and both sides, then sew around the brim edge with small, even stitches.
Pro tip: Sew the brim through the back loops of its last round. The stitches sink into the fabric and disappear, and the brim stays rolled neatly.

Step 8: Add the Nose and Beard
The eyes sit just under the brim. Center the nose between them, between Rnds 9 and 10. Wrap red yarn 5 or 6 times over one stitch, or sew on a 5 mm red bead or felt dot.
For the beard, cut 14 strands of fluffy white yarn, each 2 in (5 cm) long. Fold each strand in half and knot it through a stitch in a curved line. Start at Rnd 8 below the outer edge of one eye, dip down to Rnd 6 under the nose, and rise back to Rnd 8 below the other eye. Once all the strands are secured, brush them gently and trim the beard to about 0.75 in (2 cm).
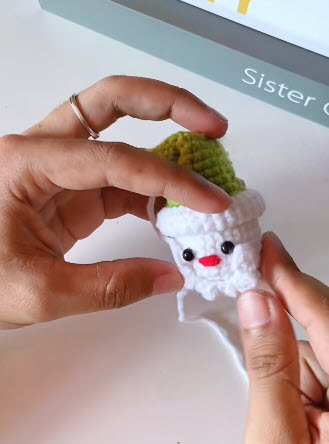
Step 9: Add the Keychain Hardware
Thread a 10 in (25 cm) length of white or green yarn through the highest point of the folded hat. Pass it under 3 or 4 stitches across two rounds, and make a 0.5 in (1.3 cm) loop. Go over the loop 3 times, then knot the ends and bury them inside. Slide the jump ring through the loop and your keyring. Open jump rings sideways, never pulling them apart, so they don’t weaken.
Making the Keychain Strong Enough for Daily Use
Keychains get far more pulling and swinging than shelf toys. Anchor the hardware through several rounds of the hat, never just one stitch. A tiny dab of fabric glue on the inside knots of the beard and nose adds extra hold. Check the attachment points after a few weeks of use and re-stitch if the loop starts to loosen.
Common Mistakes
- Losing the round start: Spiral rounds hide it, so move the marker every round.
- Uneven hat increases: Stacking increases creates corners. Stagger them.
- A crooked face: Eyes placed without counting stitches drift off-center. Keep exactly 4 stitches between them.
- Adding safety eyes too late: They must go in before Rnd 14 starts closing the base.
- A weak keyring anchor: A loop through one stitch will tear. Spread it across several stitches.
Hat Color Ideas
- Classic red hat with a white brim
- Forest green for a woodland Santa
- Navy or deep blue for a winter look
- Burgundy with a cream pom
- A striped hat, switching colors every two rounds
Yarn Swaps and How They Change the Size
The stitch counts stay the same for every yarn below; only the finished size changes.
- Fingering cotton with a 2.0 mm hook: About 2.25 in (5.7 cm) tall, a dainty charm for zipper pulls
- Sport or DK cotton with a 2.5 mm hook: About 3 in (7.5 cm) tall, the size used in the pattern
- Worsted cotton with a 3.5 mm hook: About 4 in (10 cm) tall, better as a tree ornament than a keychain
- Acrylic in place of cotton: Softer and slightly fuzzier, fine for ornaments, though it pills faster on keys
Turn Santa Into a Dated Keepsake
A little Santa makes a lovely heirloom when you add a few personal details. Small touches turn a quick keychain into something the recipient will bring out every December.
- Year on the brim: Backstitch the year in red thread across the white brim.
- Name on the hat: Embroider a short name or initial in white along one side of the hat.
- Baby’s first Christmas: Make the hat in soft pastel and tie on a tiny paper tag with the date.
- Family set: Make one Santa per family member, each with a different hat color, so everyone knows which is theirs.
- Ornament version: Swap the keyring for a ribbon loop so it can hang on the tree year after year.
For more holiday charms, try the Christmas tree keychain and the crochet hat keychain. The Christmas snowman and the Christmas ice creams make great companions for your Santa.
Care Instructions
Spot clean with a damp cloth and mild soap, and let it air dry fully. Avoid the washing machine, which can flatten the beard and loosen the safety eyes. Keychains with safety eyes aren’t suitable for young children, because small parts can come loose.
FAQs
What yarn works best for a keychain Santa?
Sport or DK cotton, or a cotton blend. It holds its shape well and resists fuzzing from daily handling.
Can I embroider the eyes?
Yes. Stitch two small ovals in black yarn between Rnds 10 and 11, 4 stitches apart. Embroidered eyes are safer for gifts to children and hold up better on a keychain.
How do I keep the hat tip bent?
Fold the top 1 in (2.5 cm) over and tack it with two or three stitches in matching yarn.
Can I make it bigger?
Yes. Worsted cotton with a 3.5 mm hook and the same rounds gives a Santa about 4 in (10 cm) tall, which works nicely as a small ornament.

Santa’s Ready to Ride Along
A white dome, a slouchy hat and a fluffy beard add up to a Santa small enough to travel with you every day. Take your time on the face and the keyring anchor, because those two details decide how neat it looks and how long it lasts. Clip one to a backpack, tuck another into a stocking, and tie a third onto a gift bag as a handmade tag.